A 15-second AI clip can show an idea. A 30-second scene can tell part of a story. With Seedance 2.5 inside CapCut PC, you can generate longer AI videos, place them on a desktop timeline, refine the footage, add music, and export the finished project in one workspace.
The workflow starts in CapCut PC‘s AI Video area. You select Dreamina Seedance 2.5, write a shot-by-shot prompt, choose your settings, and generate a native 30-second video. You can then extend the clip, change parts of the scene with AI Edit, adjust the soundtrack, and prepare the final file for sharing.
Why Seedance 2.5 Makes CapCut PC Better for AI Storytelling
Seedance 2.5 CapCut tools combine video creation with standard editing controls. That gives you more control after the first generation finishes.
Generate longer AI scenes
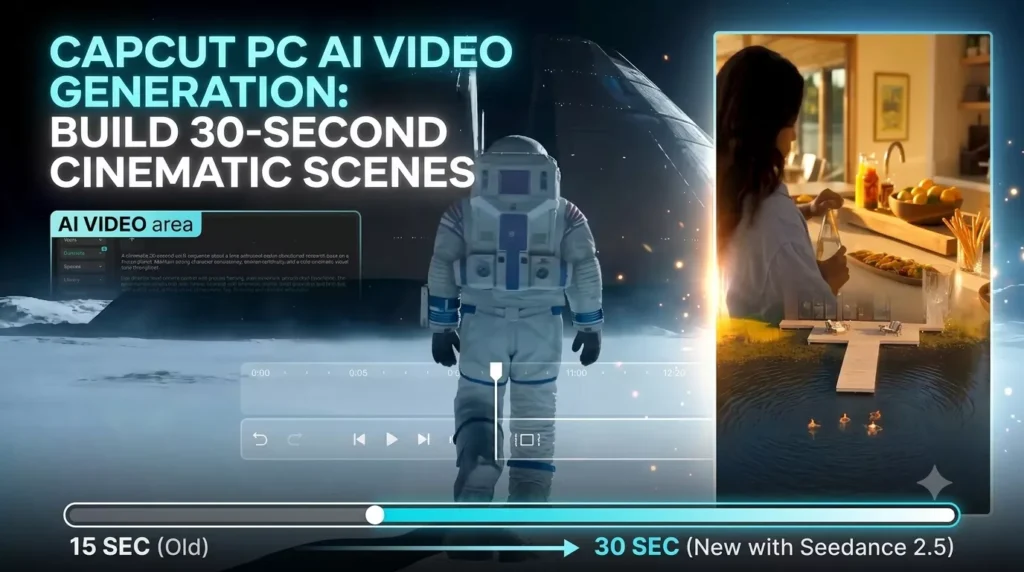
Seedance 2.5 supports native 30-second AI video generation. This doubles the 15-second limit referenced for Seedance 2.0 and gives each clip more room for movement, pacing, and visual detail.
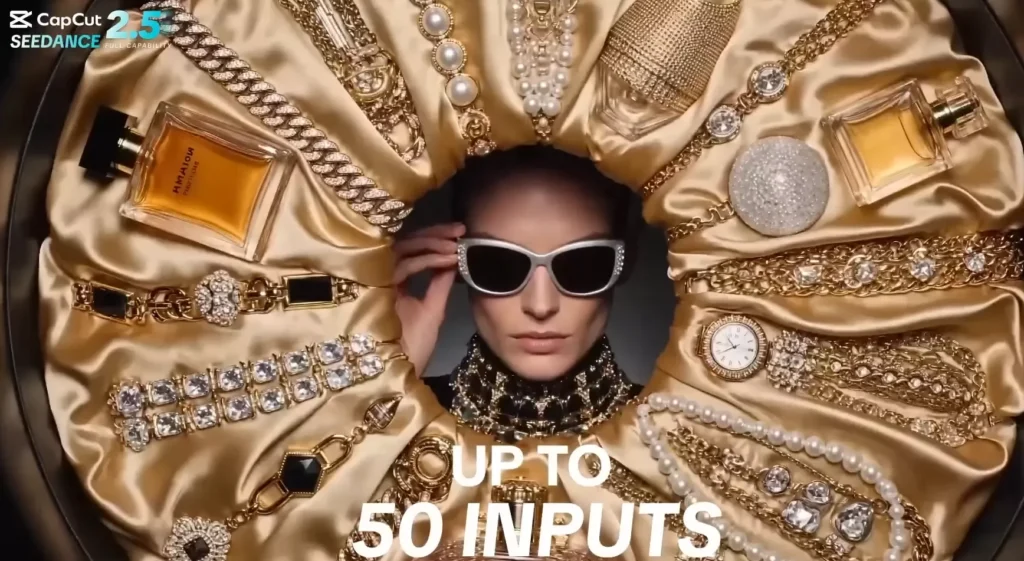
A longer clip can support a short film scene, a product idea, a social post, or a cinematic test. You can show a subject entering a location, taking an action, and reacting within one generation instead of cutting the idea into several short clips.
The model also supports multiple reference assets. These can help guide the look of characters, objects, or locations when your project needs stronger visual control.
Keep generation and editing together
After generation, the video appears in the CapCut PC timeline. You can scrub through the footage, trim sections, extend either end, and add other media without moving the project into another editor.
CapCut PC also includes AI Image, Extend Video, AI Edit, split-screen tools, background removal, auto-adjustment, and quality enhancement. This creates a clear production path: plan the scene, generate it, revise it, add sound, and export the result.
Plan for visual continuity
A useful prompt should cover more than the main subject. Include the character, location, mood, lighting, camera style, and the order of events.
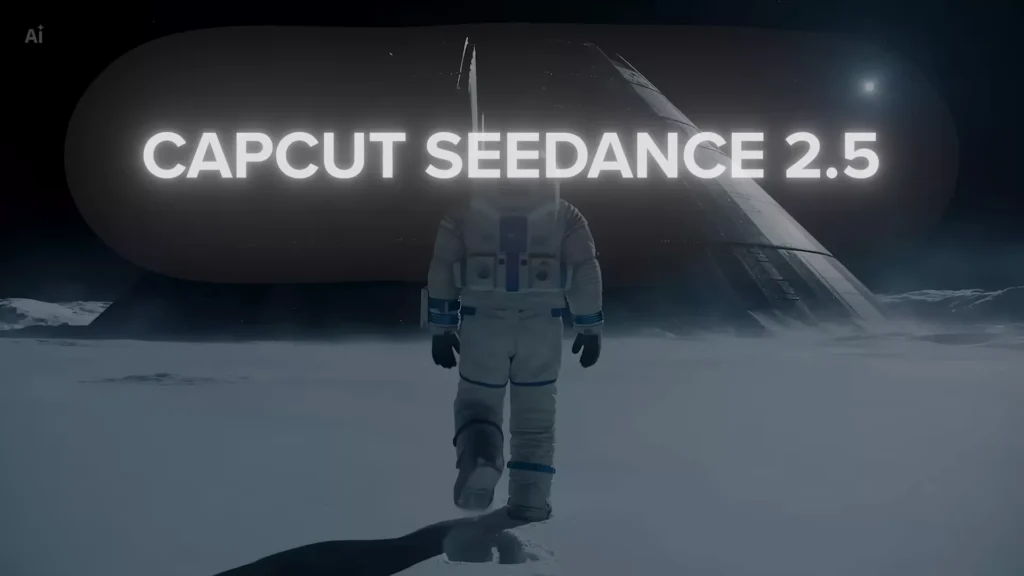
The video demonstration uses a lone astronaut exploring an abandoned research base on a frozen planet. The prompt called for a cold cinematic tone, strong character consistency, and continuity across the environment. Those details help the model treat the video as one connected scene instead of a set of unrelated shots.
How CapCut PC AI Video Generation Starts
This setup takes place inside the desktop version of CapCut. You can test the wider AI creative suite before choosing the video generator.
Download and open CapCut PC
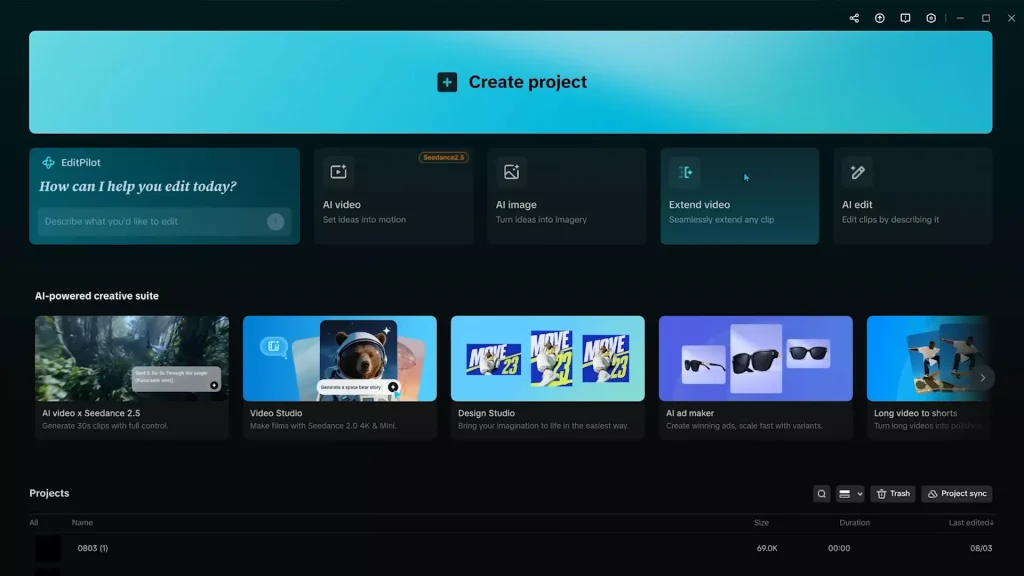
Install CapCut PC and open a new project. The main AI area includes tools for video, images, extensions, and edits.
Open AI Video to view the generation workspace. The interface places the model selection and generation controls beside the prompt box, which keeps the main setup in one view.
Select Seedance 2.5
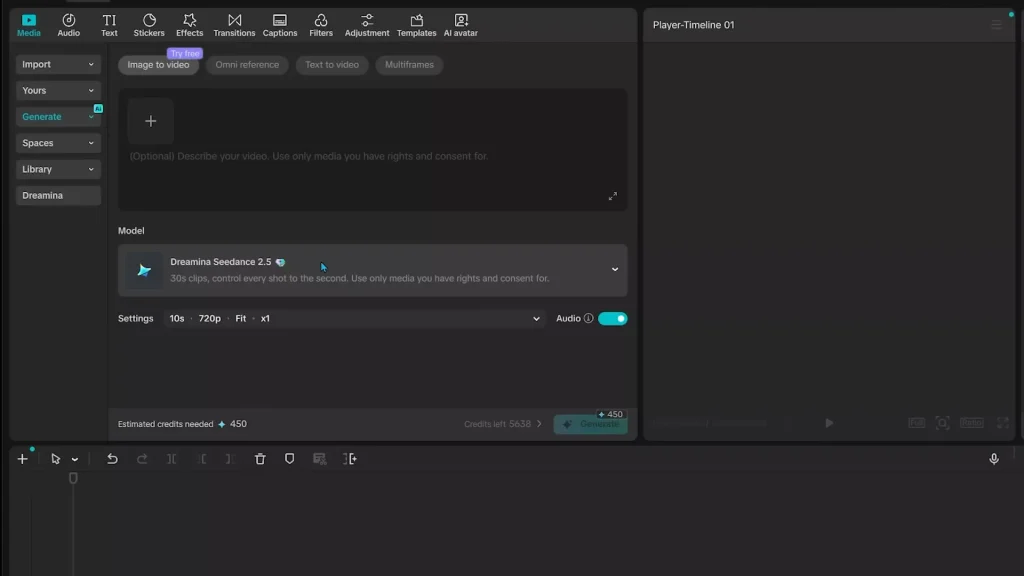
Under the Generate section, choose Dreamina Seedance 2.5. This activates the model used for the 30-second cinematic demo.
The selection is part of the CapCut PC interface, so the generated video can move straight into the editor. You won’t need to download the result before reviewing it on the timeline.
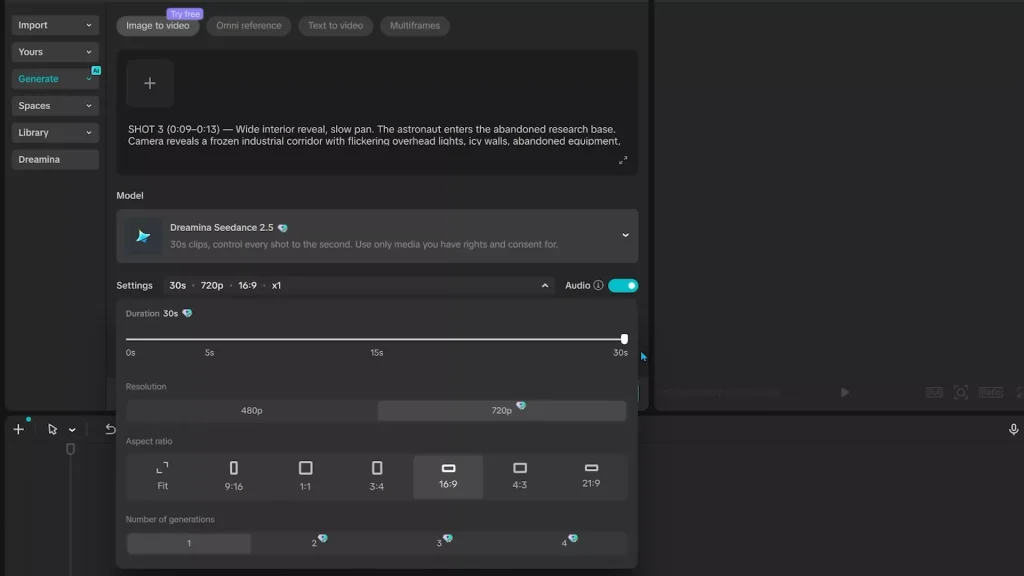
Choose your video settings
We used these settings:
- Duration: 30 seconds
- Resolution: 720p
- Aspect ratio: 16:9
- Generations: One
Choose the aspect ratio based on where you plan to publish the video. Use 16:9 for standard widescreen content, then select another format when creating a vertical social video. Setting this early can reduce cropping later.
How to Write Shot-by-Shot Prompts
Detailed prompts give Seedance 2.5 more direction over composition, action, and pacing. The strongest prompts in our demonstration describes the scene in a clear sequence.
Start with the story and tone
Begin with a short creative brief. State who the subject is, where the action happens, and how the scene should feel.
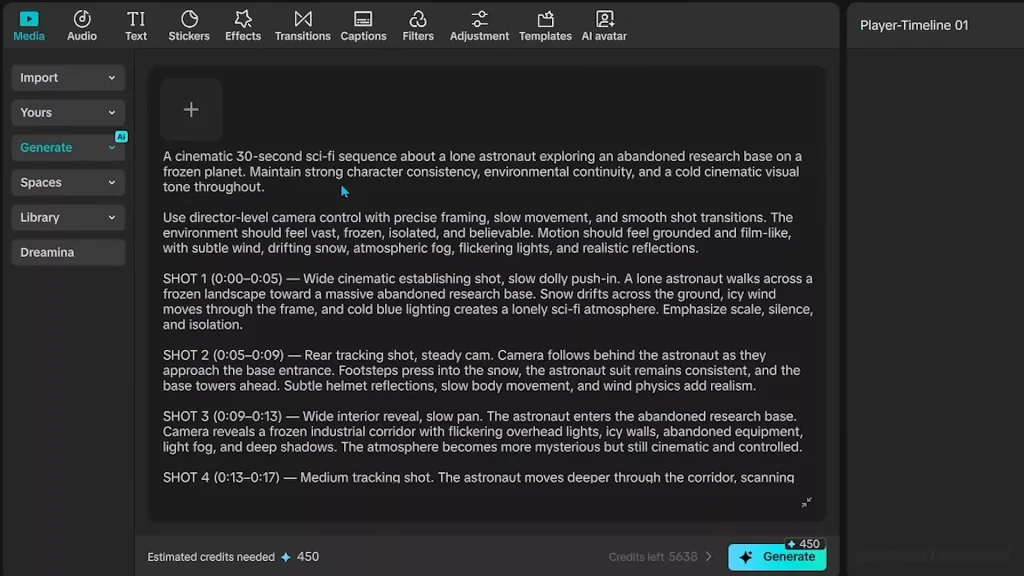
For example, describe a lone astronaut entering an abandoned research base on a frozen planet. Add the cold color palette, the empty surroundings, and the sense of mystery. This gives the model a central direction before you describe individual shots.
Describe each shot in order
Write the scene as a sequence. The astronaut prompt began with a wide cinematic establishing shot, then moved through closer views of the action.
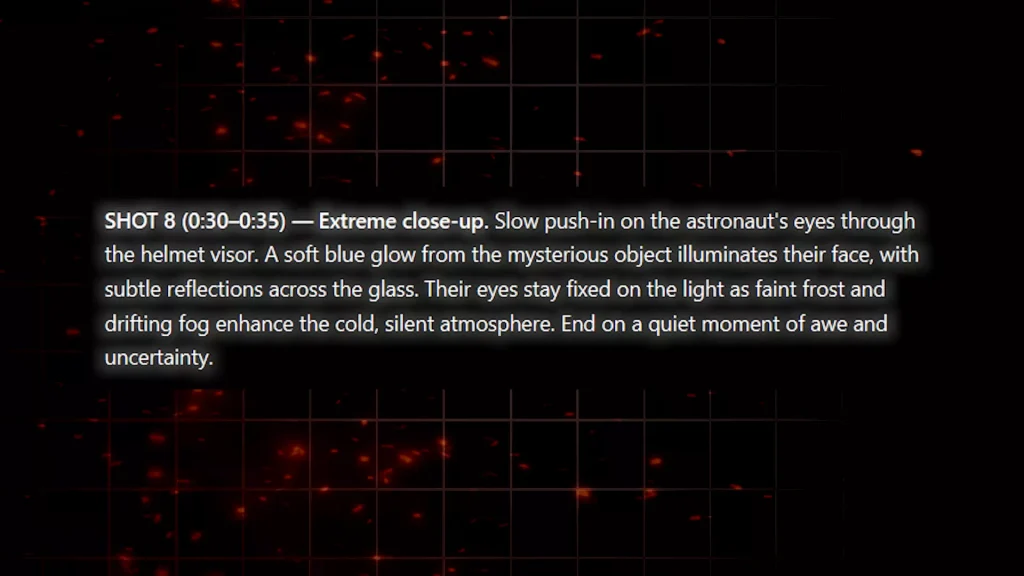
Include the shot size, camera movement, subject action, lighting, background details, and the link between each moment. A strong structure could begin with the base from a distance, move to the astronaut entering the building, and finish with a close-up as a mysterious object lights the helmet visor.
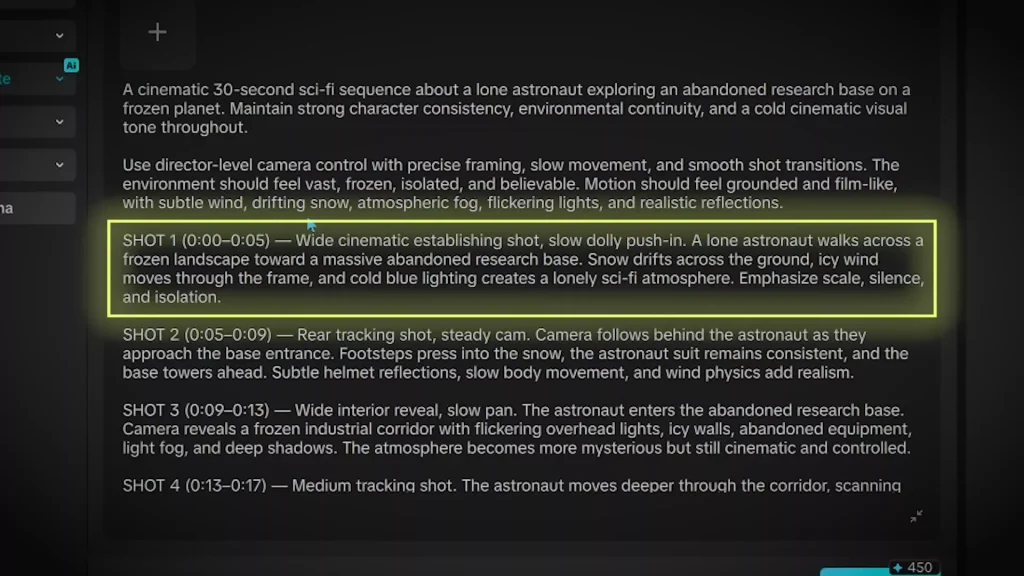
Chronological wording helps the model understand what should happen at the opening, middle, and end of the clip.
Repeat key details for consistency
Keep the astronaut’s core traits, helmet, setting, and lighting direction consistent throughout the prompt. Repeat important details when the story moves between wide shots and close-ups.
The frozen base, blue object, helmet visor, and cold color palette all support one visual style. Avoid changing the wardrobe, location, or time of day unless the story requires it.
Refine Clips with the CapCut AI Video Generator
CapCut PC treats the generated footage as editable material. The timeline lets you review the full scene before deciding what needs work.
Review the clip on the timeline
Scrub through the complete generation and look for weak transitions, missing details, or moments that need more emphasis. The timeline includes access to AI Extend, AI Edit, split screens, background removal, auto-adjustment, and quality enhancement.
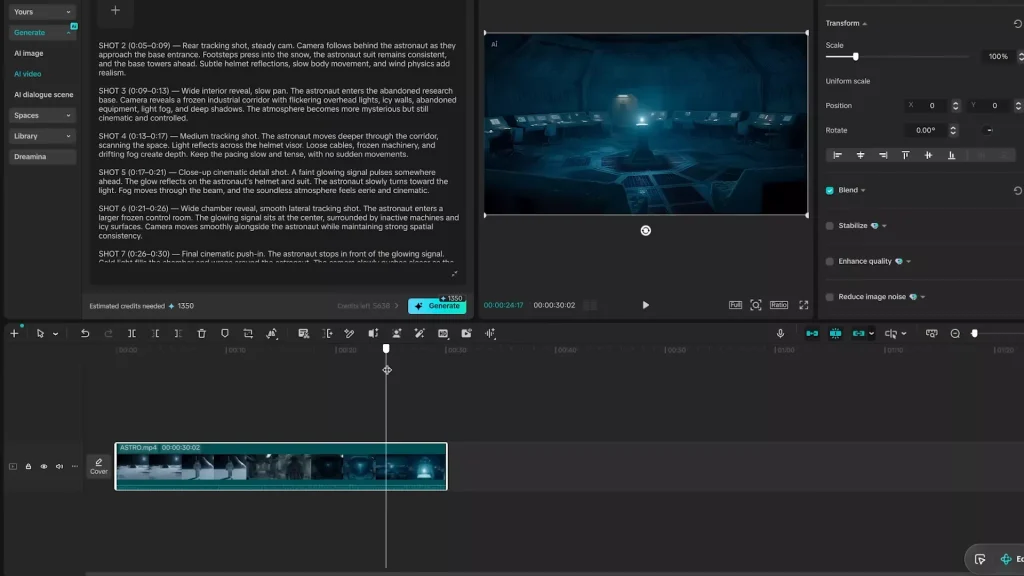
Reviewing the whole clip first helps you make changes that support the story. A close-up may work well only after the earlier shots establish the setting.
Extend footage with AI Extend
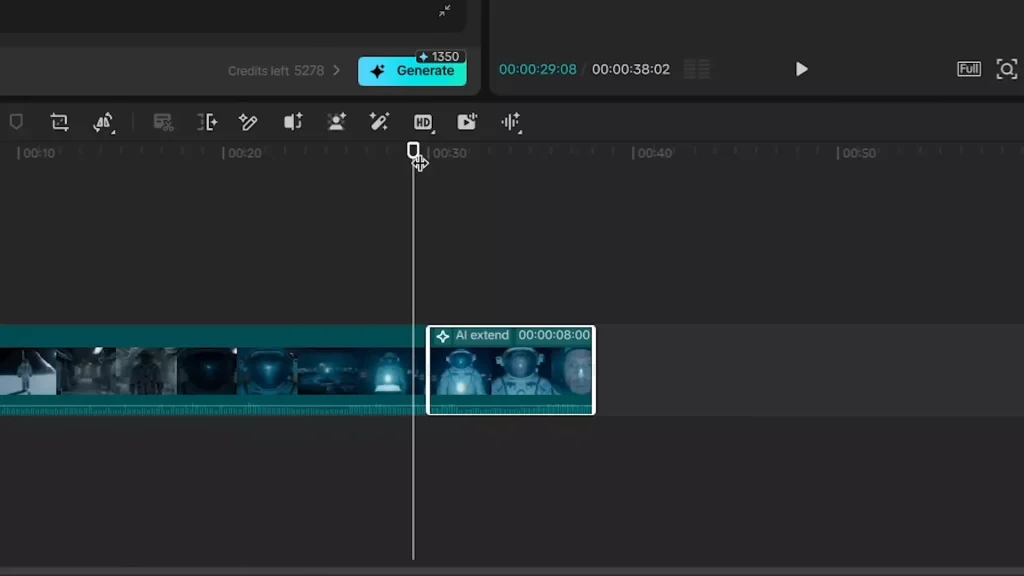
Select the clip and choose AI Extend. You can drag from either end of the clip or open the extension tool and describe what should happen next.
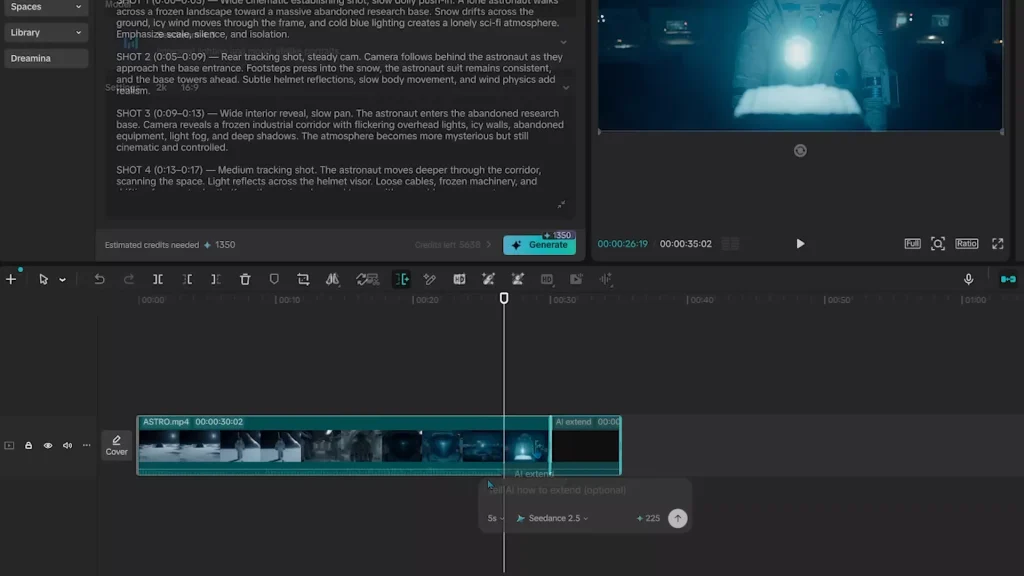
The tool includes an optional instruction field, model selection, quality controls, and duration settings. The demonstration showed that a clip can be extended by up to another 30 seconds.
Write the extension as a continuation of the existing action. Keep the same subject, location, lighting, and camera style so the new footage fits the original scene.
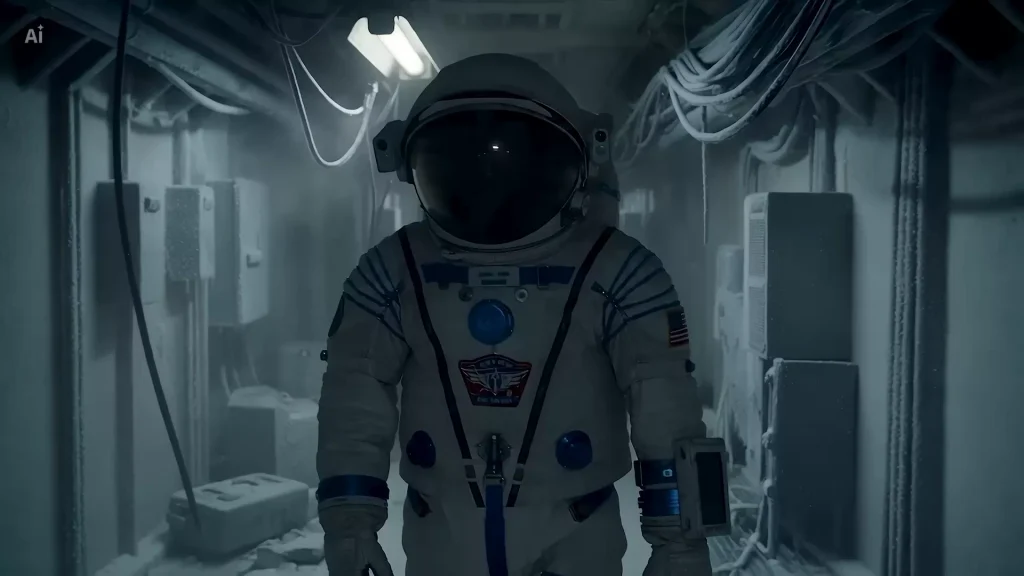
Add a focused continuation shot
The astronaut example used an eight-second extension. The requested shot was an extreme close-up of the astronaut’s eyes behind the helmet visor, with a soft blue glow from the mysterious object lighting the face.
This kind of focused addition can improve pacing without requiring a full regeneration. It also adds emotion by moving from the wider environment to the character’s reaction.
Finish the Video with AI Edit, Music, and Export
The final stage combines visual changes with sound and output controls. These steps turn a generated clip into a complete CapCut PC video project.
Change one part of a scene with AI Edit
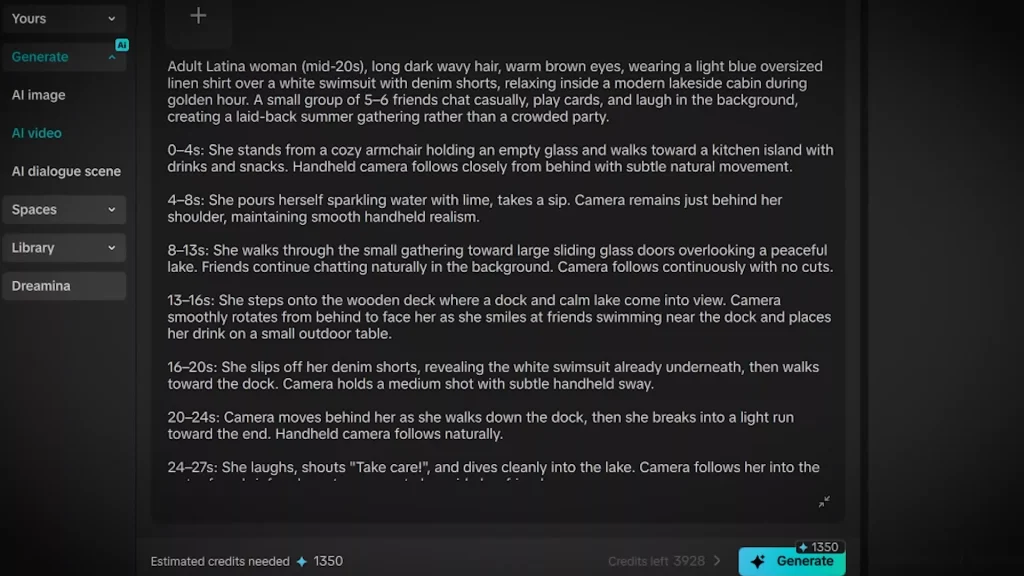
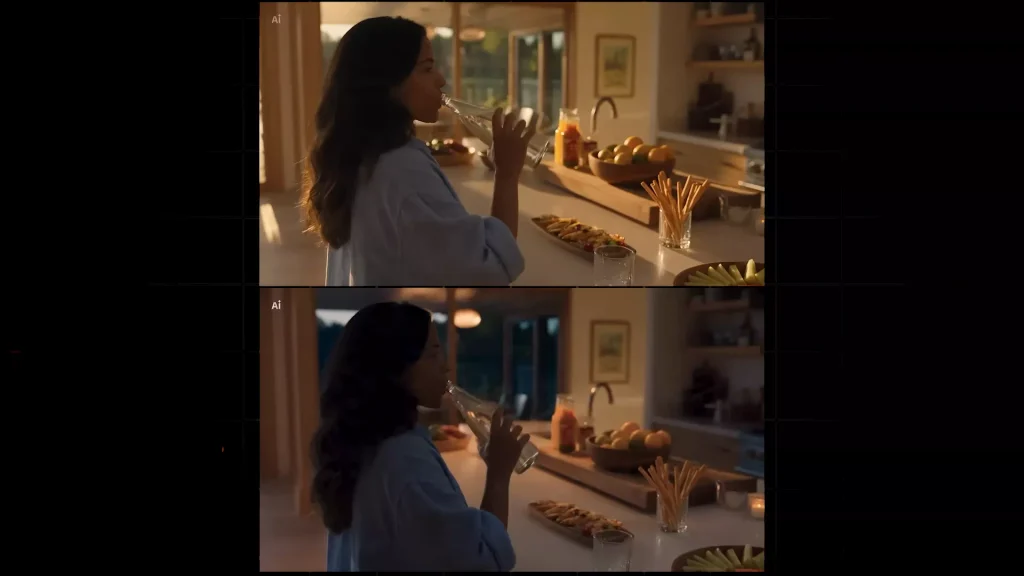
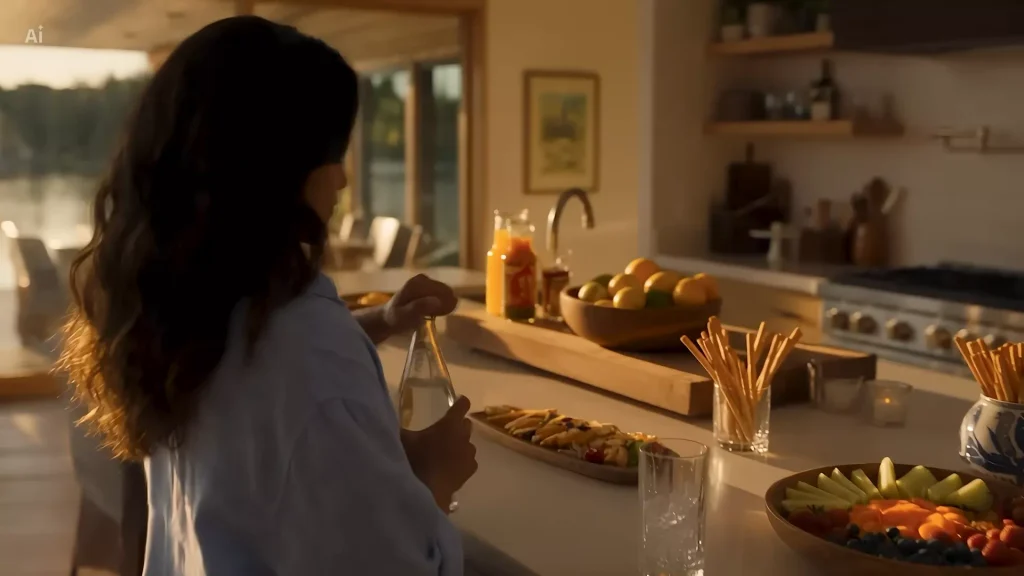
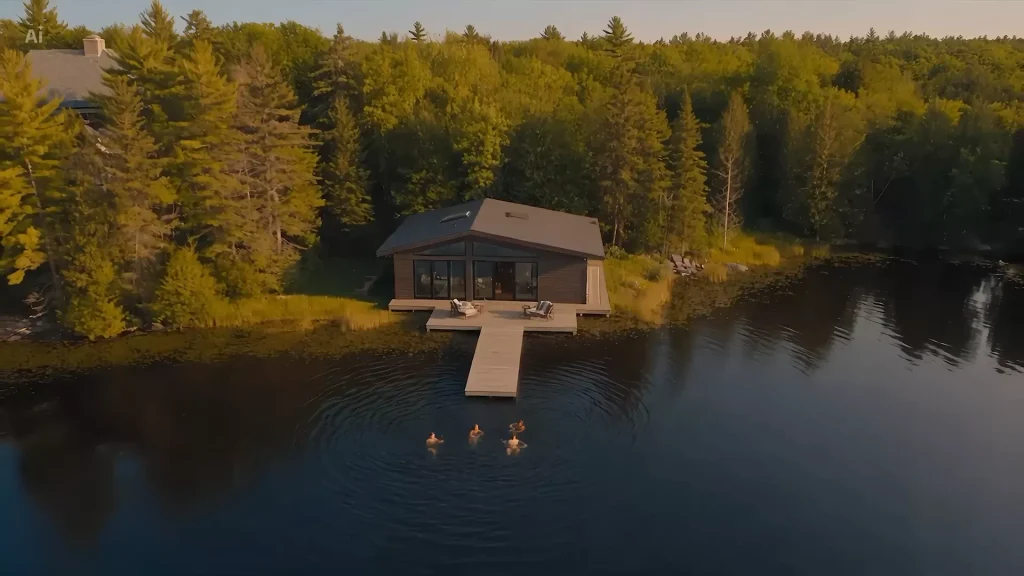
We include a second demo which shows a woman leaving a relaxed summer gathering at a lakeside cabin. She walks to the dock and dives into the lake to join her friends.
With the clip selected, the creator opened AI Edit and entered: “Change the environment from evening to nighttime. Keep everything else the same.” This type of instruction sets a clear change while protecting the subject, action, and other scene details.
Add and balance music
Drag a music track into the timeline, trim it to fit the video, and adjust its volume. The demonstration lowered the track to about -6, though the best level depends on the music and any dialogue or sound effects.
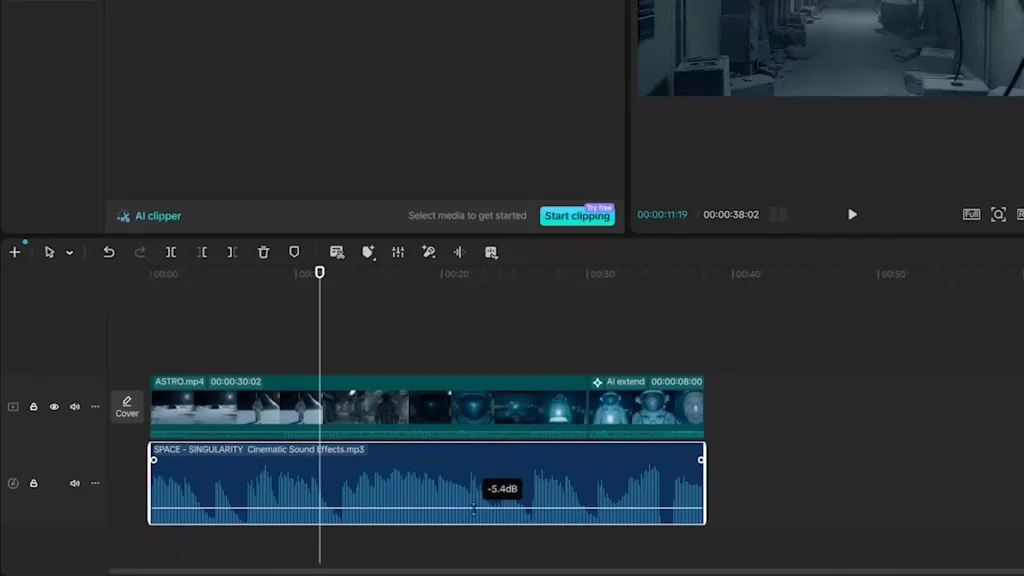
Music can support the cold mood of a sci-fi scene or add energy to an outdoor lifestyle clip. Trim the track around the visual action so its strongest moments match key shots.
Export the finished project
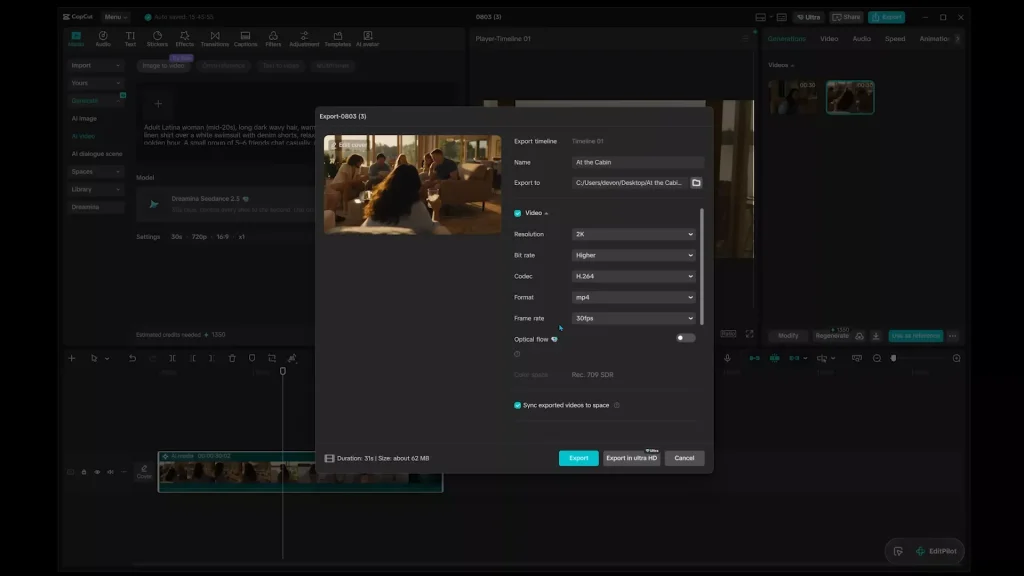
Use the Export button in the top-right corner of CapCut PC. You can adjust the resolution, format, and frame rate before rendering the final file.
Review the timeline first, check the aspect ratio, and export a test version when possible. A short test can reveal unwanted cuts, audio problems, or quality issues before the final render.
What This Workflow Enables
Seedance 2.5 and CapCut PC support several types of creative work. The right prompt and timeline edits matter as much as the first generation.
Create cinematic short-film scenes
The frozen-planet astronaut demo shows how a 30-second generation can combine an establishing shot, action, close-ups, and a consistent visual tone. AI Extend can add another story beat when the scene needs more time.
This approach works well for short narrative tests, music video concepts, and visual storyboards. You can build a scene around movement and reaction instead of presenting one isolated image.
Test realistic lifestyle scenes
The lakeside-cabin video tested a more natural setting with people, outdoor movement, water, and changing light. The nighttime edit then showed how AI Edit can change the environment while keeping the main action intact.
Treat this type of result as a creative test rather than a guaranteed realism benchmark. Review faces, hands, motion, and background details before publishing.
Repeat the full production process
A practical workflow looks like this:
- Define the story, subject, setting, and visual tone.
- Write a shot-by-shot prompt.
- Select Seedance 2.5 and choose the output settings.
- Generate the 30-second clip.
- Review it in the CapCut PC timeline.
- Extend or revise sections with AI tools.
- Add music, trim it, and balance the volume.
- Set export controls and render the final video.
The main benefit is the connection between generation, editing, refinement, and export. Each stage happens inside the same desktop project.
Seedance 2.5 vs. Seedance 2.0: What’s New for Creators?
Upgrading from Seedance 2.0 to Seedance 2.5 transforms how desktop AI video is generated and edited. The table below highlights the key differences that impact storytelling:
| Feature | Seedance 2.0 | Seedance 2.5 | Workflow Advantage |
| Native Duration | Up to 15 seconds | Up to 30 seconds | Doubles scene length in a single take without clip stitching. |
| Multimodal Inputs | Single reference image | Up to 50 references | Locks character faces, props, and environments across shots. |
| Targeted Editing | Full clip regeneration | Local / Region AI Edit | Modifies specific scene elements without resetting the entire visual. |
| Prompt Accuracy | Standard text parsing | Timestamped & Chronological | Better adherence to sequential camera movements and actions. |
Mastering the Shot-by-Shot Prompt Framework
To get predictable results from Seedance 2.5, structure your text prompt chronologically. The model responds best when you establish the visual atmosphere before detailing sequential actions.
The Prompt Blueprint: [Subject & Costume] + [Environment & Lighting] + [Camera Style] + [Sequential Action Sequence] + [Visual Mood]
Example Cinematic Script:
A lone explorer wearing a scuffed white hazmat suit walking through a dimly lit, damp underground tunnel with rusting pipes. Cold blue environmental lighting with flickering yellow warning lamps overhead. Cinematic 35mm lens, atmospheric fog, slow tracking shot. 00:00-00:10: The explorer walks slowly away from the camera, pointing a flashlight down the passage. 00:10-00:20: Cut to a medium front shot; the explorer pauses, turns their head left, and raises a device. 00:20-00:30: Close-up on the explorer’s visor reflecting a sudden bright red glow from down the hall. Deep, tense, dramatic tone.
Troubleshooting Common AI Video Glitches on the Timeline
Even with advanced models, long-form AI generations occasionally show minor visual artifacts. Instead of burning prompt credits on full regenerations, use CapCut PC’s native tools to fix them right on the timeline:
- Flickering Lighting or Tone Shifts: Apply CapCut’s Auto-Adjustment tool to equalize luminance, or overlay a subtle cinematic LUT (color grade) across the entire 30-second duration to bind visual variance together.
- Distorted Hands or Minor Details: Use AI Edit to isolate the specific frame range or region. Type a focused patch instruction (e.g., “Keep the scene identical, but adjust the character’s right hand holding the tool”) instead of re-rendering the full clip.
- Unnatural Motion Blur: If action looks slightly jittery, highlight the clip on the timeline and apply Quality Enhancement or enable motion blur smoothing inside the Video Effects tab to fluidize frame transitions.
Conclusion
CapCut PC AI video generation gives you a practical way to build longer AI scenes and finish them in an editor. Seedance 2.5 supports native 30-second clips, while AI Extend can add up to another 30 seconds to selected footage.
Start with a clear story and a detailed shot list. Then select AI Video, choose Dreamina Seedance 2.5, generate your scene, and refine it on the timeline. Add music, test AI Edit for targeted changes, confirm the export settings, and render your finished video.