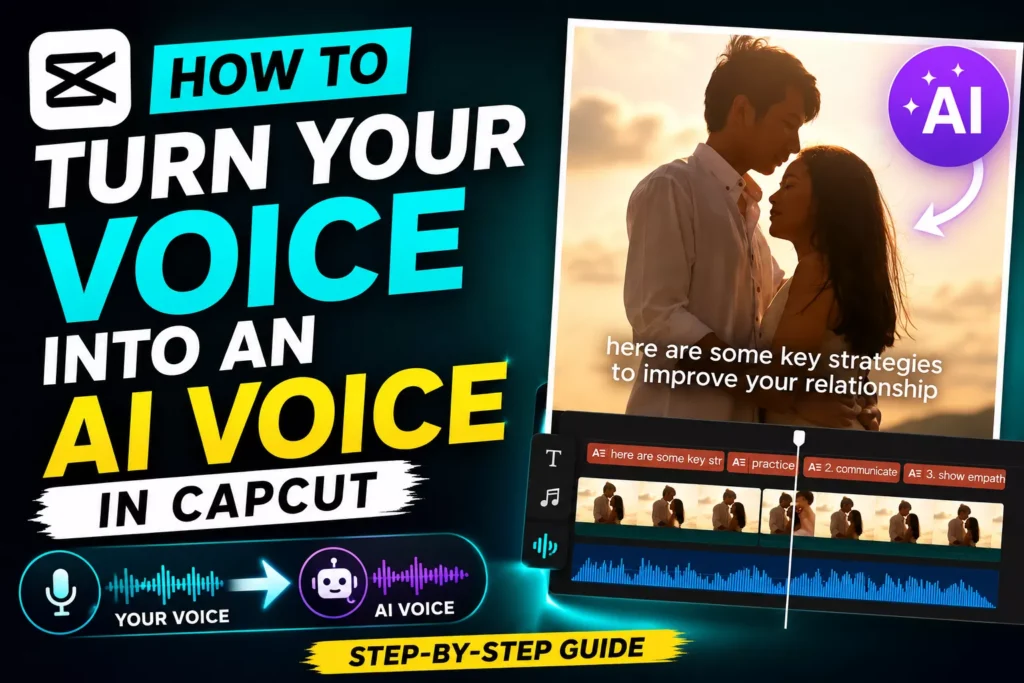
You can now replace your own voice with a high-quality AI version without spending money on expensive software. CapCut makes it easy to take a recording and swap the audio for a professional sounding AI voice. This is a great way to fix a bad recording or hide your voice if you’re shy on camera.
Many creators struggle with audio quality because they don’t have a fancy studio. Using an AI voice removes background noise and makes your delivery sound consistent. CapCut handles the transcription and the voice synthesis in one place, so you don’t have to jump between different apps.
This guide shows you how to move from a raw voice recording to a polished AI voiceover. You’ll learn how to prep your files, use the auto-caption tool, and pick the right AI persona for your brand.
What Is CapCut AI Voice?
CapCut AI Voice is a built-in text-to-speech feature that converts written text into natural-sounding speech. Instead of recording a voiceover yourself, you can type a script or generate captions from an existing recording and have CapCut read the text using one of its AI voices.
Unlike traditional voice recording, AI-generated speech offers consistent quality without background noise, microphone issues, or changes in tone. This makes it ideal for creators producing YouTube videos, Instagram Reels, TikTok clips, tutorials, product demos, and business presentations.
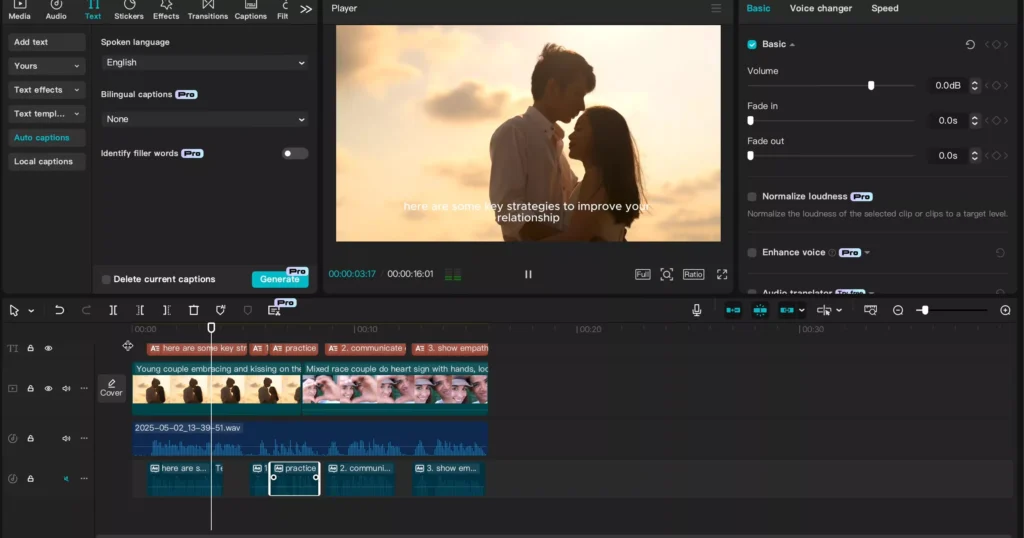
It’s important to understand that CapCut doesn’t directly replace one person’s voice with another. Instead, it follows a simple workflow:
- Convert speech to text using Auto Captions.
- Edit the generated text for accuracy.
- Convert the text into speech using one of CapCut’s AI voices.
Because everything happens within CapCut, you don’t need separate transcription or text-to-speech software.
Prepare Your Project and Audio for AI Voice Transformation
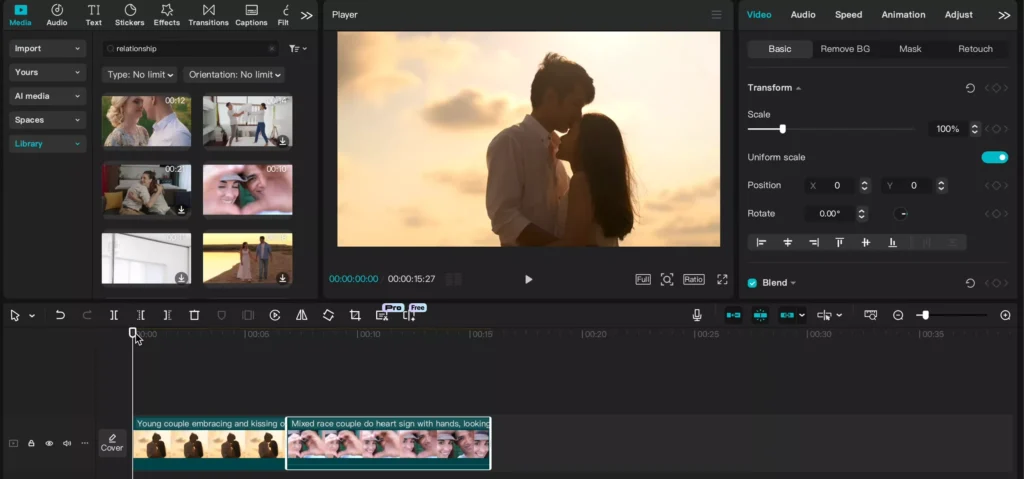
Before you touch the AI tools, you need your basic building blocks ready. Start by opening CapCut and creating a new project. You’ll need some visuals to go along with your audio, as the software works best when there is a video track active.
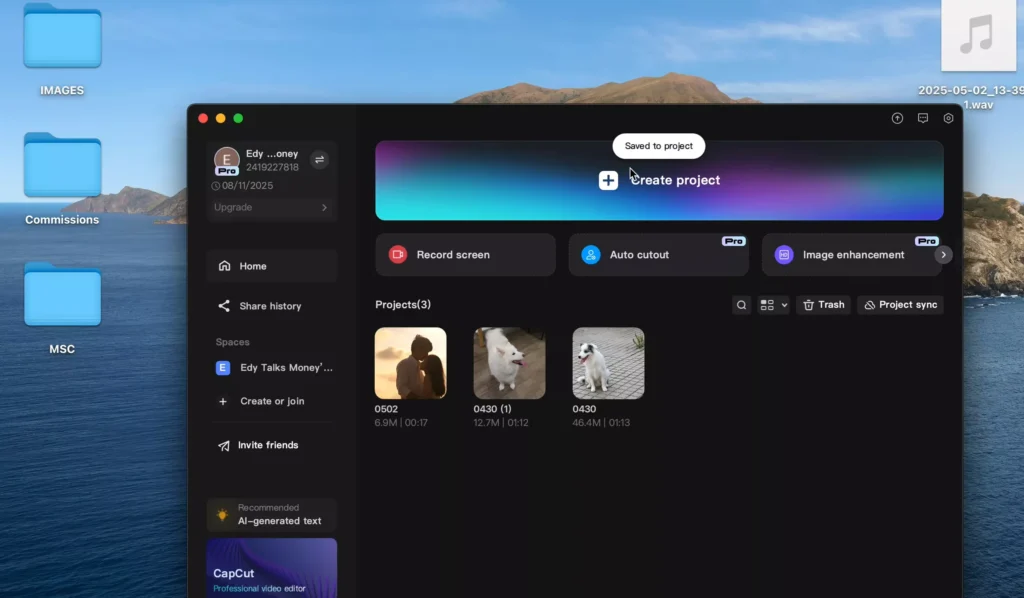
Import the video clips or photos you want to use. If you don’t have footage yet, you can use the stock library inside CapCut to find placeholder clips. This lets you focus on the audio timing before you worry about the final edit.
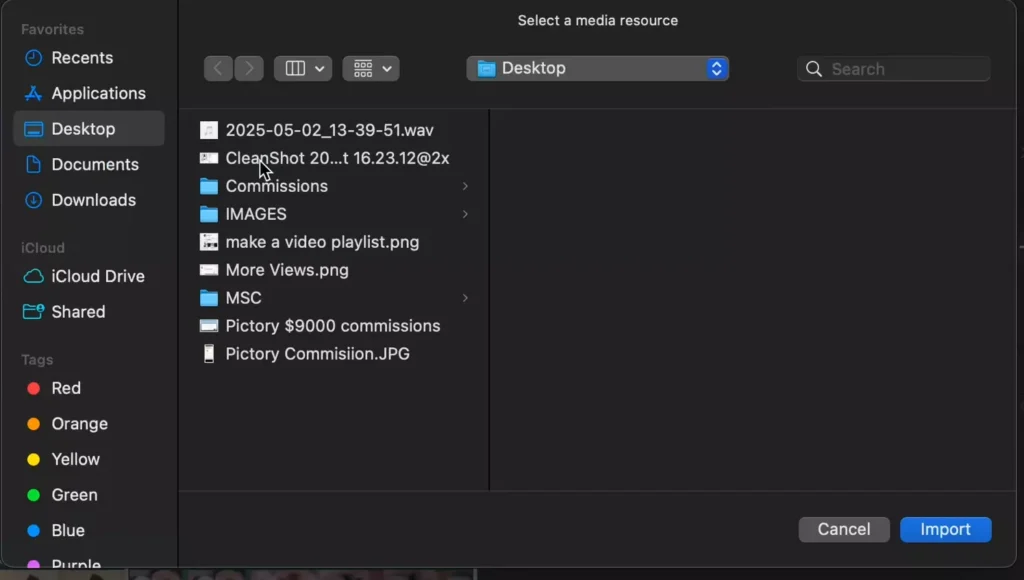
Next, get your original audio file. You can record your voice on your phone using a voice memo app. Once you’re done, send that file to your computer. If you use an iPhone and a Mac, AirDrop is the fastest way to do this.
Try to record in a quiet room. If there is too much wind or noise in the back, the AI might struggle to transcribe your words correctly. Clean audio leads to a better text version, which means a better AI voice.
Mastering Text-to-Speech within CapCut
CapCut cannot turn audio directly into a different voice. It uses a bridge: it turns your audio into text, and then turns that text into a new voice. This is where the “Auto Caption” tool becomes your best friend.
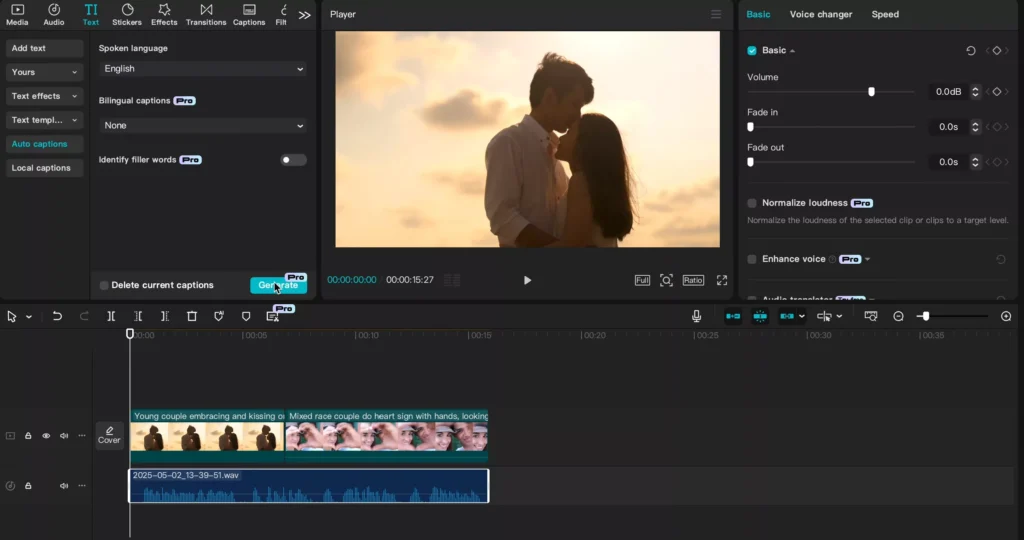
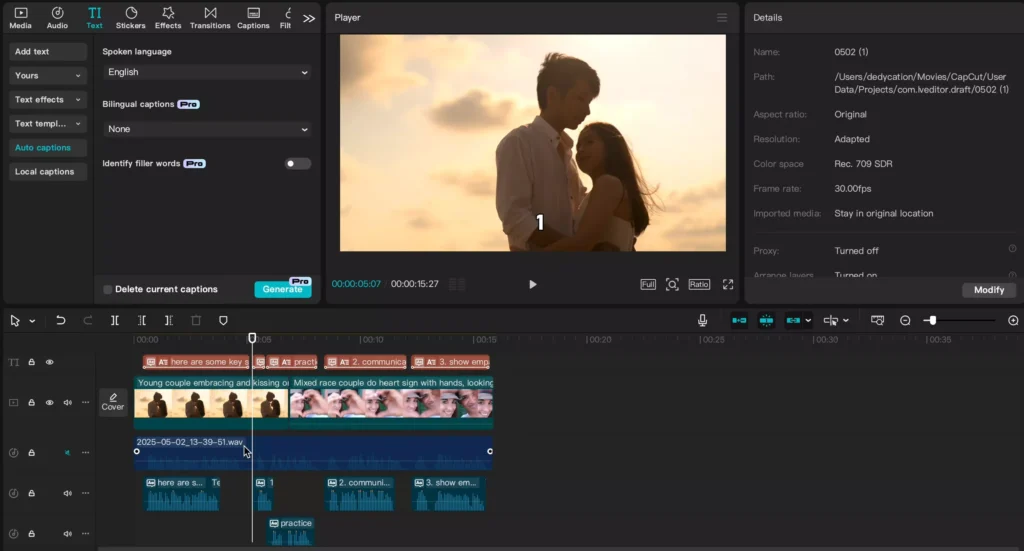
Go to the text menu and select “Auto Captions.” Choose the language you spoke in and hit generate. CapCut will listen to your audio track and create text boxes on your timeline that match exactly when you spoke.
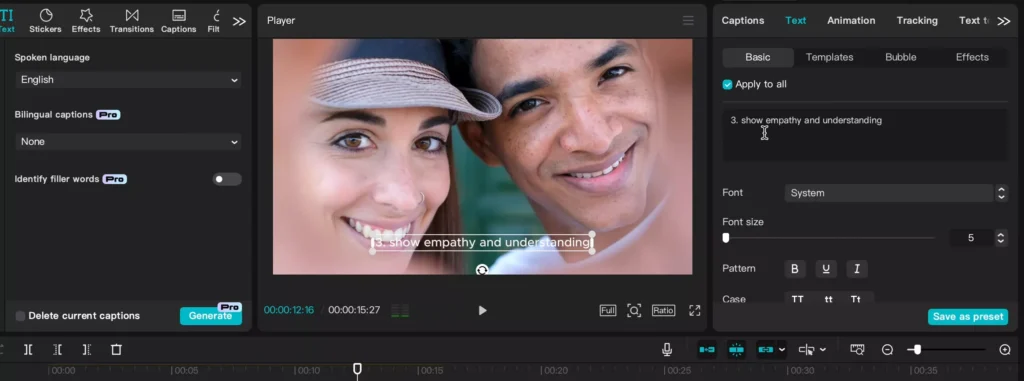
The auto-captions are rarely perfect. You will likely see typos or weird breaks in the sentences. If a sentence is split into two small boxes, the AI voice will pause awkwardly between them. To fix this, you must combine the text.
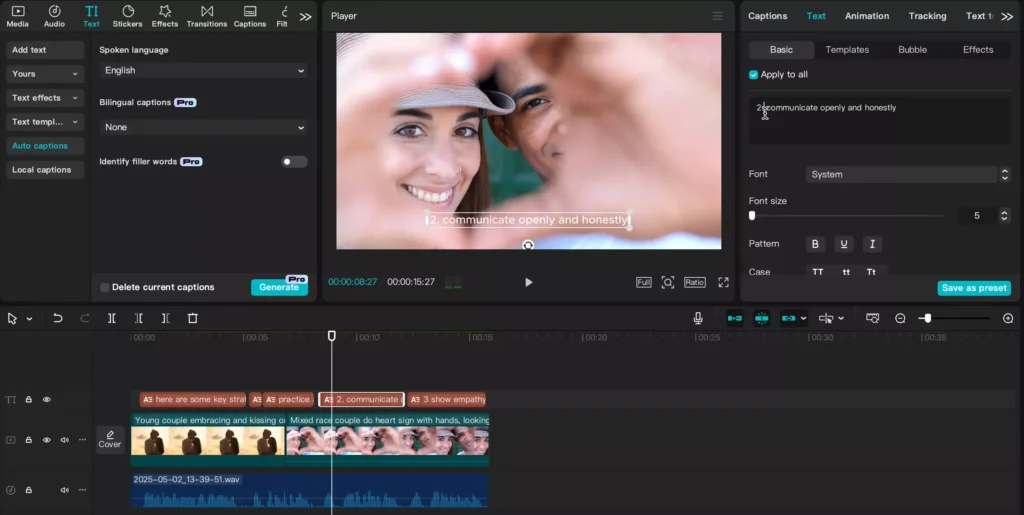
Cut the text from one box and paste it into the previous one. This creates a long, smooth sentence for the AI to read. You should also check your punctuation. If you have a list, like “One, Two, Three,” put a period after each number. Without a full stop, the AI will rush through the list without breathing.
Converting Your Text into AI Voice
Once your text is clean and the punctuation is set, you can perform the actual voice swap. This is the part where your project starts to sound professional.
Highlight all the text boxes on your timeline. Look at the top right panel and click on “Text to Speech.” A menu will pop up with a list of different voices and languages.
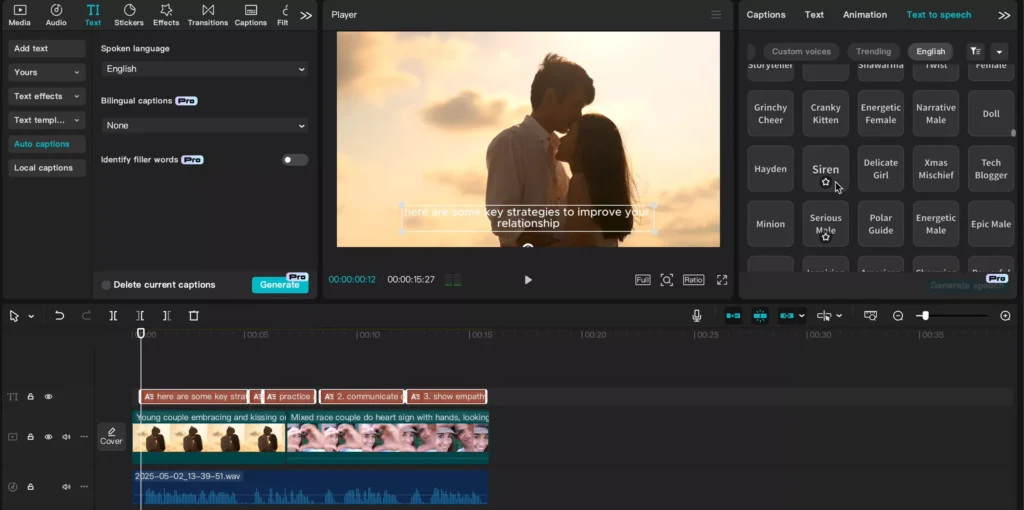
You can browse through dozens of options. Some sound like upbeat narrators, while others are calm and serious. Pick a voice, like “Jesse,” and click “Generate Speech.” CapCut will then create a brand new audio track that reads your text.
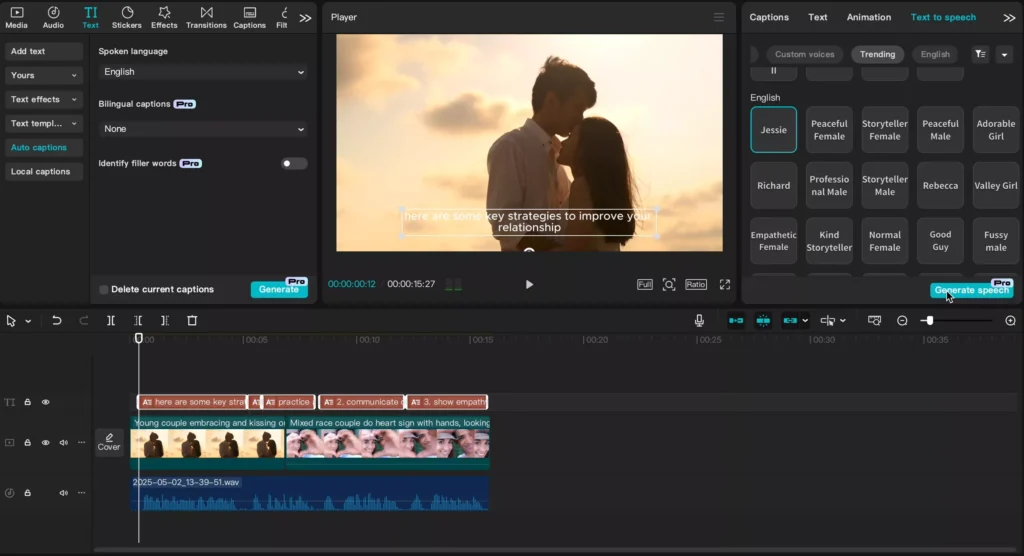
Now you have two audio tracks: your original voice and the AI voice. If you leave both on, they will overlap and sound messy. Click the mute button on your original audio track. Now, when you play the video, only the AI voice will be heard.
Optimizing Your AI Voiceover and Project
After the AI generates the speech, listen to it closely. Sometimes a word is pronounced wrong or the pacing feels off. If you find a mistake, go back to the text box and change the spelling or add a comma to change the rhythm.
You can also change how the captions look on screen. If the default text is too plain, explore the templates. Many of these are free and can make your video look like a high-end social media clip.
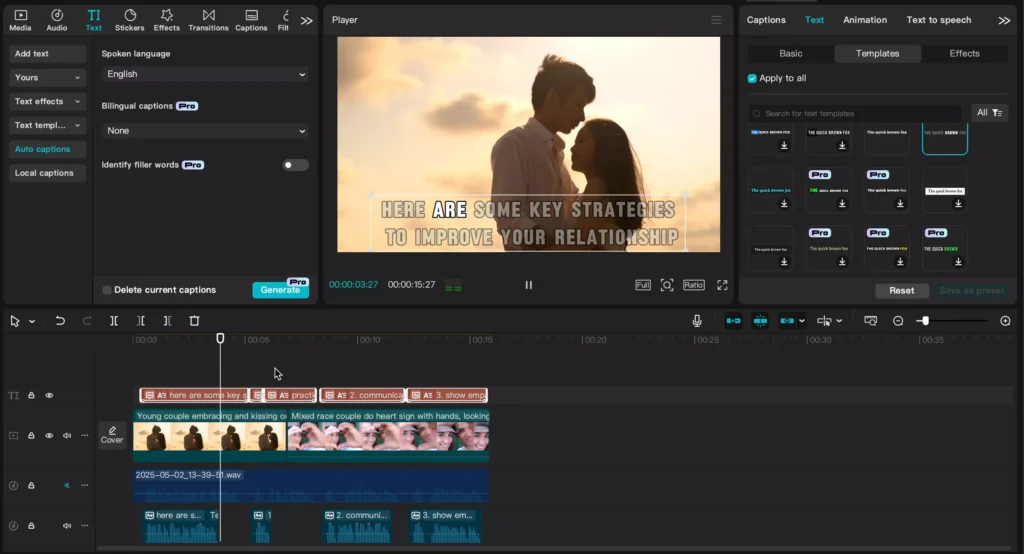
You might see “Pro” features in the menu. While these offer extra bells and whistles, you don’t need them for this process. The basic AI voice tools are available to free users and work great for most projects.
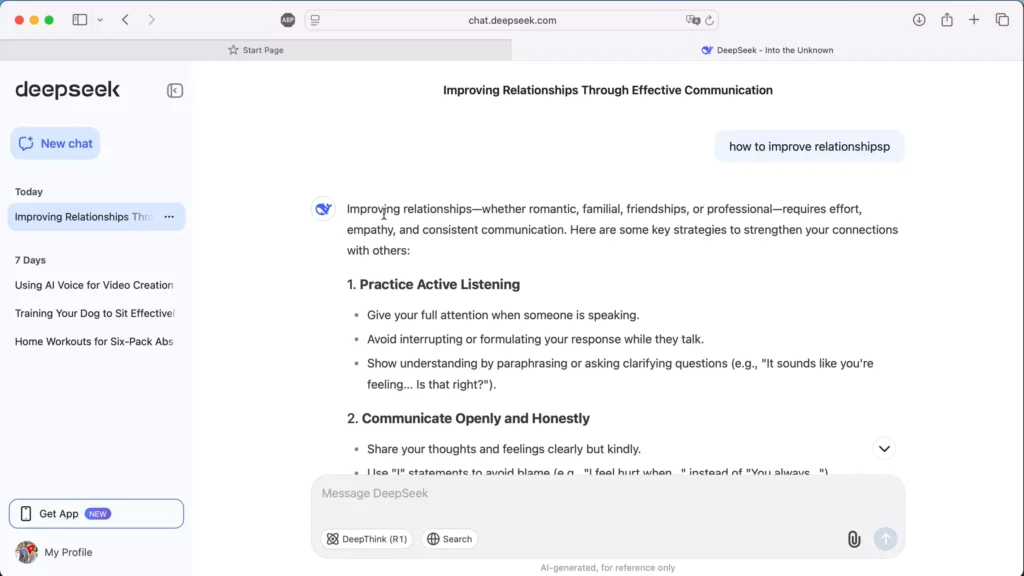
If you want to get creative, you don’t even have to record your own voice first. You can write a script in ChatGPT, paste that text into CapCut, and go straight to the “Text to Speech” step. This saves you the time of recording and transcribing.
Exporting Your Final Project
When you are happy with the voice and the visuals, it is time to save your work. Click the “Export” button in the top right corner of the screen.
Give your file a clear name so you can find it later. Check your resolution settings to make sure you’re exporting in 1080p or 4K depending on where you plan to post the video.
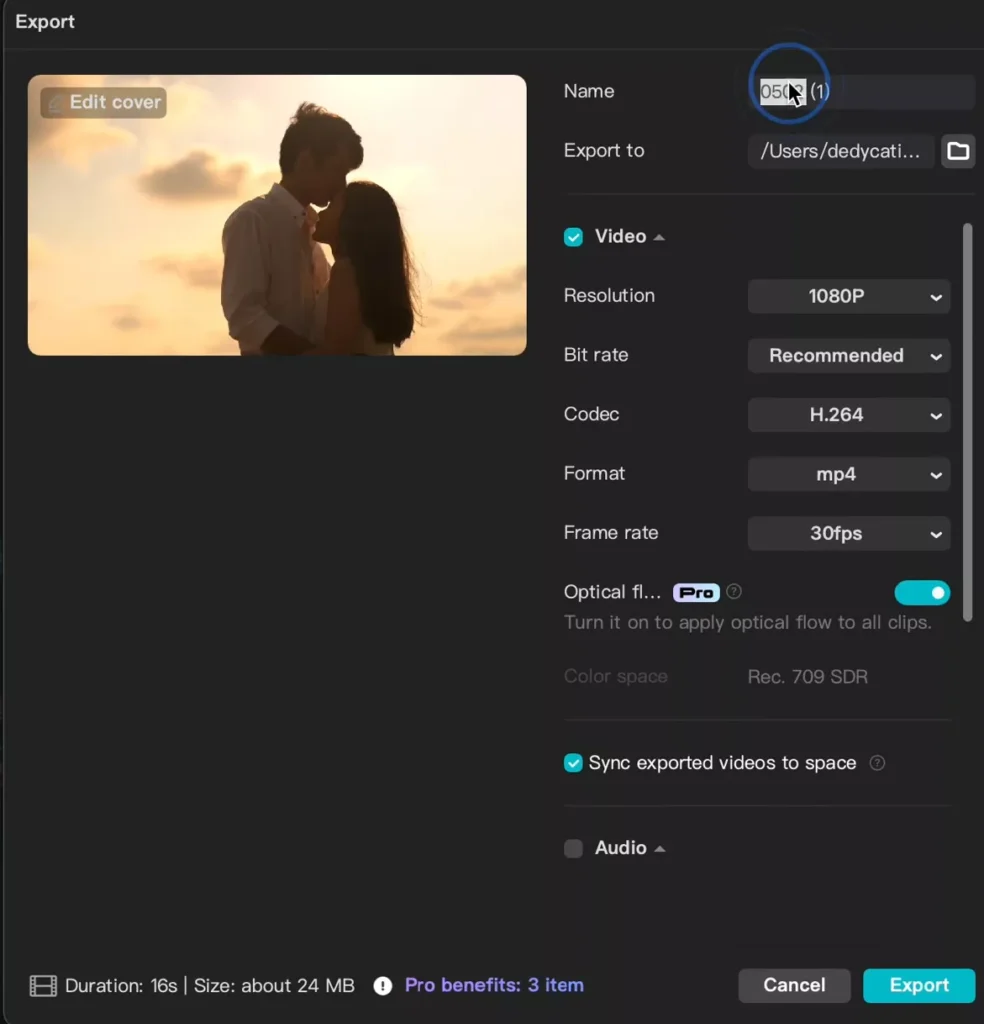
Once you hit the final export button, CapCut will render the video. Your final file will have a clean, AI-generated voice that replaces your original recording.
Can CapCut Clone Your Voice?
Many creators wonder whether CapCut can create an AI version of their own voice. At the moment, CapCut does not offer true voice cloning.
Voice cloning uses artificial intelligence to learn the unique characteristics of a person’s voice—including tone, accent, pitch, and speaking style—and then generates entirely new speech that sounds like that person.
CapCut works differently. Rather than cloning your voice, it converts your spoken words into text and then reads that text using one of its built-in AI voices. While the wording stays the same, the voice itself changes completely.
If you’re looking for software that recreates your own voice, you’ll need a dedicated AI voice cloning platform. CapCut is designed for fast, high-quality text-to-speech generation instead of personalized voice replication.
Features of CapCut AI Voice
CapCut includes several AI-powered tools that simplify voiceover creation, especially for beginners and content creators who want professional results without expensive equipment.
Some of the most useful features include:
- Built-in text-to-speech conversion
- Multiple male and female AI voices
- Support for multiple languages and accents
- Automatic caption generation from recorded audio
- Easy caption editing before generating speech
- Voice synchronization with video timing
- Integration with CapCut’s editing timeline
- Free AI voice options for most basic projects
- One-click replacement of original narration
These features allow you to complete recording, transcription, voice generation, caption editing, and video editing within a single application.
Read Also:
- Best AI Video Generators in 2026 + CapCut Workflow Guide
- Voice Changer Effects in CapCut – Complete Guide for Creators
- How to Convert Text to Voice in CapCut? Detailed Guide
Tips for Creating More Natural AI Voiceovers
Although AI voices sound increasingly realistic, a few editing techniques can make them even more natural.
Write your script as if you’re speaking to someone rather than reading from a document. Short, conversational sentences usually produce better results than long, complex paragraphs.
Pay close attention to punctuation. Commas create short pauses, while periods create longer breaks. Proper punctuation helps the AI understand the rhythm of your speech and prevents it from rushing through sentences.
Read the generated voiceover several times before exporting. If a word sounds unnatural, try changing its spelling to match its pronunciation. This simple trick often fixes unusual pronunciations.
Avoid placing too much text in a single caption box. Breaking long paragraphs into logical sections improves both readability and speech pacing.
Finally, test several AI voices before deciding on one. A voice that works well for educational content may not fit entertainment videos or product reviews.
Common CapCut AI Voice Problems and How to Fix Them
If your AI voice doesn’t sound right, the issue is usually easy to solve.
AI Voice Doesn’t Generate
If the Text-to-Speech option isn’t working, first make sure you’re connected to the internet. CapCut processes AI speech online, so an active connection is required.
You should also update CapCut to the latest version, as older releases may not include the newest AI voice features.
Incorrect Captions
Auto-generated captions aren’t always perfect. Background noise, strong accents, or unclear speech can cause transcription errors.
Before generating AI speech, carefully review every caption and correct any mistakes manually.
Words Are Pronounced Incorrectly
Sometimes AI voices mispronounce names, technical terms, or abbreviations.
Try writing the word phonetically or adding commas and periods to influence pronunciation and pacing.
AI Voice Sounds Too Fast
If the narration feels rushed, add commas or split long sentences into shorter ones. Natural pauses significantly improve the listening experience.
Original Voice and AI Voice Play Together
After generating the AI narration, don’t forget to mute or delete the original audio track. Otherwise, both tracks will play simultaneously.
Pros and Cons of Using CapCut AI Voice
Like any AI tool, CapCut has strengths and limitations.
Pros
- Easy to learn for beginners
- No professional recording equipment required
- Clean, noise-free narration
- Multiple AI voices available
- Built directly into CapCut’s video editor
- Faster than recording voiceovers repeatedly
- Suitable for YouTube, TikTok, Instagram, and presentations
Cons
- Doesn’t support true voice cloning
- Limited voice customization compared to dedicated AI voice platforms
- Some premium voices require a Pro subscription
- Requires an internet connection for AI processing
- Occasionally mispronounces names or specialized vocabulary
For most everyday video projects, however, the advantages outweigh the limitations.
CapCut AI Voice Alternatives
While CapCut works well for quick voiceovers, other AI tools offer additional features such as custom voice cloning, emotional speech, or commercial voice libraries.
Some popular alternatives include:
| Tool | Best For |
|---|---|
| ElevenLabs | Realistic AI voices and voice cloning |
| Murf AI | Business presentations and training videos |
| Descript | Podcast editing with AI voice replacement |
| PlayHT | Natural-sounding narration in multiple languages |
| Speechify | Fast text-to-speech reading |
| VEED | Browser-based AI video editing |
| InVideo AI | AI-generated videos with narration |
If your primary goal is editing videos inside one application, CapCut remains one of the simplest options. If you need advanced voice cloning or custom AI voices, one of these specialized platforms may be a better choice.
Frequently Asked Questions (FAQ)
Is CapCut AI Voice free?
Yes. CapCut offers several AI voices for free, although some premium voices and advanced editing features require a Pro subscription.
Can CapCut clone my voice?
No. CapCut does not currently support true voice cloning. It converts text into speech using its own AI-generated voices.
Can I use CapCut AI Voice on mobile?
Yes. The Text-to-Speech feature is available on both the CapCut mobile app and desktop version, although the available voices may differ slightly between platforms.
Why isn’t the Text-to-Speech option showing?
Make sure you’re using the latest version of CapCut and that your region supports AI voice features. Some tools are rolled out gradually and may not be available everywhere.
Can I use AI-generated voices for YouTube videos?
Yes. Many creators use CapCut AI Voice for YouTube tutorials, explainer videos, Shorts, and faceless channels. However, always review CapCut’s latest licensing terms if you’re creating commercial content.
How can I make AI voices sound more realistic?
Use proper punctuation, keep sentences conversational, edit transcription errors, and experiment with different AI voices until you find one that matches your content style.
Can I change the AI voice after generating it?
Yes. Simply select the text again, choose a different voice from the Text-to-Speech menu, and regenerate the narration.
Does CapCut support multiple languages?
Yes. CapCut supports several languages for both Auto Captions and Text-to-Speech, though availability varies depending on the version and region.
Final Thoughts
Turning your voice into AI with CapCut is a fast way to improve your content. You just need to record audio, generate captions, fix the punctuation, and pick a voice. It removes the need for expensive microphones or professional voice actors.
This method works for pranking friends, making faceless YouTube channels, or simply polishing a business presentation. The most important part is the punctuation in your text boxes. Small changes like adding a period can make the AI sound much more human.
Start experimenting with different voices to see which one fits your style. Once you get the hang of the workflow, you can produce high-quality voiceovers in a fraction of the time. Grab your phone, record a few lines, and try it out today.