Driven by the popularity of TikTok’s short-form videos, CapCut, ByteDance’s mobile video editing app has quickly gained widespread attention. Despite being a smartphone editor, it offers an impressive range of features, many of which are missing from traditional desktop editing software.
CapCut’s timeline editing allows you to work with essential tools such as trimming, cropping, adding music, mirroring, rotating, and more—all within a clean, intuitive interface.
If you have just downloaded CapCut and aren’t sure where to start, this guide is for you. It will walk you through the basics of timeline editing and show you how to make the most of CapCut’s powerful features.
What is a video editor timeline?
Today’s video editing software typically includes a non-linear timeline editor, or NLE (nonlinear editor). This feature of the application enables you to add material, edit it, organize it, and alter it – basically, manipulate the video’s elements to give it the appearance, sound, and feel you like.
You don’t have to add the material to the timeline in a linear or sequential manner because of the nonlinear aspect. If you preferred, you might add the final clip first, followed by a middle clip, and then fill in the gaps before including the first piece of media.
You must be aware of the following elements of a video processing timeline:
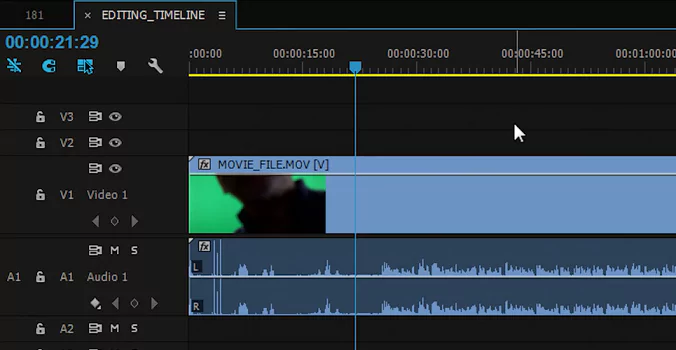
Timeline
The reason it’s called a timeline is that the different video clips will be horizontally arranged, with material on the left showing before film on the right. The locations of each frame are often marked on the timeline by time code markers.
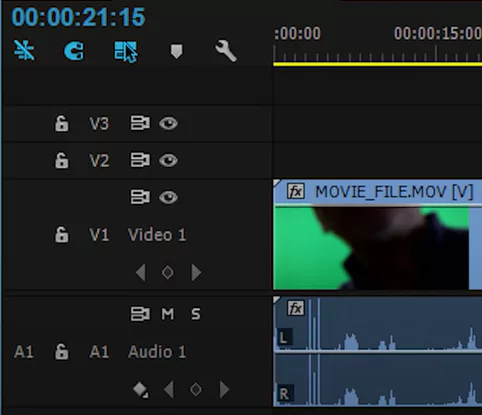
Tracks
Usually vertically layered, allowing you to add a variety of assets (both sound / video) to your film. The visual elements on the upper tracks will often display on top in editing software.
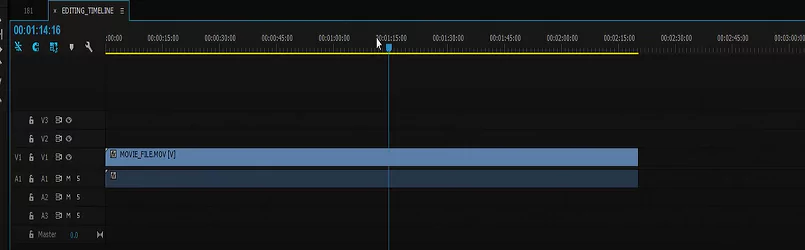
Media
The material, which can include text, photographs, music, video, and more, is shown on the timeline. These make up your video’s components.
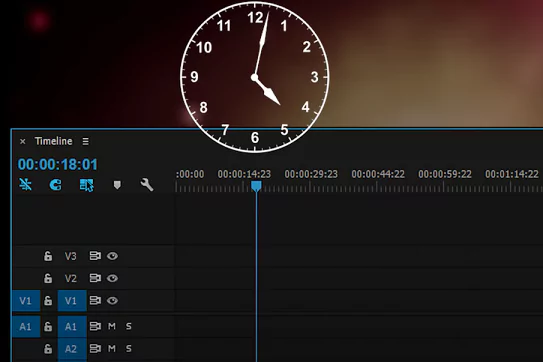
PlayHead
The portion of the movie you are watching is shown by the playhead. To ensure that you are modifying the appropriate section of your movie, the playhead is a crucial component.
There may be other features available for your video editor that will aid in your video editing. These can include track locks, zooming in for a comprehensive overview of your timeline, cutting and splitting tools, and more.
It’s important to spend some time learning the features of your software’s editing timeline if you are unfamiliar with them. A fast suggestion is to linger your cursor over the tool you’re unsure of while you’re studying a new piece of software. The title of the tool will often display in a tool tip, allowing you to quickly learn how it works and how it operates.
Common Editing Functions used on CapCut Timeline
Editing a video might mean removing a section of the footage or, more broadly, producing the entire project. Here, we’ll go through everything you need to know to modify a project as a whole and a specific clip to add or delete any section.
Using CapCut you can achieve various advanced effects such as green screen, zoom in, 3D zoom. Here we will address basic functions in more details.
Trimming the Video
One of the finest tools an editor may use is trimming. Depending on your preferences and demands, you can prolong or shorten any movie. For CapCut video trimming:
Click to choose the clip. Now drag to lengthen or shorten your video clip by tapping either end of the white selection box. That’s all, then! The chosen video has now been edited in CapCut to your specifications.

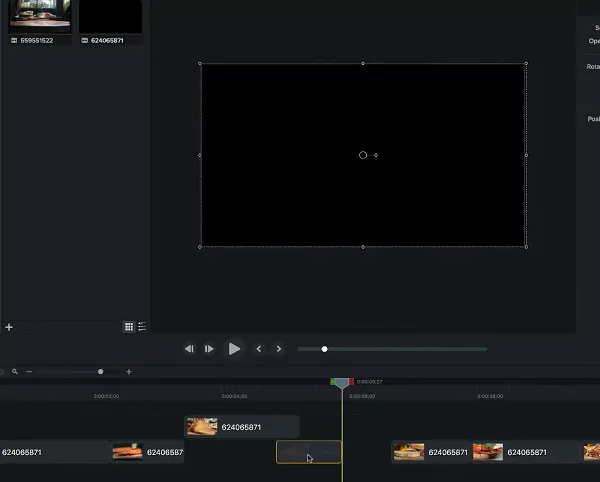
Shift or move the video clip
In CapCut, moving a clip is also simple. By doing so, you may reorganise your timeline and give your project a fresh appearance and feel. You may see a thumbnail sample for a movie in your timeline by just tapping and holding it.
Drag and shift the clip to any location in the timeline when the preview shows. The beginning and ending points of the clip will automatically match those of surrounding clips or the beginning and ending points of your project.
Resize the clip
You may simply resize your films and clips on the palette with CapCut as well. Easily slide and zoom in or out on the teaser video at the top of your screen to modify the size of a video on your canvas. This allows you to resize nearly every layer in your project.
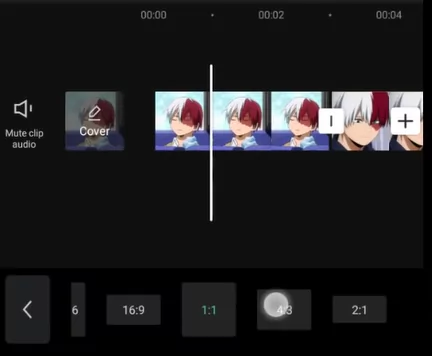
To avoid resizing the currently chosen layer, just make sure to pick the layer in advance in your timeline.

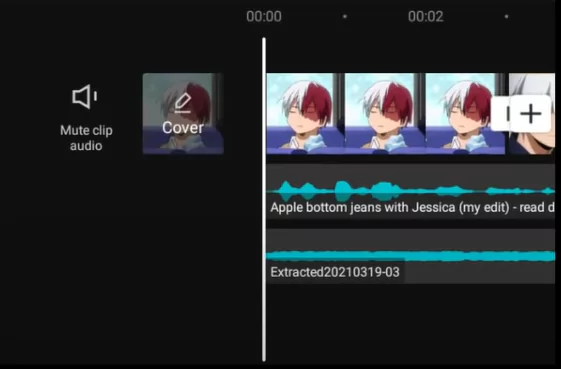
Adding and editing Audio
Tap on “+Add Audio” in your timeline to add sound to your project.
Select one of the following choices that are now accessible to you.
- Sounds: You may use this feature to select sounds from CapCut’s huge collection of resources or to use sounds that have already been saved in CapCut.
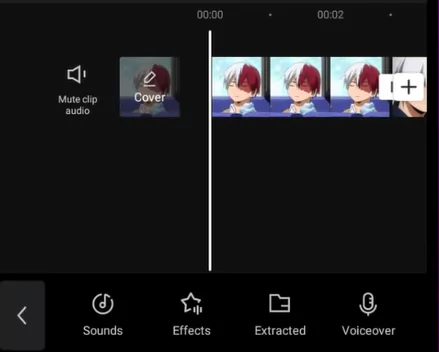
- Effects: Sound effects are an essential component of every video creation. They provide crucial parts to your project and aid in enhancing your surroundings. You may customise your gadget by adding things including laugh tracks, stage effects, and more.
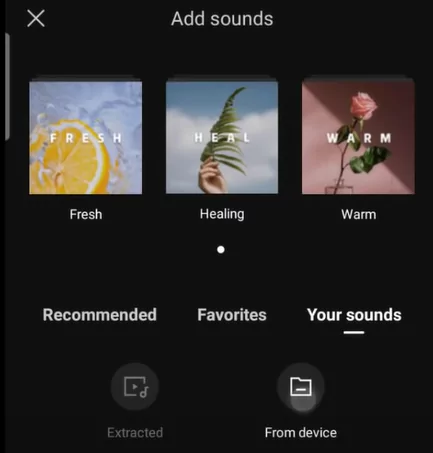
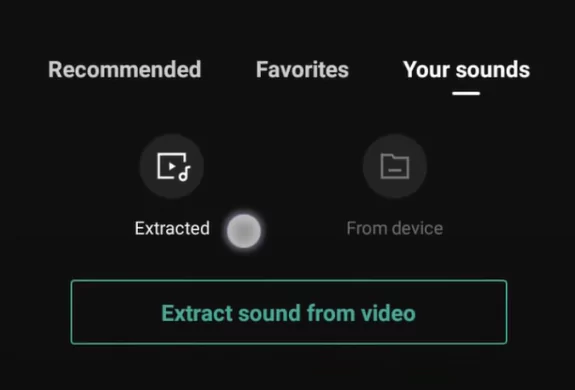
- Extracted: You may use this part to extract sound from short videos stored locally so that you can utilise it in your project. You can use it to recover audio from viral videos, movies, podcasts, and more.
- Voiceover: You may record voiceovers for your clip using this option. You may record your own noises and conversations to place on top of the videos that have been published to your timeline.
Once you’ve made your choice, choose the file or effect you want, and when you’re done, hit the checkbox in the top right corner of your screen.
Modifying the Speed
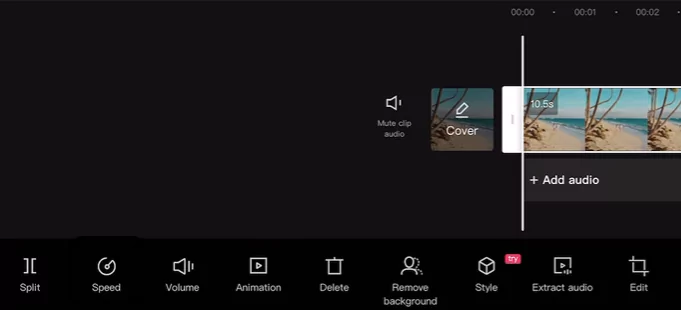
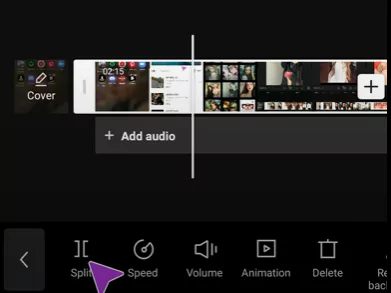
Most of the features you’ll need while using a video producer are covered by specific menus in CapCut. To change the speed of any clip, use the editor’s dedicated speed button. Click on ‘Speed‘ at the bottom of your screen after selecting the relevant clip in your timeline.
You will now have the choice of dynamically changing your pace by employing a curve instead of a fixed incline or decrease. Choose the one that best meets your needs:
- Normal
- Curve
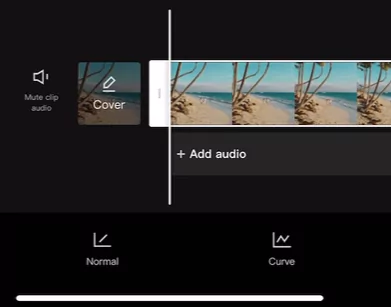
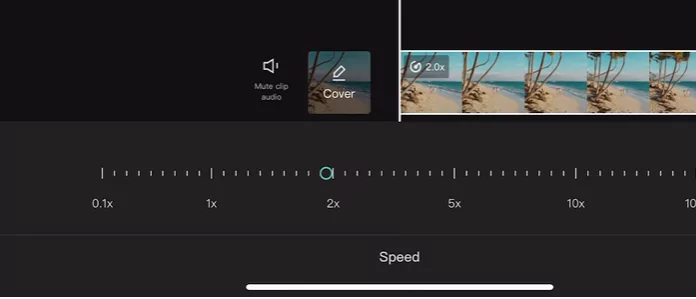
Normal speed editing
- The pointer may be moved to the required frequency by clicking on it.
- If you want to adjust the audio pitch of the clip to match the speed of the video, turn on “Pitch” in the bottom left corner.
- If you want to use the original audio, uncheck this box. When finished, click the “Check Mark” button in the lower right corner of your screen.
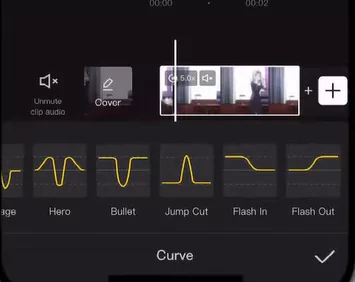
Curve Editing
- You may use curves to dynamically change the pace of your clip to create special effects that can improve the overall plot and aesthetic of your film.
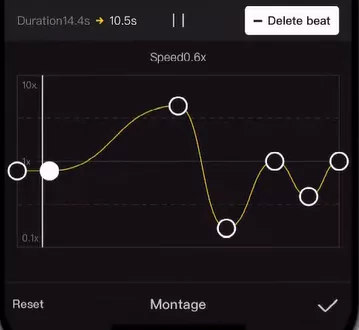
- You may either choose from one of CapCut’s presets or use the “Custom” option to make your own.
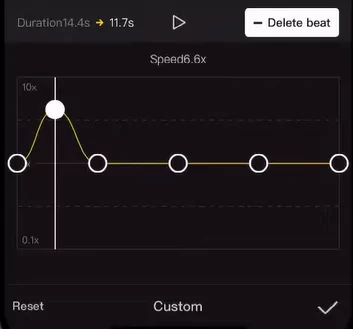
- Create your own curve by following the instructions below.
- Click and choose “Custom.” Press “Edit” once more.
- Then, position the pointer at the appropriate point in the video. One of the placeholders may be moved to the appropriate speed by tapping and holding it.
- Move each place holder to the desired location and then proceed to define your curve based on your requirements.
- To save your changes, after you are finished, hit the “Check Mark” in the bottom right corner of your screen.
- Press “Check Mark” once more. That’s all, then! Your clip will now apply the chosen graph.
Replacing the video
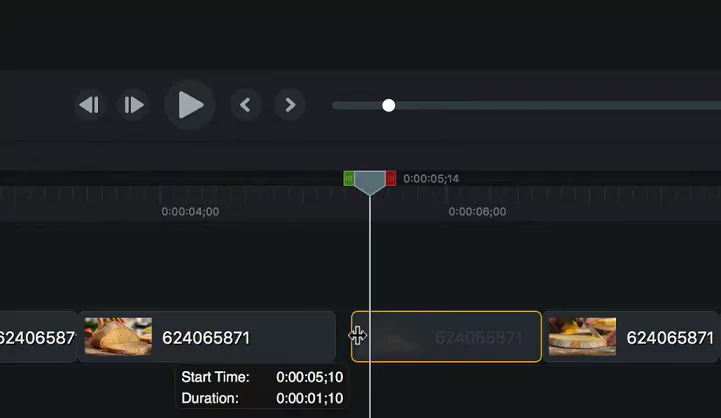
To replace a clip, just click on it and then scroll down the menu bar until you see “Replace.” From the clips stored locally, choose the one you want. The clip in the project will be automatically edited to the appropriate length.
To cover the required area of your video clip, click and drag the place holder. When you are satisfied with your choice, click “Confirm” in the bottom right corner of the screen. Now that you’ve made your choice in the timeline, the clip should have been immediately updated.
Using the Split function to cut the clip
In CapCut, breaking a clip is a simple process. Open the chosen file in the app first. Place the cursor where you want to divide the clip on your timeline by moving it there now. At the bottom of your screen, click “Split.”
You may now choose to add a transformation to your cut after the footage has been divided. If you want to create a transition, click “Add transition.” Now, divide the chosen clip into two halves.
Other functions frequently used with CapCut
There are some basic functions such as crop, rotate, mirror, change volume etc. Let us explore in detail below:
Mirror or flip the video
You may use this option to mirror your video and, in effect, flip its 2D depiction on the canvas. To easily flip your movie, use the “Mirror” button.

Cropping the video clip
You may use this option to crop your video. To begin, tap on “Crop“. Now locate the appropriate location on the seek bar using the slider at the top.
When you’ve located it, you can either choose from the crop settings at the bottom of your screen or click “Free” to manually crop the canvas to the appropriate region.
When you’re finished, click the “Check Mark” button in the bottom right corner of your screen. Your video clip will now have the chosen crop applied to it.
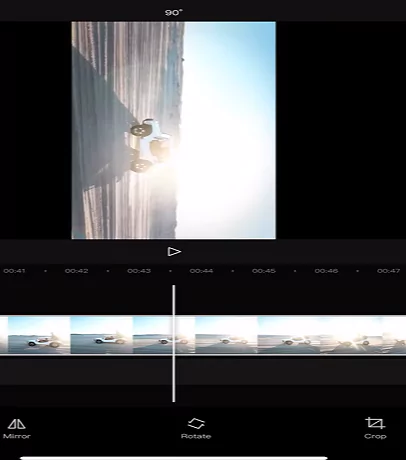
Rotate
This option allows you to rotate your video within the canvas. Each time you tap on it, your preview will spin 90 degrees.
Modify the Volume
In CapCut, you may independently change the volume of each clip that has been placed to your timeline. Simply press the relevant clip in your timeline, select it, and then tap the “Volume” button at the bottom of the screen.
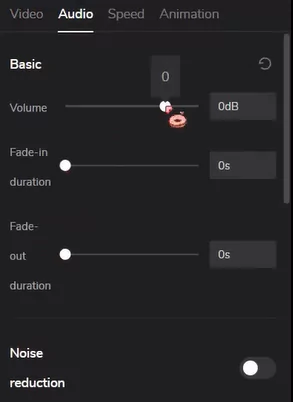
Use the slider to now change the volume to the desired setting. When finished, click the Check Mark button in the bottom right corner to save your adjustments. You may now adjust the loudness of the chosen clip to suit your tastes.
Watch the below video to learn all about timeline editing in CapCut:

What is the basic process of video timeline editing?
There are several approaches to video editing, so you should choose the one that suits you the most. The following are recommendations to get you started, but feel free to make modifications as you become accustomed to your editing routine.
- Assemble all the video content you anticipate using in your production. Labeling each piece of film is useful if you have a lot of it. Although it might seem like a lot of effort, the easier it will be to locate all of the necessary materials later on the larger the project.
- Once you’ve gathered your material, add the important clips to the timeline to begin establishing the video’s overall structure and sequence. This would be the major footage in an interview or instructional that we were editing.
- After adding each clip to the timeline, you must trim it and remove all except the most important segments of the video. Don’t bother about graphics or other editing jobs at this time (like transitions). Here, being clear with your point is crucial.
- You may begin adding supplementary video, such as pictures or text, once your primary material is in place and conveying the message you desire.
- You may add audio, such as music, after you’ve visually constructed your video.
Closing Thoughts
It takes both art and science to edit video on the timeline. There are many intriguing and cool effects and things you may attempt. However, little is more in many situations in life.
We advise watching a lot of videos as you start to edit your video. What do they excel at? What kind of editing did they do that you thought was successful? Write down notions for editing that you would like to imitate or try yourself while you watch these tutorials.
We hope this tutorial helped you become familiar with the fundamental editing features of CapCut. Please use the comments area below if you have any more queries.