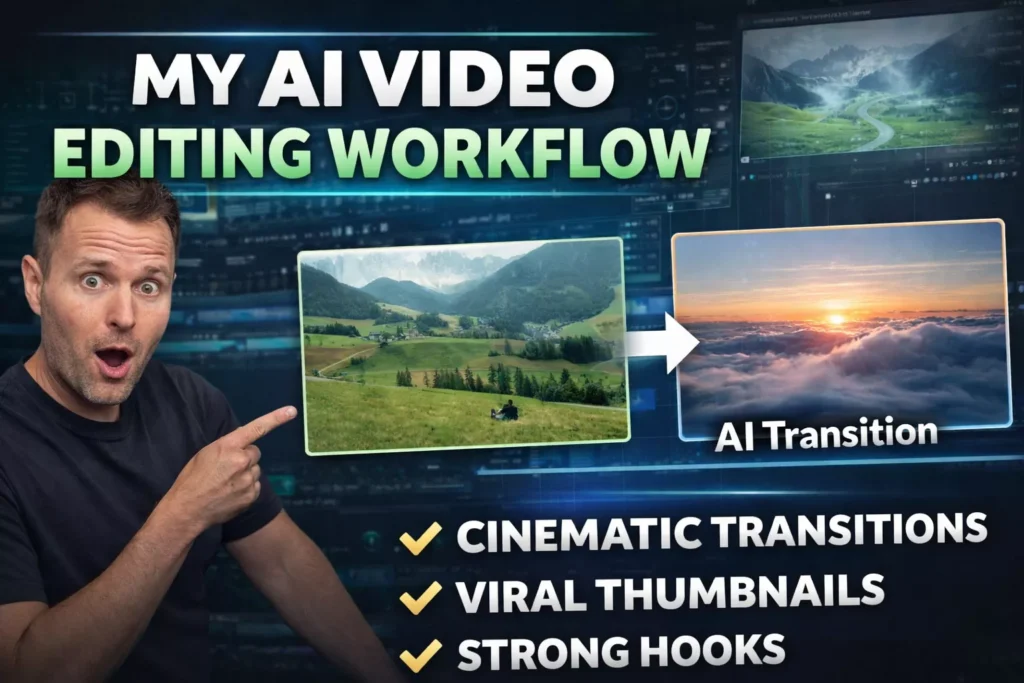
With the rapid expansion of social streaming services like TikTok, video editing is no more the only domain of filmmakers. After watching some stunning effects, like zoom, individuals will inquire how to achieve this or how to do that. Even on your phone, you can make this straightforward adjustment.
With CapCut, one of the most popular video editing applications today, you may add a zoom effect either manually while recording or automatically during post-production. On CapCut, there are three ways to zoom in. This is the only step-by-step manual you will require.
You might want to think about employing the zoom effect if you’re searching for a technique to make your movies and photographs seem better. Your films will appear more polished and expert with this effect.
The need for Zoom In on Capcut
A video may be made more immersive for viewers by zooming in. It may also be used to draw attention on certain elements of the video, such a character’s expressions or an object in the scene.
When focusing on a huge item to make it look larger than it actually is, zooming may also be employed to establish a feeling of scale. This may be a powerful tool for inspiring fear or intimidation.
Any of your movies may be given a fresh appearance by zooming in. Even the spectators are astonished by the video’s ingenuity.
The zoom-in capability makes it extremely easy to produce an attention-grabbing video. You may draw attention to the key element or section of the video that you want each viewer to concentrate on. Just a few samples of trendy products, unusual movements, and facial expressions.
Additionally, enlarge the details so that viewers can clearly see what you sought to capture and film.
The majority of video editors utilize this editing tool to give the video a beautiful appearance. To increase views and likes on TikTok videos, a zoom-in option has been implemented.
Steps to Zoom in using Capcut
Just follow the simple guide below. Follow the images shown after each step:
- First, select your media on the Timeline, and go to where you want the Zoom in effect to start
- Press the Keyframe button
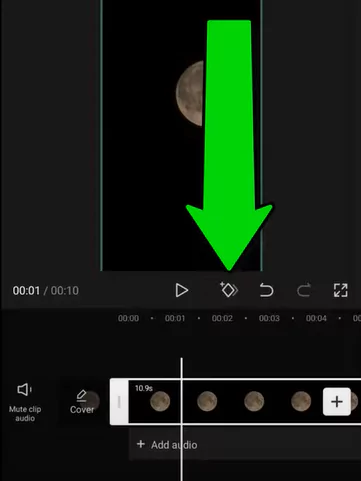
- Go to where you want the Zoom in effect to finish
- Press the Keyframe button again, then pinch and drag to zoom into your objective. This will create a Zoom in effect

- To zoom out, add another Keyframe where you want the Zoom out effect to start
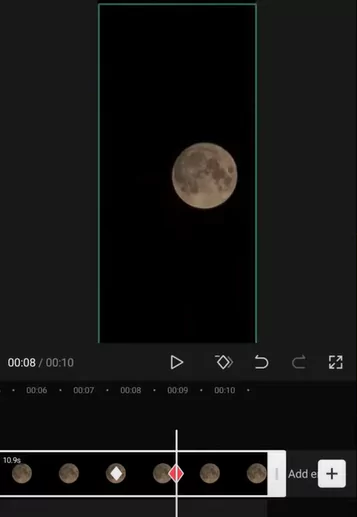
- Go to where you want it to finish, add a Keyframe then zoom out your objective to it’s starting position
- All Done!
Watch the video walkthrough below for following the above steps:

The zoom-in editing function in the CapCut app is only visible to our eyes as a visual effect. It was created using the CapCut software application. On CapCut, you may simply change the zoom-size, in’s speed, duration, etc.
Making the zoom-in effect appear on your chosen movie is not very difficult. Even novices who are unfamiliar with the programme may edit fairly simply because to how simple the editing tool has been intended to be.
It’s all your responsibility. You must use your fingers to zoom in on the video at an appropriate spot in the recording.
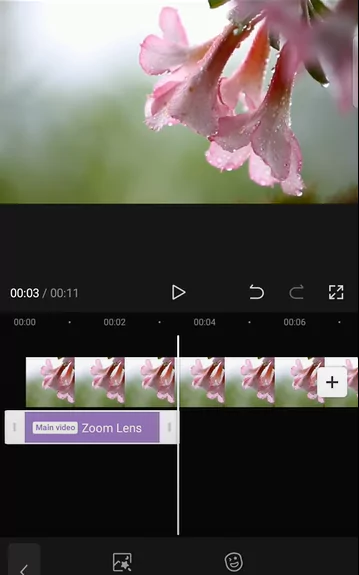
How to use the “Zoom Lens” effect on Capcut?
The majority of functionality for creating and editing brief videos are available in CapCut. The Zoom Lens effect on CapCut allows you to enlarge a video. The effect is pre-set for one-click use. The specific steps are listed below (follow the images along).
- Open CapCut on your smartphone, then start a brand new project.
- To begin with, add the video to the project
- Select Video effects by clicking the “Effects button” at the bottom.
- In the Basic section, select the “Zoom Lens” effect by scrolling through.
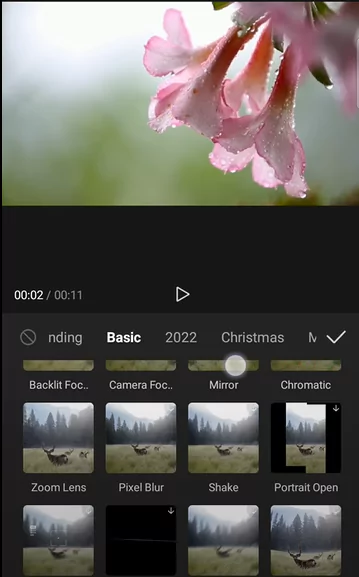
- By selecting the Adjust option, you may change the Speed and Range.
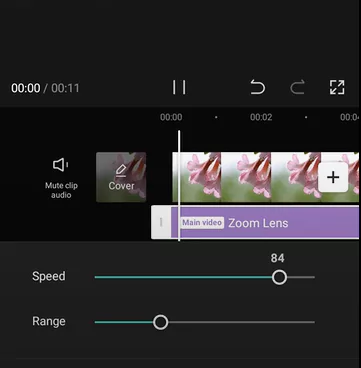
- To activate the effect, tap the checkbox.
- To adjust the duration of the zoom effect, hold down and drag the effect’s edge.
- Utilize the Export button in the upper right area to save the zoomed video.
Watch the video walkthrough below:

Zoom in effect using Keyframes
In addition to the above, we’d like to show you how to use the CapCut mobile app’s keyframe function to zoom in on a video using your phone. Users of the iPhone and Android devices can download CapCut for free.
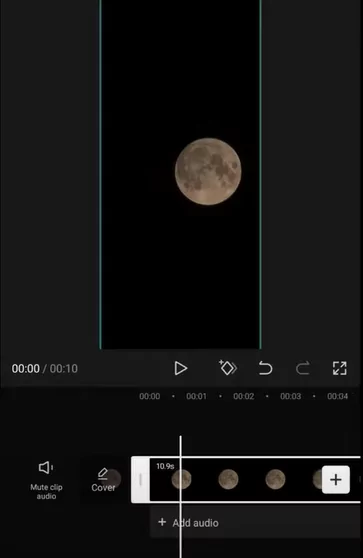
Step 1: Open CapCut, create a new project, then import the video.
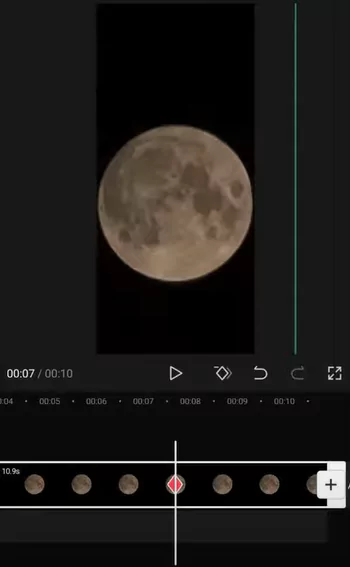
Step 2: By moving the playhead, you may choose where the video’s zoom effect will begin. By tapping the Keyframe tool, you can add the initial keyframe.
Step 3: Applying the zoom in effect. Wherever you want the zoom effect to terminate, stop the playhead by continuing to move it. To add the second keyframe, use the keyframe tool once more. Then, using your fingers, unpinch the video to increase its size and move it to the part of the video you want to zoom in on Done. The video will dynamically zoom in for the region you chose when you play it again.
Step 4: Applying zoom out effect. Playhead movement, third keyframe placement, playhead movement further, fourth keyframe placement, and pinch to adjust the video size to its original size. The video will then automatically zoom back to its original size. The velocity of the zoom in and out effect on the video is determined by the separation between two keyframes.
Step 5: Finally exporting the video. So now you are aware of the CapCut and Keyframe techniques for zooming in on a video. We hope you find our guide useful and like the video editing tools we suggested. So begin adding a zoom effect to your video right away for bigger tutorials or product evaluations!
Why Capcut is the ideal app for creating zoom?
Despite being created to be used on mobile devices, this application is one of the most comprehensive in the video editing sector and now gives its users the greatest number of capabilities in the production and editing of short videos.
The zoom feature It is one of the numerous features that this application provides, and it is just this feature that we discussed above.
Zooming in functions as a visual effect on CapCut, whose speed and duration may be readily changed. When the zooming in and out of a movie on CapCut begins and stops, you may also move. It is now simpler for those who are just starting out with video editing.
Common questions associated with Capcut Zoom
Since Capcut commands more than 500 million users, there are lot of queries raised regarding zoom features. If you have any questions then write to us and we shall strive to address then same in the quickest possible time. Following are the some of the common questions arising out of this functionality:
Best method to slow the Zoom In
Keyframes allow you to progressively zoom in on CapCut footage. To add a keyframe where you want the zoom effect to start, scroll the video layer and press the keyframe button. Next, add the second keyframe to the desired zoom location. You may zoom in on the frame by pinching the screen with your fingers. Select Graphs from the menu. To delay the effect of the zooming in, flatten the speed curve.
What are Capcut Keyframes?
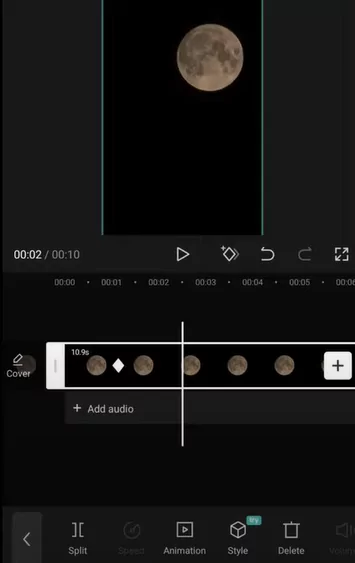
The CapCut keyframe option icon is a little diamond-shaped object. Keyframes serve as markers for the start and stop of various effects, transitions, etc. By utilizing keyframes, you may create various effects from one point to another.
Is there option for 3D zoom in?
CapCut presently only supports the 3D zoom effect for pictures. When you choose the image you wish to alter, you can find it. The Style section contains it. The 3D Zoom option may be found by clicking the Style button and swiping the bottom toolbar to the left.
Why is Capcut considered best video editing app?
One of the greatest editing application is CapCut as it has lot of free functionalities. It is widely used and a highly well-liked app across Play Store and Apple Store. This software has a tons of features and gives you good outcomes.
Use the CapCut app whenever you want to edit a TikTok video, an Instagram clip, a Facebook post, etc. However, because CapCut does not handle huge files and videos, you cannot use it to cut long-duration YouTube vlogs, movies, etc. CapCut is an app with several functions that may be altered on a single platform.
Final Thoughts
Video editing is not at all of an issue in the modern world. Numerous apps provide the ability to alter movies and photographs whatever you choose. Videos can be edited by the average individual without the aid of a professional editor. CapCut does slow motion, crop, zoom in, and other tasks really well.
People may think your edit to be really appealing and want a video instruction from you. Even on your phone, you can modify your Instagram reels, TikTok videos, and other content. The zoom-in effect is simple to utilize because it is completely automated while making a movie.
In general, zooming in on CapCut is a rather easy operation that can be carried out by according to the instructions provided in this piece. You should be able to easily zoom in on your movies with a little effort. Tap “Zoom lens” to adjust the duration and speed as well.
Let us know what you like about this app and any tips for the visitors in the comments section. If you liked this post then please share with your friends and family using the button below.