Want to make those viral photo beat sync videos? You know, the ones that pop up on your WhatsApp Status, Instagram Reels, and YouTube Shorts? They’re super popular and grab attention.
This guide will show you exactly how to create them using CapCut. Get ready to make your videos stand out!
We’ll walk through everything, from setting up your project to adding music and making those photos dance to the beat. You’ll learn about syncing everything perfectly, using cool animations, and adding awesome effects.
Even if you’re new to video editing, these easy steps will help you make amazing content.
Getting started with CapCut for Beat Sync Videos
Before we dive into editing, let’s get the tools ready. This initial setup is quick and easy.
CapCut application installation
CapCut is a fantastic video editing app. You can get it for free on both iOS and Android phones. Just search for “CapCut” in your app store and hit install. It’s user-friendly, making it great for beginners.
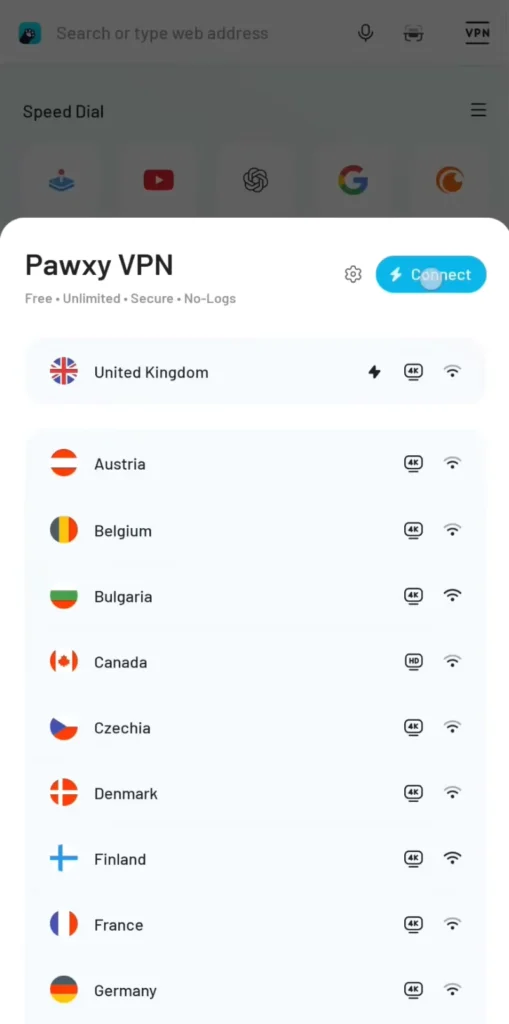
VPN requirement for CapCut
- Sometimes, certain features in CapCut need a little help to work.
- Using a VPN can unlock these features or improve performance.
- Download a free VPN app from your app store, like VPN Master or similar.
- Once installed, open the VPN app and tap the connect button.
- You’ll then be ready to use CapCut without issues.
Importing Media and Setting up your Project
Now that CapCut is ready, let’s start building your video. This is where the magic begins.
Creating a new project and selecting photos
- Open CapCut and click on the “New Project” button.
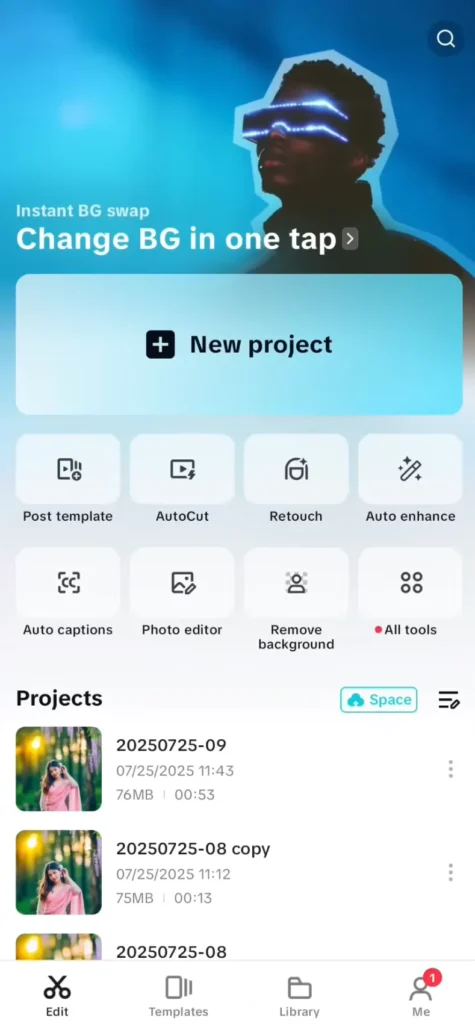
- This starts a fresh canvas for your video.
- Next, go to the “Photos” tab.
- Here, you’ll select all the pictures you want to use in your beat sync video.
- Pick photos that tell a story or match the vibe of the music you plan to use.
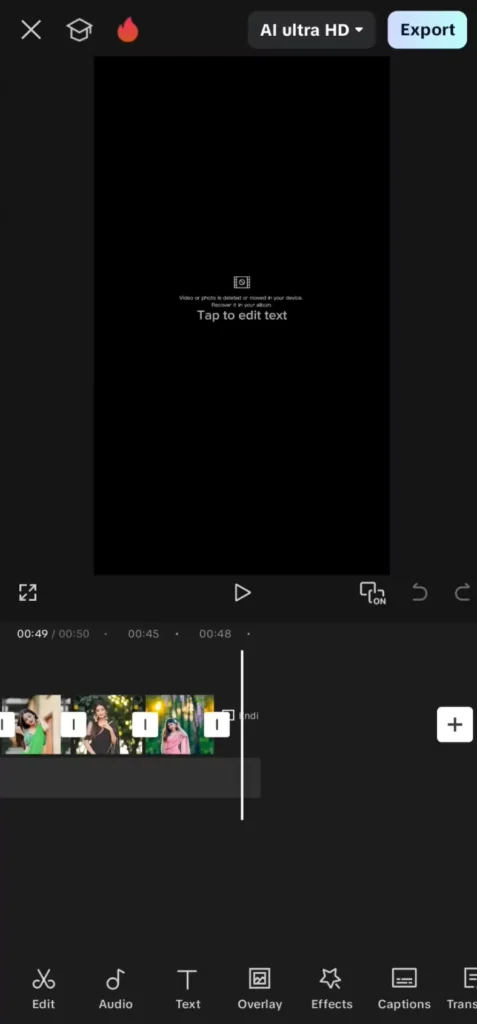
Project Configuration: Aspect Ratio and Photo Arrangement
- For social media, the right look is key.
- Click on the “Format” option at the bottom.
- Choose “9:16” – this is perfect for vertical videos like Reels and Shorts.
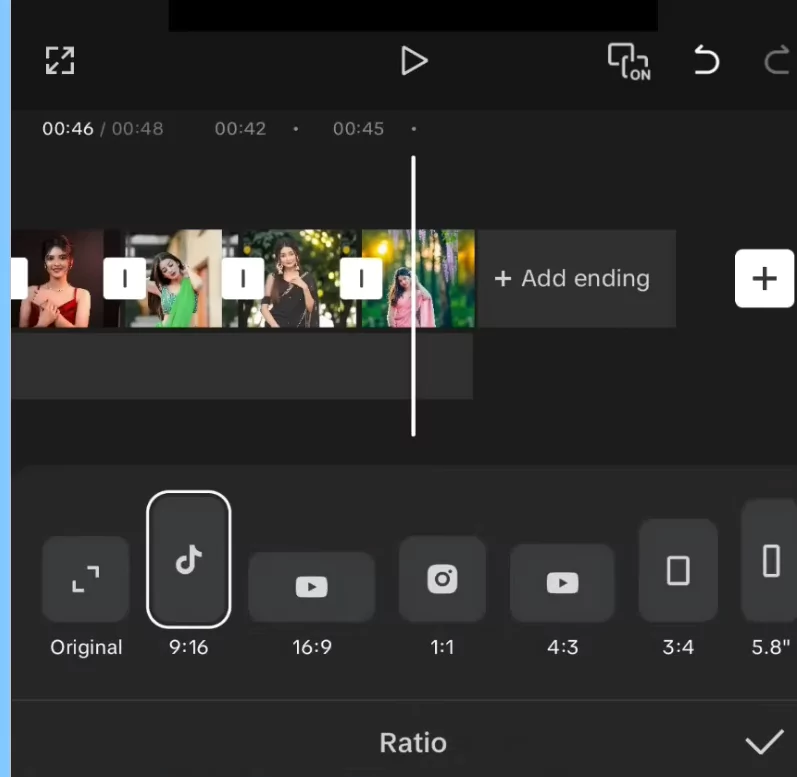
- Make sure your photos fill the screen nicely.
- You can pinch and zoom them to fit.
- If you want to change the order of your photos, just tap and hold one, then drag it to its new spot.
- Finally, swipe to the end of your timeline and click on the default CapCut ending.
- Hit delete to remove it for a clean finish.
Best Music Tracks for Photo Beat Sync Videos
Music choice is everything in beat sync videos. Here’s how to find tracks that elevate your visuals:
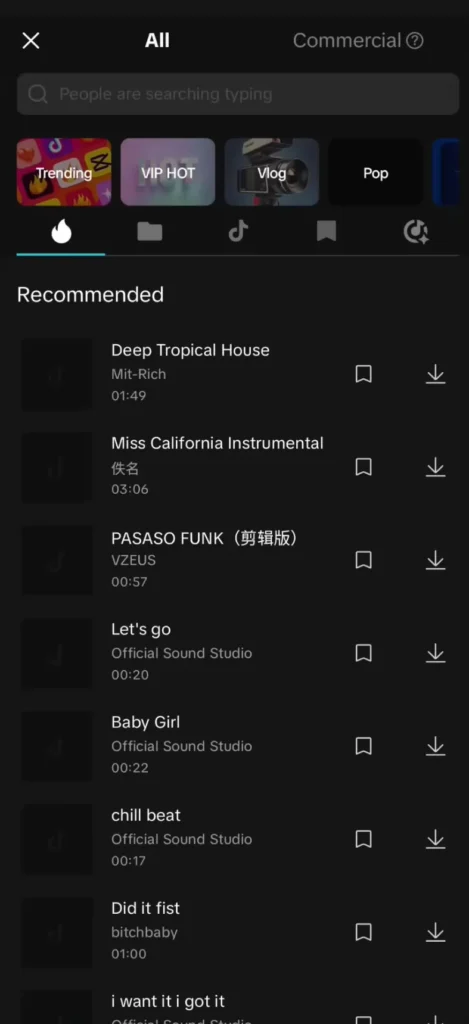
Where to Find Good Music:
- CapCut Sounds Library: Tap into trending tracks from TikTok or Reels.
- Device Music: Download royalty-free tracks from sites like Pixabay Music or Mixkit and import via “Device.”
- Screen Recording TikTok Sounds: Screen-record trending Reels audio, convert to MP3, and import.
Trending Music Types:
- Lofi + Chill Beats
- Fast-paced EDM (for photo transitions)
- Tamil, Hindi, or Telugu movie BGM for local flavor
- Emotional piano for romantic or nostalgia-themed edits
Tip: Beat-heavy songs work best. Look for tracks with consistent tempo and clear downbeats.
Adding music and mastering Beat Synchronization
Music is the heart of a beat sync video. Getting the timing right is crucial for that awesome effect.
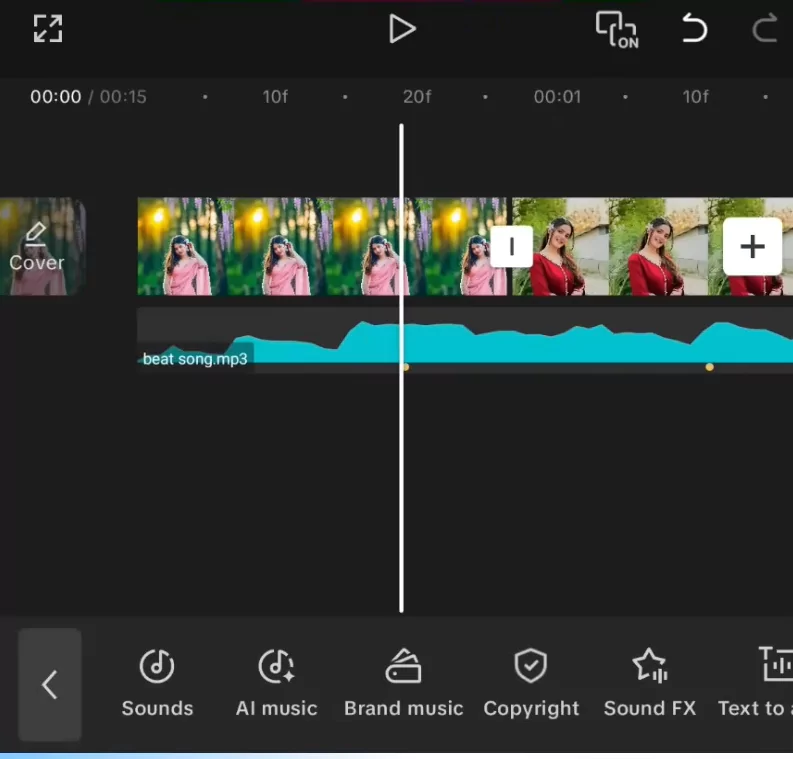
Importing your chosen Music Track
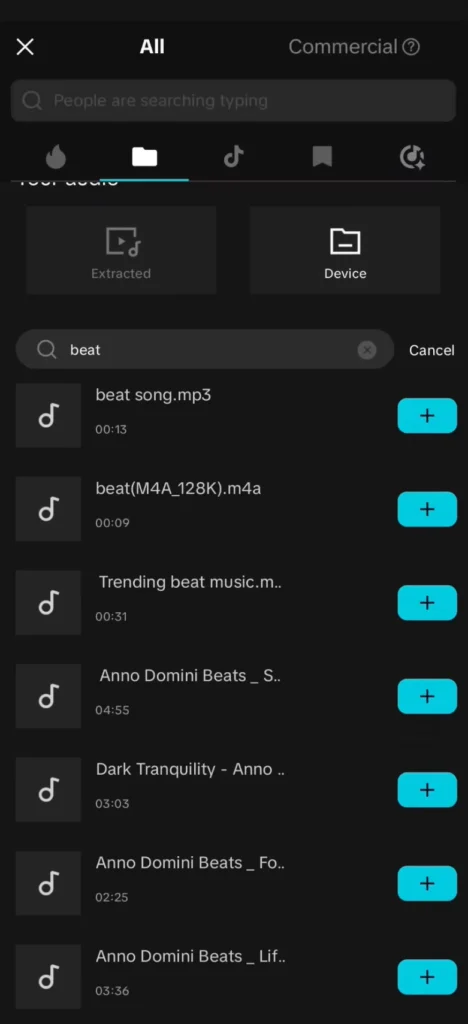
- Go to the “Audio” option on your timeline.
- Then, click on “Sounds.”
- You can add music from your phone’s library by tapping “Device.”
- If you are unsure what music to use, check out trending audio on TikTok or Instagram.
- You can save those sounds and find them later.
- You can add music from Spotify or Youtube into your CapCut projects.
- Click here to download beat music.
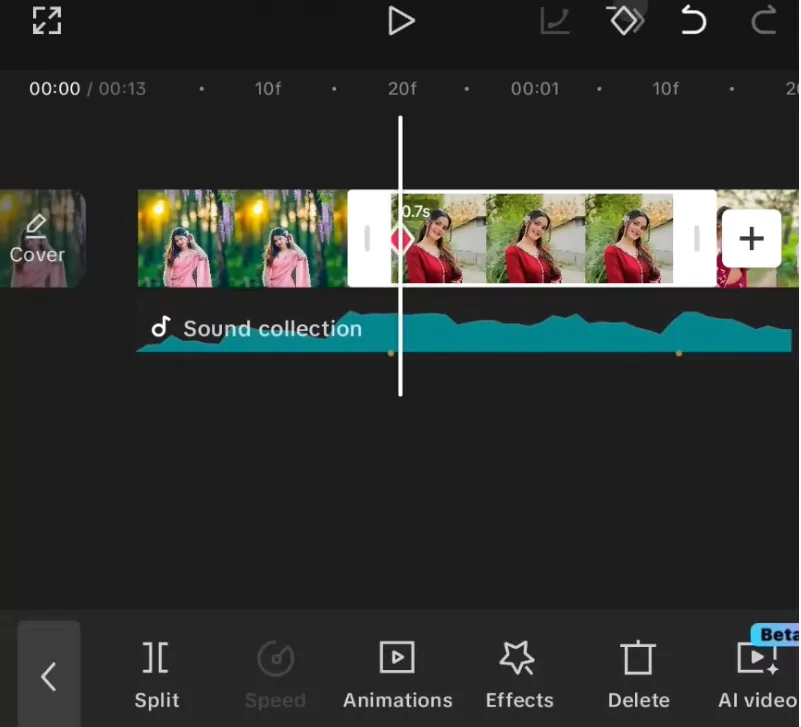
Precise Beat Mapping for Synchronization
This is where we match the video to the music. Find the “Beats” button below your audio track. Instead of letting CapCut guess the beats, it’s better to do it yourself. Play the song and listen carefully.
When you hear a strong beat, tap “Add Beat.” Zoom in on the audio waveform to place your beats perfectly.
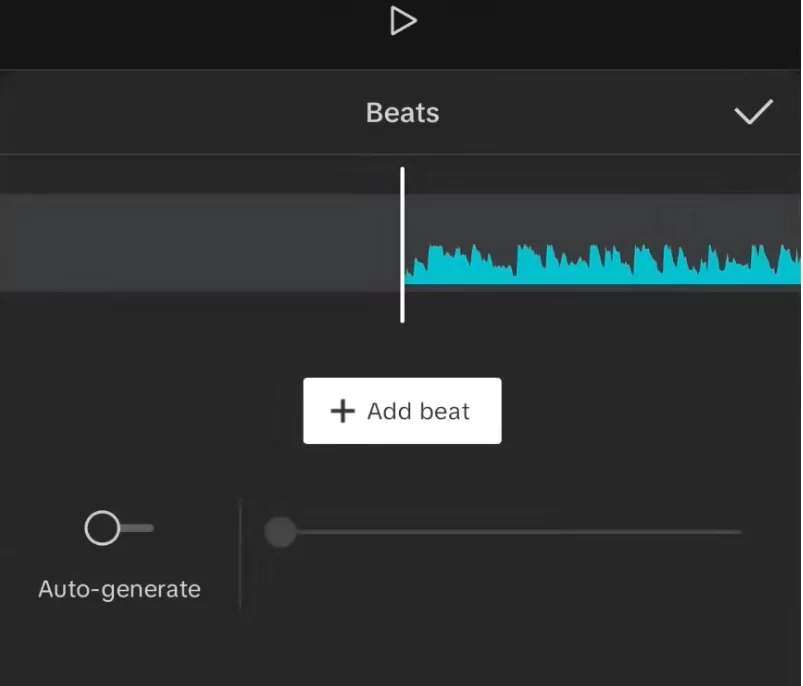
It might take a bit of time, but it’s worth it. After marking all the beats, you’ll adjust each photo.
Tap on a photo and drag its edges to make it fit the duration of a beat. Trim them so they start and end exactly on your beat marks. If there are many beats close together, you might need to use fewer photos.
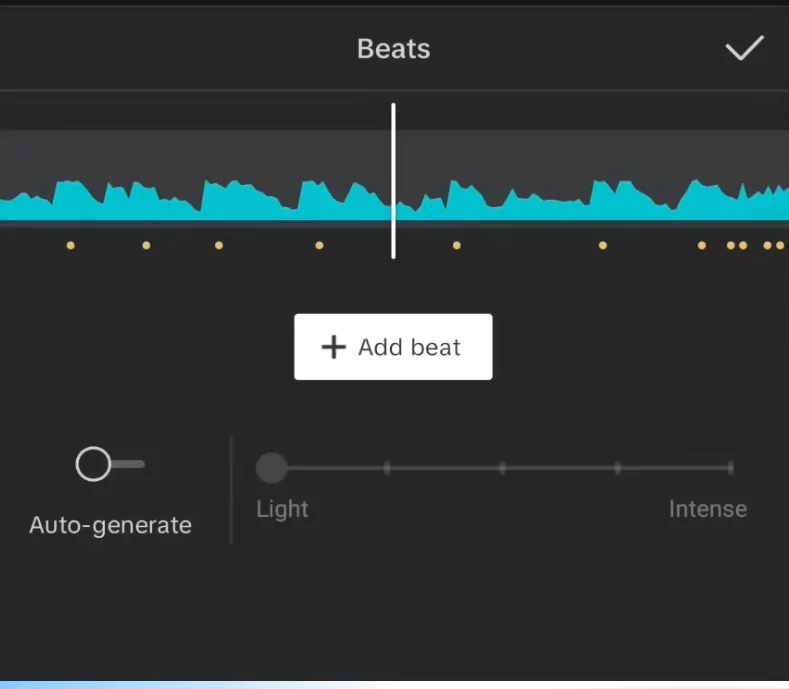
Choose your best shots for these fast-paced sections to keep the video looking good.
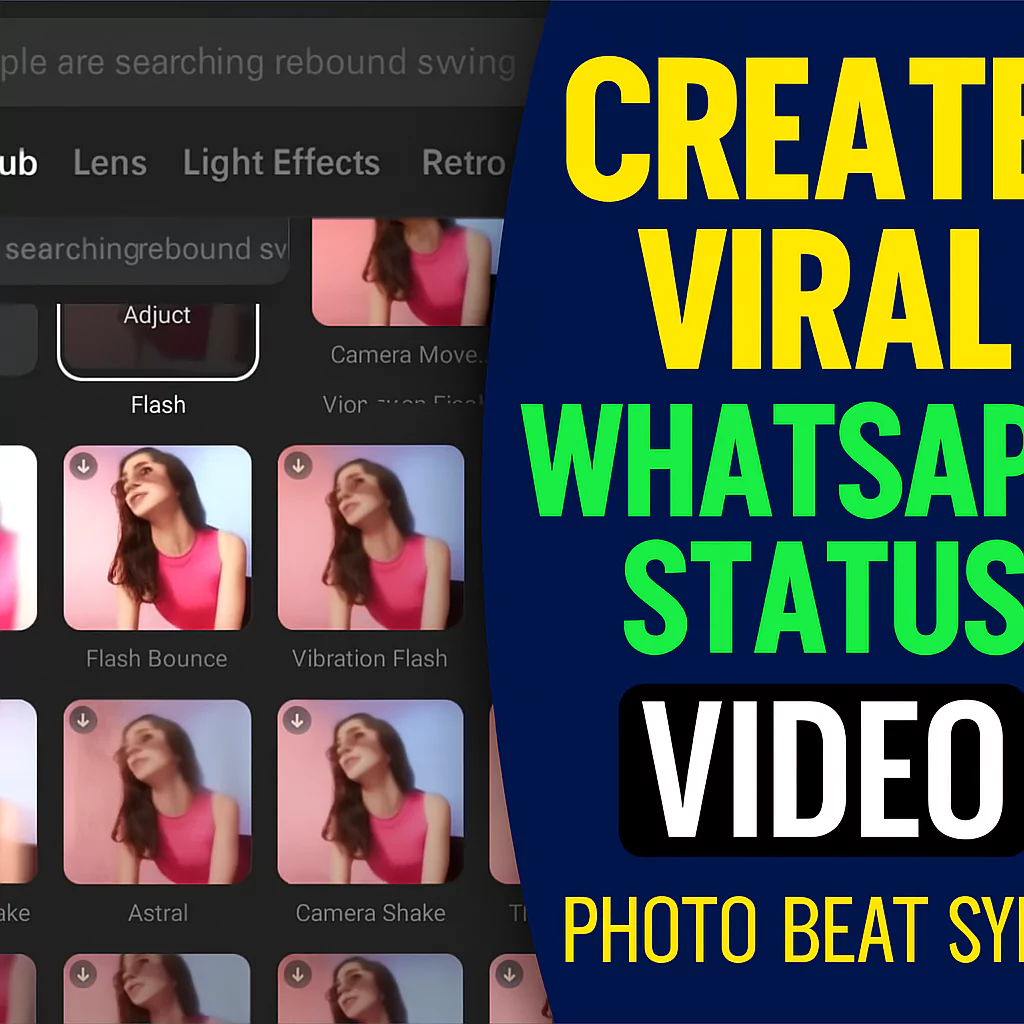
How to use CapCut Templates for Instant Beat Sync Videos
CapCut offers readymade templates where photos auto-sync to music. These are perfect if you are short on time.
Steps:
- Go to the Template tab on CapCut home.
- Search terms like:
- “Photo beat sync”
- “Status video”
- “Slideshow beat”
- Tap a template and hit “Use Template.”
- Add your photos → CapCut auto-generates the video synced to the beats.
- Customize music, text, or animations as needed.
Tip: Save high-performing templates as Favorites for reuse later.
Applying engaging Animations and Effects
Now, let’s add some life to your photos with animations and effects. This makes the video really pop.
Incorporating Dynamic Photo Animations
- CapCut has tons of animation options.
- Select a photo, then click on “Animation.”
- You’ll see options for “In” (how it starts), “Out” (how it ends), and “Combo” (animations that play throughout).
- The “Combo” section is great for beat sync videos.
- Try animations like “Zoom” or “Bend Zoom.”
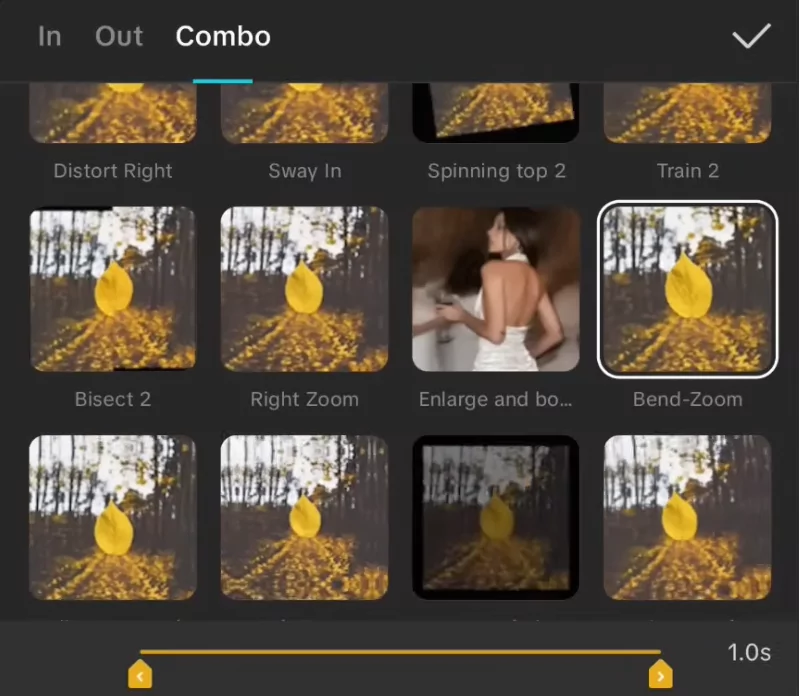
- Applying the same “Bend Zoom” to a few photos in a row can create a really trendy look.
- You can also make your own animations using keyframes. Place a keyframe at the start of a photo, then another at the end.
- At the end keyframe, you can zoom in or out. This lets you control the movement precisely.
- For smoother animations, use the “Graph” option after setting keyframes.
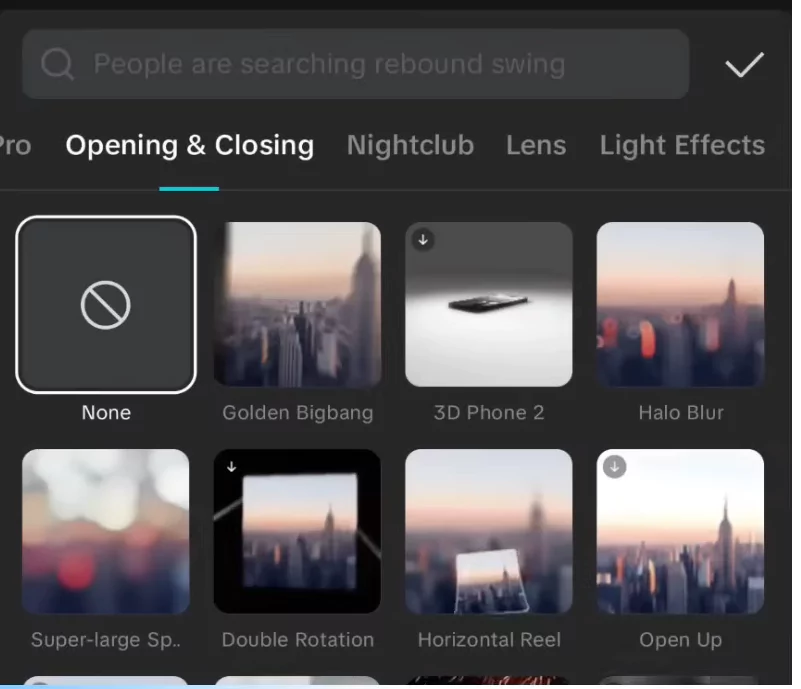
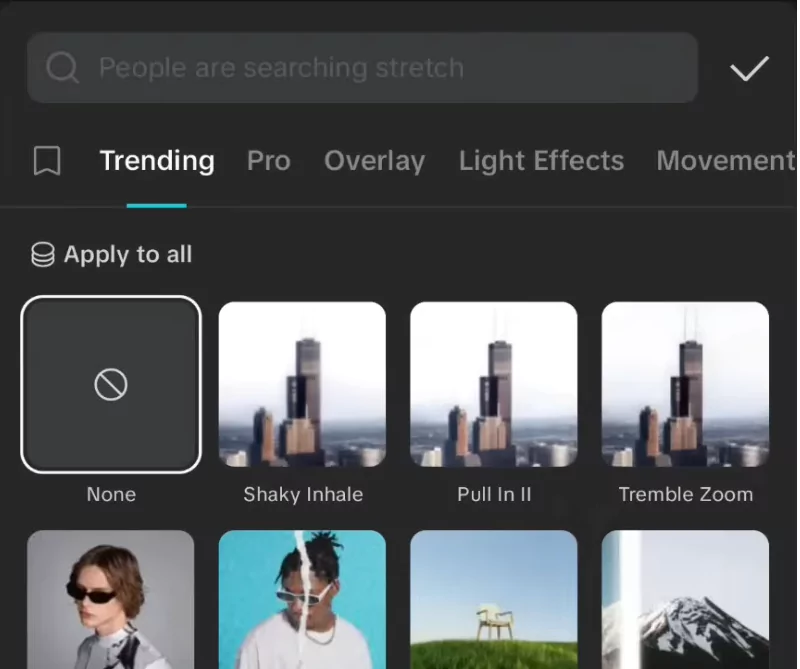
Enhancing Visuals with Video Effects and Transitions
- Effects can add extra wow factor.
- Go to the “Effects” menu and browse “Video Effects.”
- Effects like “Halo Blur” at the start give a nice intro.
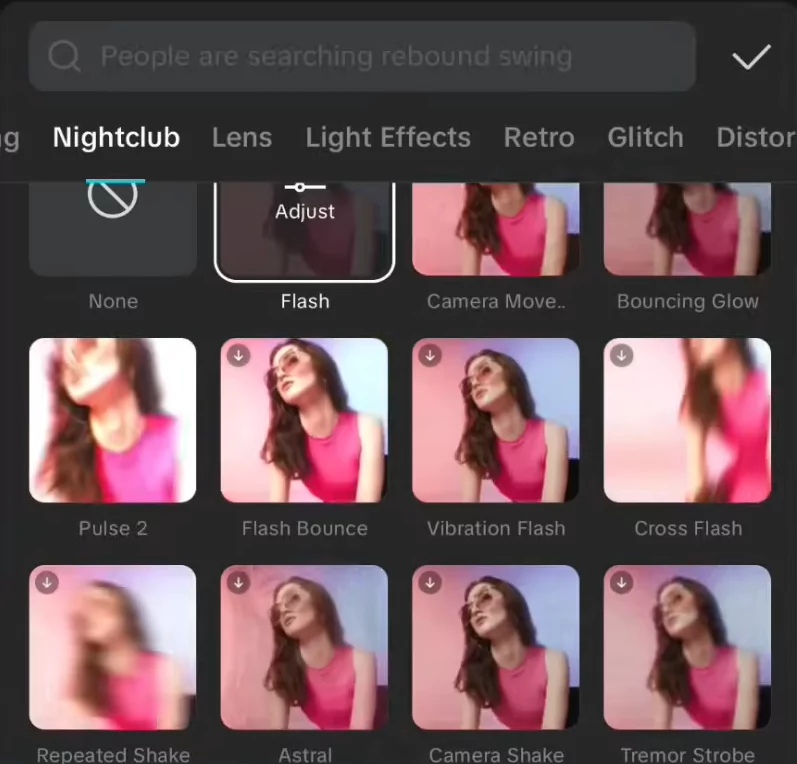
- For moments with lots of beats, try “Insane Glow” from the “Nightclub” effects.
- You can adjust how long an effect lasts.
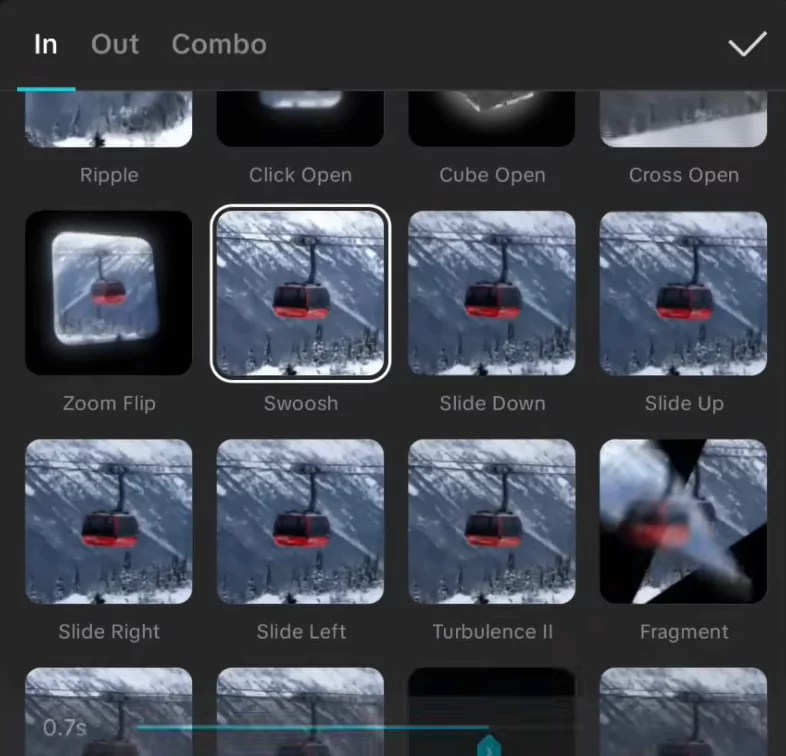
- Transitions connect your photos smoothly.
- Tap the “Transitions” button between photos.
- Choose smooth ones that don’t distract from your video.
- Avoid super fast or shaky transitions.
- If you’re using lots of other animations, you might not need a transition on every single photo.
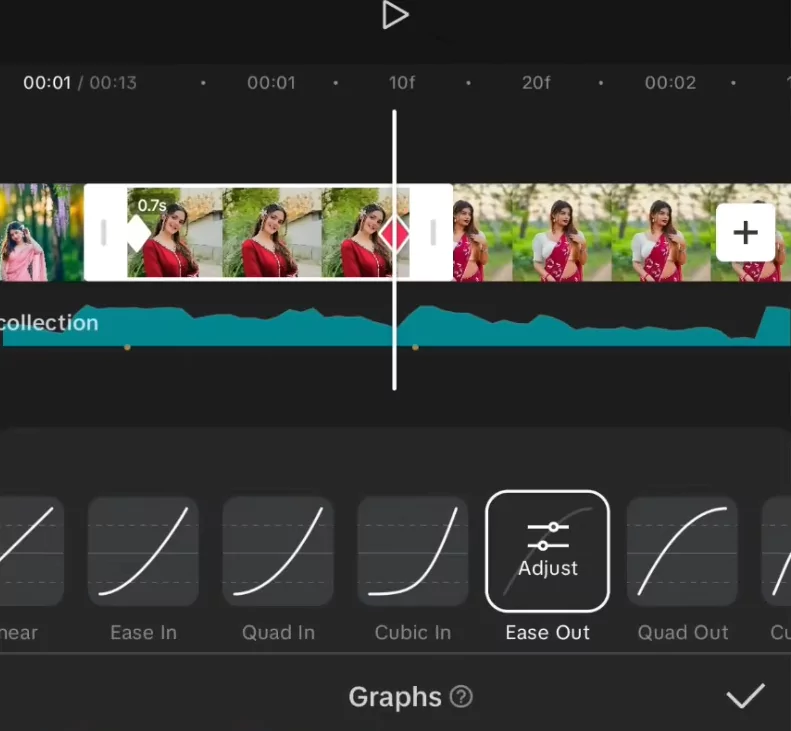
Using Keyframes for Pro-Level Syncing
Want more control than templates? Mastering keyframes lets you add precision zooms, pans, and tilts.
Example Workflow:
- Tap on a photo > go to Keyframe.
- Add a keyframe at the beginning and end.
- Zoom or pan in the second keyframe.
- Go to Graph > Ease In or Ease Out for smoother movement.
You can also add Rotation or 3D Tilt to make the photos feel more alive.
Advanced Techniques and Final Touches
Let’s mix things up and give your video a pro finish.
Creative Animation Combinations
- You can combine different animation styles.
- Try adding an “In” animation like “Unfold,” then use keyframes to add a zoom.
- This creates a layered effect.
- Experiment with effects like “Turbulence” or “Padding” for unique movements.
- It’s good to change up the animations.
- Don’t use the same zoom for every photo.
- Mix zoom-ins, zoom-outs, and other effects to keep viewers watching.
Fine-Tuning and Exporting Your Video
Watch your video one last time. Check that all the beats are perfectly timed and the animations look smooth.
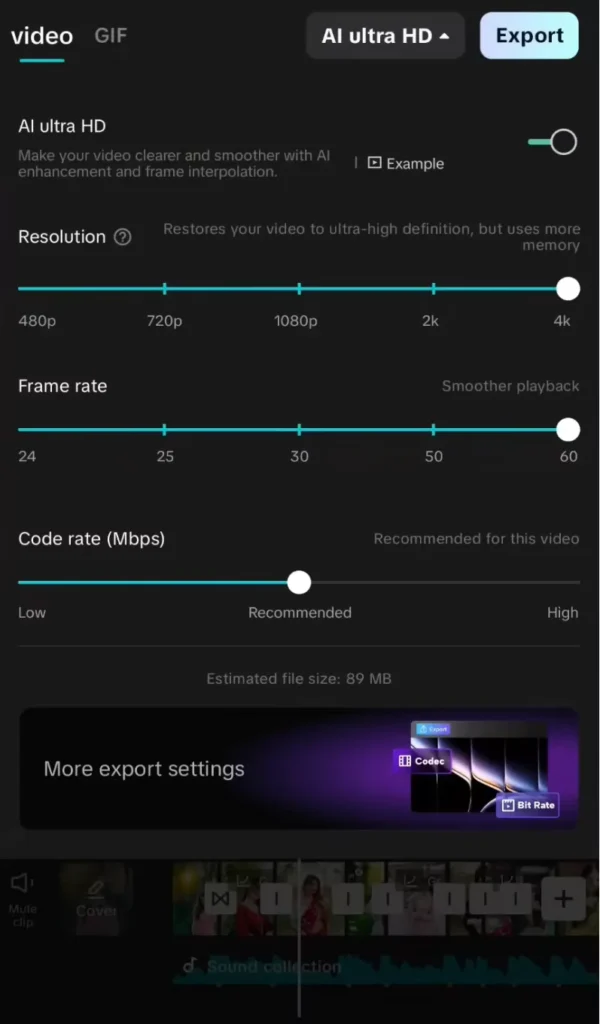
When you’re happy, it’s time to save. Tap the export button, usually in the top right corner.
Make sure to set the resolution to 1080p and the frame rate to 30fps for the best quality.
Creative Styles: Match Video Type to Music Mood
Match your visuals with the vibe of your chosen track. Here’s how:
| Music Mood | Photo Style | Effects to Use |
|---|---|---|
| Chill / Lofi | Sunset, travel, minimal | Blur, VHS, slow pan |
| Romantic | Couple selfies, vintage shots | Heart Bokeh, Glow, Warm Filters |
| Festival / EDM | Party pics, bold poses | Shake, Flash, RGB Split |
| Emotional | Old memories, childhood pics | Fade transitions, Piano BGM |
This helps set the right tone and improve engagement.
Troubleshooting Common Problems in Beat Sync Editing
Photo Doesn’t Align with Beat?
- Double-check your beat markers.
- Zoom into the audio timeline to fine-tune trims.
App Lags or Crashes?
- Restart CapCut and clear cache.
- Reduce resolution preview for smoother editing.
Can’t Export in HD?
- Tap Export > change settings to 1080p or 4K.
- Use a VPN if Pro features are restricted.
Beats Button Missing?
- Make sure music is selected, not just photos.
- If still missing, try updating CapCut.
Best Practices for Posting Beat Sync Videos on WhatsApp Status
Even the best video won’t go viral if not shared properly.
Tips:
- Keep video length under 30 seconds for WhatsApp.
- Use eye-catching first frames.
- Add a caption or lyric line using CapCut’s text tool.
- Avoid watermark (turn off CapCut ending and use original sound).
Share the video on Instagram Stories, Reels, and YouTube Shorts too!
Template Downloads & Resources
- Free CapCut Beat Sync Template
- Top 10 Viral Audio Tracks
- Status Video Preset Settings Sheet
Inspiration from Trending Creators
Here are some creators who regularly post beat sync videos and can serve as inspiration:
- @editor_boyzz – Emotional status edits
- @sync_master_india – High-beat festival edits
- @reelstorm – Minimal, aesthetic zoom edits
- @love.status_yt – Romantic photo status with soft animations
Study how they use rhythm, pacing, and transitions to tell visual stories.
Frequently Asked Questions
Can I use videos instead of photos?
Yes! Just import short clips instead of photos and trim them to match beat markers.
Why does my video lag during editing?
Lower preview resolution, close background apps, and clear CapCut’s cache.
How many photos should I use?
Depends on the beat speed. For 15 seconds of music, 10–20 photos work well.
What’s the ideal resolution for WhatsApp Status?
1080×1920 (9:16), 30fps. Export in MP4 format.
Conclusion: Your Guide to Viral Video Creation
You’ve now learned how to make awesome photo beat sync videos!
Using CapCut makes it easy. Just remember to sync to the beats, use cool animations, and add those special effects.
Practice makes perfect, so keep trying different music and styles. You’ll be creating viral-ready content in no time!