Editing videos on your phone or computer is more popular than ever. CapCut has become a go-to app thanks to its simple yet powerful tools. Among these, the masking feature offers huge creative potential. It allows you to hide, reveal, or highlight parts of your videos in fun and professional ways. Whether you want to blur out backgrounds or create cool overlay effects, mastering the mask tool is key.
This guide walks you through every step of the masking process in CapCut. From importing clips to exporting your finished project, learn how to make your videos stand out.
Understanding the Masking Tool in CapCut
What is Masking and why use it?
Masking is a technique in video editing that lets you control which parts of a video are visible. Imagine using a stencil to cover certain areas while revealing others. With masks, you can create effects like focusing on a subject or hiding distracting backgrounds.
CapCut’s masking tool offers shapes like circles, rectangles, stars, hearts, and even custom forms.
Benefits for Content Creators
Masking adds polish and creativity to your videos. You can blur backgrounds, highlight specific subjects, or add funky overlays. It’s a quick way to make videos look more professional without needing fancy equipment. Plus, with intuitive controls, anyone can learn to use masks effectively.
What’s new: Latest updates to the Mask Tool in CapCut (2026)
CapCut’s 2026 updates have improved the masking tool in exciting ways. One of the biggest changes is the introduction of animated masks, which now let users add motion to masks using keyframes. This makes it possible to track moving objects or reveal elements dynamically.
New shapes like triangle, ellipse, and custom-draw have also been added, giving creators more flexibility. Plus, improved feathering controls and real-time preview performance make masking smoother, even on mobile devices.
If you’ve used masking before, now’s a great time to revisit it and explore these new features.
How to Prepare your Video for Masking
Importing and Organizing Clips
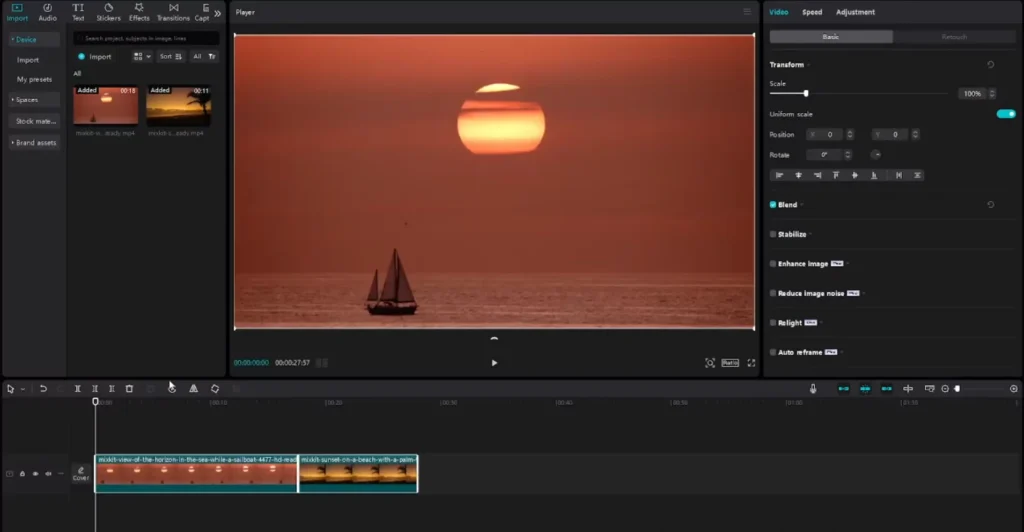
Start by opening CapCut and creating a new project. Import your video clips from your device. Drag the clips onto the timeline, lining up your background and overlay clips. Usually, the overlay should be placed above the background.

Fine-Tuning Your Clip Lengths
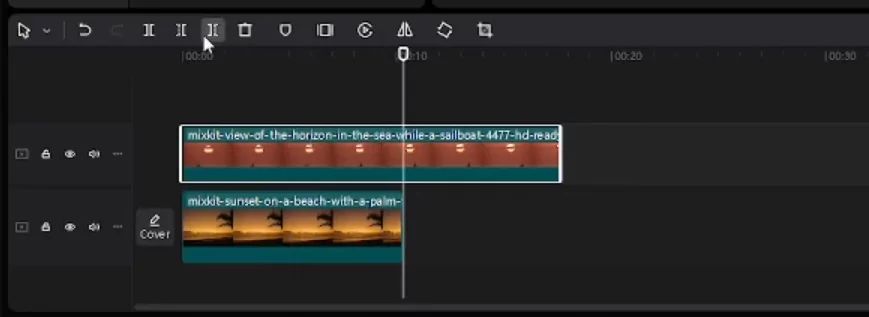
Use the split tool to trim dull segments or excess footage. Simply select your clip and tap the split button at the right moments. Keeping your clips tidy will make masking smoother and help your edits look cleaner.
Tips for a Smooth Workflow
- Match clip durations for seamless effects.
- Use timeline markers to mark important spots.
- Work in small steps — don’t rush through editing.
Understanding Feathering, Opacity, and Blend Modes
Feathering softens the edges of your mask, creating a smooth transition between visible and hidden areas. Increasing the feather makes the mask’s edge more subtle — ideal for background blurs or soft highlights.
Opacity controls how transparent your masked area appears. Lowering it lets the background peek through, great for layered overlays or dreamy effects.
Blend modes (if available in your version) can change how the mask layer interacts with layers below. Try experimenting with modes like “Overlay” or “Multiply” to achieve creative visual styles.
Applying Masks in CapCut: Step-by-Step
How to access the Mask Tool
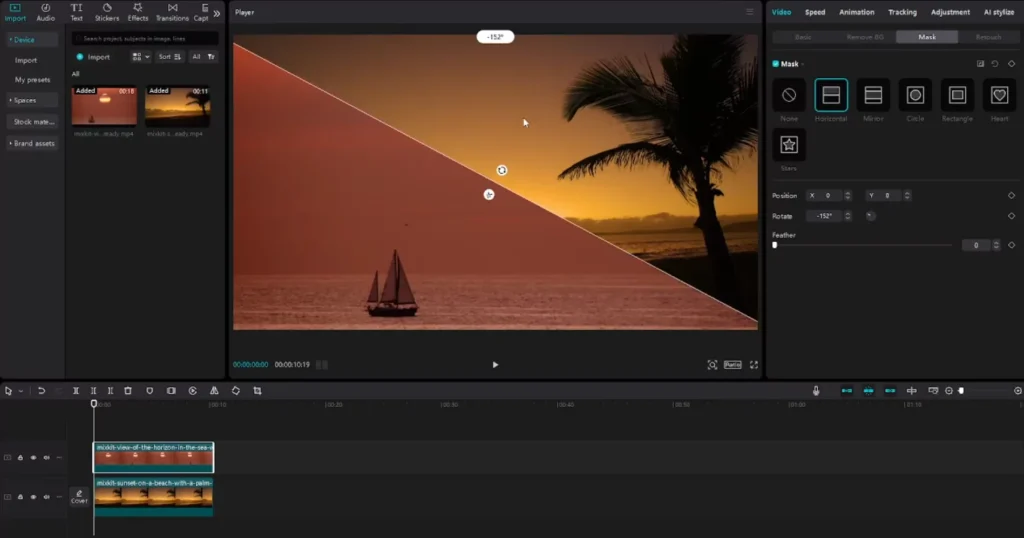
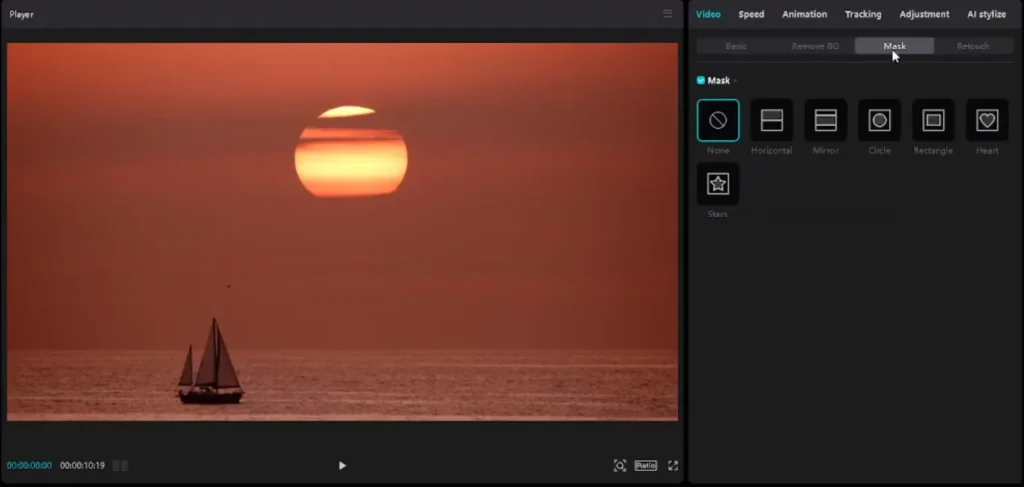
First, tap on the overlay clip—this is the layer you want to mask. Then, find the mask icon in the toolbar, usually represented by a shape or square. Tapping it opens options for masks and shapes.
Choosing the perfect Mask Shape
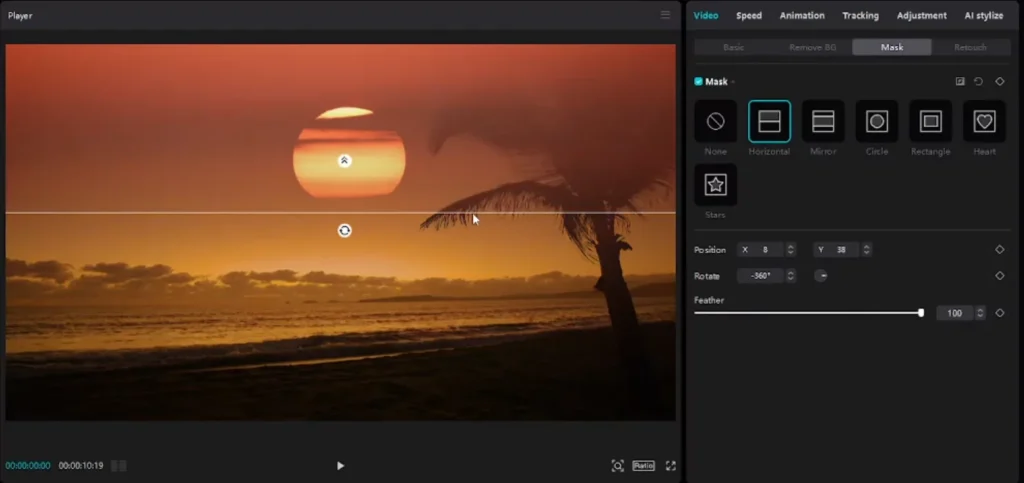
CapCut has several shapes to choose from: circle, rectangle, star, mirror, and heart. For example, a horizontal mask can crop your video into a wide strip, perfect for emphasizing a scene or removing parts.
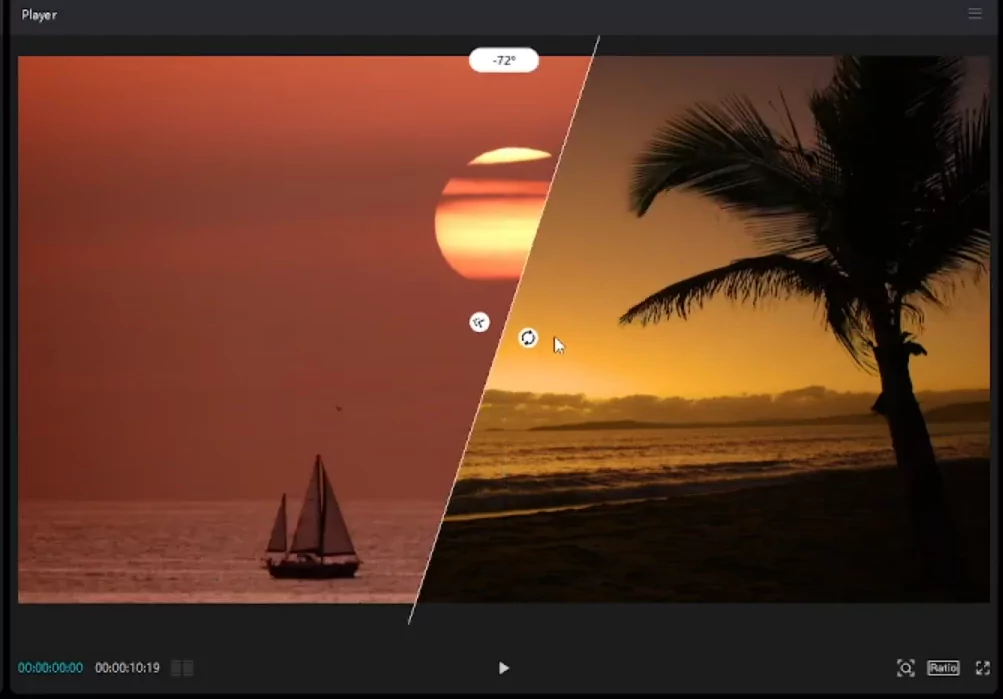
Applying a Horizontal Mask
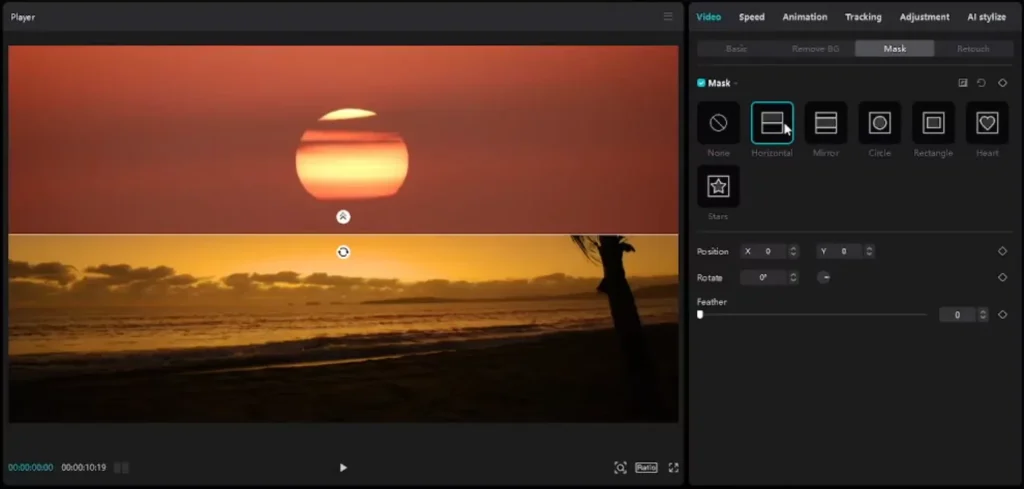
Select the horizontal mask option. When applied, you’ll see the shape over your video in the preview screen. Resize the mask by dragging the edges to cover exactly what you want. Want it thinner or wider? Just drag the sides.
Customizing Your Mask
- Resizing: Drag the border lines to fit your needs.
- Rotating: Use the rotation handle to tilt the mask for creative angles.
- Softening edges: Increase the feather slider. This creates a blurred edge, softening the transition between masked and unmasked areas.
Pro Tips for Mask Customization
- Keep aspect ratios in mind when resizing.
- Combine multiple masks for complex effects.
- Use rotation creatively, like tilting a shape for more interest.
Enhancing your Masked Video with Filters and Effects
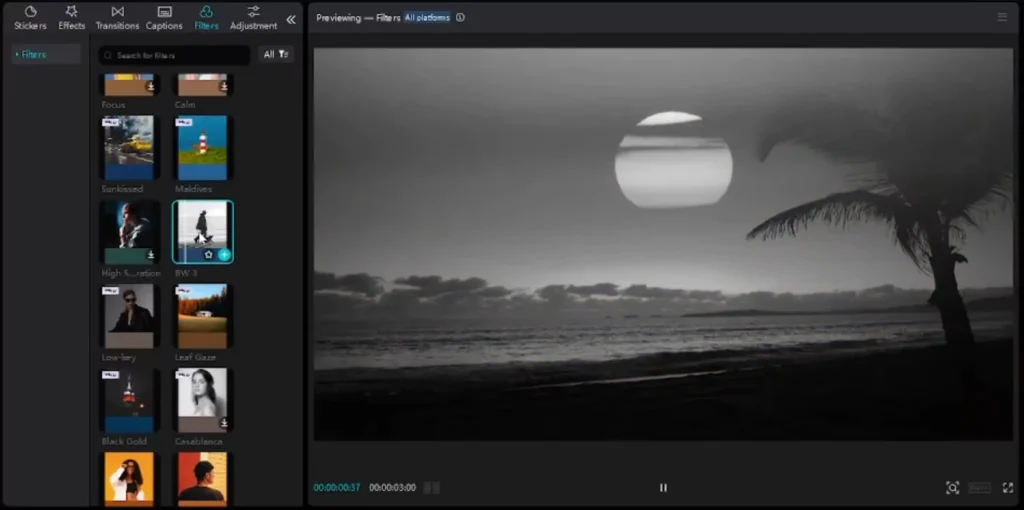
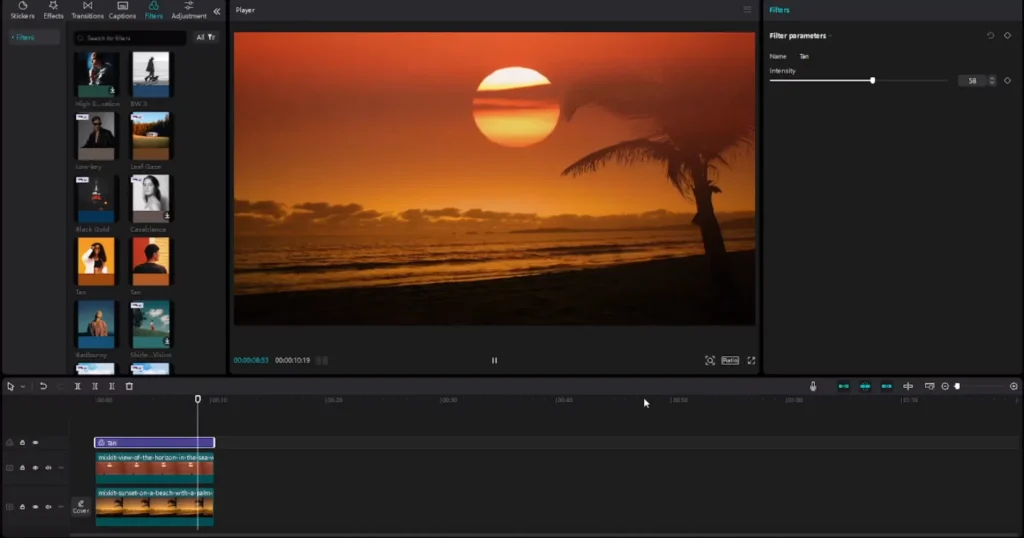
Adding Complementary Filters
Filters give your masked videos a specific mood or style. Choose one that fits your project—maybe a brightening filter for upbeat videos or a soft vignette for a cinematic look.
Once selected, drag your filter layer to cover the entire video timeline. This ensures the effect applies throughout.
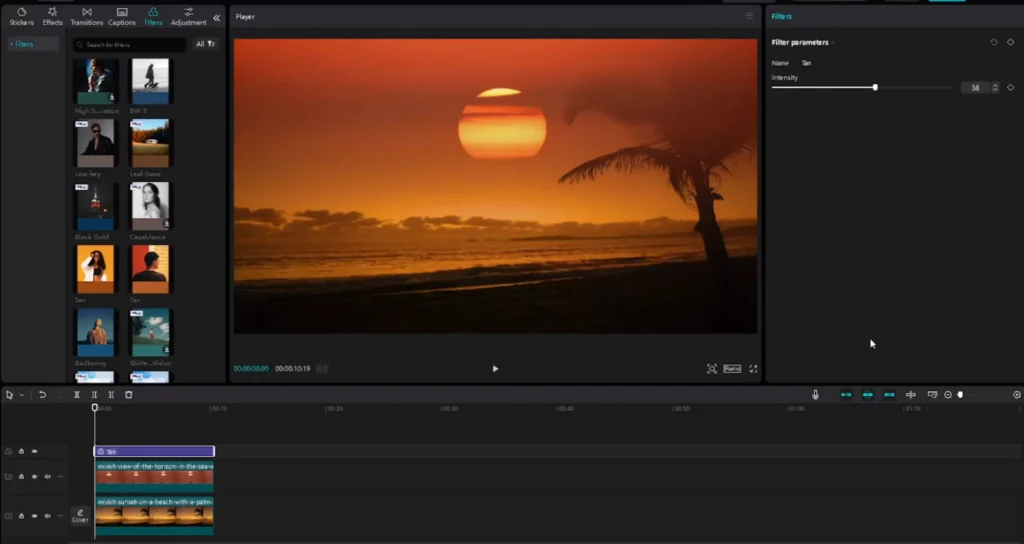
Fine-Tuning Filters
Adjust the filter’s strength to match your vision. Want more subtlety? Dial down the intensity. You can even animate filters with keyframes, gradually changing effects over time.
Creative Examples
- Focus on a subject by blurring the background with a soft vignette.
- Highlight a character with a bright overlay while dimming the surroundings.
Finalizing and Exporting your Masked Video
Preview Before Saving
Always playback your project to see how masks and filters work together. Make adjustments as needed before exporting.
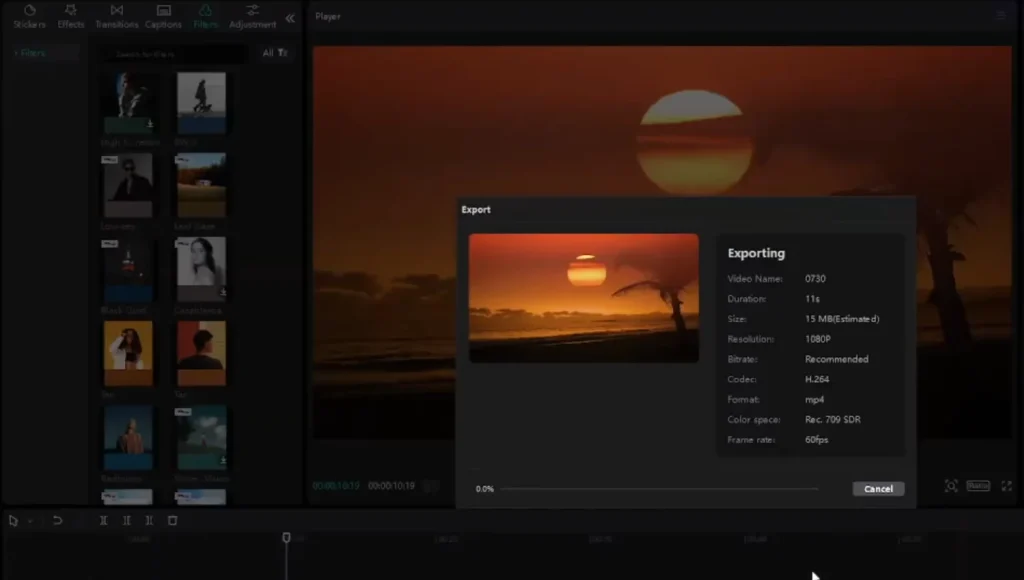
Export Settings
CapCut offers various saving options. Choose the resolution suitable for your platform—social media videos typically require 1080p. Save with the right format and quality to preserve your work.
Troubleshooting Common Problems
- Misaligned masks: Double-check your clip positioning and resize the mask carefully.
- Edges not feathering: Adjust the feather slider more for softer transitions.
- Low resolution or pixelation: Export in higher resolution settings if possible.
Use cases: 5 Creative ways to use Masks in Your Videos
Here are five creative ways to use masks in CapCut:
- Clone Effect: Duplicate yourself in a scene by filming two takes and masking each half of the frame.
- Focus Reveal: Blur the background while keeping your subject sharp and masked.
- Text Reveal: Use a shape mask to animate the appearance of text behind objects.
- Comparison Split Screen: Show before/after edits using a vertical or horizontal mask.
- Stylized Overlays: Apply filters or effects only to a portion of your video with a mask.
Each of these effects helps elevate your storytelling and visual appeal.
Masking vs. Green Screen (Chroma Key): Which one should you use?
Both masking and green screen (chroma key) techniques help isolate or highlight parts of a video, but they serve different purposes:
| Feature | Masking | Green Screen (Chroma Key) |
|---|---|---|
| Control | Manual (shape-based) | Color-based automatic removal |
| Use Case | Highlight or hide specific areas | Replace background entirely |
| Best For | Artistic effects, text reveals | Talking head videos, cutouts |
If you need precision and flexibility, masking is your go-to. For background swaps, green screen is quicker.
CapCut Masking Presets or Templates
While CapCut doesn’t have official masking presets (yet), you can easily save projects as templates and reuse them.
Some creators share CapCut templates online with pre-set masks for common uses like social media overlays, cinematic bars, or text cutouts. Look for shared templates on platforms like TikTok, Pinterest, or CapCut’s own template library.
You can also create your own preset mask project and duplicate it for future edits to speed up your workflow.
Masking on CapCut Mobile vs. CapCut PC: Key Differences
The masking feature works on both CapCut mobile and desktop, but there are some differences:
| Feature | CapCut Mobile | CapCut PC |
|---|---|---|
| Interface | Touch-based sliders/drag | Mouse + keyboard precision |
| Mask Controls | Limited fine-tuning | More detailed control over shapes |
| Keyframes | Available | Easier to animate on timeline |
If you’re doing quick social edits, mobile is great. For advanced masking and complex keyframing, the PC version gives more precision.
Before and After examples of Masking in CapCut
Want to see the power of masking in action? Here are some quick before-and-after examples you can try:
- Before: Regular interview shot with a cluttered background
After: Masked subject with blurred background, drawing attention to the speaker. - Before: Plain overlay text
After: Masked text reveal from behind an object or animation. - Before: Side-by-side video clips
After: Smooth split-screen mask revealing one video from left to right.
Advanced Techniques: Mask Transitions and Motion Tracking (Manual)
Want to simulate motion tracking in CapCut? While there’s no auto-tracking yet, you can manually animate masks using keyframes:
- Select the masked clip.
- Tap the keyframe icon at the start of the motion.
- Move forward a few frames and reposition the mask to follow your subject.
- Repeat until the mask smoothly tracks the object.
You can also create dynamic mask transitions by animating mask shapes and feathering—great for reveals or swipes.
Troubleshooting Masking issues in CapCut
Issue: Mask doesn’t show up
Fix: Make sure you’re editing the correct layer and that the mask is applied to an overlay, not the background.
Issue: Harsh edges
Fix: Increase the feather slider or resize the mask to blend better.
Issue: Mask moves unintentionally
Fix: Lock keyframes or avoid accidental dragging on the timeline.
Issue: Low resolution after export
Fix: Choose at least 1080p when exporting and check “HDR” or “High Quality” options.
FAQs About Masking in CapCut
Can I animate a mask in CapCut?
Yes! Use keyframes to move or reshape masks over time.
Why does my mask disappear after export?
Check if the masked clip is trimmed too short or placed below another overlay.
Can I apply multiple masks to one clip?
Currently, CapCut only allows one mask per clip, but you can duplicate the clip and stack layers for more complex effects.
Can I save my own custom masks?
While you can’t save shapes as templates, you can duplicate projects with your custom mask settings to reuse them.
Related Tools: Apps that offer better or different Masking
If CapCut’s masking isn’t meeting your needs, consider trying these alternatives:
- VN Video Editor – Has masking and keyframe support with a more professional UI.
- Kinemaster – Powerful masking with blending and chroma key.
- Adobe Premiere Rush – Offers cloud sync and refined controls.
- Alight Motion – Excellent for motion graphics and advanced masking.
However, CapCut remains the best choice for free, beginner-friendly editing with fast results.
Related Tutorials You Might Like
- How to use Green Screen on CapCut – Detailed Guide
- How to add music from Spotify or YouTube into CapCut?
- 7 CapCut Effects to use in your Videos for Getting PRO Level Edits
- Glare Effect Transitions: Step-by-Step Guide in CapCut
Conclusion
Mastering the masking tool in CapCut unlocks endless creative possibilities. Whether you want to hide backgrounds, draw focus, or add stylish overlays, masks are your best tool. By following this guide, you’ve learned how to set up clips, choose shapes, customize masks, and enhance your videos with filters.
Keep experimenting and practicing. The more you use masking, the more your edits will stand out. Share your progress and keep pushing your editing skills forwards.
If you found this guide helpful, subscribe for more tips. Happy editing and see you in the next project!