Are you new to the world of video editing and looking to create eye-catching TikTok edits? Look no further! In this comprehensive guide, we’ll take you through the step-by-step process of making a TikTok edit on the popular video editing app, CapCut.
Whether you’re a complete beginner or have some experience under your belt, this tutorial will equip you with the skills and knowledge to craft professional-looking TikTok videos in no time.
CapCut is a powerful and user-friendly video editing tool that has become a go-to choice for many content creators, especially those looking to create engaging TikTok content.
With its intuitive interface and a wide range of features, CapCut makes it easy for anyone to transform their raw footage into visually stunning, TikTok-ready masterpieces.
In this article, we’ll cover everything from importing your scene packs and audio, to adjusting the aspect ratio, splitting clips to the beat, adding fade in and fade out animations, enhancing the brightness, and applying color grading.
By the end of this tutorial, you’ll have all the knowledge and skills you need to create your very own TikTok edit in just 1 minute!
- Getting started with CapCut
- Why use CapCut for TikTok Editing?
- Importing your Scene Packs and Audio
- Adjusting the Aspect Ratio
- Splitting clips to the Beat
- Adding Fade In and Fade Out animations
- Enhancing Brightness and Contrast
- Applying Color Grading
- Exporting and sharing your TikTok Edit
- Using CapCut Templates for Quick Edits
- CapCut Mobile vs PC: Which is better for TikTok?
- Adding Text & Captions for TikTok
- How to add trending TikTok Sounds
- Adding transitions between clips
- Creative tips for viral edits
- Uploading to TikTok: best settings
- Troubleshooting common CapCut editing problems
- Frequently Asked Questions (FAQ)
- Recommended CapCut Presets & Resources
- Conclusion
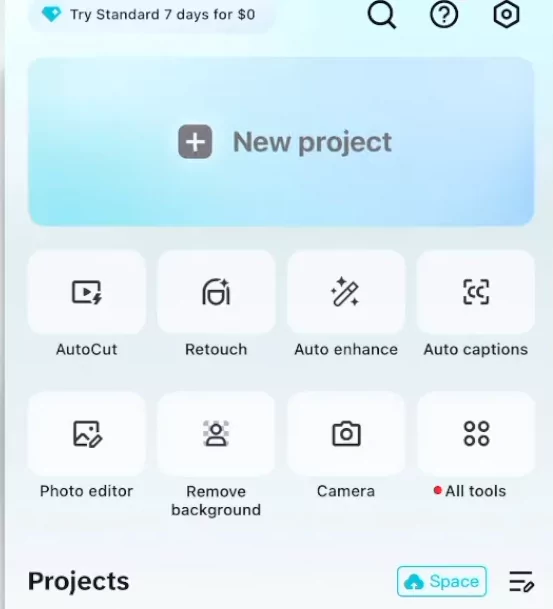
Getting started with CapCut
Before we dive into the step-by-step process, let’s first make sure you have the necessary tools and resources to get started. To follow along with this tutorial, you’ll need:
- The CapCut app, which is available for free on both iOS and Android devices.
- Your desired video footage or scene packs, which you can find on platforms like TikTok, Instagram, or even create yourself.
- Your chosen audio track, which can be a song, sound effect, or voiceover.
Once you have these elements ready, it’s time to start your CapCut project and begin the editing process.
Why use CapCut for TikTok Editing?
CapCut is one of the most powerful free video editing tools available for mobile and desktop. It’s especially popular among TikTok creators because:
- It’s completely free with no watermark (unless using paid assets).
- It supports trending TikTok formats like auto captions, 9:16 aspect ratio, and AI templates.
- It offers one-click effects, transitions, and speed adjustments.
- You can import TikTok sounds and audio directly into your edits.
Compared to apps like InShot, VN, or Adobe Premiere Rush, CapCut provides more advanced features without a premium cost, making it the go-to choice for creators on a budget.
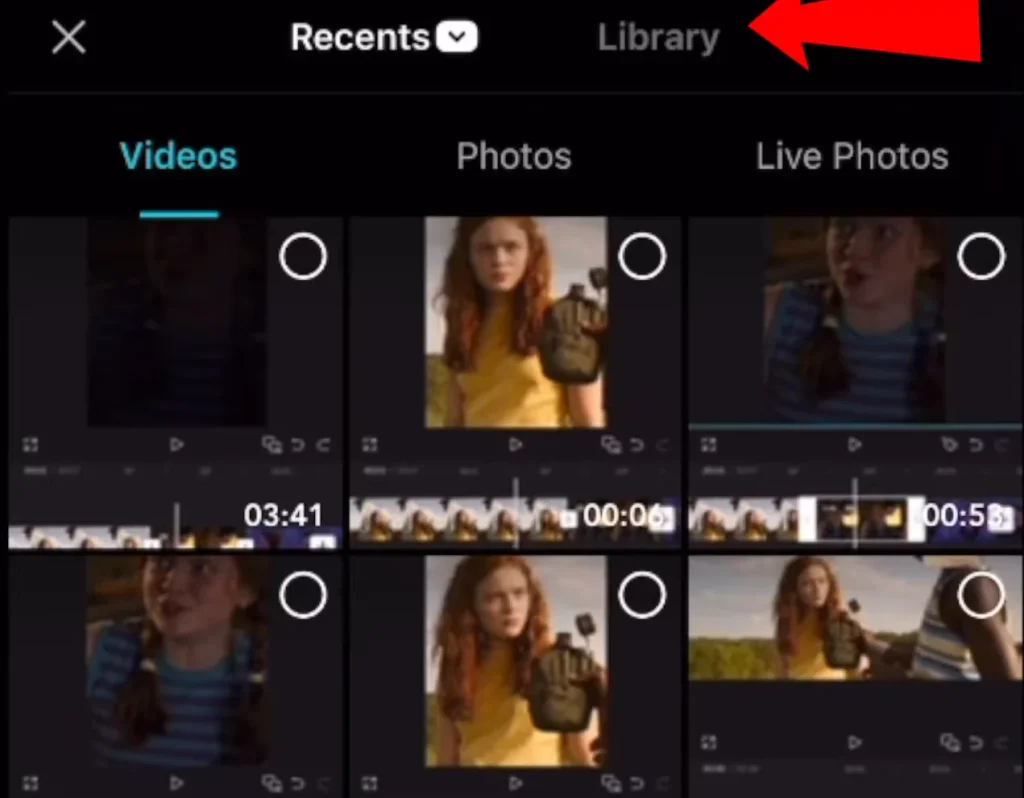
Importing your Scene Packs and Audio
The first step in creating your TikTok edit is to import your scene packs and audio into CapCut. To do this, follow these simple steps:
- Open the CapCut app and create a new project.
- Scroll to the bottom of the screen and tap on the “Import” button to access your scene packs.
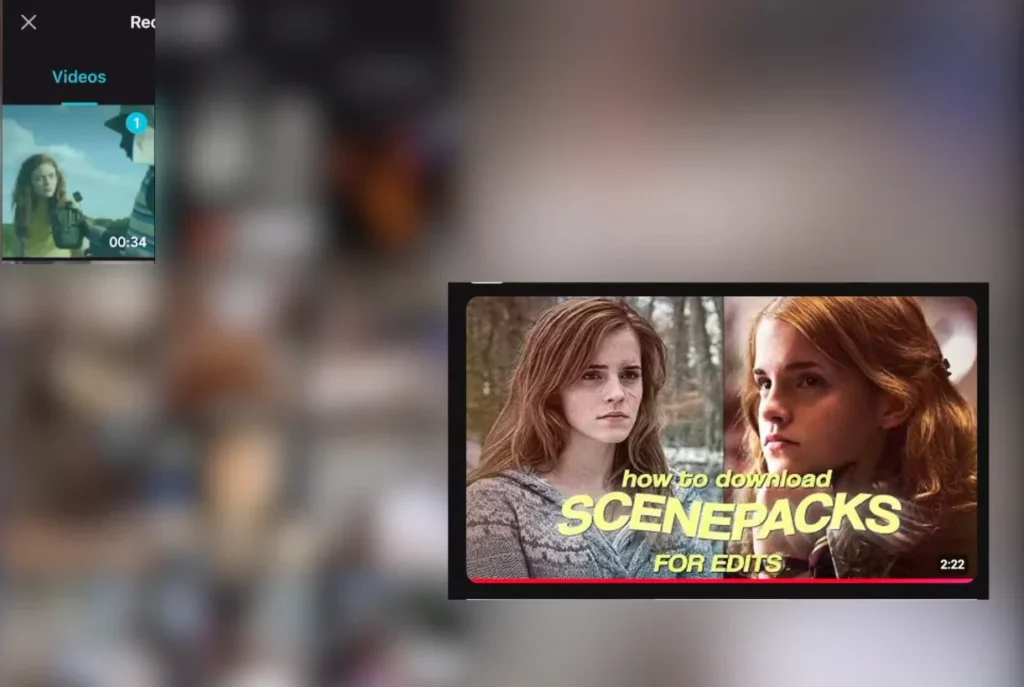
- Locate the scene pack you want to use and tap on it to add it to your project.
- Next, tap on the “Audio” button at the bottom of the screen and select your desired audio track.
- Drag and drop the audio clip onto the timeline, making sure it’s positioned where you want it to play in your TikTok edit.
By importing your scene packs and audio, you’ve laid the foundation for your TikTok edit. Now, let’s move on to adjusting the aspect ratio to ensure your content is optimized for the TikTok platform.
Adjusting the Aspect Ratio
TikTok has a specific aspect ratio of 9:16, which is the perfect format for vertical video content. To ensure your TikTok edit looks its best, you’ll need to adjust the aspect ratio in CapCut. Here’s how:
- Click on the “Aspect Ratio” button at the bottom of the screen.
- Select the first option on the left, which is the 9:16 aspect ratio.
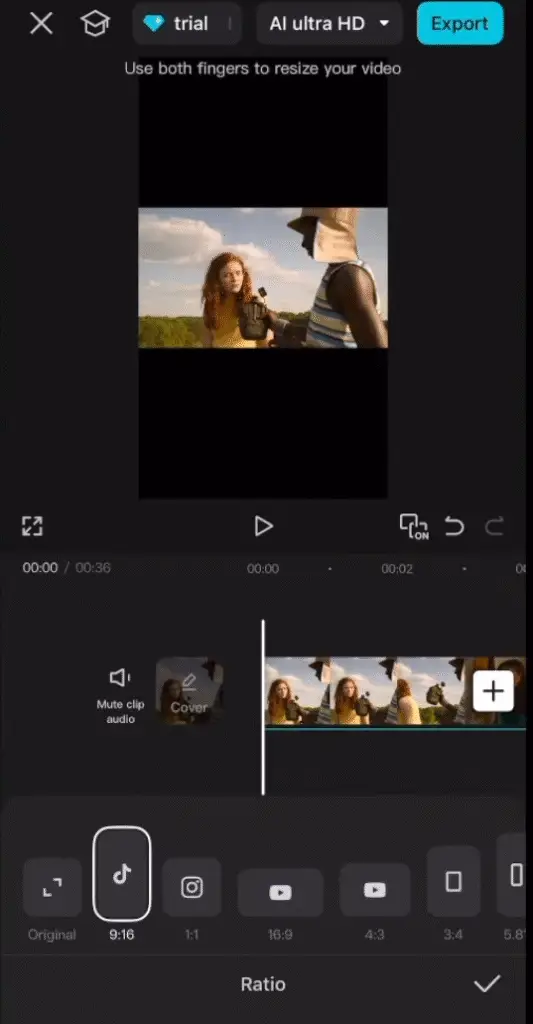
- Adjust the size of your scene packs and other elements as needed to fit the 9:16 frame.
By setting the correct aspect ratio, you’ll be able to create a TikTok edit that looks polished and professional, ensuring your content stands out on the platform.
Splitting clips to the Beat
One of the key elements of a great TikTok edit is the ability to sync your visuals with the beat of the music. In CapCut, you can achieve this by splitting your clips and aligning them with the rhythm of your audio track. Here’s how:
- Tap on the clip you want to split and select the “Split” option.
- Use your thumb to scroll through the clip and identify the points where you want to split it.
- Tap on the clip to create a split, and then delete the sections that don’t align with the beat.
- Repeat this process for each clip in your TikTok edit, ensuring that the visuals and audio are perfectly in sync.
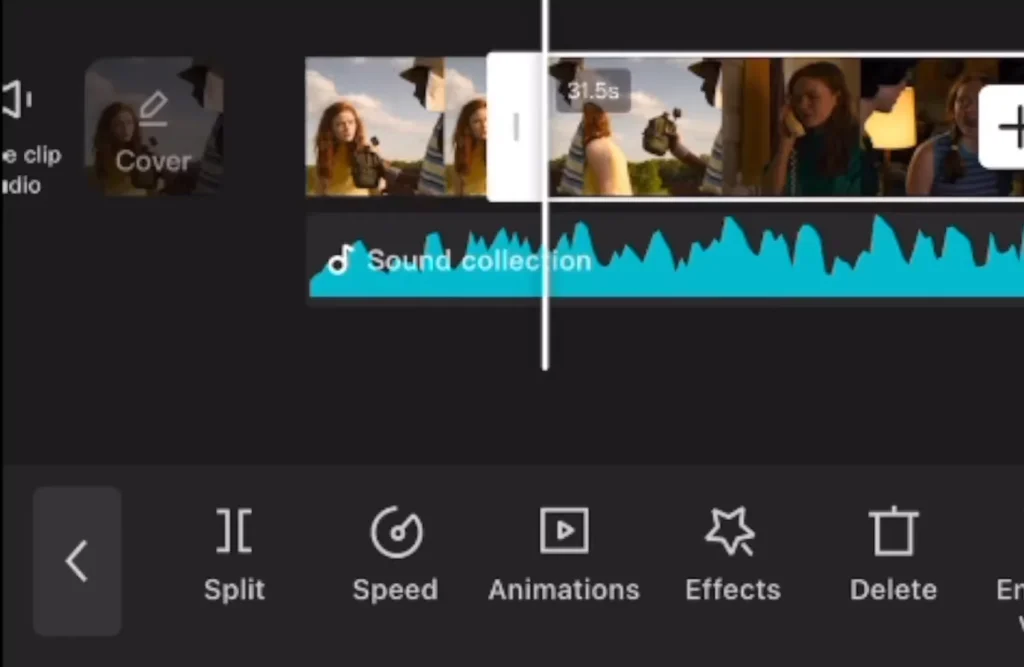
By taking the time to split your clips and align them with the music, you’ll create a TikTok edit that is visually engaging and rhythmic, captivating your audience from start to finish.
Adding Fade In and Fade Out animations
Smooth transitions are essential for creating a professional-looking TikTok edit. In CapCut, you can easily add fade in and fade out animations to your clips to achieve a polished, cinematic effect. Here’s how:
- Tap on the clip you want to add the fade animation to.
- Scroll down to the “Animations” section and select “Fade“.

- Adjust the fade duration to around 0.1 seconds for a subtle, seamless transition.
- Repeat this process for the end of the clip, adding a “Fade Out” animation with a similar duration.
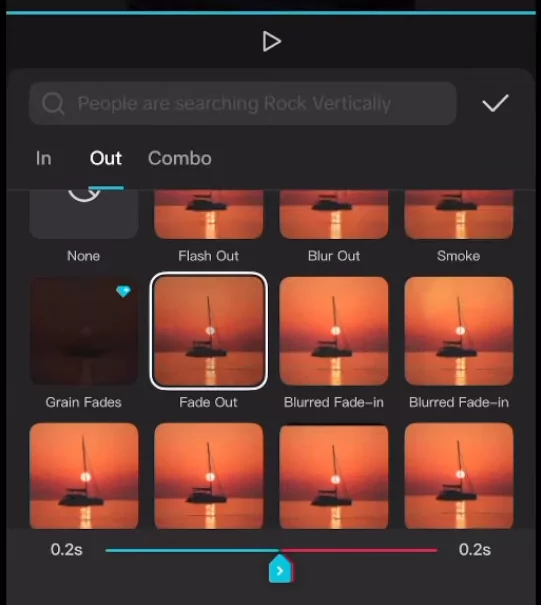
- Ensure that the fade in and fade out animations are consistent across all your clips for a cohesive look.
By incorporating these fade animations, you’ll create a TikTok edit that flows smoothly from one scene to the next, enhancing the overall viewing experience for your audience.
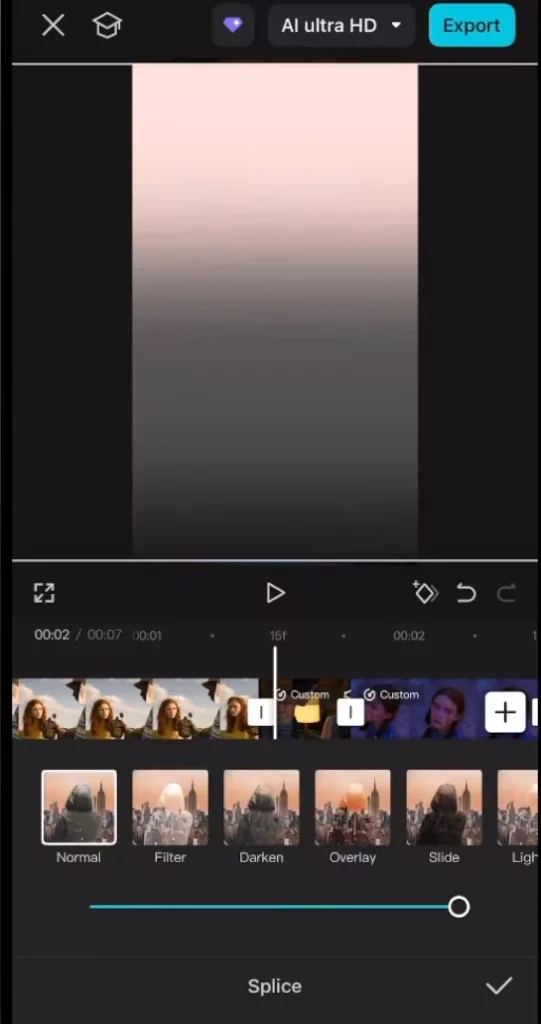
Enhancing Brightness and Contrast
To make your TikTok edit truly stand out, it’s important to pay attention to the overall brightness and contrast of your visuals. CapCut offers a range of tools to help you achieve the perfect look. Here’s how you can enhance the brightness and contrast of your TikTok edit:
- Click on the “Library” button at the bottom of the screen to access the app’s built-in assets.
- Scroll down until you find the “Overlay” section and select a white backdrop or overlay.
- Drag and drop the overlay onto your timeline, positioning it over your existing clips.
- Tap on the overlay and select the “Splice” option, then choose “Overlay” from the menu.
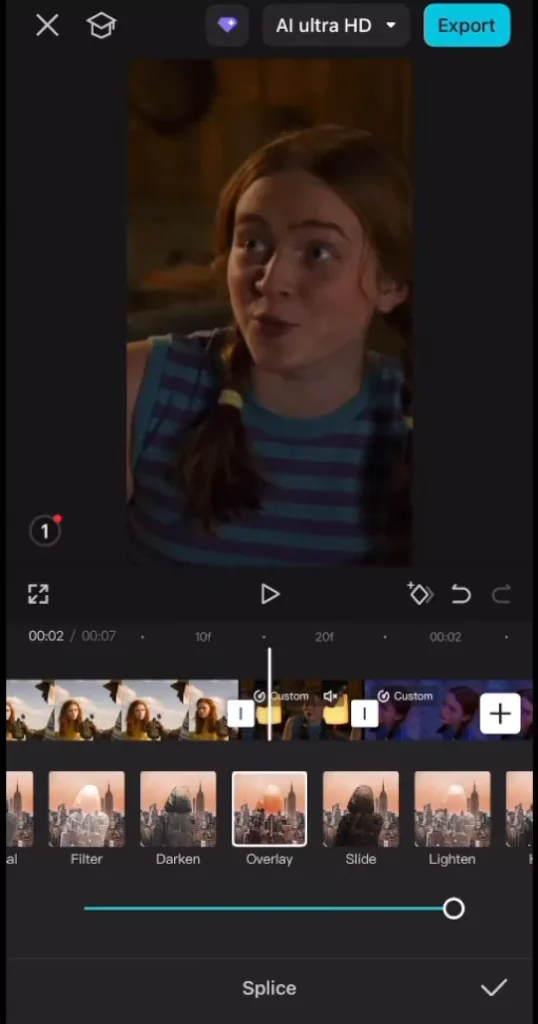
- Adjust the brightness, contrast, and sharpness of the overlay to achieve your desired look.
By adding a subtle overlay and fine-tuning the brightness and contrast, you can create a TikTok edit that is visually striking and eye-catching, helping your content stand out on the platform.
Applying Color Grading
Color grading is another powerful tool in your TikTok editing arsenal. By adjusting the color and tone of your footage, you can create a unique and cohesive look that reflects your personal style or the overall theme of your TikTok edit. In CapCut, you can easily apply color grading to your clips:
- Take a screenshot of your desired color grading settings, which you can find online or create yourself.
- Import the screenshot into your CapCut project as a new media item.
- Tap on the screenshot and select the “Splice” option, then choose “Overlay” from the menu.
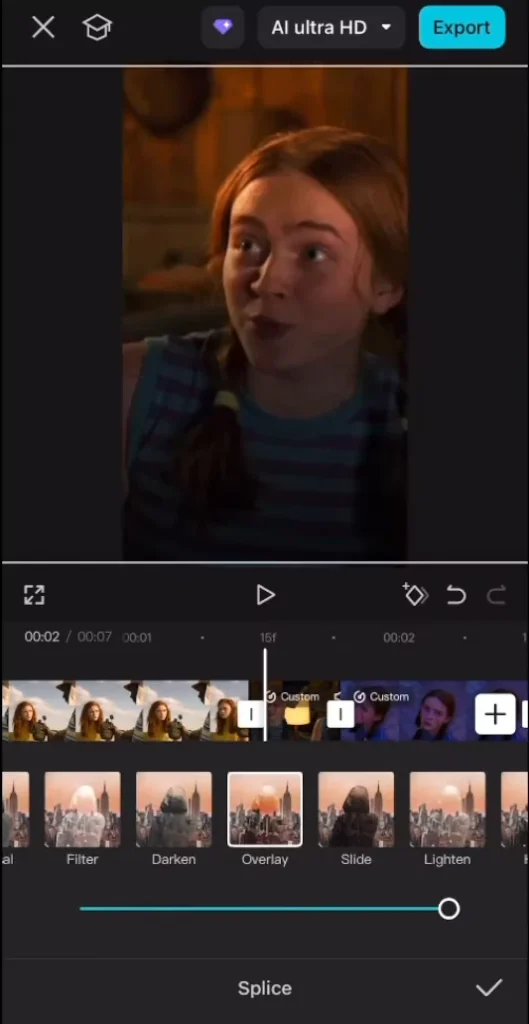
- Adjust the opacity and positioning of the color grading overlay to achieve your desired look.
- Ensure that the color grading is consistent across all your clips for a polished, professional finish.
By incorporating color grading into your TikTok edit, you can elevate your visuals and create a distinctive, visually appealing style that sets your content apart from the rest.
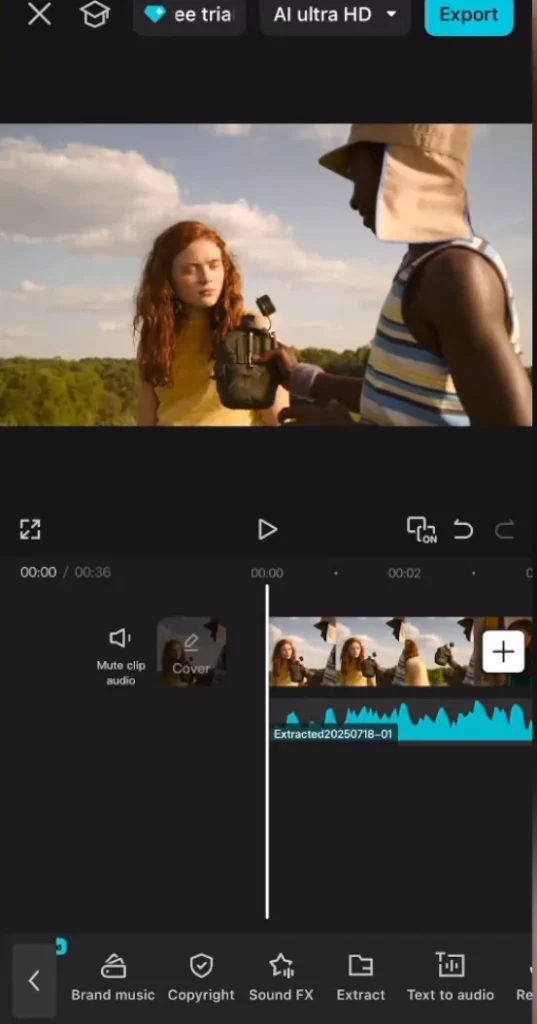
Exporting and sharing your TikTok Edit
Once you’ve completed all the editing steps and are satisfied with the final result, it’s time to export your TikTok edit and share it with the world. In CapCut, the export process is straightforward:
- Tap on the “Export” button at the bottom of the screen.
- Select the appropriate export settings, such as video quality and file format, to ensure your TikTok edit is optimized for the platform.
- Once the export is complete, you can share your TikTok edit directly to the platform or save it to your device to post later.
Remember to promote your TikTok edit across your social media channels, including your Instagram, TikTok, and FaceBook accounts.
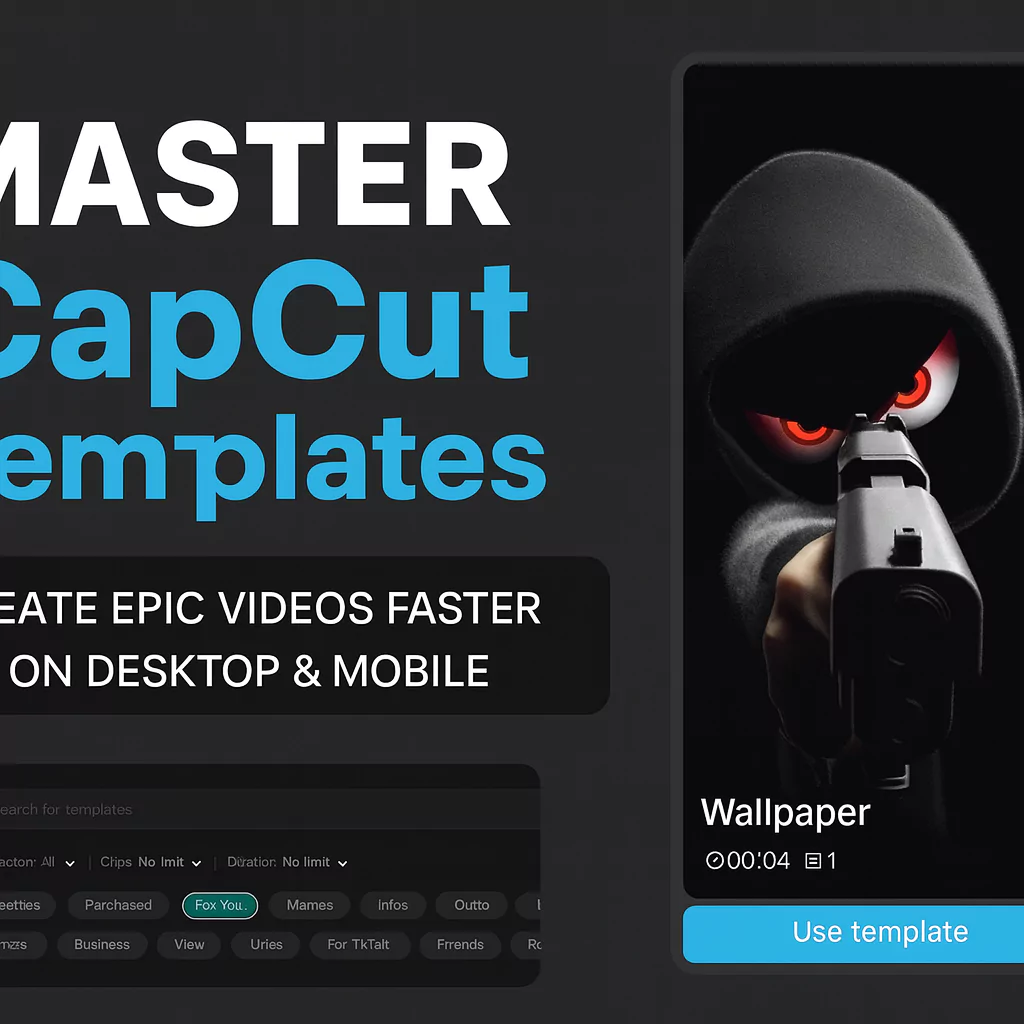
Using CapCut Templates for Quick Edits
If you’re new to editing, CapCut’s TikTok templates are a great way to get started.
- Open CapCut and select the “Templates” tab.
- Browse trending templates or search by theme (e.g., “glow-up”, “aesthetic”, “photo edit”).
- Tap on a template, then add your own clips or images.
- Export and share to TikTok with one click.
Templates make editing fast, and they’re optimized to match popular TikTok trends and music.
CapCut Mobile vs PC: Which is better for TikTok?
CapCut is available on both mobile (iOS/Android) and desktop (Windows/macOS). Here’s a quick comparison:
| Feature | Mobile App | PC Version |
|---|---|---|
| Ease of Use | Very beginner-friendly | More control, complex |
| Speed | Faster for short edits | Better for detailed edits |
| Features | Most TikTok-specific tools | Advanced editing options |
| Templates | Available | Limited |
Use the mobile app for short, quick edits, and switch to PC when doing transitions, motion keyframes, or cinematic TikToks.
Adding Text & Captions for TikTok
Text overlays and captions can help emphasize parts of your edit or make your video more accessible. Here’s how:
- Tap Text → “Add Text”.
- Type your caption and adjust the font, color, and size.
- Choose animation styles like pop, fade, or typewriter.
- Use Auto Captions (available in CapCut Mobile) to auto-generate subtitles from your voice or music.
Use bold or trendy TikTok fonts like Bebas Neue, Billabong, or Luckiest Guy for a more attention-grabbing edit.
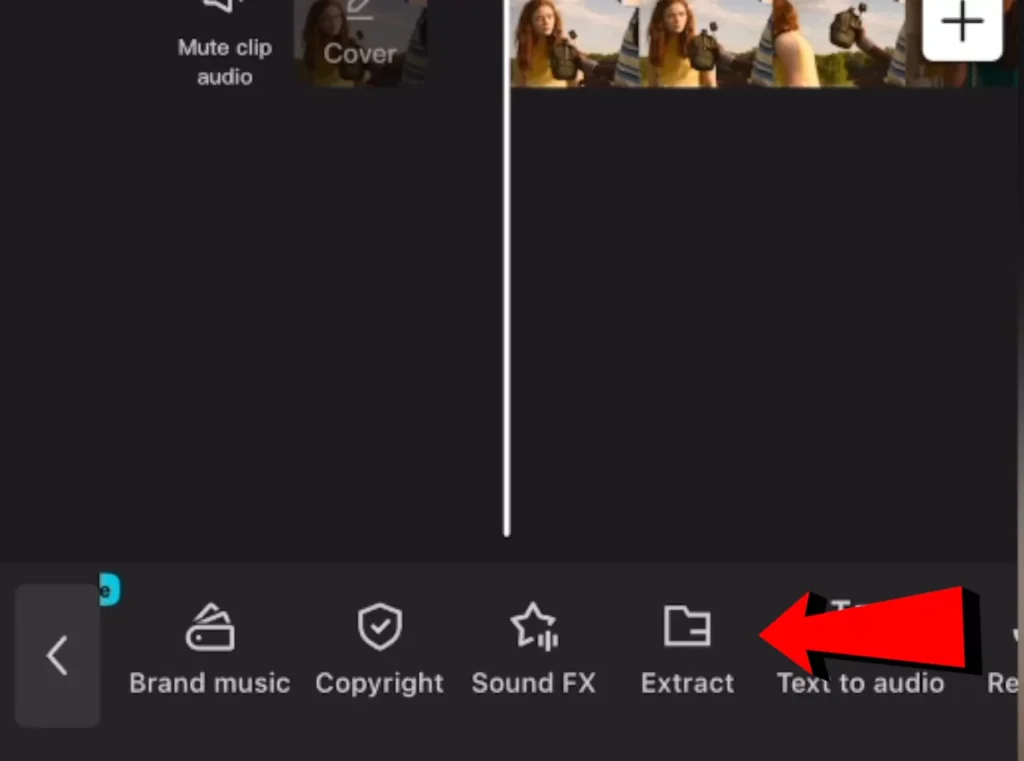
How to add trending TikTok Sounds
Using trending audio can help your video go viral. Here are a few ways to do it in CapCut:
- Extract Audio: Download or screen-record a TikTok with the trending sound, then use the “Extract Audio” option.
- TikTok Sound Downloader Tools: Use tools like ssstik.io or savefrom.net to extract the sound and import it into CapCut.
- Use Inside TikTok: Edit the video in CapCut and then add the sound inside TikTok after uploading.
Make sure your clips are synced to the beat drops or transitions in the music.
Adding transitions between clips
Transitions add flow and energy to your video. Here’s how to use them in CapCut:
- Tap the white square between two clips on the timeline.
- Choose a transition like Spin, Zoom, Fade, or Flash.
- Adjust the duration (0.3–0.6s usually works best).
Beat Sync Tip: Match your transition timing to the beat in your music for a satisfying edit.
Creative tips for viral edits
Here are a few techniques to make your TikTok edits stand out:
- Slow Motion + Speed Ramp: Add dramatic flair by slowing clips right before a beat drop.
- Zoom Effects: Use keyframes to create zoom-in and zoom-out movements.
- Motion Blur: Adds a smoother, cinematic look to moving clips.
- Filters + LUTs: Use color grading to match popular TikTok aesthetics (e.g., vintage, pastel, moody).
- CapCut Effects: Try trending effects like “3D Zoom”, “Shake”, or “Retro VHS”.
Experiment and follow what’s trending on #CapCut or #VideoEdit hashtags.
Uploading to TikTok: best settings
After finishing your video, exporting it properly ensures it looks good on TikTok:
- Resolution: 1080p (Full HD)
- Frame Rate: 60 FPS for smoothness
- Aspect Ratio: 9:16 (vertical)
After Exporting:
- Open TikTok and upload your video.
- Add hashtags like #CapCut, #foryou, or niche-specific ones.
- Use trending sounds if not already added.
Troubleshooting common CapCut editing problems
Issue 1: Audio Not Syncing
- Make sure frame rate and speed changes are consistent.
- Try re-importing the audio or manually syncing with keyframes.
Issue 2: Exported Video Looks Blurry
- Increase resolution and bitrate before exporting.
- Avoid compressing the file too much.
Issue 3: Missing Effects or Features
- Make sure your app is updated.
- Some features may only be available in mobile or in specific regions.
Frequently Asked Questions (FAQ)
Is CapCut free to use?
Yes! CapCut is free with no watermark. However, some advanced assets require a CapCut PRO subscription.
Can I use copyrighted music from TikTok?
You can use TikTok sounds inside the TikTok app legally. Be cautious about using copyrighted tracks outside of TikTok.
Can I edit longer videos in CapCut?
Yes. CapCut supports long-form videos, but TikTok’s upload limit is 10 minutes.
Why is my CapCut export lagging?
Check your device storage, clear cache, and lower effects complexity if needed.
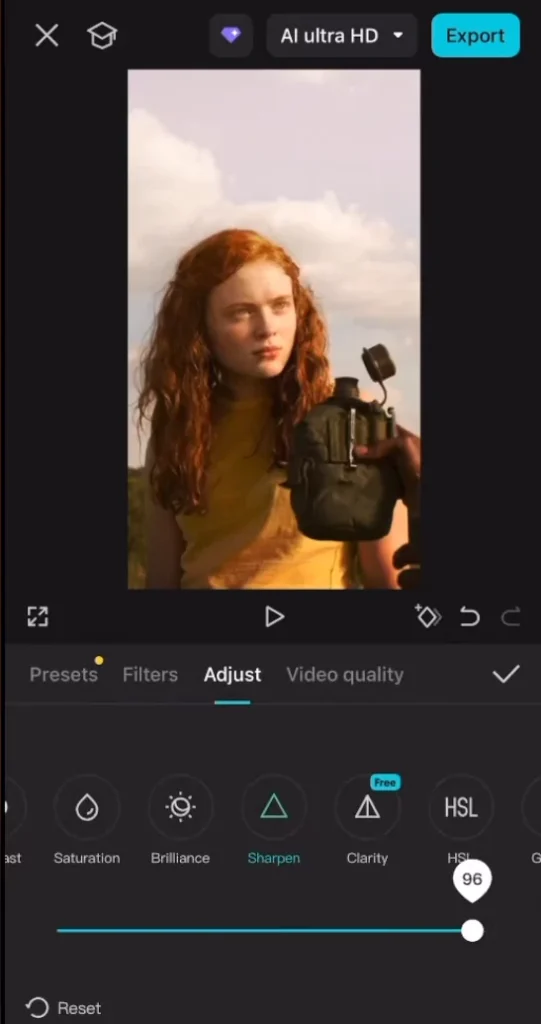
Recommended CapCut Presets & Resources
Here are some great resources to improve your editing:
- Scene Packs: Find free scene packs on YouTube (search “scene pack for CapCut”).
- Preset Creators: Follow editors on TikTok or CapCut Community who share presets and transitions.
- Coloring Filters: Look for downloadable LUTs or use CapCut’s “Filters” section under Adjust.
Conclusion
Congratulations! You’ve now mastered the art of creating a TikTok edit using the CapCut app. By following the step-by-step guide outlined in this article, you’ve learned how to import your scene packs and audio, adjust the aspect ratio, split clips to the beat, add fade in and fade out animations, enhance the brightness and contrast, and apply color grading to your TikTok edit.
Remember, the key to creating successful TikTok content is to experiment, have fun, and continuously refine your skills. Keep exploring the features and tools within CapCut, and don’t be afraid to try new techniques and styles. With practice and dedication, you’ll be churning out professional-looking TikTok edits in no time.