When it comes to reaching a bigger audience and, notably, accessibility, subtitles are crucial whether they are used in Storytelling, vlogs on YouTube, or corporate films. CapCut is an editing tool that you can use manually or automatically to do this work. It is accessible for iOS and Android. Here’s how to use the app to add subtitles to a video.
Most videos are viewed without audio these days, especially on social networking sites like Instagram. Subtitles are essential in this case.
In truth, adding subtitles has always been an option for video material, especially when doing so helps individuals who might not comprehend the spoken language to benefit from the film. But these days, more and more video producers are beginning to see the importance of including subtitles or captions — even in the same language — to their YouTube or social media films. Because a far larger audience can now get it much more easily.
Let us understand in detail how to add auto captions and subtitles using Capcut to your videos. The process is very similar to Android, iOS and Capcut PC options.
Advantages of auto captions using CapCut
Capcut offers a number of advantages when it comes to adding captions and subtitles. Let us what are those quickly before delving deeper on how to exactly achieve it:
Ability to automatically produce captions
With just one click in CapCut, users can easily and effortlessly auto-generate subtitles in a number of different languages. Less time spent manually adding subtitles means more time to concentrate on editing the other elements of the film that really make it stand out.
Option to manually edit the subtitles
Your video’s subtitles are an essential component, and you may easily edit those that were automatically created. Simply click twice to activate the edit option, then input any changes you wish to make to your subtitles, including unique names.
The size, font, colour, spacing, and other aspects of your subtitles can be creatively changed at this point to ensure that they completely complement your visual style.
Seamless modification on the go
CapCut has indeed made it simple for you to modify the time of your subtitles. In CapCut, subtitles are displayed in the chat box, editor timeline and preview screen among other locations.
You can always see exactly how your film will appear since each modification you make to the subtitles in one of these locations will cause the others to synchronize. Additionally, subtitles are displayed with distinct timestamps that are simple to change to ensure exact timing.
Now let us see how exactly we can add auto captions and subtitles and also edit the same manually.
How To Add Subtitles Using CapCut Auto Captions Feature
Regardless of the device you use, CapCut makes editing videos simple. With CapCut, inserting text to a video is a straightforward process, and the application offers a number of capabilities for innovative editing. In CapCut, you can easily add captions to your films in two different methods.
First, let us learn on using automated mode, which adds transcription at the precise place in the speech and is a more efficient and exact function.
Steps to add captions automatically
The auto-captioning option in CapCut is useful for speeding up the video editing process. For videos, it will automatically produce subtitles that you can later manually adjust. You must choose the language used in the video if you want to use CapCut’s automatically generated subtitles. The text will then be automatically generated by the app based on the audio in the video.
Here’s how to make CapCut’s automatic captions in iOS, Android or Capcut PC:
Step 1: Open Capcut and import the video
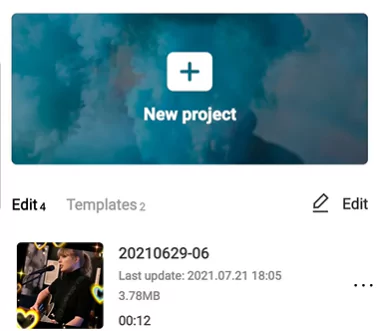
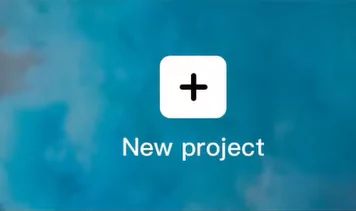
Launch the CapCut mobile app. There is a banner there that says “new project.” Add the video file to which you wish to add a caption to a new editing project after starting one.

Step 2: Using the “Auto Caption” feature in Capcut
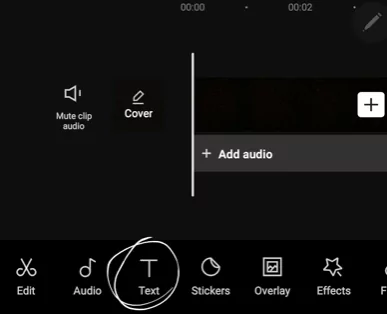
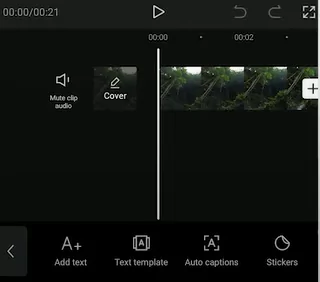
- Once the video is imported, click on “Text” option on the bottom of the screen.
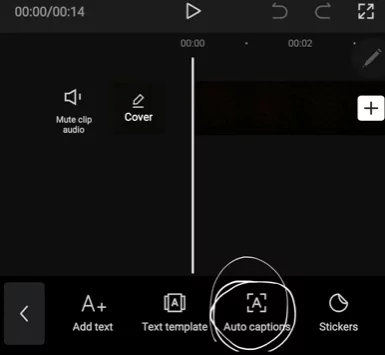
- Select “Auto captions” from the menu.
- From the pop-up dialogue box, select the sound choices. Three choices are available:
- If the narrator of the video is present, select “Original sound“.
- If the video has a voiceover that has already been recorded to go with it, select that option.
- If the video mixes the first two, choose “Both.”
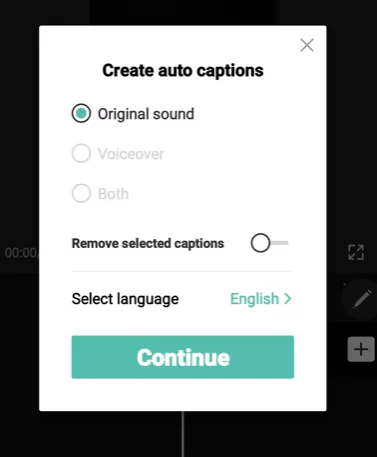
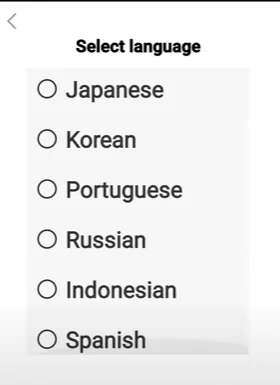
- Choose the language that corresponds to the video. The languages to which CapCut can now add captions automatically are English, Korean, Russian, Japanese, Spanish, Indonesian, Italian, Deutsch, French, Chinese, Turkish, Dutch, Thai, Malay, Vietnamese, Romanian, and Portuguese.
Step 3: The final caption should be saved with the video
Click on the “Start” button and check for the progress.
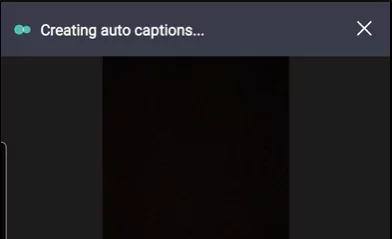
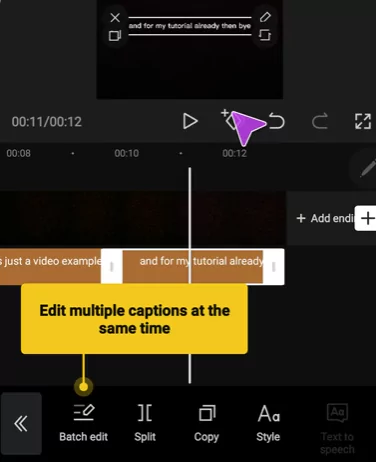
The length of the video affects the processing time. If the auto caption transcribed something incorrectly after finishing its automatic generation, you may manually update the caption text. Using the Batch Edit option, you may access this capability. This option allows you to manually edit the subtitle.

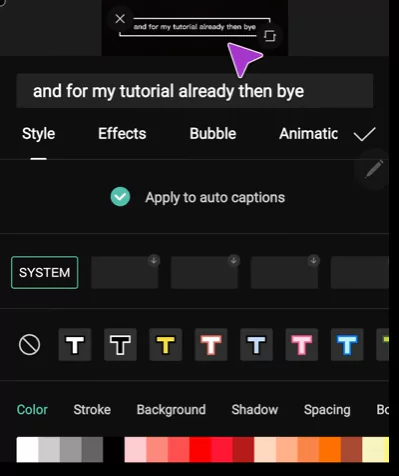
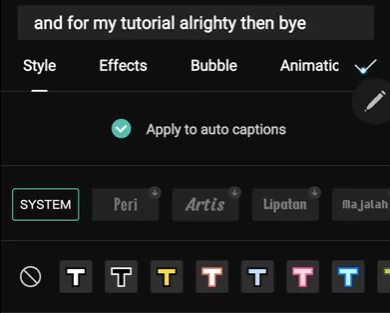
Additionally, CapCut lets you style the captions, allowing you to explore and give your films a distinctive feel. By using the Style option, you may accomplish this easily. There, you may adjust your video’s text style, colour, and other details.
After completing the above options, you can proceed to save the video on your phone. You can start publishing it to Instagram, YouTube or TikTok.
Watch this video walkthrough below in order to understand the steps better:

Steps to manually modify the subtitles
In CapCut, manual video editing could be a little trickier. However, it allows you to carefully adjust the text in your clips. If you want to integrate text in a more inventive way than merely adding subtitles to match the sound, you may use manual captioning.
The following is a guide on how to manually add captions in CapCut:
Step 1: Adding new project onto Capcut
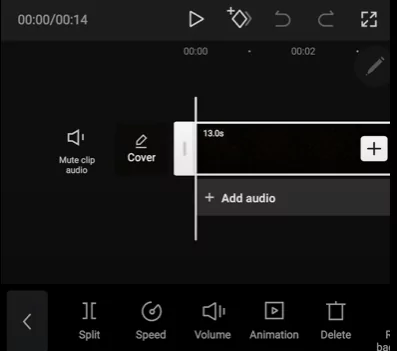
Open the app, select “New project” choose the appropriate video. Press “Add” button from bottom of the screen. Drag the video screen to the left or right with your index finger to position the white line at the start of the segment that will receive the subtitle.
Step 2: Adding subtitle and manually editing the same
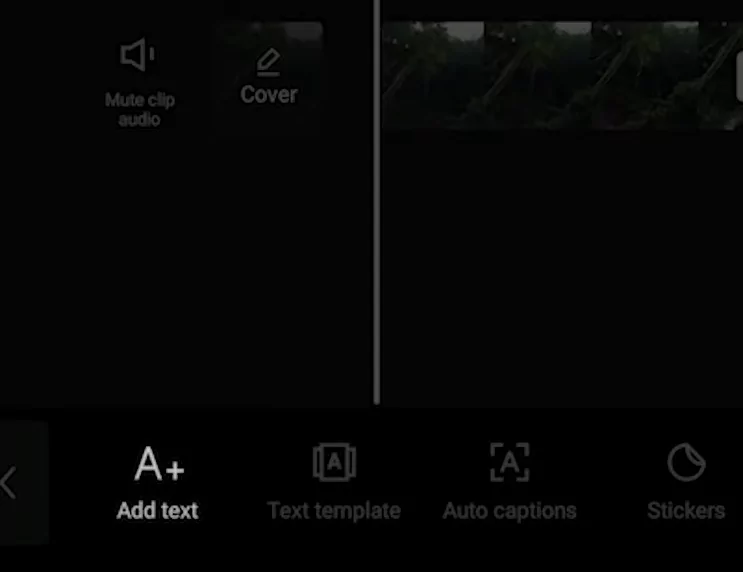
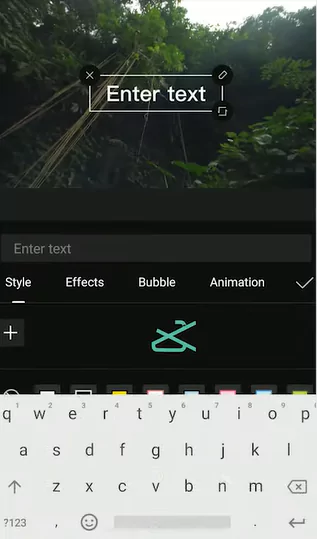
Select “Text” from the menu at the bottom of the screen. The option that gives you complete autonomy over the subtitle is called “Add text.” A keyboard will appear where you can input your manual text.
Step 3: Editing the Caption
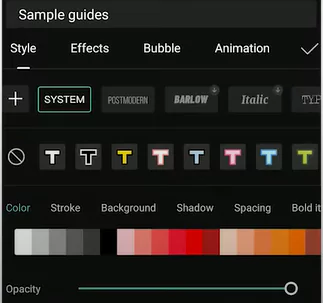
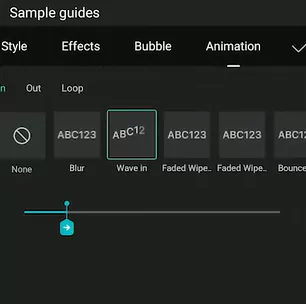
Here you can add effects such as animation or change the caption’s design. To complete the edit, simply click the check mark at the right side.
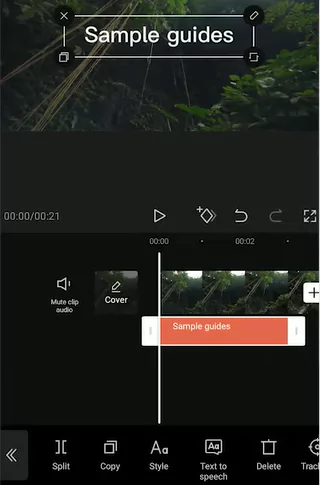
It’s time to place the caption into the video once you’ve finished designing it. The next step is to place it on the display and sync it to speech. To synchronize the text with the video, press the orange box and move the white borders as necessary.
Step 4: Completing the video and exporting it
- Utilize compact frames whenever possible to make the caption seem more natural and comprehensible.
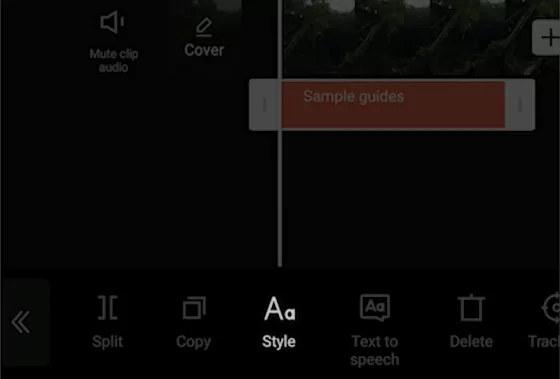
- By selecting “Style” from the drop-down menu next to the edit line, you may also change how your text appears in this choice.
- You can simply export your altered content and share it with anybody you like now that you understand how to subtitle a movie using CapCut.
Watch this video tutorial below for complete understanding:

How to create Subtitles for Tiktok videos using Capcut
One of TikTok’s more recent innovations is auto-captioning, which enables content producers to effortlessly construct visual, live subtitles for their audio tracks. Simply hit the “V” icon in the app after recording the video to achieve this. After choosing Captions on the following screen, you’re done!
However, without editing or proofreading, subtitles are not always entirely correct. In addition to occasionally timing improperly, the live captions are not always precise.
There are few options for font styles, colours, and screen text positioning inside TikTok. Since only English-speaking audios can currently be identified and translated, TikTok does not yet offer the most user-friendly subtitling function for non-English speaking nations.
Live captions can’t yet be transcribed into the video. In other words, viewers have the option to enable or disable subtitles that are automatically created by the TikTok app.
Choose a specialized video editor like CapCut that provides the feature of making screen text or professional, open captions if you prefer to avoid having to toggle your carefully selected subtitles on and off.
Ideas to create great captions
Once you’ve finished adding subtitles to your movies, you’ll want to avoid making any more adjustments. Although CapCut provides great functionality for creating video captions, it also has certain drawbacks. In order to prevent the necessity for additional caption editing, you might wish to avoid doing these things.
Make the captions crisp
Make sure the auto-generated subtitles you choose to add to your movie aren’t too lengthy. They will be more challenging to read for the audience. Additionally, once they upload, platforms like TikTok or Instagram could stop them.
Make sure you perform a manual check to avoid this problem. Look at each caption once it has automatically generated it, and shorten any sentences that are too long.
Keep the captions legible and simple
Avoid using handwritten or other difficult-to-read typefaces, according to the second piece of advice. The popularity of TikTok videos stems from their simplicity. If the caption on your video is not immediately readable by the audience, they will likely swipe up quickly. To make reading easier, use readable typefaces like Serif, Bold, or Classic.
Adjust your subtitles properly
With a variety of one-click modification choices, create picture-perfect subtitles. To adapt subtitles to any video format, choose the color, size, and typefaces, add emojis, and adjust even the slightest details.
Use multiple style effects from CapCut auto subtitles
CapCut’s automated subtitle generator offers a variety of social media-friendly patterns and effects, such as highlight, pop art, paint, reveal, fade, and custom ones. It enables users to build original looks or copy the fashions of well-known content producers.
Make sure to use the style that fits your video editing requirement. Carefully craft the subtitle including the position on the video, size, effects, color etc.
What are captions and subtitles and difference between the same?
A text-based substitute for audiovisual content is captioning. The original conversation is shown in on-screen text and is audibly audible as the video plays.
There is also an option for open and closed captioning. While open captions or hardcoded subtitles are continuously shown on the screen, closed captions can be turned on and off.
Because they serve various purposes, captions and subtitles are not the same thing. The caption is a piece of textual material that appears with the video but doesn’t always verbatim reproduce the audio.
The main purpose of the caption is to describe the video’s content and highlight relevant terms or themes. Additionally, it takes the place of the voice in communicating the message, making it adaptable and available for creative endeavors.
However, subtitles provide a word-for-word translation of the video’s language into text. Because they offer a literal translation of the video’s message, they are helpful for those with disabilities or hearing loss.
Why is it necessary to add subtitles to your videos?
The reach of your video material is significantly increased by adding subtitles. You’ll see a considerable increase in interaction as a result, which will result in more followers, visibility, and buzz about your business or content.
Videos have both audio and visual components. They do not, however, include individuals who cannot hear the sound if they are not accompanied with subtitles.
If the information is not printed on the screen, for example, those with hearing problems may not be able to completely understand what the video is providing.
Why Capcut is best for adding Captions and Subtitles?
On CapCut, editing subtitles has been made as simple as possible. With Capcut’s auto-generate tool, you may start 98% of your videos right away and just add content refinement, graphic changes, and other finishing touches rather of spending lot of time for typing and manually syncing subtitles.
All the capabilities you may possible want for including subtitles are available in CapCut. All-inclusive bundle includes synchronized editing, compatibility for many languages, tons of graphic customization options, and more.
When you add this to all of CapCut’s other advantages, like cloud-based storage, a neat media management system, and a variety of collaboration capabilities, you get a straightforward, simple-to-use video editing program that can produce high-quality films.
Closing Thoughts and Summary
The quickest and simplest approach to create precise subtitles is without a doubt to utilize a specialized video editor with auto-generation, such as CapCut. We are aware of how challenging and time-consuming trying to make correct captions may be. With CapCut, you can quickly add fresh caption tracks to your video footage by following a few easy steps using the user-friendly software.
- Create an Account and add the video file. Choose a video file that you want to edit. Directly choose it and upload it to Capcut editor’s timeline.
- In addition to various visual effects included in Capcut’s extensive creative material catalogue, you may add new caption tracks or screen text to your movie.
- Using the many font templates offered by CapCut, you may change up and alter the visual captions as you see appropriate.
- Make any extra text, font, colour, size, and timing changes that are necessary. When you are satisfied with your captioned video, just export it to share your talent with viewers all over the world!
If you liked this guide then please share it with your friends and family to spread the word. Write a comment below to express your opinion on adding caption and subtitle using CapCut.