Are your videos getting lost in the scroll? In today’s fast-moving social media world, eye-catching visuals are king. Platforms like TikTok and Instagram thrive on content that stops users in their tracks.
But how do you keep your videos fresh and engaging without spending hours editing? CapCut offers a treasure trove of simple yet powerful effects that can transform your content.
This guide breaks down four viral CapCut edits, inspired by trending techniques, to help you achieve professional-looking results with ease.
Tools & Assets you will need
Before diving into these trending effects, make sure you have the right tools and assets ready. Here’s what you’ll need for smooth editing in CapCut:
- CapCut Mobile or Desktop (Latest Version)
- CapCut Pro (for advanced effects like Motion Blur and Freeze)
- High-quality clips (1080p or higher recommended)
- Fonts: Try modern sans-serif fonts for a clean look
- Sound Effects: Use “Whoosh,” “Pop,” or “Glitch” effects from CapCut or free SFX libraries
- Overlays: PNGs for torn paper or masking shapes
- Stock Footage & Music: Sites like Pexels, Pixabay, or Epidemic Sound
Having these ready will save you time and elevate your edits.
1. The Negative Text Effect: Add a Modern Visual Punch
Want your text to pop with a modern, sleek look? The negative text effect is everywhere, and CapCut makes it surprisingly simple to create. This technique adds a cool visual flair that draws viewers in.
Generating Auto Captions
First, let’s turn your speech into text. This is the foundation for the negative text effect.
- Navigate to the “Text” tab within CapCut.
- Tap on “Auto Captions.”

- Hit “Generate.” CapCut will quickly create captions for your entire video.
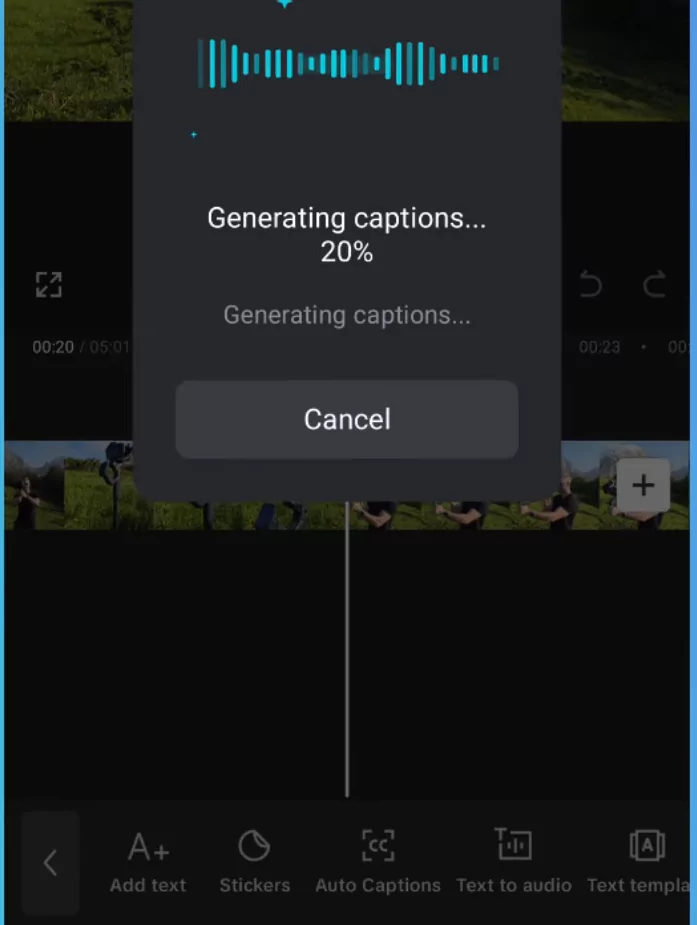
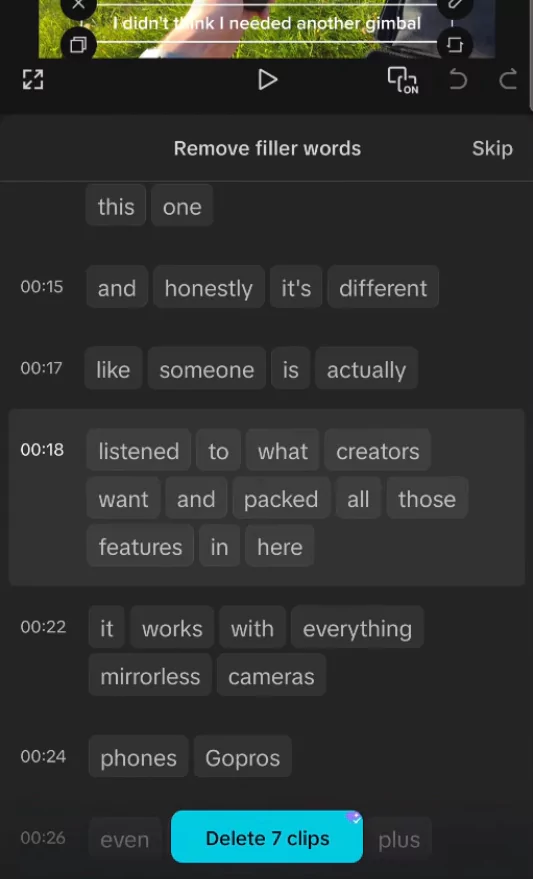
- You can also remove filler words here to clean up the text.
Applying Aesthetic Styles and Negative Animations
Now, let’s make those captions stand out with a unique style.
- Go to the “Styles” tab.
- Select the “Aesthetic” tab.
- Scroll down and find the template that’s been trending.
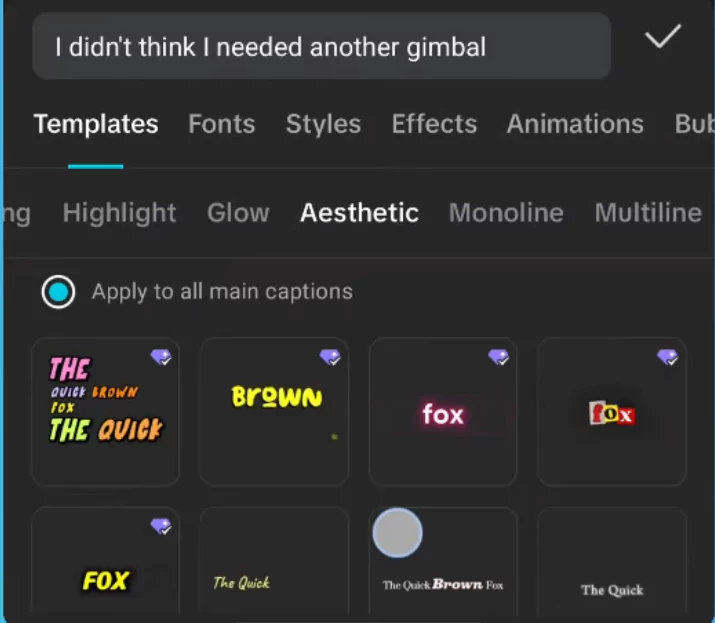
- Once applied, you can move the captions anywhere on your screen.
- To get the negative text effect, go to “Animations,” then “Captions.”
- Choose a negative style text animation that fits your video’s vibe.
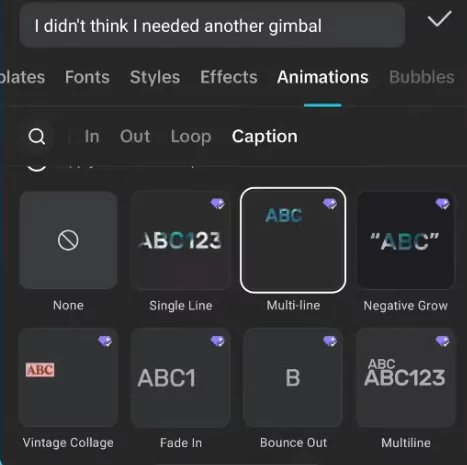
- Just like that, your text looks awesome! Save your work when you’re happy.
This CapCut text effect is a great way to add a professional touch to any video. Trying these viral CapCut edits can seriously level up your content.
2. The Torn Paper Effect: Craft a Unique Overlay
Looking for a way to add some textured, DIY charm to your videos? The torn paper effect creates a cool sticker overlay that feels handcrafted. It’s perfect for adding a unique visual element.
Preparing the Image and Removing Background
We’ll start by preparing your chosen image or video for the overlay.
- Create a new project in CapCut.
- Select the video or image you want to edit.
- Tap “Overlay” and import the image you want to use as a sticker.
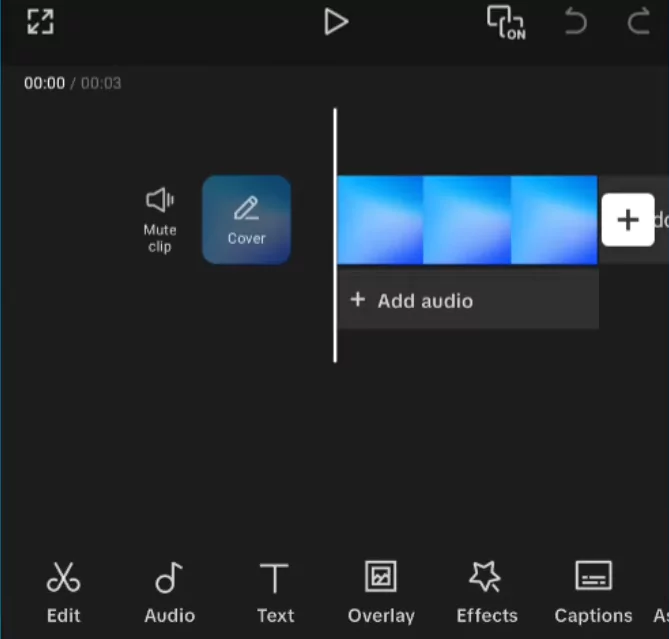
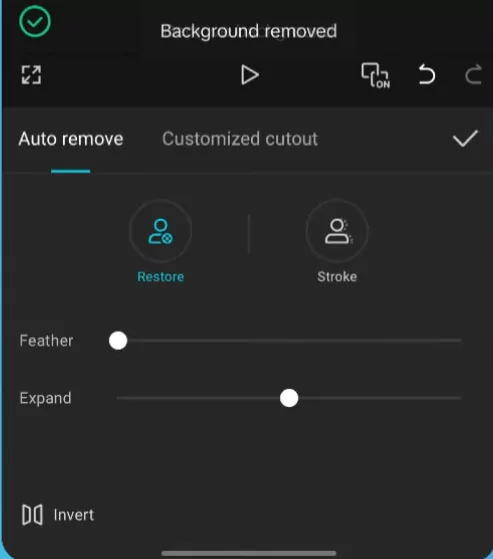
- Use CapCut’s “Remove Background” feature. Choose “Auto Removal” or “Custom Removal” for the best result.
Applying Stroke and Customizing the Cutout
Now, let’s make that image look like a piece of torn paper.
- Tap on the image overlay.
- Go to “Stroke” and select the “paper stroke effect.”
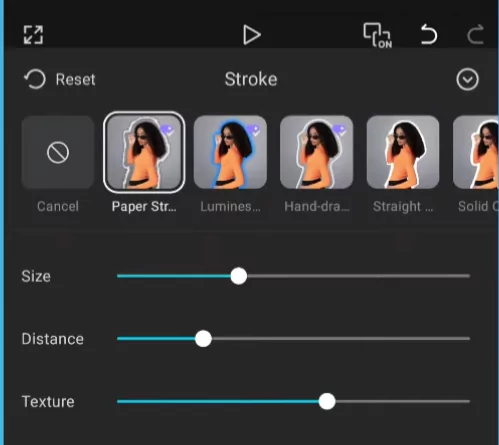
- Adjust the size and distance of the stroke to your liking.
- Increase the texture for a more realistic paper feel.
- Head to “
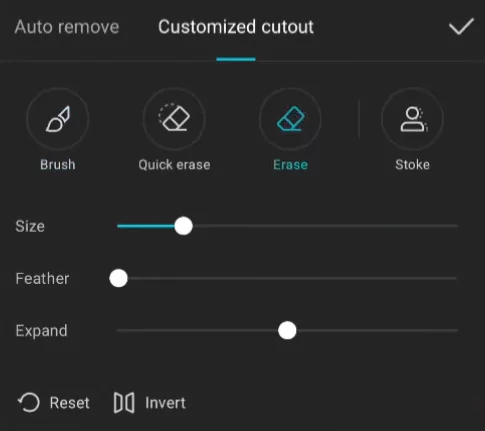
- Select the “Eraser” tool.
- Gently erase around the edges to create that torn paper look.
- Position your sticker wherever you want on your video.
Adding Animations
To make the torn paper sticker dynamic, add some animation.
- Go back and tap the “Animations” tab.
- Try the “Screen Wipe” animation for a clean look.
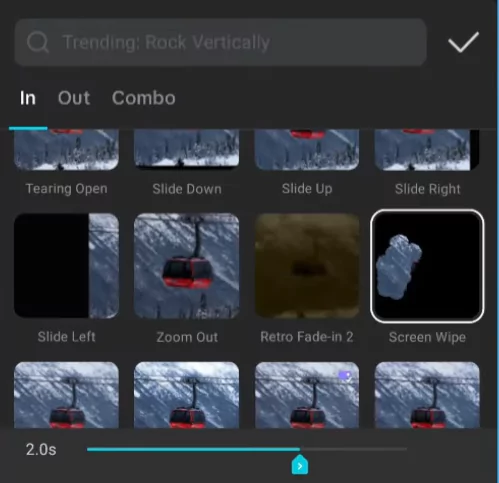
- Alternatively, use the “Sticky Note” animation for a fun feel.
- Choose an “Out Animation” as well, like “Screen Wipe” or another option.
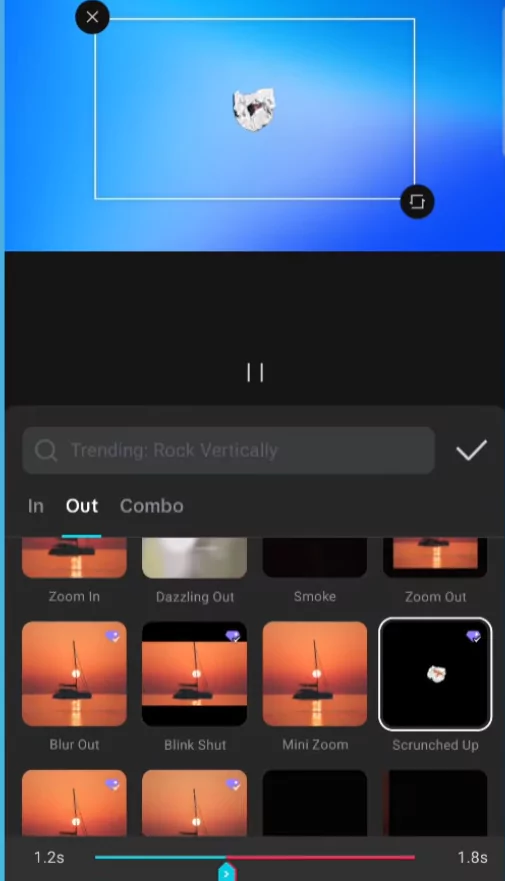
- Adjust the duration of your animations to match your video’s pace.
- Save your work to see the final torn paper effect.
This CapCut paper effect is a fantastic way to add personality. Explore these video editing techniques to make your content truly unique.
3. The Clean Zoom Out Animation: Add Dynamic Movement
Want to add a professional zoom-out that grabs attention? This animation is a staple for many content creators and is surprisingly easy to implement in CapCut.
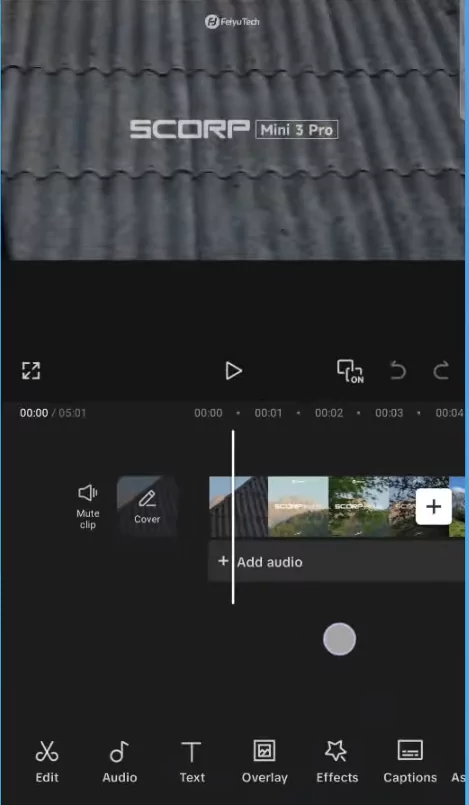
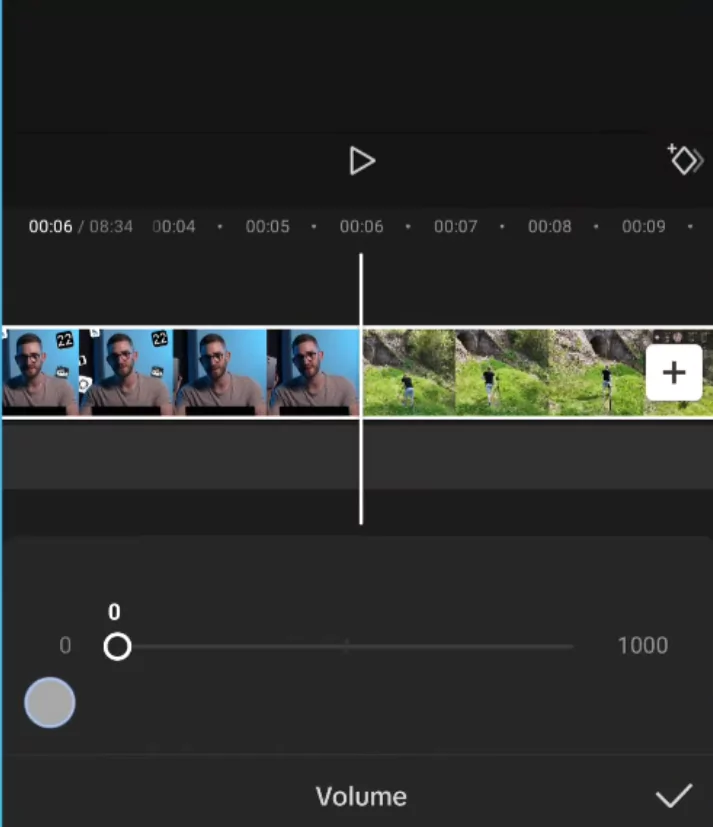
Adjusting Volume and Importing Sound Effects
Sound is key to making this animation impactful. Let’s get the audio ready.
- Tap on your video clip.
- Go to “Volume” and lower it to zero. This helps you hear the animation sound better.
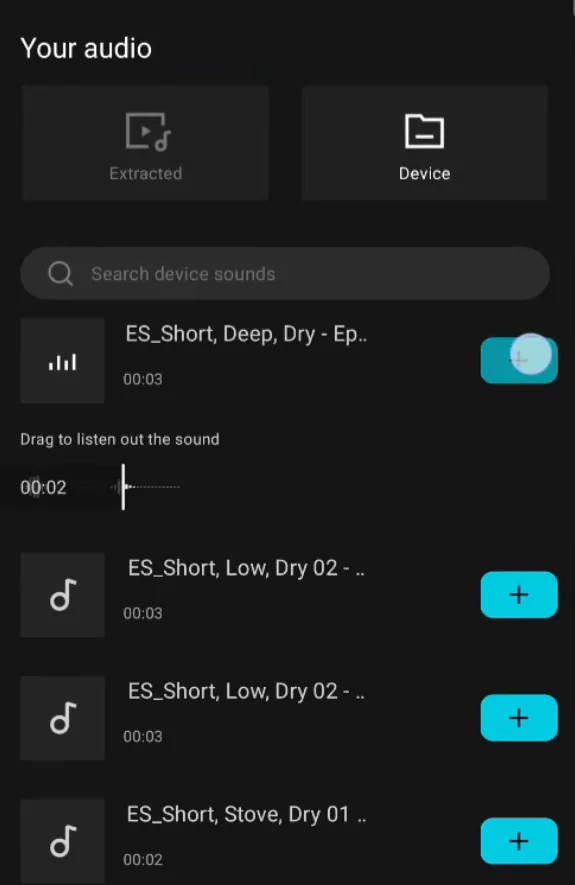
- Head to the “Audio” tab.
- Tap “Sound Effects” and search for “whoosh.”

- Pick a sound effect that fits your animation.
Syncing Animation with Audio
Now, we’ll pair the visual zoom with the sound.
- Import your chosen sound effect into CapCut.
- Add it to your timeline. Trim any extra parts.
- Position the sound effect at the beginning of your clip.
- Tap your video again.
- Go to the “Animations” tab.
- Select a “Zoom Out” animation.
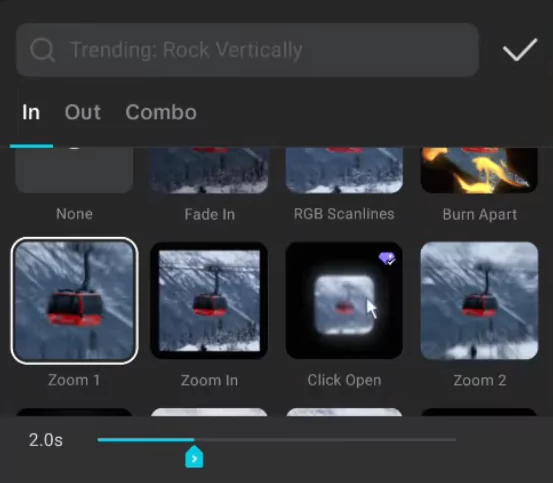
- Adjust the animation’s duration so it perfectly matches the sound effect.
- Save your edited clip.
This CapCut zoom animation, combined with the right sound effect, creates a really polished look. Using CapCut sound effects adds a pro touch.
4. The Morph Effect: Seamlessly Transition Between Subjects
The morph effect creates a smooth, almost magical transition between different subjects or scenes. It’s a popular effect that can make your videos look incredibly polished.
Filming and Creating Freeze Frames
The secret to a good morph effect starts with how you film.
- Film your footage using a tripod. Keep the camera steady.
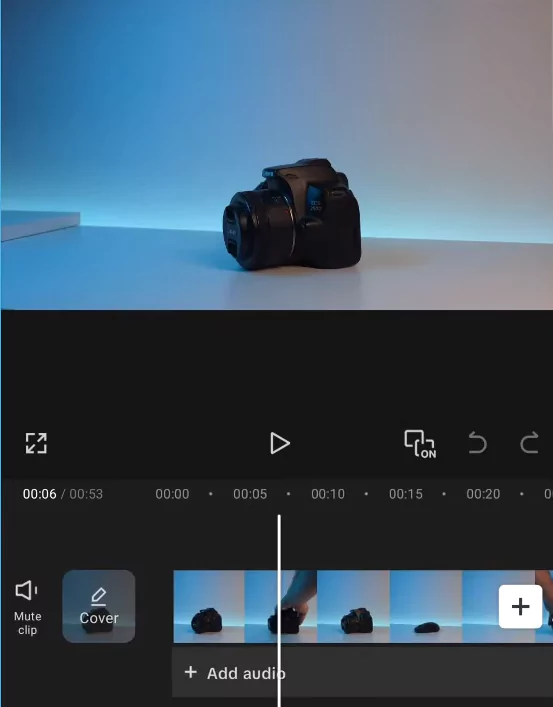
- Switch between different products or scenes in the same spot.
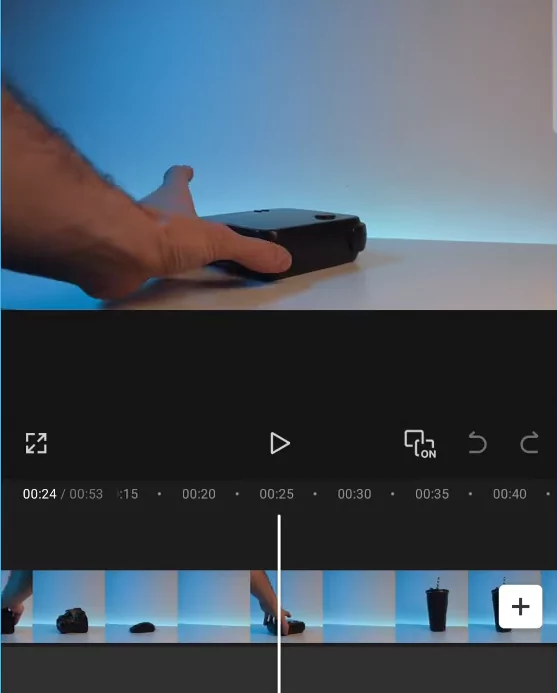
- Move the playhead to where your first subject appears.
- Tap the clip and scroll to find “Freeze.” This creates a freeze frame.
- Repeat this process for each subject or scene transition.
Refining Freeze Frames and Adding Motion Blur
Now, let’s assemble the pieces and add the final touches.
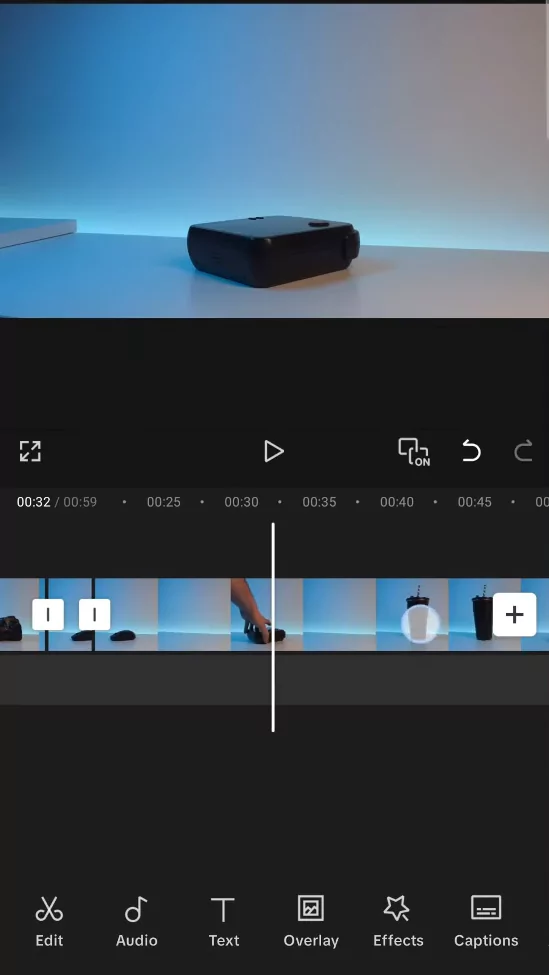
- Remove all the clips between your freeze frames. You should only have the freeze frames left.
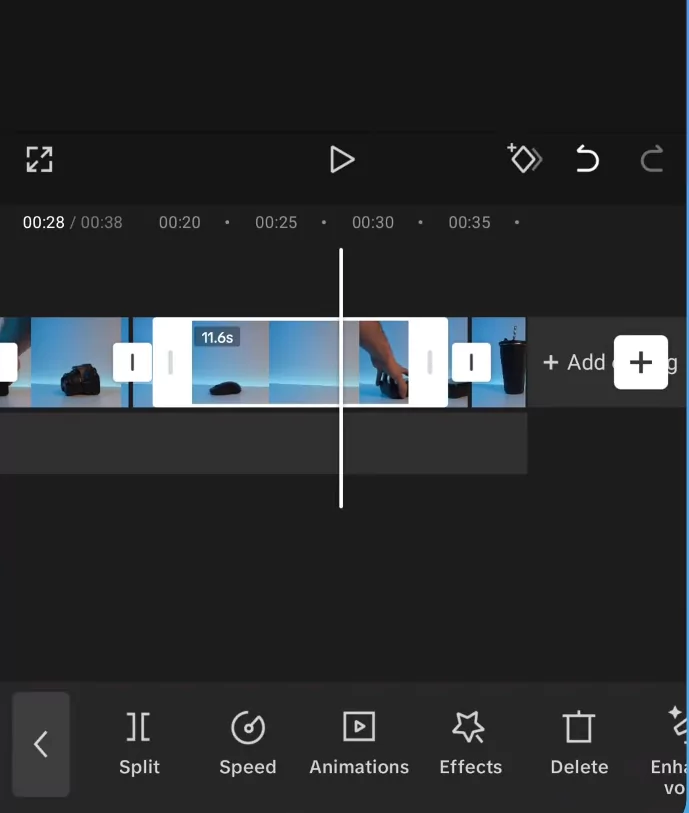
- Expand the timeline to make editing easier.
- Set each freeze frame’s duration to about 1 second. Do this for every product on the timeline.
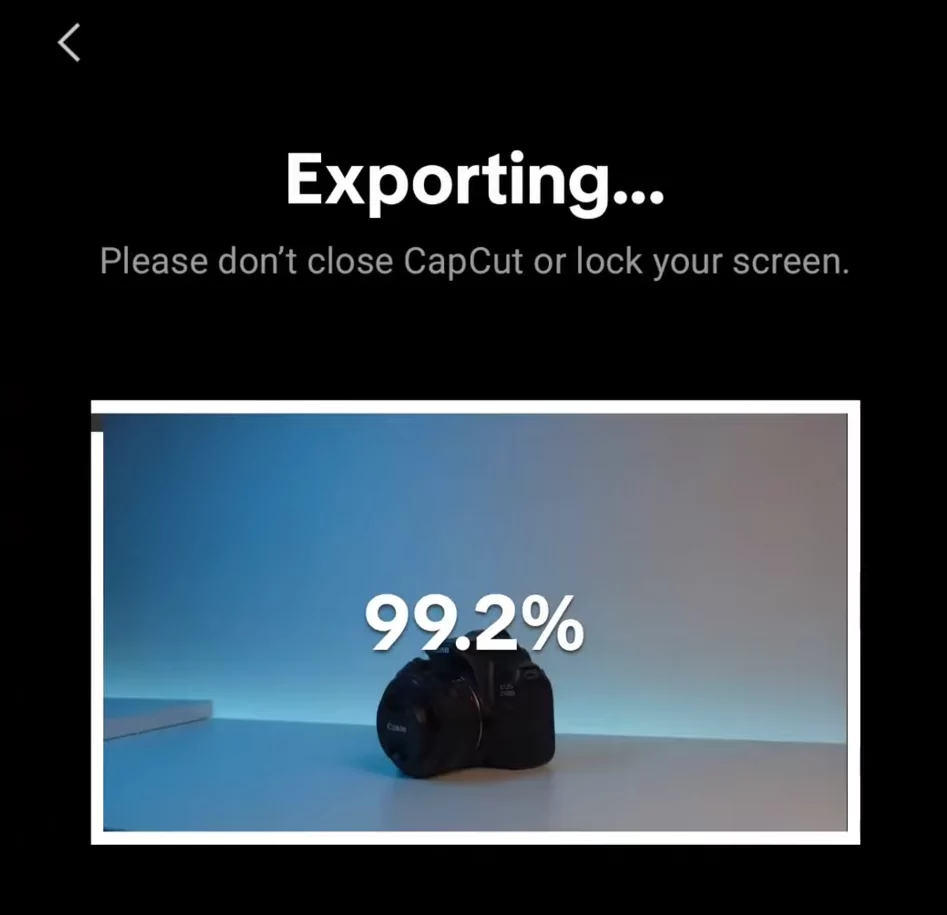
- Export this sequence of freeze frames.
- Start a new project and import the exported clip.
- Scroll to find the “Motion Blur” tab.
- Adjust the blur intensity and blend settings until it looks smooth.
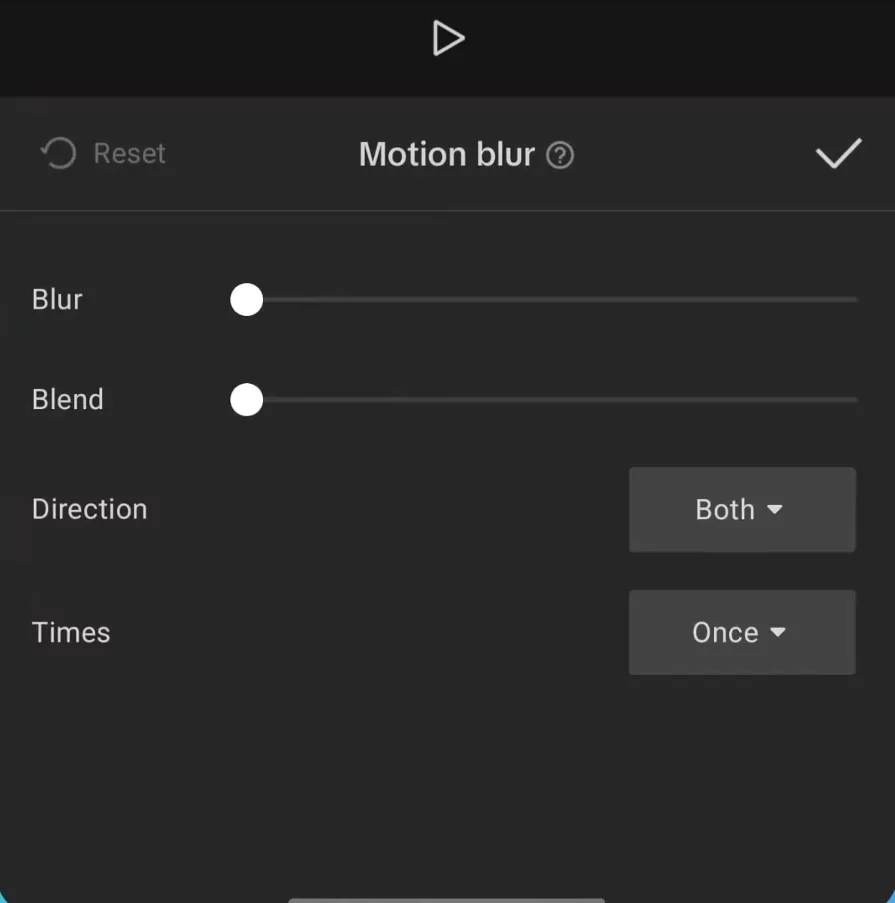
- Save your project.
Your morph effect should now look super smooth, just like this. Mastering CapCut morph effects and other video transitions can truly elevate your editing skills.
Best Platforms to Use These Edits
Each platform favors different styles. Here’s where these viral edits shine:
- TikTok: Great for fast-paced edits like the Clean Zoom Out and Negative Text Effect.
- Instagram Reels: Use the Torn Paper and Morph Effect to create branded or nostalgic vibes.
- YouTube Shorts: The Morph Effect works well for product showcases or transformation videos.
Export Tip: Use 9:16 aspect ratio, 1080×1920 resolution, and at least 8 Mbps bitrate for crisp results.
Who Should Use These Effects?
These edits aren’t just for influencers—they’re perfect for:
- Content Creators – Enhance storytelling, reactions, tutorials
- Small Business Owners – Make product videos engaging
- Educators – Add visual flair to explainer videos
- Event Planners – Recap events in dynamic ways
- Musicians – Create lyrics videos with motion text
If your goal is to stop the scroll—these effects are for you.
Before/After Comparison
Let’s look at the power of editing:
| Effect | Before | After |
|---|---|---|
| Negative Text | Plain caption text | Stylized, animated pop-out |
| Torn Paper | Static image | Handmade sticker with animation |
| Clean Zoom Out | Flat shot | Dynamic zoom synced with audio |
| Morph Effect | Abrupt cuts | Seamless, fluid transitions |
Visuals speak louder than words—use preview clips to show transformation.
Common Mistakes to Avoid
Even viral edits can flop if done wrong. Avoid these mistakes:
- Over-editing: Don’t layer too many effects—it can look messy.
- Inconsistent timing: Make sure animations sync with music or voice.
- Wrong export settings: Leads to blurry videos on social media.
- Low-quality assets: Avoid pixelated overlays or mismatched fonts.
- Ignoring storytelling: Effects should enhance—not distract from—the message.
How to Combine These Effects Creatively
Don’t treat these effects as isolated—combine them for extra punch:
- Use the Torn Paper as a transition, followed by a Morph Effect
- Start with Negative Text, then Zoom Out for reveal
- Layer text inside a Torn Paper overlay for a scrapbook vibe
Tip: Maintain consistent color grading and audio style when combining.
Tips for Speeding Up Your Workflow
Time is content. Here’s how to save more of it:
- Use keyframes instead of trimming every frame manually
- Group layers (text + overlay) for easier repositioning
- Label layers and tracks clearly—especially when using effects
- Create reusable projects with effect templates
- On PC? Use shortcuts like Ctrl + Z (undo), Ctrl + E (export), and Alt + Drag to duplicate
The faster your workflow, the more you can experiment.
CapCut Alternatives That Can Do Similar Effects
Want to explore beyond CapCut? Here are some tools with similar power:
| Software | Similar Features | Platform |
|---|---|---|
| VN Video Editor | Keyframes, overlays, effects | iOS, Android, Mac |
| InShot | Text animations, sound syncing | Mobile |
| Adobe Premiere Rush | Zooms, captions, transitions | Mobile & Desktop |
| KineMaster | Multiple layers, masking | Mobile |
Why CapCut? It strikes the perfect balance between ease of use and visual power—especially for trending social media content.
Advanced Bonus Effect: Glitch + Zoom Combo
Want to go beyond the basics? Here’s a trendy combo edit:
- Add your clip and trim to 1–2 seconds.
- Go to Effects > Basic > Glitch and apply.
- Now tap Animations > Combo > Zoom + Spin or create a keyframed zoom.
- Sync the effect with a bass drop or glitch SFX.
This is perfect for music videos, game edits, or tech product reveals.
FAQs: Viral CapCut Effects
Do I need CapCut Pro to use these effects?
No—but some features like motion blur and high-quality exports are easier with Pro.
Can I do all this on the mobile version?
Yes, though some steps (like customized cutouts) are more precise on desktop.
Will these work on older devices?
Most effects work fine, but motion blur or multiple layers may lag on low-RAM phones.
Can I export in 4K?
Yes, go to “Export Settings” and select 4K. Works best on PC version.
Conclusion: Your Go-To Guide for Viral CapCut Edits
We’ve explored four powerful, viral CapCut edits: the negative text effect, the torn paper overlay, the clean zoom out animation, and the captivating morph effect. Each of these techniques can be achieved with CapCut’s user-friendly tools, empowering you to enhance your video quality significantly. Don’t be afraid to experiment and mix these effects to find your unique style. Dive into CapCut’s vast features and keep creating!
Tried any of these effects? We’d love to see your edits!
Tag us on TikTok/Instagram with #CapCutViralEdits
Or comment below: Which effect will you try first?
If you found this guide useful, share it with fellow creators or save it for later!