Want your videos to look more professional? Tired of boring text? This guide shows you how to make amazing text animations in CapCut. We’ll go from getting your text ready to making it move perfectly. You’ll learn to create text that grabs attention and keeps people watching.
Making your videos stand out is easier than you think. With CapCut, you can create dynamic text that enhances your message. This guide will help you master smooth text movement, whether you are just starting or want to improve your skills. Let’s make your text pop!
Understanding CapCut text animation essentials
Getting started with text animations in CapCut involves a few key initial steps. We will cover how to prepare your video and set up your text for animation.
Importing your video and setting up Captions
- First, you need to get your video into CapCut.
- Simply drag and drop your video clip onto the timeline.
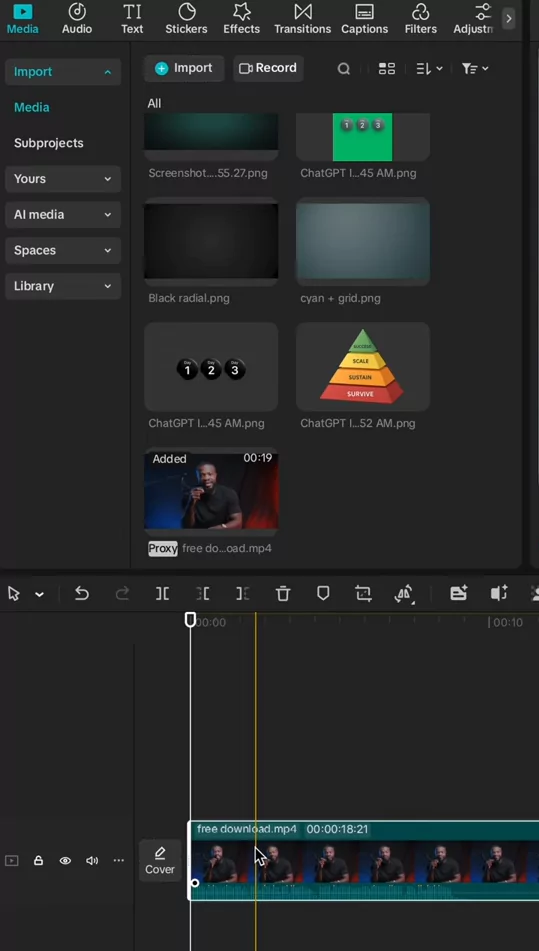
- Once it’s there, trim any parts you don’t need.
- This helps you focus on the section where you want your text animation.
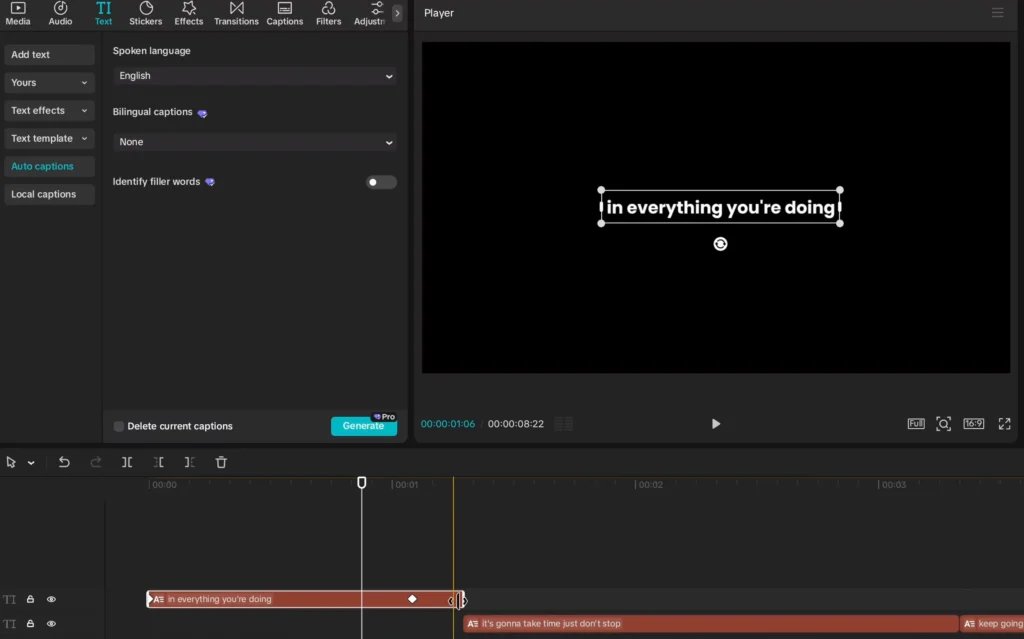
- CapCut has a great feature to automatically create captions from your video’s audio.
- Look for the “Captions” option.
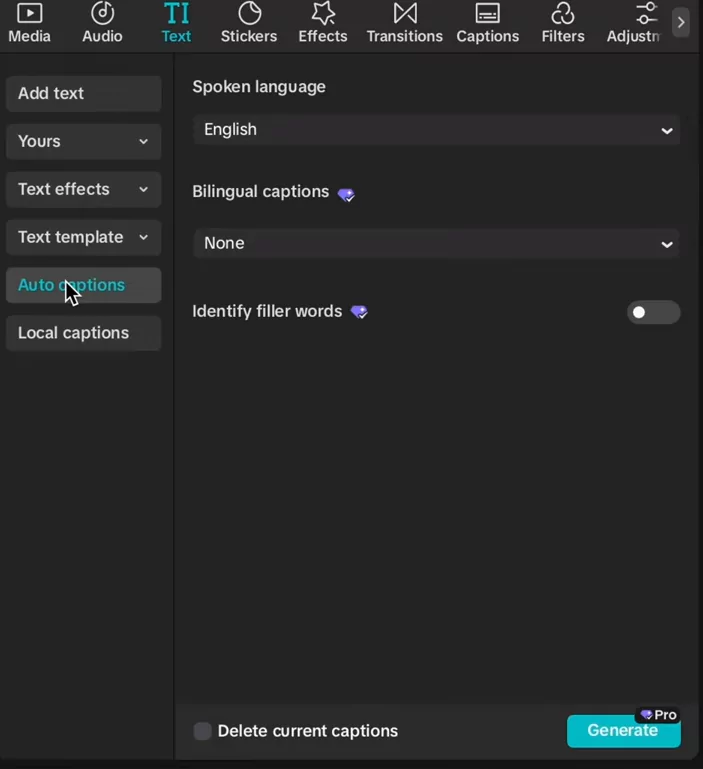
- Select your video clip, and then choose “Generate Captions.”
- This makes your text ready for animation.
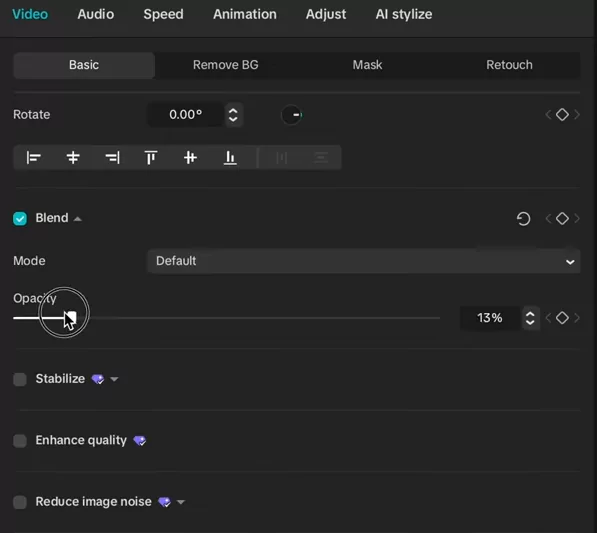
- You can choose to show your video in the background or turn its opacity down to zero, focusing just on the text.
Customizing Initial Text Appearance
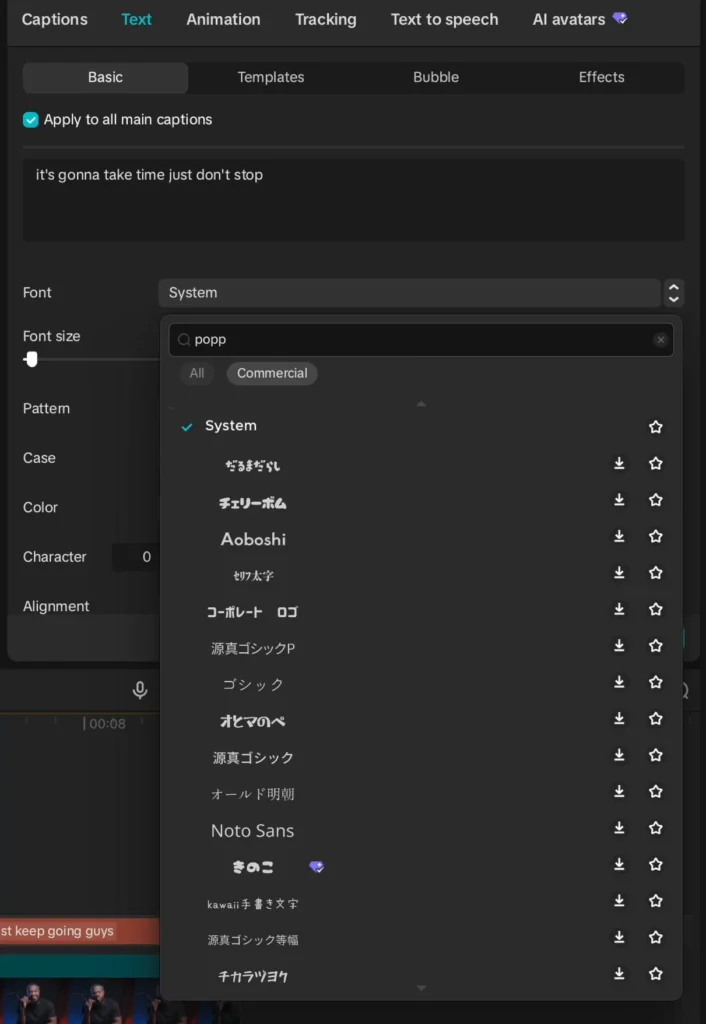
Before animating, let’s make your text look good. You can change the font to match your style. Many creators love using fonts like Poppins for a clean look. After picking your font, center the text on the screen.
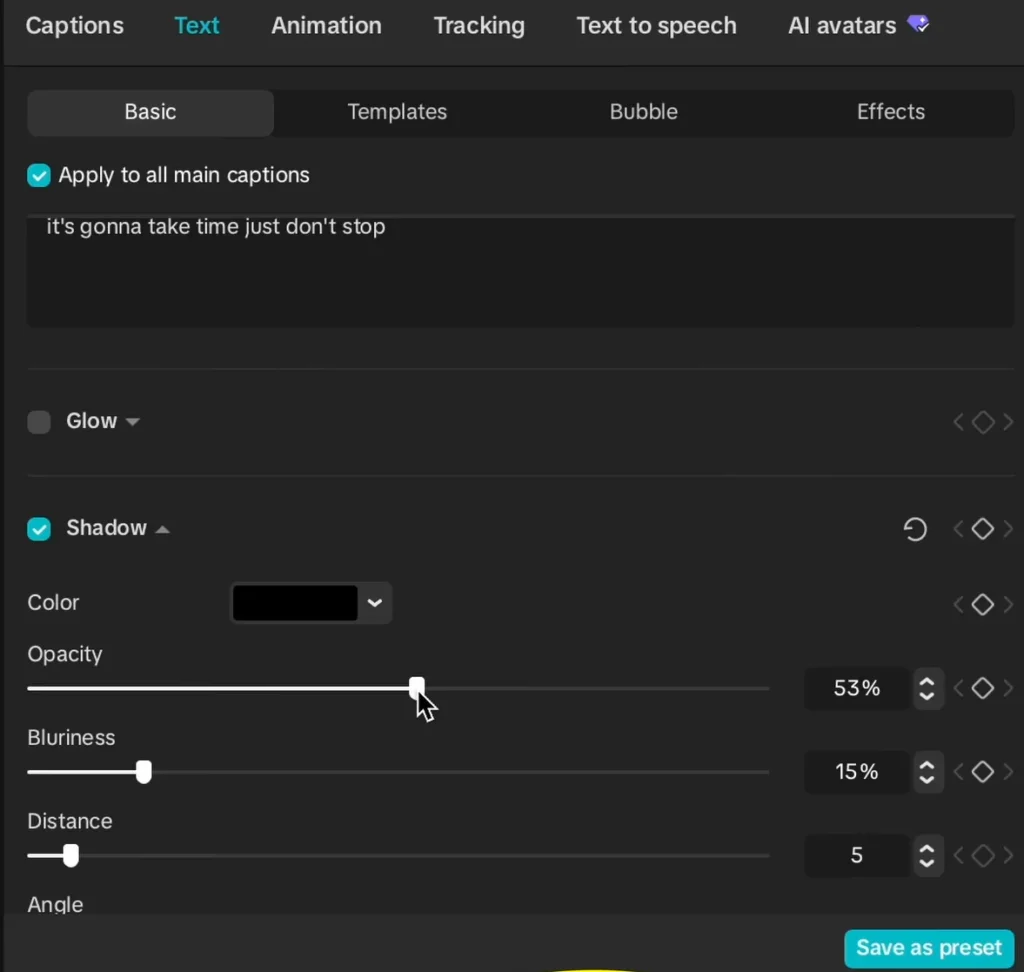
For text that stands out against your video, consider adding a drop shadow. This effect makes the text more readable.
Play around with the shadow’s position and intensity until it looks just right with your video background.
Exploring CapCut’s Built-in Animation Options
CapCut offers some preset animations for captions. While these can be quick, they might not give you the smooth, controlled movement you’re looking for.
Overview of CapCut Caption Presets
CapCut has several ready-to-use animations for your captions. You can find options like “slide up” that make your text appear automatically. These presets are easy to apply.
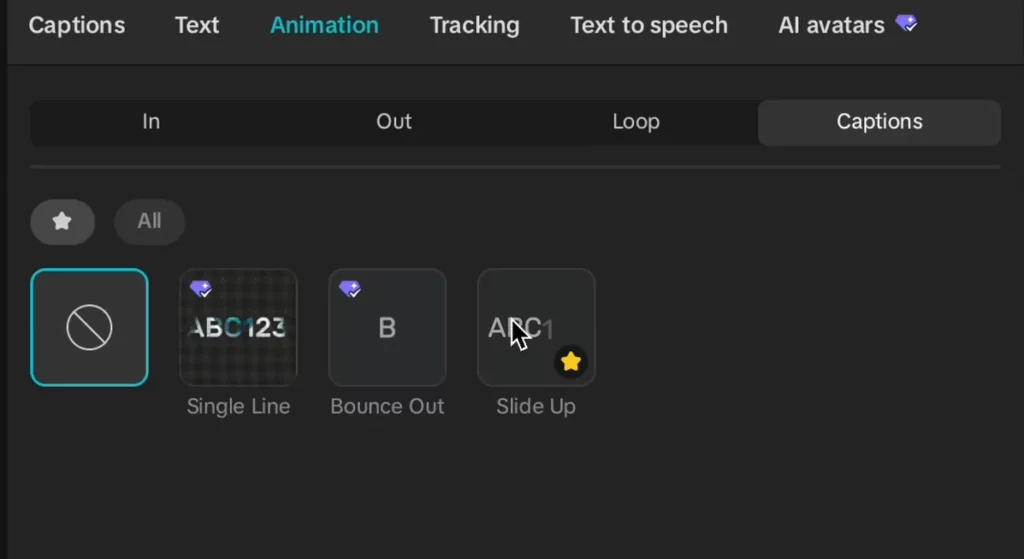
When you use a preset animation, like “slide up,” you can see how the text moves into the frame.
However, these built-in options can sometimes feel a bit jerky. They might not offer the natural, fluid motion that truly polished animations have.
Understanding the Limitations for Direct Text
It’s important to know that if you add text directly, instead of generating captions, you might not have access to all the animation features. The animation options that appear are often linked to the captioning tool. This means manually adding text might limit your animation choices compared to using auto-generated captions.
Mastering manual text animations in CapCut
For truly smooth and controlled text animations, doing it manually is the way to go. This involves using keyframes to dictate how your text moves and appears.
Utilizing Keyframes for Smooth Entry
Keyframes are your best friend for creating smooth motion. Select your text. Go to the “Animation” section, and then choose “Transform.” This allows you to control the text’s position.
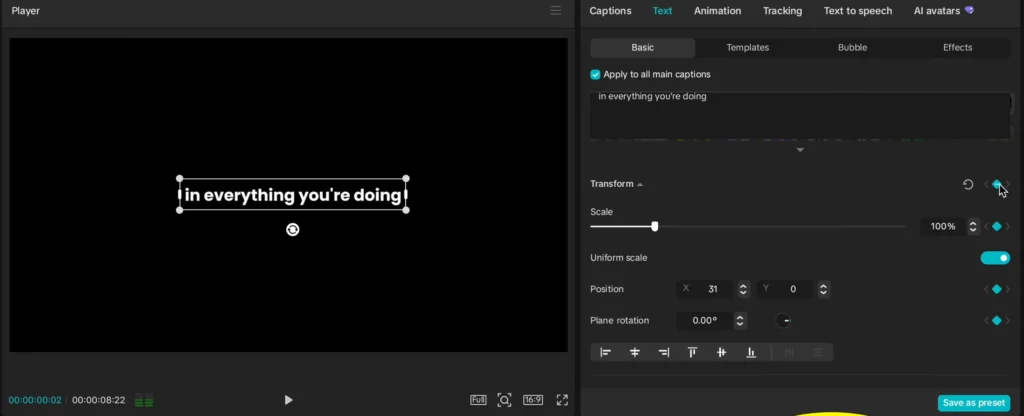
To make the text slide in smoothly, you’ll add keyframes. Place your playhead at the beginning of your text clip. Then, add a keyframe to the “Y-axis” under Transform. Move your playhead about 20 to 30 frames ahead.
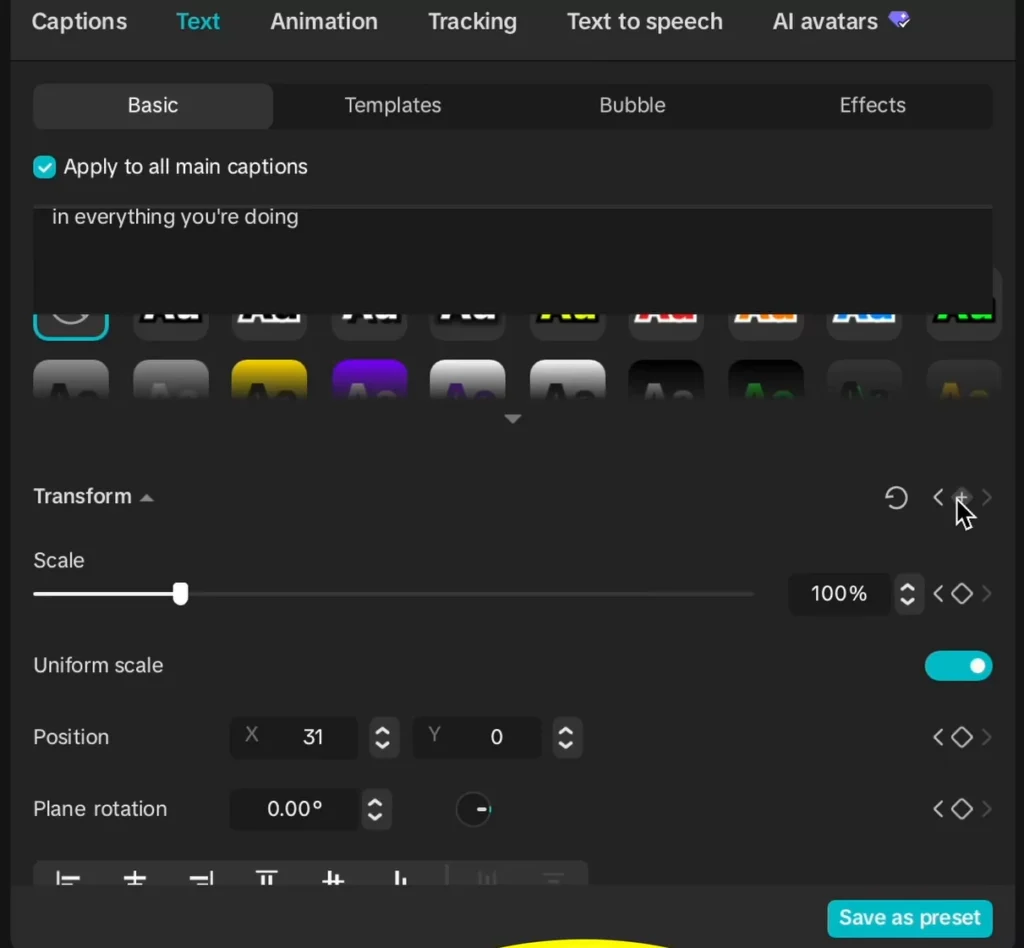
Add another keyframe. Now, go back to the first keyframe. Move the text up slightly on the Y-axis. Also, set the opacity to zero on the first keyframe. This makes the text fade and slide in.
Refining Animation with Ease Presets
Once you have your keyframes set, you can make the animation even smoother.
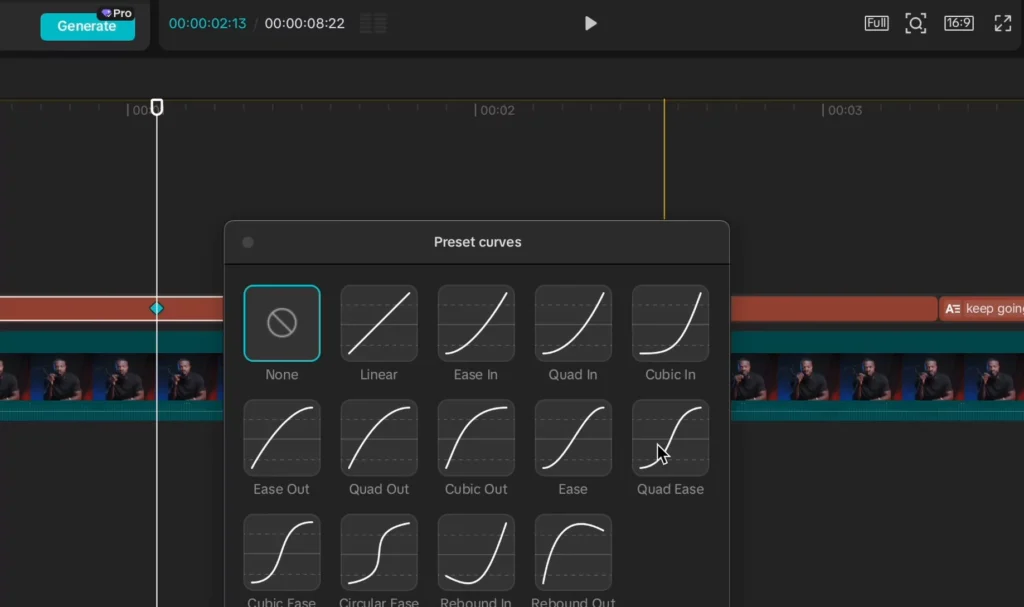
Right-click on the keyframes. You’ll see options like “Ease In” or “Quad Ease.”
These presets control how the animation starts and ends.
Trying out “Quad Ease” can give your animation a nice, natural acceleration and deceleration.
“Ease In” also works well. Experiment to see which one looks best for your specific animation. This simple step adds a lot of polish.
Advanced Techniques for Polished Text Animations
Want to take your text animations to the next level? Using compound clips and masks can create really dynamic effects, like revealing text word by word.
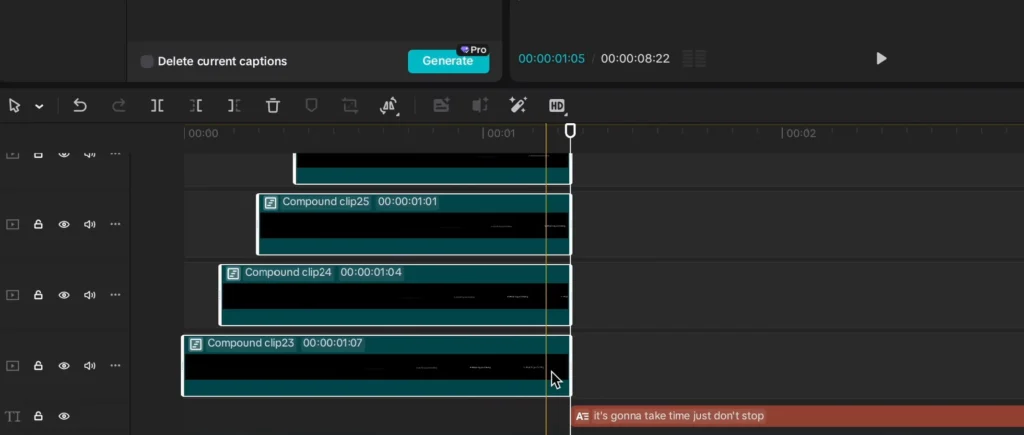
Creating Compound Clips for Layering
If you want to animate multiple words or lines of text together, you’ll want to group them. First, make copies of your text clip. Stretch each clip out on the timeline so they line up.
To group them, select all the text clips. Press Option+G on a Mac, or Alt+G on a Windows keyboard. This creates a compound clip. You can then adjust the length of this combined clip. It makes managing multiple text elements much easier.
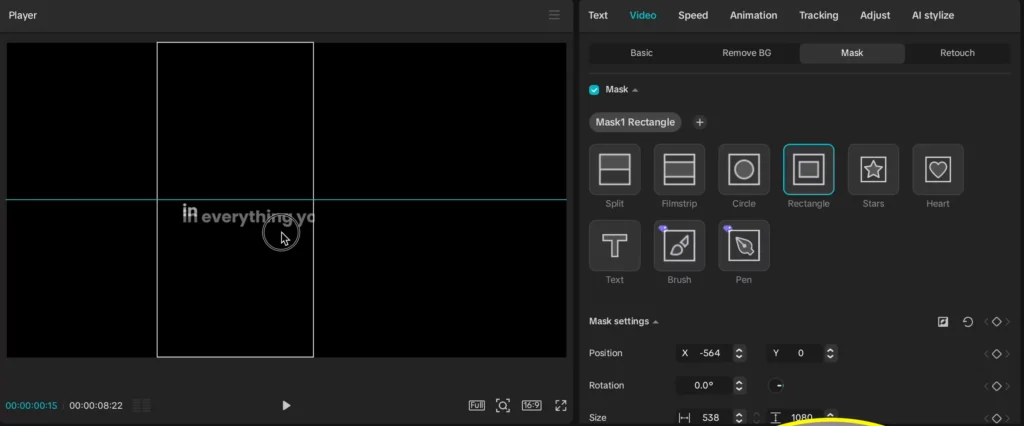
Layering Text with Video Masks
Masks let you reveal parts of your text over time. With your compound clip selected, go to “Video Mask.” Add a mask to your text. You can then adjust the mask’s shape and position.
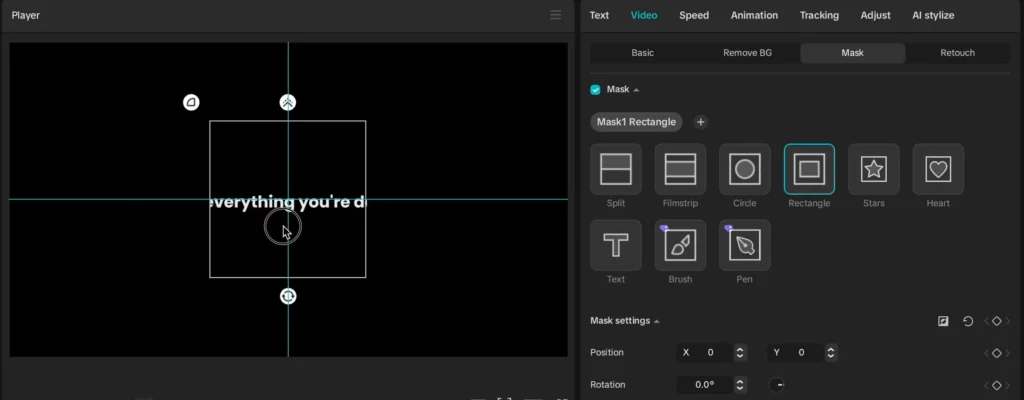
To reveal text word by word, you’ll need to create separate masks for each word. Move your playhead a few frames forward. Adjust the mask to reveal the next word. Repeat this for each word in your text. This takes a bit of time, but the result is a very clean, professional animation.
Final Touches for Professional Animation
The last steps involve tidying up your animation and adding effects that enhance its smoothness.
Trimming and Adjusting Clip Endings
Make sure your text animation finishes cleanly. Trim the end of your text clips so they fade out or stop at the right moment. Select all your text clips and use the trim function. This ensures the animation doesn’t linger too long.
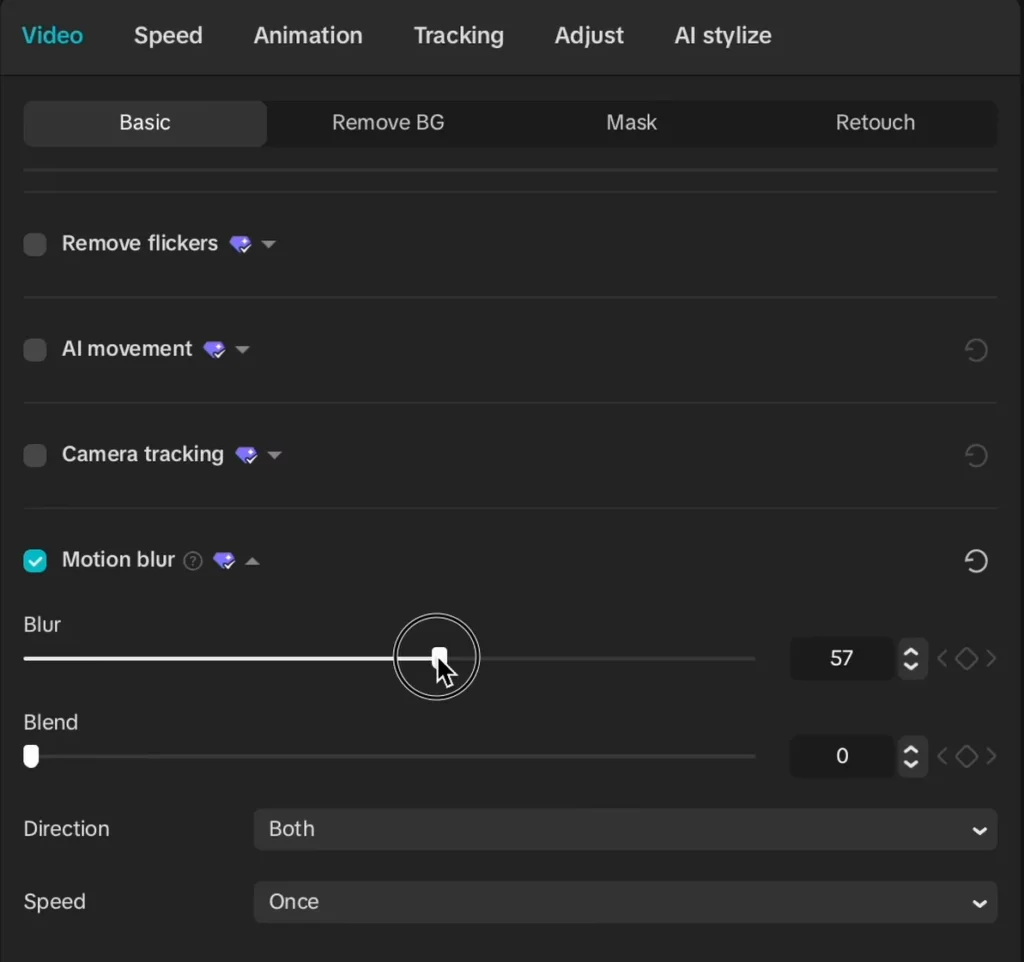
Incorporating Motion Blur for Smoothness
Motion blur can make animations look even more fluid. Select your compound clip that contains all the text. Go to the “Motion Blur” setting. Increase the value to around 60. This adds a subtle blur as the text moves. It really helps create that smooth, cinematic feel.
Why Smooth Text Animations matter?
Text animations do more than just look cool—they guide your viewer’s attention and enhance storytelling.
- A well-placed fade-in or slide-in can emphasize key points, introduce topics with flair, or create a cinematic tone.
- In today’s fast-paced content landscape, smooth, professional animations help your video stand out on platforms like YouTube, Instagram, TikTok, and Facebook.
- Whether you’re making explainer videos or cinematic reels, animated text grabs attention and keeps viewers watching longer.
Best use cases for Text Animation
Knowing where and when to use text animation can elevate your entire video editing strategy. Here are some great applications:
- Social Media Reels – Make captions pop or sync them with beats.
- YouTube Intros & Outros – Introduce your brand with slick animated titles.
- Educational Content – Highlight key terms or definitions in a dynamic way.
- Lyric Videos – Animate lyrics line-by-line to match the rhythm.
- Business Promos – Use smooth kinetic text to showcase services or features.
Tip: Less is more—use animation to enhance, not distract.
CapCut vs Other Editors comparison for Text Animation
Here’s a quick comparison of how CapCut stacks up against other popular editors when it comes to text animations:
| Feature | CapCut (Free/Pro) | Adobe Premiere Pro | Final Cut Pro | VN Editor |
|---|---|---|---|---|
| Keyframe Animation | Yes | Yes | Yes | Limited |
| Ease Presets | Built-in | Advanced | Manual | None |
| Motion Blur Support | Manual | Advanced | Advanced | No |
| Mobile-Friendly | Excellent | No | No | Yes |
| AI Caption Integration | Built-in | Plugin-based | Manual | Limited |
CapCut balances ease-of-use with powerful animation tools, especially for mobile editors.
Creative Text Animation Examples
Here are a few simple animation styles you can try to add flair to your videos:
- Slide-In from Bottom: Ideal for lower-thirds or name intros.
- Fade-In with Scale: Adds cinematic depth to titles.
- Glitch Text: Great for tech or gaming content.
- Word-by-Word Reveal: Perfect for lyric videos or quotes.
You can create these using manual keyframes, compound clips, and motion blur. Want free templates? Check out the next section!
Common Text Animation mistakes to avoid
Even experienced editors can fall into these traps:
- Overloading with effects – Too many animations can confuse the viewer.
- Poor timing – If your animation is too fast or too slow, it feels unpolished.
- Bad font choices – Using fancy or unreadable fonts can ruin clarity.
- Not matching the mood – Glitchy text doesn’t belong in a calm, cinematic scene.
- No motion blur – Without it, movements can feel robotic or jittery.
Stick to clean, subtle animations for the best results.
Tips for Cinematic Text Effects
Take your animations from good to jaw-dropping with these techniques:
- Combine text with overlays – Use soft light leaks or VHS textures.
- Speed ramp background video – Sync animation to a speed ramp for dramatic impact.
- Stack effects – Use glow + blur + slide-in for a polished intro.
- Background separation – Add a semi-transparent shape behind your text for contrast.
Try using CapCut’s “Blend Mode” on text backgrounds for enhanced visual style.
7-Day Text Animation Prompt
Want to improve your skills fast? Try this challenge:
| Day | Prompt |
|---|---|
| 1 | Slide-in lower third |
| 2 | Fade-in title with ease |
| 3 | Line-by-line lyric animation |
| 4 | Caption that bounces slightly |
| 5 | Glitch-effect intro text |
| 6 | Cinematic quote with motion blur |
| 7 | Reveal text with mask + music sync |
Tag your creations online with #CapCutTextChallenge and share your progress!
How to Animate Text with CapCut’s AI Tools
CapCut Pro now offers some AI-powered features to help with animations:
- AI Captioning – Auto-generates synced captions from speech.
- Style Suggestions – Applies animation presets based on your video type.
- AI Motion Match – Helps align text animations with scene transitions (on select devices).
While not fully manual, these features save time and offer inspiration for your own animations.
CapCut Mobile vs Desktop: Which is Better for Text Animation?
| Feature | CapCut Mobile | CapCut Desktop |
|---|---|---|
| Manual Keyframes | Yes | Yes |
| Compound Clips | Not available | Available |
| Video Masking | Limited | Advanced |
| Motion Blur | Not available | Yes |
| AI Features | Voice + Captions | Full access |
If you’re doing quick social videos, mobile works fine. For detailed animation and layering, desktop is more powerful.
Frequently Asked Questions (FAQs)
Why doesn’t my animation look smooth in CapCut?
Try increasing the frame count between keyframes and adding “Ease In/Out” or motion blur.
Can I animate individual words separately in a sentence?
Yes. Split your sentence into multiple text boxes or use compound clips and masks for word-by-word reveal.
How do I import custom fonts into CapCut?
On CapCut Desktop, click on the font menu and select “Import Font” to upload TTF/OTF files.
Is text animation available on CapCut mobile?
Yes, but with fewer features. Desktop version offers more precise control.
Level Up Your Edits
You’ve just learned how to master smooth text animations in CapCut—now it’s your turn to create!
- Try out the templates
- Practice the 7-day challenge
- Share your edits and tag us
Want more CapCut tutorials?
- How to use Green Screen on CapCut – Detailed Guide
- How to make easy TikTok Edits using CapCut? (Quick Tutorial)
- How to Download and Add Best Custom Fonts on CapCut?
- How I Create Text Animation Tutorial in Capcut
Conclusion: Elevate Your Videos with Dynamic Text
You’ve learned how to create smooth text animations in CapCut. By using manual keyframes for position and opacity, you gain full control. Combining these with compound clips and masks offers advanced effects.
Remember to practice these steps: keyframe your text’s movement, group elements with compound clips, and add motion blur. Consistent practice will make you a pro at creating dynamic text. Ready to make your videos shine? Check out more CapCut tips to keep improving.