Video transitions are like visual bridges between different clips, helping your footage flow smoothly from one scene to the next. They play a key role in keeping your video polished, professional, and engaging. Without transitions, cuts can feel abrupt and jarring—something that can easily pull your viewers out of the moment.
When used well, transitions help maintain the rhythm of your story, hold the viewer’s attention, and elevate the overall look of your project.
CapCut makes this easier with a wide variety of transition effects, offering plenty of creative options to match different moods, styles, and video types.
But transitions aren’t just about looking cool—they also shape how your story is experienced. The key is to use them thoughtfully. Overdoing it or using the wrong type of transition can make your video feel cluttered or distract from your message.
With CapCut’s large selection, it’s important to know how and when to use each transition to get the best results. Whether you’re just starting out or already experienced, having some guidance on choosing the right transition for the right moment can make a big difference.
Step-by-Step Guide: Adding Transitions in CapCut
Adding transitions in CapCut is a straightforward process, whether you are working on the desktop or mobile version of the application. The following sections provide detailed instructions for both platforms.
On CapCut Desktop:
The desktop version of CapCut provides a robust interface for adding and customizing transitions, offering flexibility in how users interact with CapCut.
Step 1: Import Media
Begin by importing your video clips and images into a new or existing CapCut project on the desktop application. This can typically be done by clicking on an “Import” button or by dragging and dropping your media files directly into the project’s media panel. This initial step lays the groundwork for your editing process, ensuring all necessary footage is readily accessible within the CapCut environment.
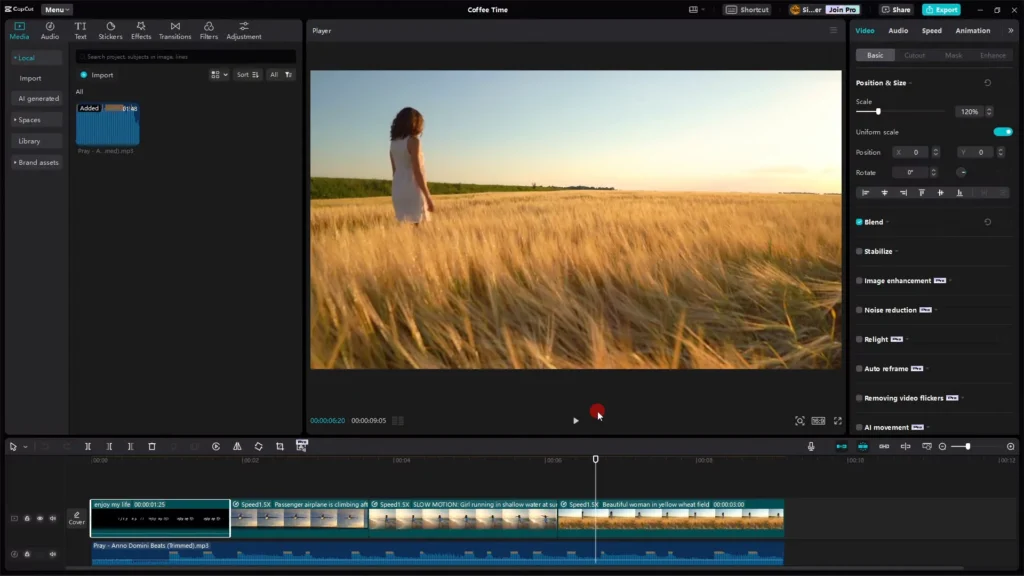
Step 2: Navigate to the Transitions Tab
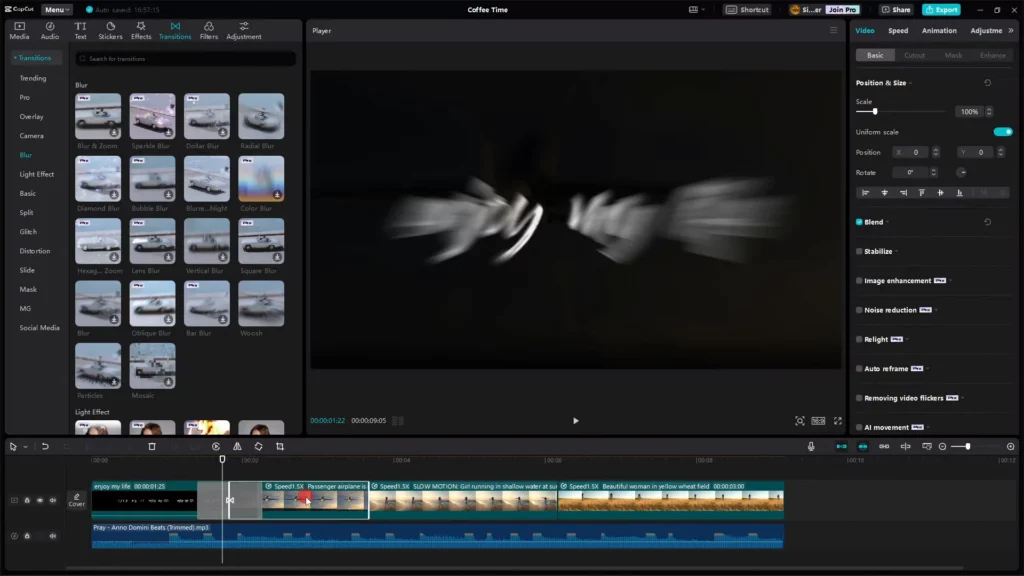
Once your media is imported, locate the “Transitions” tab within the CapCut interface. This tab is generally found in the top left menu, often grouped with other editing tools such as “Media,” “Audio,” “Text,” and “Effects”. Clicking on the “Transitions” tab will open the library of available transition effects.
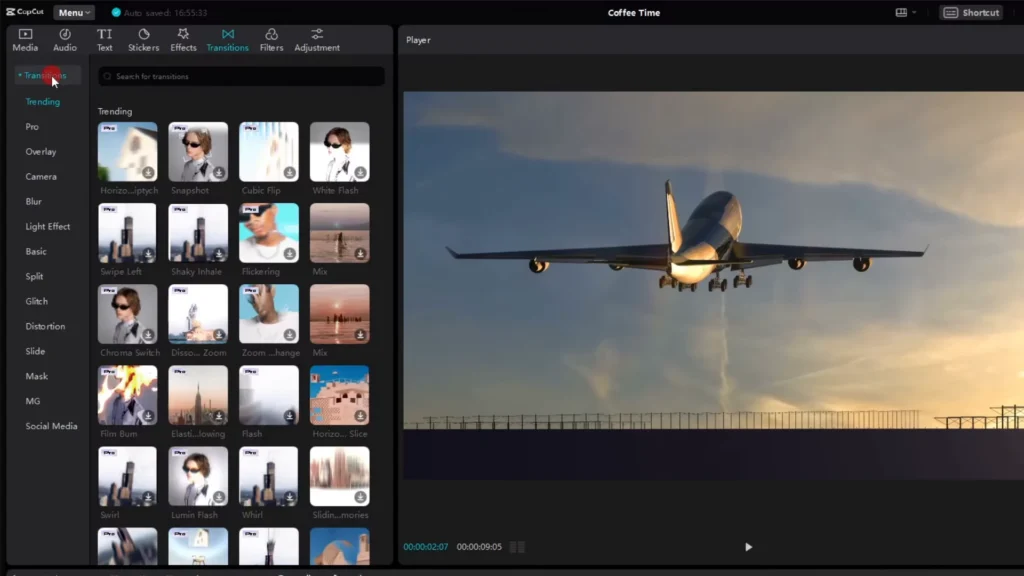
Step 3: Browse and Select a Transition
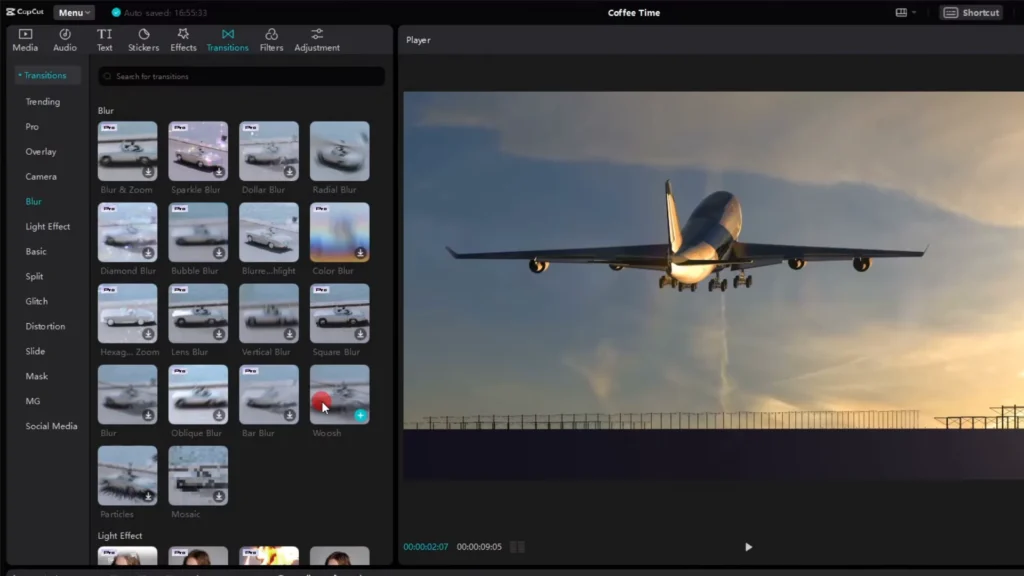
Within the “Transitions” library, you will find various categories of transitions, such as “Basic,” “Blur,” “Slide,” and “Glitch”. You can browse through these categories to explore the different visual effects.
Many transitions offer a preview when you hover your mouse cursor over their thumbnail, allowing you to see a brief animation of the effect. Additionally, CapCut typically includes a search bar within the “Transitions” tab, enabling you to quickly find specific transitions by name if you already know what you are looking for.
Step 4: Add the Transition to the Timeline
To apply a transition between two clips on your timeline, the most common method is to drag and drop the selected transition from the library. Click on the transition thumbnail, hold the left mouse button, and drag the transition to the point where two video clips or images meet on the timeline.
A vertical line will often appear between the clips, indicating the precise placement of the transition. Release the mouse button to drop the transition into place.
Alternatively, after selecting a transition in the library, some versions of CapCut allow you to click a “+” icon, which will add the transition to the timeline at the current position of your playhead (the vertical line indicating your current position in the video).
Step 5: Adjust Duration (Initial)
After adding a transition to the timeline, you will notice it as a rectangular block overlapping the end of the first clip and the beginning of the second. The initial duration of the transition can often be adjusted immediately after placement or later in the editing process.
This flexibility allows for fine-tuning the timing of the visual bridge between your media elements.
The desktop version of CapCut offers users more than one way to insert transitions, providing a degree of convenience based on individual editing preferences.
The drag-and-drop functionality is intuitive for those who prefer a visual approach, while the plus icon method might be quicker for users focused on the playhead position.
It’s also important to note that some transitions within the desktop library may require an initial download before they can be used for the first time. This might introduce a slight delay, but it ensures that a wide variety of effects are available to the user.
Here is a visual guide of the above process:
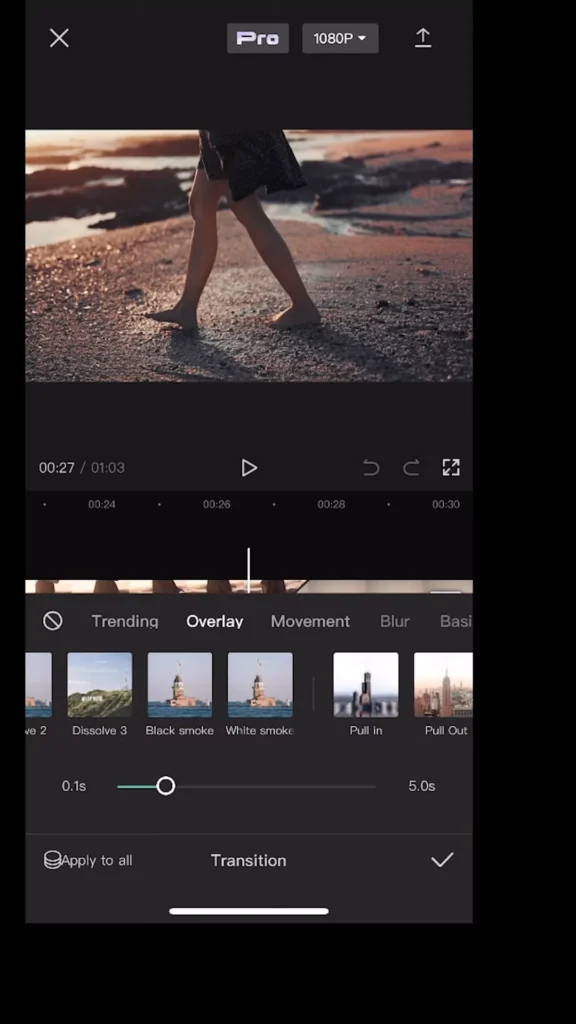
On Mobile
The mobile version of CapCut provides a streamlined approach to adding transitions, optimized for touch-based interaction.
Step 1: Open Project and Select Clips
Begin by opening your CapCut app and either starting a new project or selecting an existing draft. Next, upload or select the video clips or images that you wish to add transitions between. To add a transition, you will need at least two media elements in your project.
Step 2: Locate the Transition Icon
Once your clips are arranged on the timeline, look for a vertical ” | ” icon that appears between each pair of adjacent clips. This icon serves as the gateway to the transitions menu on the mobile app.
Step 3: Tap the Transition Icon
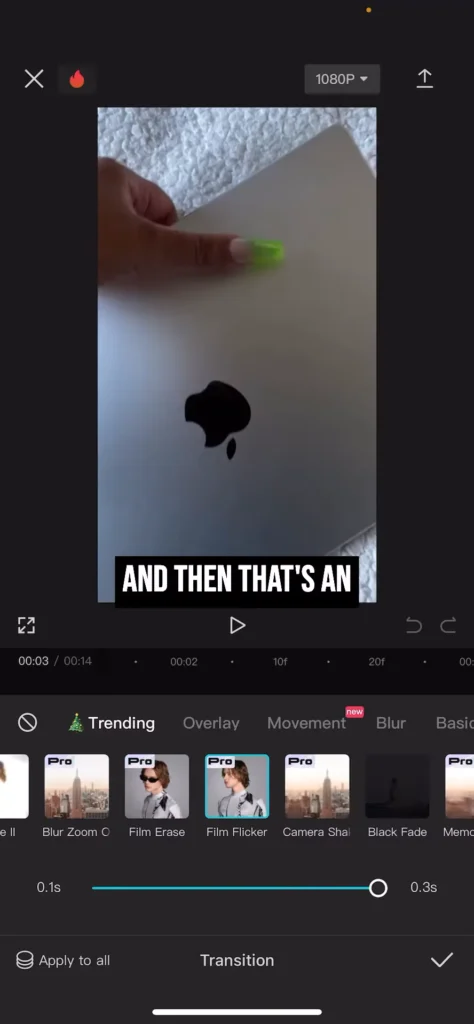
To access the available transitions, simply tap on the ” | ” icon located between the two clips where you want to insert a transition. This action will open the transitions menu, displaying a range of visual effects.
Step 4: Choose a Transition
Within the transitions menu, you can scroll through the various options. Tap on the desired transition to select it. Many transitions will play a brief preview when selected, allowing you to see how they will look between your clips.
Step 5: Adjust Duration (Initial)
After selecting a transition, a slider will typically appear at the bottom of the screen. You can drag this slider left or right to adjust the duration of the transition, making it faster or slower as needed.
Step 6: Apply
Once you are satisfied with the selected transition and its duration, tap on the checkmark or a similar confirmation button, usually located in the bottom right corner of the screen. This action will apply the transition between your chosen clips.
The mobile version of CapCut employs a distinct interface element – the “|” icon – to directly access transitions between clips. This design choice offers a more immediate and focused approach compared to navigating through tabs on the desktop. It’s worth noting that users of the free mobile version might encounter certain transitions that, upon application, lead to a brief promotional clip for CapCut. This is a common practice in free software to encourage users to consider upgrading to a paid subscription for an ad-free experience and potentially access to more advanced features.
Here are couple of guide videos for you to walkthrough:
What are the different types of transitions on CapCut?
CapCut boasts a wide array of transition effects, categorized to help users find the perfect visual link for their video segments. Understanding the different types and their common applications can significantly enhance the storytelling and overall impact of your video.
Basic Transitions: These are fundamental and widely used transitions.
Fade transitions, including fade in, fade out, fade to black, and fade to white, smoothly transition by gradually increasing or decreasing the opacity of a clip. They are often used to indicate the beginning or end of a scene or to create a sense of time passing or emotional shift.
A Dissolve transition blends one shot into another, creating a gradual overlap. This technique is useful for suggesting a passage of time or a change in location, and it can also evoke a dreamlike or reflective mood.
Wipe transitions reveal the next clip by moving a line or shape across the screen, effectively “wiping away” the previous clip. These can be directional, such as wipe left, right, up, or down, and are often used to signify a more distinct change in scene or topic.
Slide transitions move one clip out of the frame while simultaneously sliding the next clip into view from a specific direction. These dynamic transitions can add energy and visual interest to your video.
Blur Transitions: These effects introduce a defocusing element during the transition.
A simple Blur transition gradually blurs out one clip before blurring in the next, creating a smooth and often elegant transition.
Particle Blur might involve more dynamic and textured blurring effects. Blur transitions are becoming increasingly popular due to the sense of smoothness and sophistication they can add to videos.
Slide Transitions: Beyond the basic slide mentioned earlier, this category can include more stylized movements like a Push transition, where one clip literally pushes the other off-screen, or a Zoom Slide, which combines a sliding motion with a zoom effect. These are effective for maintaining visual flow and adding a touch of dynamism.
Glitch Transitions: These modern and edgy transitions introduce digital distortion effects, mimicking technical malfunctions or signal interference. They often involve color shifts, sudden jumps, or analog-style artifacts, making them ideal for videos with a contemporary or tech-focused theme, or for creating a sense of energy and excitement.
3D Transitions: These transitions utilize three-dimensional movements to connect scenes. The Cube transition flips the current clip as if it were a face of a rotating cube to reveal the next clip. A Flip transition might involve a page-turning or card-flipping effect. These visually striking transitions can add depth and creativity to your storytelling.
Camera Transitions: This category often includes effects that mimic camera movements, such as a Pan, where the view smoothly moves across the scene, or a Zoom, which can either zoom into the current clip before transitioning or zoom out from one clip to reveal the next. These transitions can create a sense of continuity or emphasize specific details.
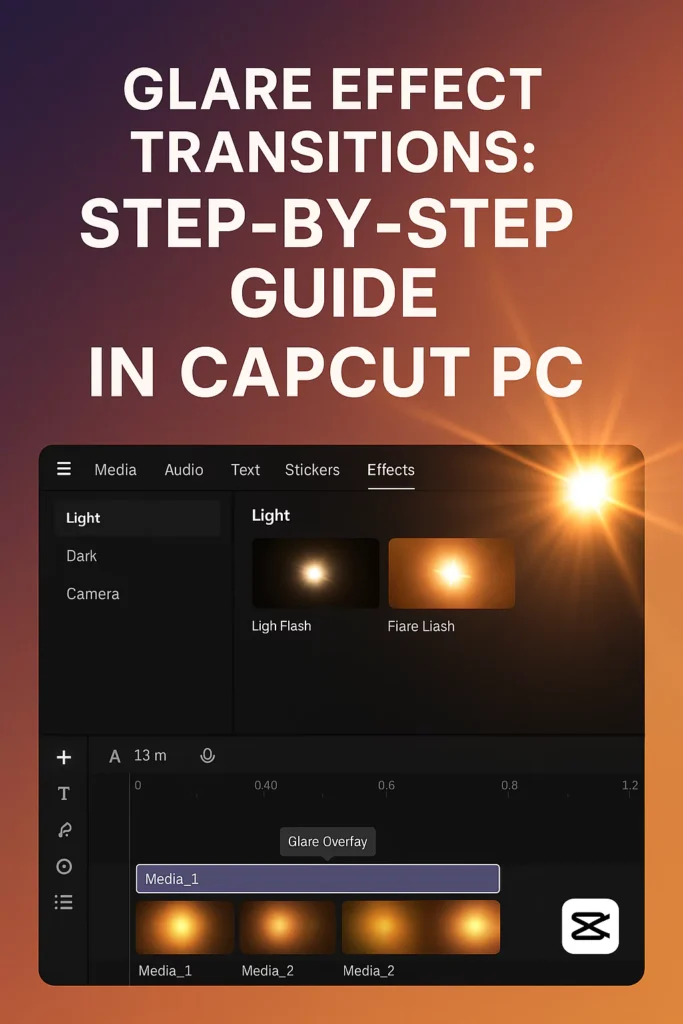
Light Effects Transitions: These transitions incorporate elements of light to create visual interest. Glare transitions are trendy and often involve a bright flash or streak of light that passes between clips.
Light Leaks add warm, often vintage-style light effects that blend scenes together.
Film Burns mimic the appearance of damaged or exposed film, creating nostalgic light flashes. These transitions can add a unique aesthetic and mood to your video.
Social Media Specific Transitions: Recognizing the trends on platforms like TikTok, CapCut often features transitions that are particularly popular among content creators on these platforms. Examples include the Glare and Pull In/Out transitions, which are favored for their visual appeal and ease of use in short-form video content.
Mask Transitions: These creative transitions use shapes or layers (masks) to reveal or hide parts of the clips during the transition, creating intricate and engaging visual effects. They allow for a high degree of customization and can be used to achieve unique and artistic scene transitions.
CapCut’s categorization of transitions provides a helpful framework for users to explore the available options. However, truly understanding the subtle nuances and best applications of each transition type often comes down to experimentation and observing how different effects impact the overall feel of the video.
Certain transitions, like Glare and Pull In/Out, have gained significant traction on social media platforms, suggesting that users aiming for engagement on these sites might find them particularly effective.
| Transition Type | Description | Suggested Use Cases |
|---|---|---|
| Fade In/Out | Gradually increases/decreases clip opacity | Beginning/end of video, scene changes, emotional moments |
| Dissolve | Blends one shot into another | Passage of time, change of location, dreamlike sequences |
| Wipe | One clip replaces another with a moving line or shape | Distinct scene or topic changes, before/after comparisons |
| Slide | One clip moves out of frame as another slides in | Energetic scene changes, presenting related information |
| Blur | Gradually defocuses and refocuses between clips | Smooth, elegant transitions |
| Glitch | Introduces digital distortion effects | Modern, tech-themed videos, high-energy sequences |
| 3D Cube/Flip | Transitions using three-dimensional rotations | Creative storytelling, adding visual depth |
| Glare | Bright flash or streak of light between clips | Trendy social media content |
| Light Leak/Film Burn | Adds vintage light effects | Retro or nostalgic videos, travel montages |
| Mask | Uses shapes or layers to reveal the next scene | Intricate, artistic transitions |
Customizing Transition Duration and Settings
Once a transition is added to your timeline, CapCut provides options to customize its duration and, in some cases, other settings to better align with your video’s tempo and desired effect.
Adjusting Duration
The duration of a transition determines how long the visual effect lasts between the two clips. Adjusting this can significantly impact the perceived pacing and smoothness of the transition.
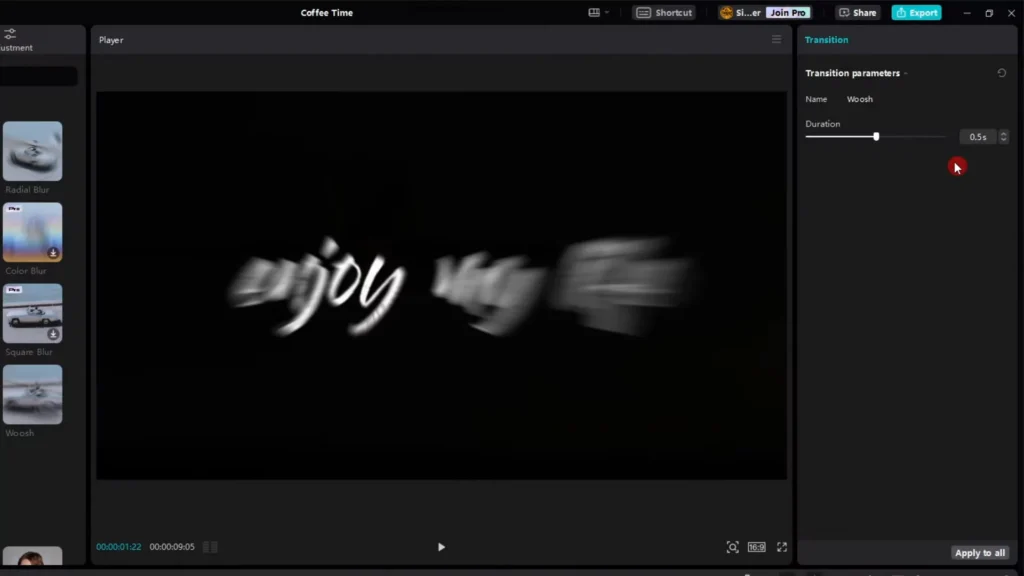
Desktop: On the desktop version, you can easily adjust the duration of a transition by clicking on either edge of the transition block on the timeline and dragging it left or right to shorten or lengthen it.
When you select a transition on the timeline, the top right panel of the CapCut interface often displays a “Duration” slider or an input field where you can numerically set the desired duration.
It’s important to be aware that standard CapCut transitions may have a maximum duration, sometimes around 5 seconds, or may be limited to half the length of the shorter adjacent clip.
Mobile: On the mobile app, after you select a transition, a duration slider typically appears at the bottom of the screen. Dragging this slider allows you to precisely control how long the transition effect plays out between your clips.
The ability to fine-tune the duration of a transition is crucial for matching its pace to the overall rhythm of your video and the specific mood you are trying to create.
A faster-paced video with quick cuts might benefit from shorter transitions, while a more cinematic or emotional piece could utilize longer, more gradual transitions.
The constraint that a transition’s length cannot exceed half the duration of the shorter of the two adjacent clips means that editors need to ensure their individual clips have sufficient length to accommodate the desired transition effect.

Customizing Other Settings
- Beyond duration, some transitions in CapCut offer additional customizable settings. These can include the direction of a wipe or slide, the intensity of a blur or glitch effect, or the specific parameters of a 3D animation.
- When you select a transition on the timeline, the right-hand panel might display these additional properties, allowing for further refinement of the visual effect.
- For instance, a wipe transition might offer options to choose the direction from which the wipe originates (left, right, up, down), while a blur transition could have an intensity slider to control the amount of blur applied.
- Exploring these settings for different transition types can unlock more creative possibilities and allow for a more tailored look.
Applying Transitions Between Video Clips and Images
- CapCut makes it generally seamless to apply transitions not only between video clips but also between images or a combination of video and images. The fundamental process remains the same as described earlier for both desktop and mobile platforms.
- However, there are a few potential differences and considerations to keep in mind when working with images. The duration of an image displayed on the timeline might need adjustment to effectively accommodate a transition.
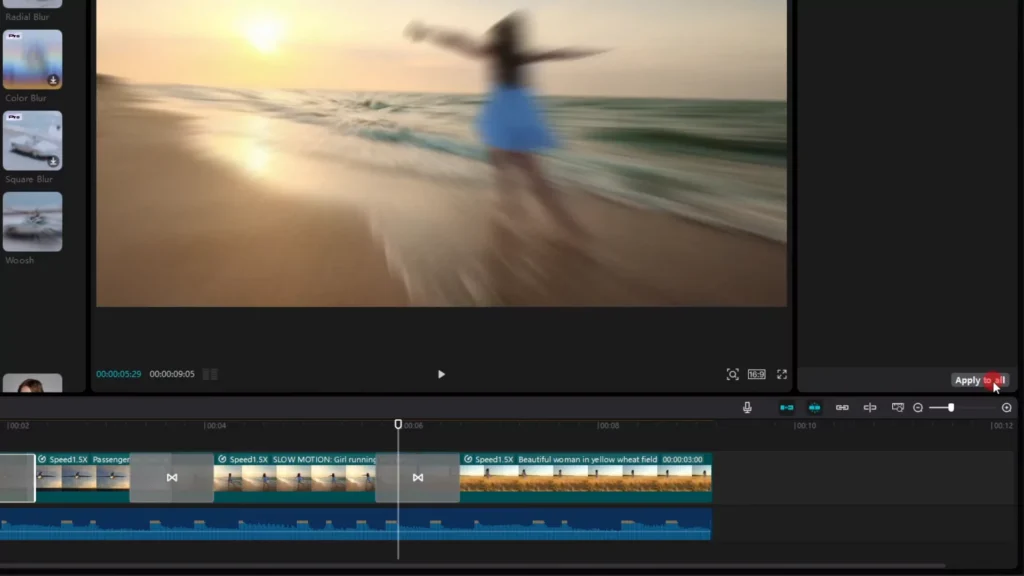
- If an image is set to display for a very short time, a longer transition might not have enough time to fully play out. For users creating slideshows consisting primarily of images, CapCut often provides a convenient “Apply to all” feature when selecting a transition.
- This allows you to quickly add the same transition between every consecutive image in your project, significantly speeding up the editing workflow for this type of content. This feature is typically available on both desktop and mobile versions.
Best Practices for Using Transitions Effectively
While CapCut offers a vast selection of transitions and customization options, employing them effectively requires a thoughtful approach. Here are some best practices to consider:
- Choose Transitions Purposefully: Select transitions that genuinely enhance your video content, matching its overall tone, style, and pacing. Avoid the temptation to use flashy or overly complex transitions simply for the sake of it. The goal is to create a smooth and natural flow that supports your narrative.
- Maintain Consistency: Using a limited number of transition styles throughout your video can contribute to a more cohesive and professional visual experience. While variety can be interesting, too many different types of transitions can make your video feel disjointed and amateurish.
- Consider the Mood: Different transitions can evoke different emotions or signal shifts in the storyline. For example, a fade might be suitable for a more reflective or emotional moment, while a wipe could indicate a change in location or subject. Choose transitions that align with the intended mood of your video segments.
- Avoid Overuse: It’s often said that less is more when it comes to video transitions. Overusing transitions can be distracting and can detract from the content itself. Sometimes, a simple cut (no transition) is the most effective way to move from one scene to the next.
- Preview Regularly: Always preview your video with the added transitions to ensure they look and feel right within the context of your entire project. A transition that seems appealing in isolation might not work as well when viewed as part of the overall flow.
- Use Sound Effects: Adding relevant sound effects can significantly enhance the impact of certain transitions. For instance, a “whoosh” sound effect paired with a slide or wipe transition can create a more dynamic and engaging effect.
Mastering the effective use of transitions is a skill that develops with practice and a solid understanding of video editing principles. Beginners are often encouraged to start with simpler transition types and gradually experiment with more complex options as they gain experience and develop their creative eye.
Troubleshooting Common Issues with Transitions
While CapCut generally makes adding transitions easy, users may occasionally encounter issues. Here are some common problems and potential solutions:
Transitions Not Appearing or Working:
- Insufficient Clips: Ensure that you have at least two clips on the main video track of your timeline where you are trying to add the transition. Transitions bridge the gap between two separate media elements.
- Gaps Between Clips: Transitions require continuous clips. If there are any gaps or empty spaces between the clips on your timeline, the transition might not appear or function correctly. Make sure the clips are butted directly against each other.
- Incorrect Playhead Position: When using the “+” icon method on desktop or if the software relies on playhead position for insertion, ensure that your playhead is positioned precisely between the two clips where you intend to add the transition.
- Subscription Requirements: Some of the more advanced or “Pro” tagged transitions might require a CapCut Pro subscription to use. If you are using the free version, try using basic transitions.
- Software Bugs: Occasionally, software can have temporary glitches. Restarting the CapCut application or even trying a different internet connection (or in some reported cases, using a VPN) might resolve the issue.
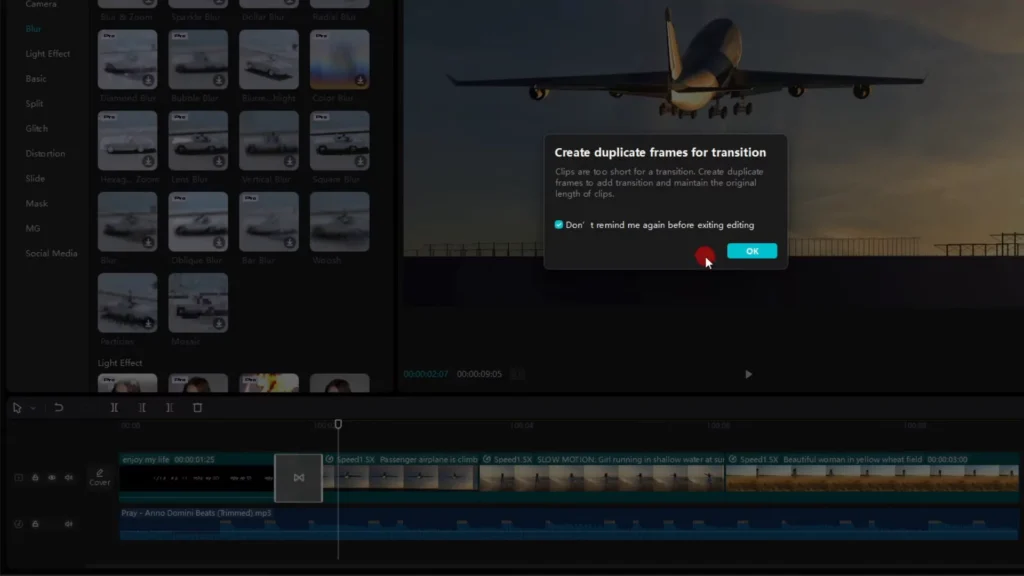
- Insufficient Clip Handles: For a transition to work smoothly, there need to be enough extra frames (handles) at the end of the first clip and the beginning of the second clip. If your clips are trimmed too tightly, there might not be enough media for the transition effect to fully play out.
Glitches or Artifacts During Transitions:
- Export Settings: Try exporting your video with different settings, such as resolution or frame rate. Sometimes, certain export configurations can resolve rendering issues with transitions.
- Software Version: Ensure that your CapCut application is up to date. Developers often release updates that fix bugs and improve performance.
- Transition Type Specific: The issue might be specific to a particular transition effect. Try using a different type of transition to see if the problem persists.
“Video too Short for Transition” Error:
- Shorten Transition Duration: The simplest solution is often to reduce the duration of the transition you are trying to apply.
- Adjust Clip Speed: You can try using CapCut’s speed adjustment features to slightly lengthen the video clips involved in the transition.
- Use Longer Clips: If possible, consider using longer versions of your video clips or images to provide more frames for the transition to work with.
Occasional issues with transitions might stem from software-related bugs or limitations related to the length of the video clips being used. This highlights the importance of keeping the application updated and ensuring that your source media has sufficient duration for the desired transition effects.
| Problem | Possible Causes | Solutions |
| Transition not appearing | Insufficient clips, Gaps between clips, Incorrect playhead position, Subscription required, Software bug | Ensure at least two clips, Remove gaps, Position playhead correctly, Use free transitions or subscribe, Restart CapCut/try VPN |
| Glitches during transition | Export settings, Outdated software, Transition type specific | Try different export settings, Update CapCut, Use a different transition |
| “Video too short” error | Transition duration too long, Short video clips | Shorten transition duration, Lengthen video clips, Use longer clips |
Conclusion
Transitions are powerful tools within CapCut that can significantly elevate the quality and engagement of your video projects.
By understanding the step-by-step process of adding and customizing these visual connectors on both desktop and mobile, exploring the diverse range of available transition types, and adhering to best practices for their effective use, video editors can master the art of seamless scene changes. While occasional technical issues might arise, a systematic approach to troubleshooting can help resolve most common problems.
Ultimately, the thoughtful and purposeful application of transitions in CapCut contributes to a more professional, polished, and captivating viewing experience, allowing creators to effectively convey their stories and engage their audiences.