So many people make thousands on YouTube with stories. But many others struggle. The truth? It’s not just the story. It’s how you craft the video. Editing is like a rocket for your YouTube channel.
What if you could make amazing videos with a simple tool? Many people overlook it because it’s so easy. But understanding editing basics changes everything. Let’s make a documentary-style video using CapCut.
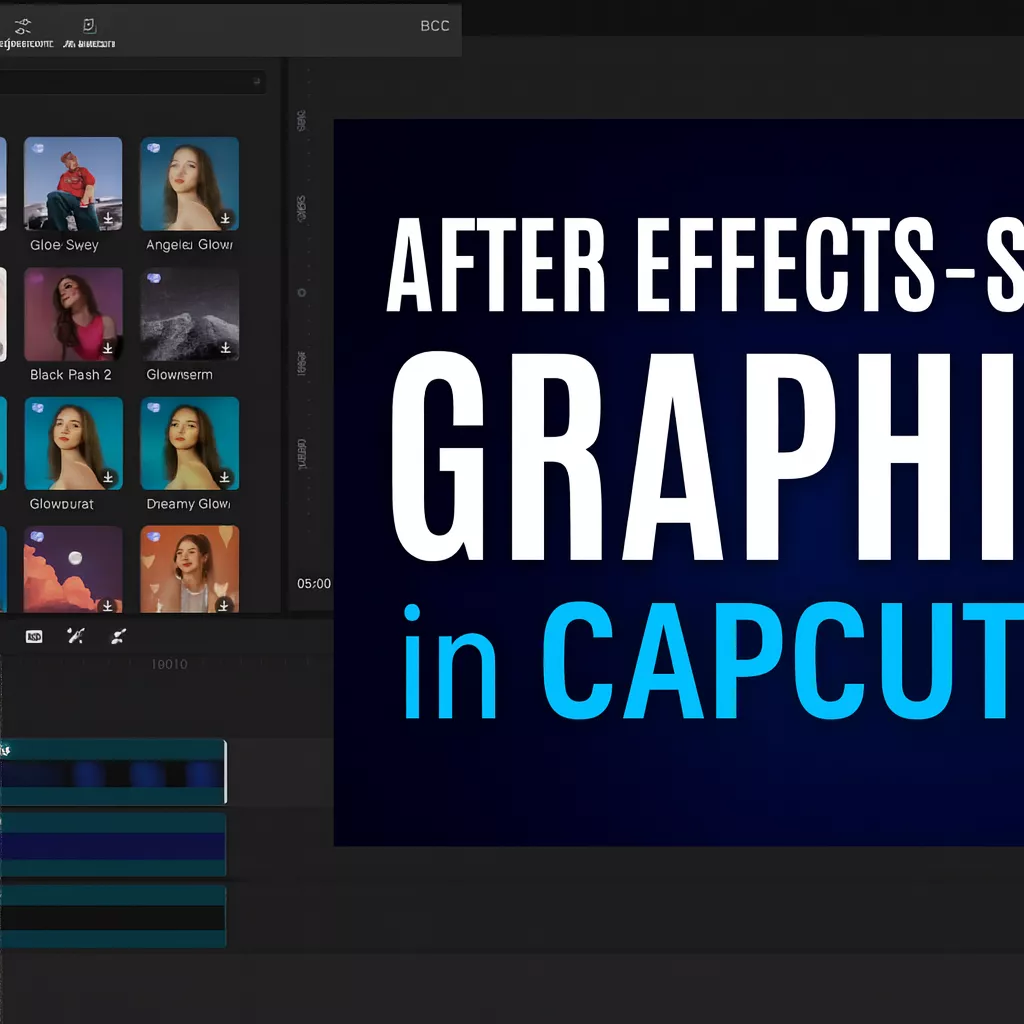
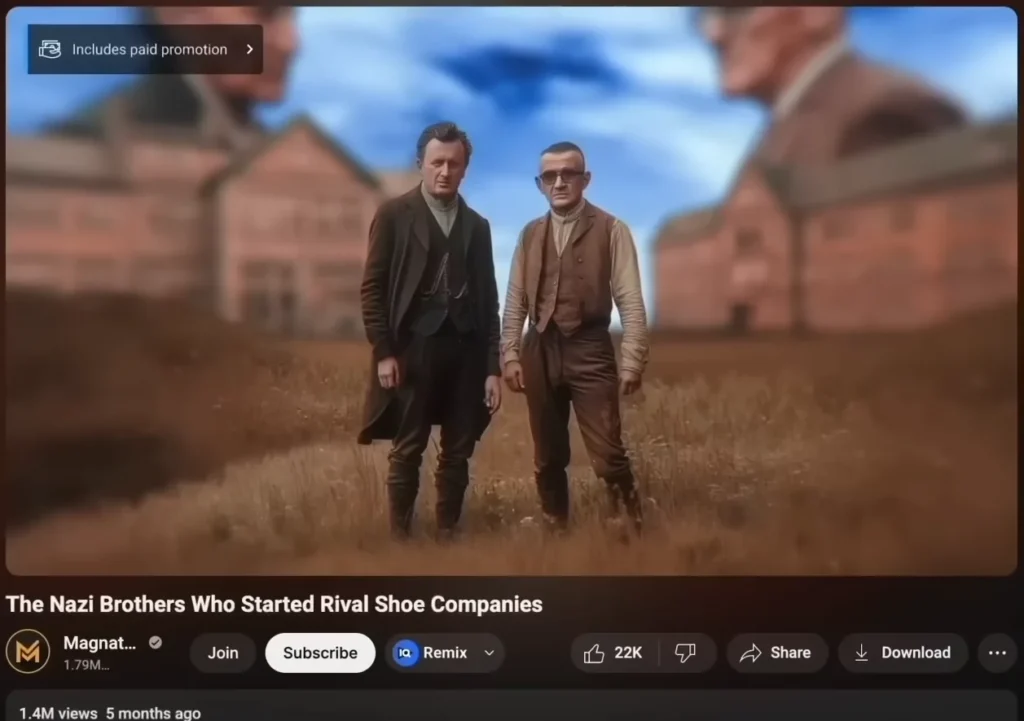
Look at channels like Magnates Media. Each creator has their own style. It might seem like they use fancy tools like After Effects or Blender. But check their older videos. Many with millions of views were made with simpler apps. Think of your favorite artist.
You know their music right away. It’s their rhythm, their chords. That’s their signature. Copying it just doesn’t feel right. Finding your own rhythm is hard for creators. It’s like developing a unique fingerprint.
It takes time and effort. But we will show you techniques to help. They’ll help you visualize your style. You can combine it with your ideas. Nothing too complex, just simple and effective.
Unlocking your unique YouTube Style: Beyond the software
The Creator’s Signature: Finding your Rhythm
Established creators have a distinct style. It’s how you recognize their work. Even older videos, made with simpler tools, can rack up millions of views.
This proves you don’t need the most expensive software. Your style is like a signature. It’s your unique rhythm, like a song you instantly know. It’s a combination of elements that makes your work yours. Trying to copy someone else’s style won’t feel authentic.
Developing an authentic fingerprint
Developing a unique style is a challenge. It takes time to make it truly your own. Think of it like creating a fingerprint.
Everyone’s is different. But there are elements and techniques to help. These will help you visualize your style. You can combine your ideas with them. This helps cultivate your individual aesthetic.
Essential tools & assets for story-driven Edits
Storytelling isn’t just about the narrative—it’s also about the visual language. To help create a cinematic experience in CapCut, the right tools and assets can make a huge difference.
Must-Have Elements:
- Fonts: Choose bold or elegant fonts for title cards. Try Bebas Neue for a documentary feel or Playfair Display for emotional stories.
- Overlays: Add realism or drama with light leaks, dust particles, bokeh, film grain, or fog effects.
- Sound Effects: Use ambient sound, camera clicks, whooshes, fire crackles, or city background noise to build your environment.
- LUTs/Color Presets: Use cinematic LUTs with desaturated tones, warm golds, or teal/orange to unify your video’s aesthetic.
Where to find quality assets:
- Mixkit: Free video overlays, sound effects, and music.
- Pexels: High-quality free B-rolls.
- MotionElements: Paid, professional overlays and visual effects.
Storyboarding & Scripting Tips for YouTube Storytelling
A strong video starts before you hit “record” or open your editor. Storyboarding and scripting help you structure your ideas clearly.
Why Structure matters:
Without a plan, your edit can feel disjointed—even if the story is strong. A storyboard or script keeps your pacing tight and emotionally resonant.
Quick structure framework (perfect for YouTube):
- Hook (0–5s) – Ask a big question, show a bold visual, or use dramatic text.
- Conflict / Curiosity (5–30s) – What is at stake? Why should we keep watching?
- Climax (1–3 mins) – The main point, transformation, or reveal.
- Resolution (Last 30s) – Tie everything together emotionally.
- Call to Action (Optional) – Invite the viewer to subscribe, comment, or visit a link.
Scripting Tip:
Write the voiceover script first and build your visuals around it. This gives you a strong backbone to guide your editing rhythm.
The Power of Light: Elevating Visual Storytelling in CapCut
Dynamic Movement with Keyframing
You can make static images come alive. CapCut’s keyframing is great for this.
Imagine a dramatic scene. You upload a still image. Use keyframing to add a zoom or pan effect.
This makes it more dynamic and interesting. Simple keyframing adds visual appeal.

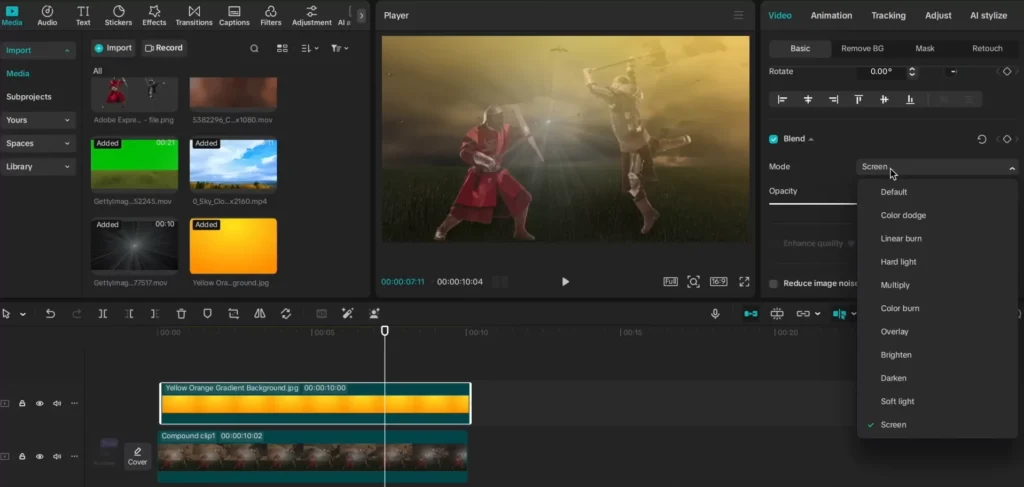
Enhancing Scenes with Light Overlays
Light overlays can boost your storytelling.
They make scenes feel more alive. Use blend modes like “screen” or “overlay.”
This adds a subtle glimmer. It’s great for dramatic or atmospheric moments. Think of adding a soft glow.
It truly elevates the mood.
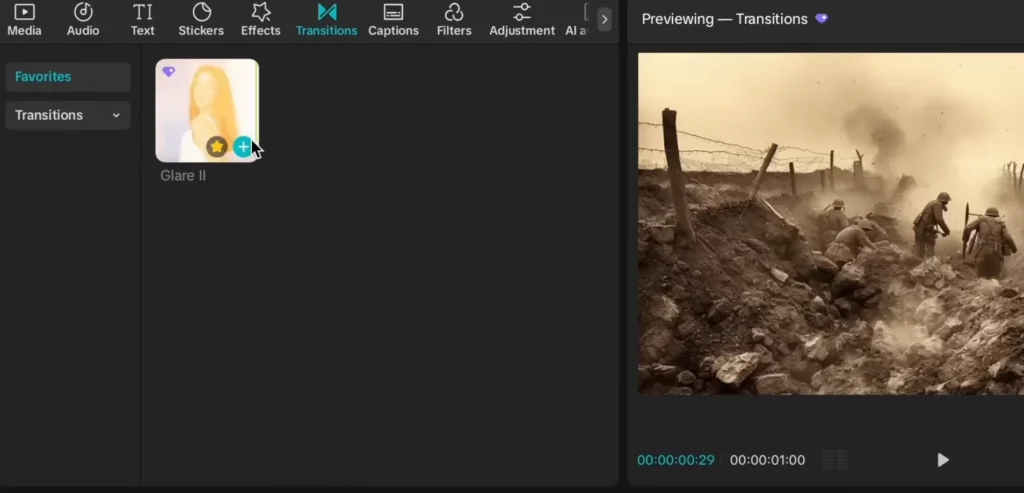
Creative Transitions and Effects
Light leaks can create smooth transitions.
Time your cuts to a full-screen flash.
Creators like Isaac use this often.
Want an element to shine? Use light rays.
This can make a sword appear to gleam. Experimenting with light is key.
Faking Light Sources for Cinematic Appeal
You can fake a light source easily.
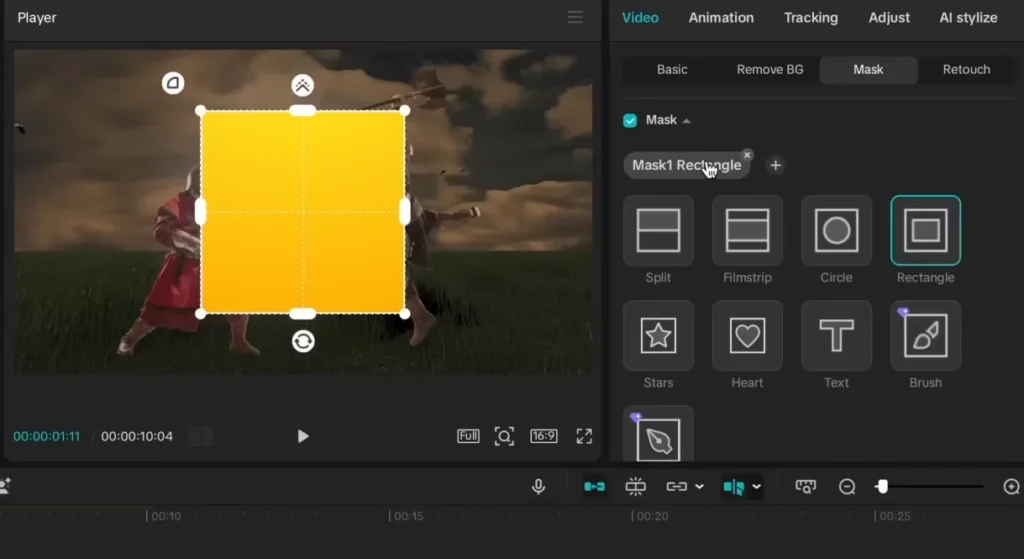
Layer a colored background over your scene. Mask it to a corner.
Feather the edges to make it soft. Adjust the blend mode. This helps it blend naturally.
These tricks make your video cinematic.
Voiceover & music integration techniques
Narration and sound design add depth to your visual storytelling. With CapCut, you can layer voiceovers and music seamlessly.
Voiceover Tips:
- Record in a quiet space using a lapel mic or USB mic.
- Use CapCut’s noise reduction feature under the audio panel to clean up background hiss.
- Adjust the gain to maintain a consistent volume level throughout.
Background Music Integration:
- Select music that matches your scene’s mood—dramatic, emotional, suspenseful, or inspirational.
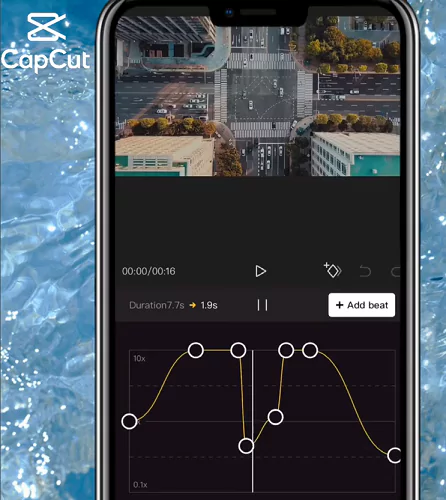
- Use CapCut’s beat detection to time cuts or transitions.
- Apply ducking manually by lowering the music volume under voiceovers using keyframes.
Pro tip: Use royalty-free music from sources like Epidemic Sound, YouTube Audio Library, or Artlist.
The Three-Layer Rule: Building Depth and Dynamism
Foundation of Depth: Ground, Sky, and Subject
The three-layer rule creates depth. It makes your scenes richer.
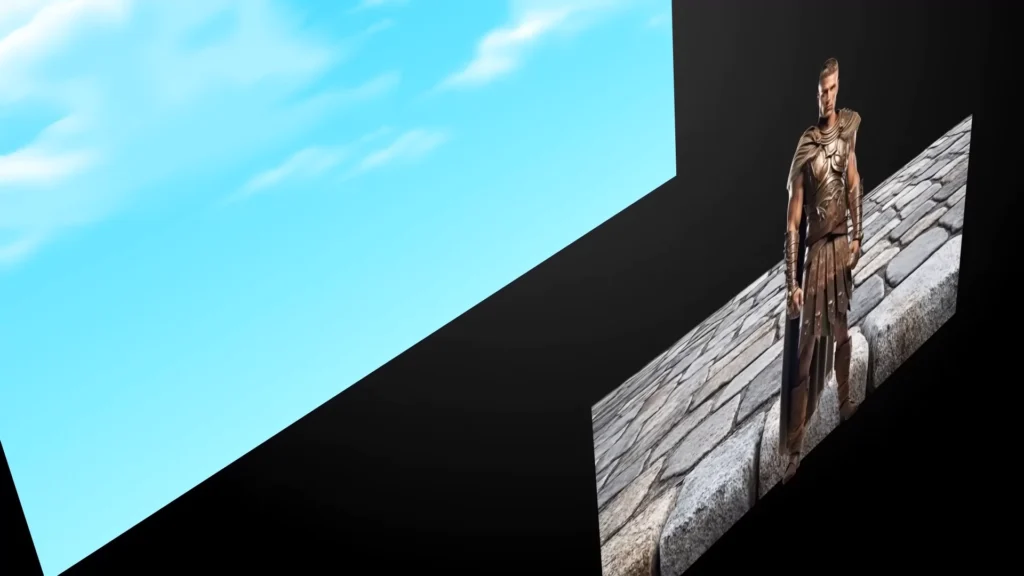
You need a ground, a sky, and a main element. This could be a person.
Adding more layers builds more depth. It helps tell your story better.
Enriching Scenes with Overlays and Color Grading
Replace static skies with video clips. Add overlays like fire or sparks.
Castles can add a fantasy feel. Color grading is the final touch.
It makes your scene look professional. These steps create amazing visuals.
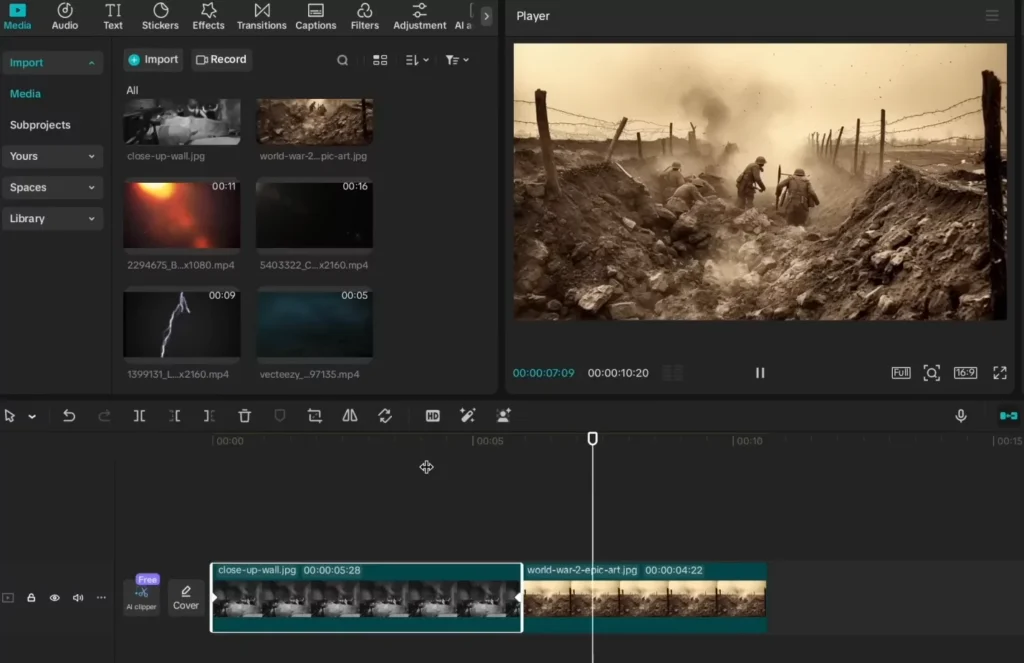
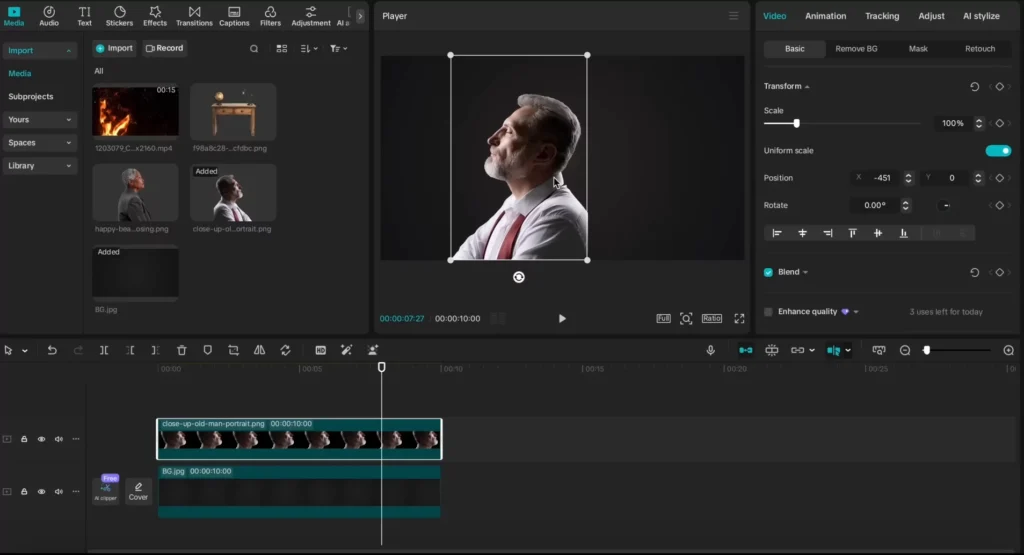
Advanced Application: A Detailed Workflow Example
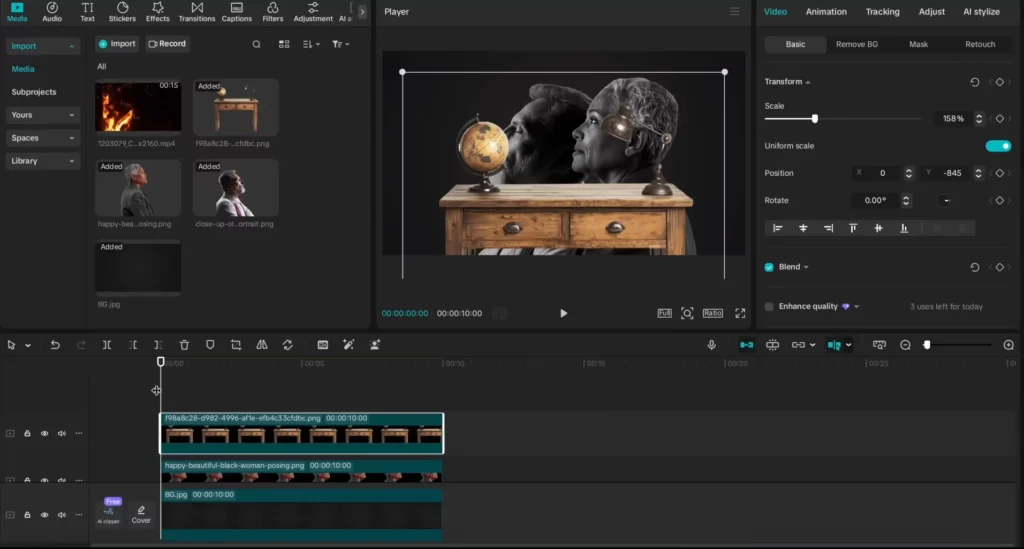
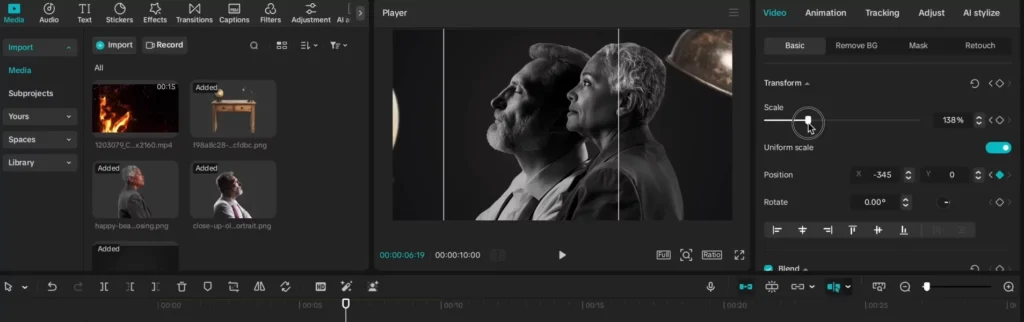
Let’s build a scene. Start with a background layer. Add two portraits as middle layers. Reverse the layer order for your workflow. Scale and position them as you like.

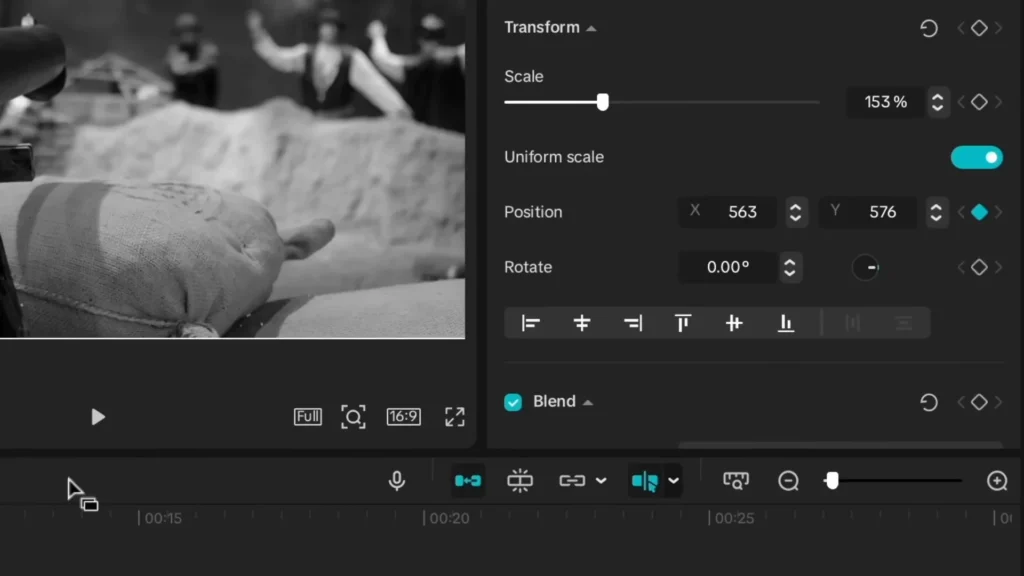
Now, adjust the portraits. Make one black and white. Lower its saturation. Boost the contrast. Keep the other one brighter. Adjust its whites and shadows. Add a desk element. Scale it up to cover the bottom.
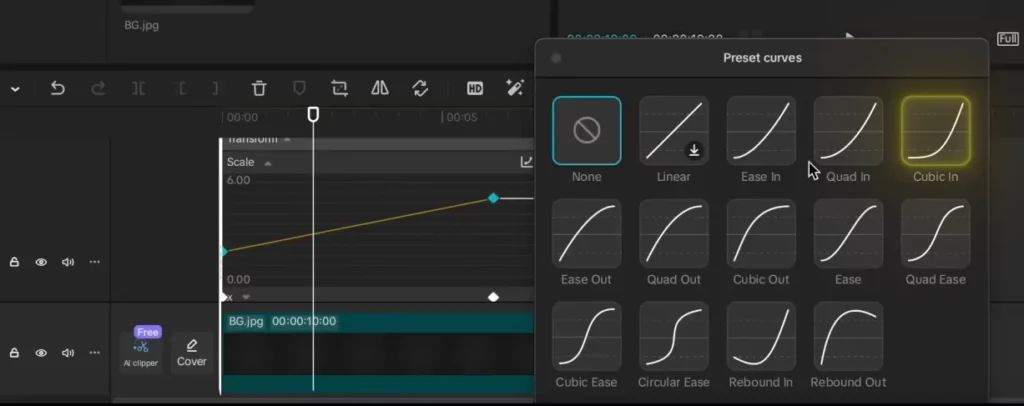
Animate the desk. Use keyframes for scale and position.
Make it look like it’s growing. Use “cubic in” curves for smooth motion.
Now animate the woman. Create a manual fade-in. Set her opacity to zero. Bring it back to 100% later.

Add position keyframes. Move her down, then back up. Use “quad in” curves for her movement.
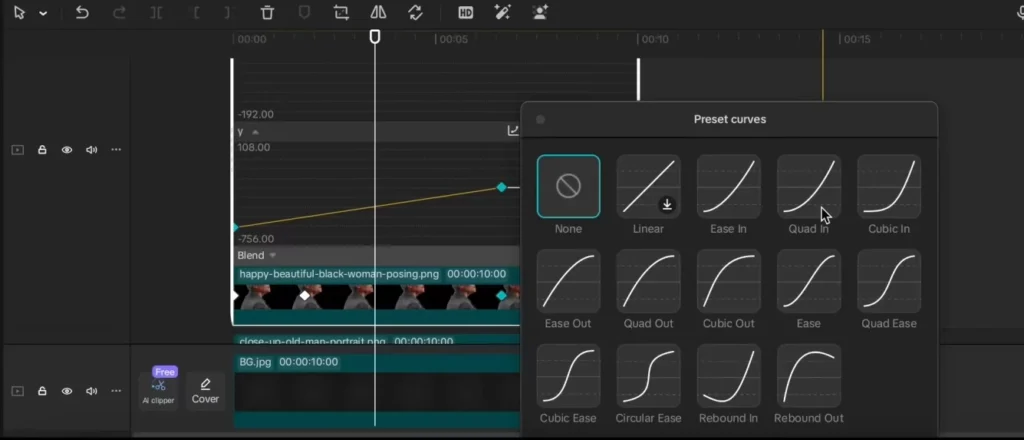
Add markers to sync the man. Apply the same fade-in to him. Animate his position and scale.
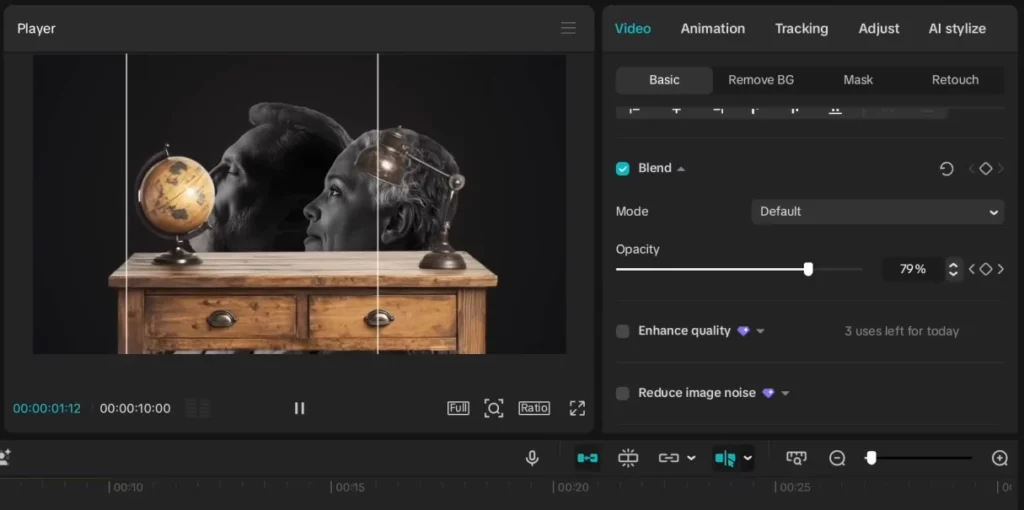
Use “quad in” curves here too. Add a fire overlay. Set its blend mode to “screen.”
Make all layers a compound clip. Animate this clip. Add scale and position keyframes.
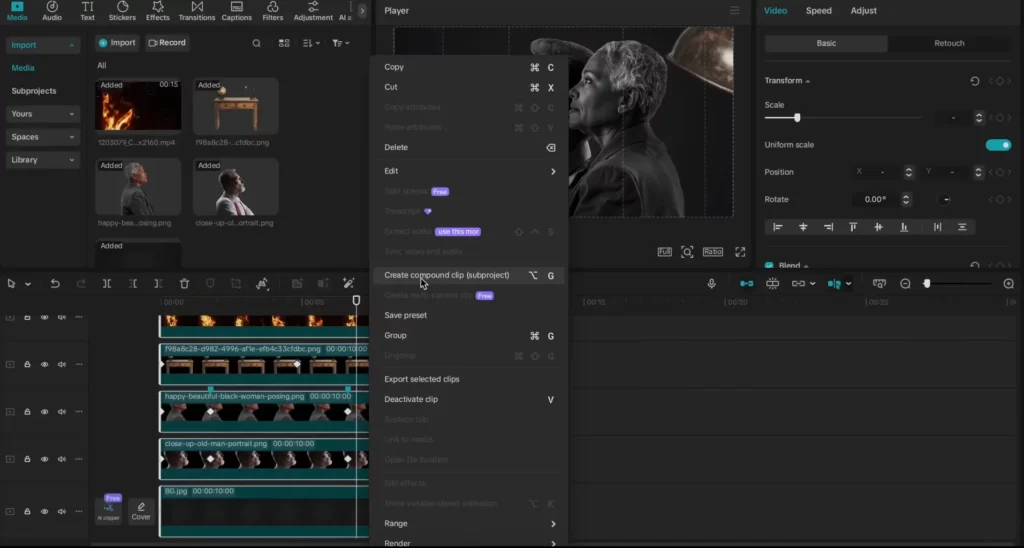
Zoom in on the scene. Center the portraits. Add an adjustment layer.
This is for color grading. Adjust the color wheel. Give the scene a warm yellow tone.
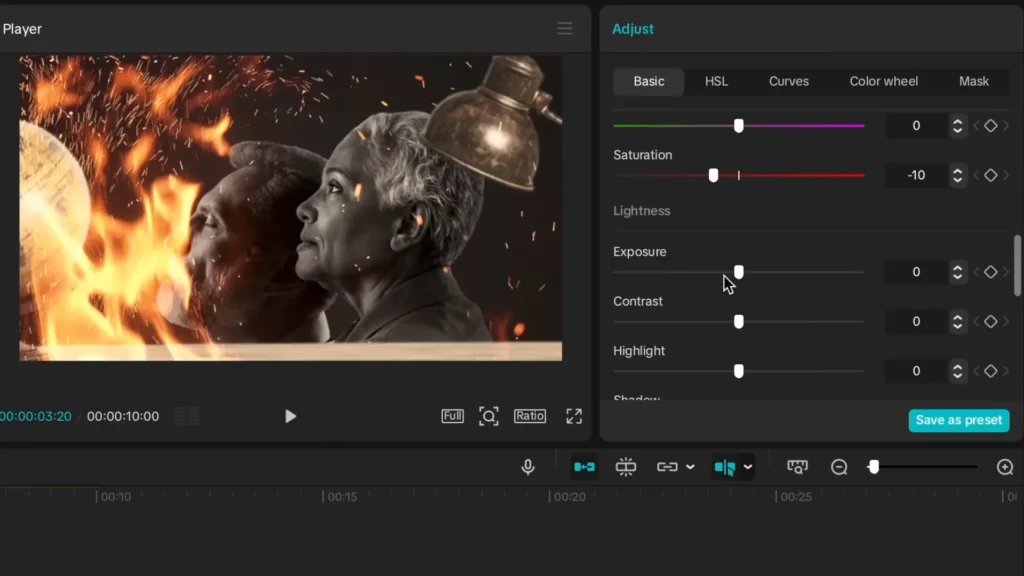
Tweak tint, shadows, and midtones. Play with saturation.
Add a little vignette. Increase clarity and sharpness. Your final scene looks incredible.
Best CapCut Presets for Storytelling
Presets help you edit faster while still maintaining a professional look. Here are some that work brilliantly for narrative-style videos:
Recommended Presets:
- Zoom + Blur Presets: Great for emphasizing emotion or reaction shots.
- Light Leak Transitions: Perfect for flashbacks or dreamy transitions.
- Cinematic Color Presets: Apply a warm tone for intimate scenes or a blue filter for mystery.
- Old Film or VHS Presets: Use these for nostalgic or historic storytelling themes.
How to Apply:
In CapCut PC:
- Go to Effects > Video Effects > Basic/Retro/Light.
- Stack multiple effects for depth.
- Use adjustment layers to apply color grading across multiple clips at once.
Before & After: Storytelling Edits in Action
Let’s break down how a basic scene becomes cinematic using CapCut:
| Feature | Before | After |
|---|---|---|
| Still Portrait | Static, lifeless | Keyframed with slow zoom and fade-in |
| Flat Lighting | Normal photo | Light overlays and fake directional light added |
| No Background Depth | One layer only | Three layers with sky, subject, and foreground desk |
| Raw Color | Dull | Color graded for warm, golden tones |
Example Breakdown:
- Keyframing: Subtle zoom-in on the character over 2 seconds.
- Overlay: Fire or fog video placed in front using blend mode “Screen”.
- Color Grading: Increased contrast, yellow midtones, slight vignette for a moody finish.
These changes elevate the story and evoke emotion, even with minimal footage.
Common mistakes new Creators make and how to fix them
Even with the best tools, many beginners make avoidable mistakes that weaken their storytelling. Here’s how to recognize and fix them:
1. Overusing Effects
Problem: Too many transitions, effects, or overlays make your video feel cluttered.
Fix: Use effects sparingly and purposefully. Stick to 1–2 styles for consistency.
2. Ignoring Audio Design
Problem: Raw audio or unbalanced music ruins the emotional experience.
Fix: Balance music and voice using volume keyframes. Add ambient sounds to bring scenes to life.
3. Copy-Paste Editing Styles
Problem: Imitating other creators’ styles without understanding them results in videos that feel forced.
Fix: Study why their edits work. Then adapt those techniques to your own theme and tone.
4. No Pacing Variation
Problem: A flat timeline with zero variation leads to boring videos.
Fix: Use pacing tools—slow motion, pauses, and speed ramps—to maintain rhythm and interest.
5. Lack of Layering
Problem: Videos look flat and uninteresting.
Fix: Use the three-layer rule: background (sky), subject, foreground (overlay or object). It creates depth.
Creative Prompt Ideas to Practice Storytelling in CapCut
Practicing storytelling is the fastest way to develop your unique editing voice. Here are a few creative prompts you can try, using only basic footage and CapCut:
Prompt 1: “The Last Photo”
Use a single image to tell a full emotional story—add zoom-ins, a slow fade, and a melancholic voiceover.
Prompt 2: “Letters from the Past”
Animate text overlays on vintage paper textures. Add a voiceover as if someone is reading the letter.
Prompt 3: “A Day I’ll Never Forget”
Use B-roll footage (parks, trains, sunsets) and mix it with emotional narration and music.
Prompt 4: “The Forgotten Room”
Create suspense using dust overlays, light flickers, and eerie sound design. End with a dramatic fade to black.
Tip: Record a simple voice memo and build your scene around it. You’ll sharpen your pacing, emotion, and visual timing.
Alternatives to CapCut and why CapCut still wins
CapCut is great, but some creators wonder if they should switch to other tools. Here’s a quick comparison:
| Software | Strengths | Weaknesses |
|---|---|---|
| Final Cut Pro | Powerful, native for Mac, great plugins | Expensive, Mac-only |
| DaVinci Resolve | Industry-grade color grading | Complex interface, steep learning curve |
| VN Video Editor | Mobile-friendly, simple UI | Limited for pro-level storytelling |
| CapCut | Free, accessible, cinematic results possible | Lacks advanced tracking or masking tools |
Why CapCut is Best for Storytelling Beginners:
- Intuitive interface, even for complex effects like keyframing and masking.
- Built-in presets and overlays save time.
- Seamless workflow between mobile and PC.
- It removes technical barriers so you can focus on the story.
Optimizing Your Videos for YouTube Growth
Great storytelling is just the beginning. Let’s ensure your videos are seen by the right audience.
Best CapCut Export Settings:
- Resolution: 1920×1080 (Full HD) or 3840×2160 (4K)
- FPS: 24 for cinematic, 30 for smooth edits
- Bitrate: Choose high for best quality
- Format: MP4 for compatibility
YouTube Optimization Checklist:
- Title: Use emotional + keyword-driven phrases
- Thumbnail: Bold text, faces, contrasting colors
- Chapters: Add timestamps for key sections
- Hashtags: Include 3–5 relevant ones like #Storytime or #Documentary
- Description: Summarize the video + include keywords + asset credits + CTA
Tip:
Reuse your content on Shorts, Instagram Reels, and TikTok with minor edits. CapCut supports aspect ratio switching for quick repurposing.
FAQ – YouTube Storytelling with CapCut
Can I make cinematic videos using just the free version of CapCut?
Yes! Most storytelling techniques—keyframes, overlays, transitions, color grading—are available in the free version of CapCut PC and mobile.
How do I find my unique editing style?
Try different approaches consistently. Watch creators for inspiration but experiment with your rhythm, colors, and pacing. Your voice will evolve over time.
What stories work best with this style?
Human interest stories, biographies, historical narratives, travel logs, personal reflections, and even product storytelling all benefit from cinematic editing.
Can I use CapCut for professional YouTube videos?
Absolutely. Many creators use CapCut to produce high-quality videos with millions of views. It’s not about the tool—it’s about the execution.
What’s the ideal length for storytelling videos?
5–10 minutes is a sweet spot. Long enough to develop a story, short enough to keep viewers engaged. But powerful short-form (1–3 minutes) stories can also go viral.
Conclusion
You can create professional edits. Beginner-friendly apps like CapCut make it possible. Focus on editing basics. Use techniques like adding light and layering. Keyframing adds movement. Creating a unique style takes practice. These methods help you stand out. You can produce high-quality, story-driven content. All the assets used in this video are linked below. Download them and practice recreating the scene. Start making videos that people love to watch.