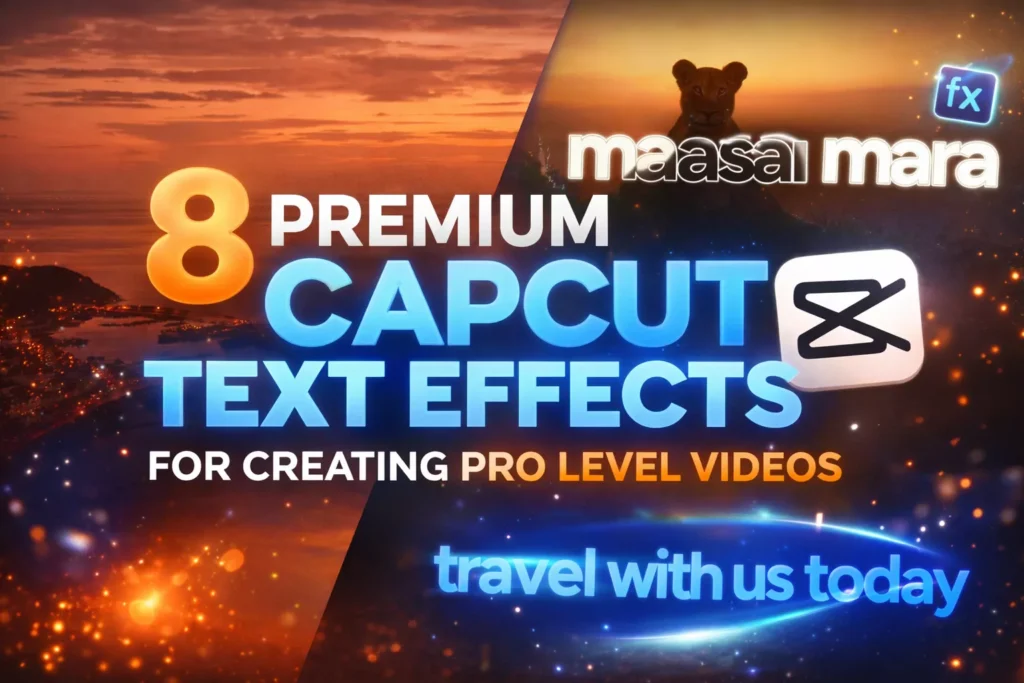
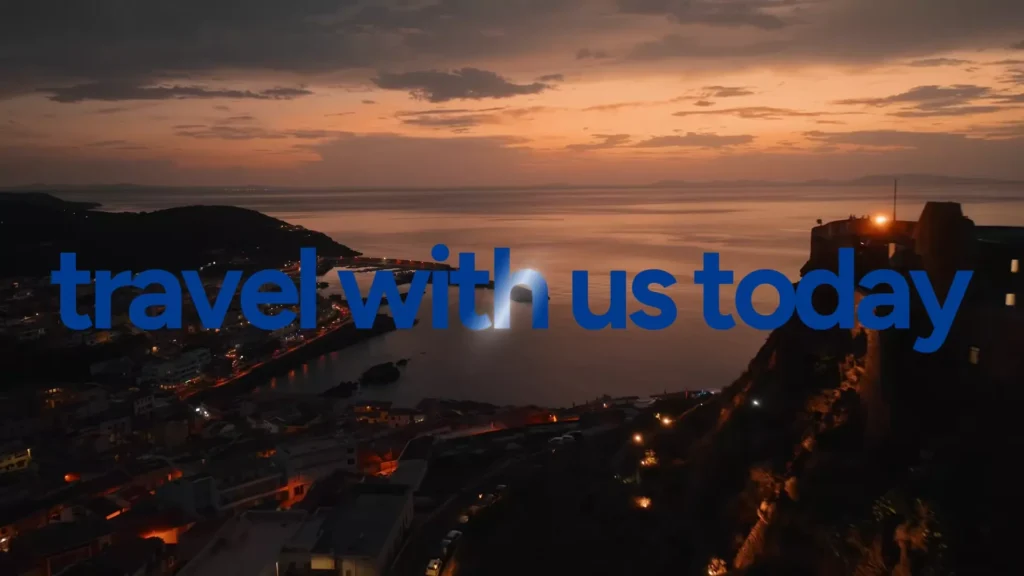
If your CapCut edits still look like beginner projects, the problem usually isn’t your footage — it’s your text.
Professional editors turn simple captions into visual highlights. Smooth animations, subtle depth, cinematic highlights, and dynamic reveals can instantly make your videos feel like high-budget productions.
Think documentary-style captions like Johnny Harris, smooth TikTok subtitles, or cinematic title reveals.
The good news? You can create these effects directly inside CapCut. Get your free CapCut Pro APK today.
Here are 8 premium text effects that can transform your edits instantly.
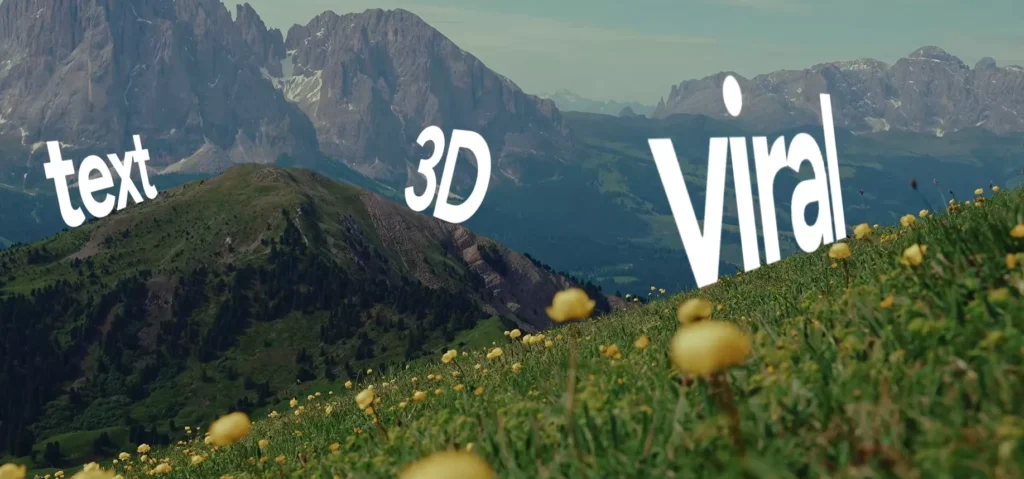
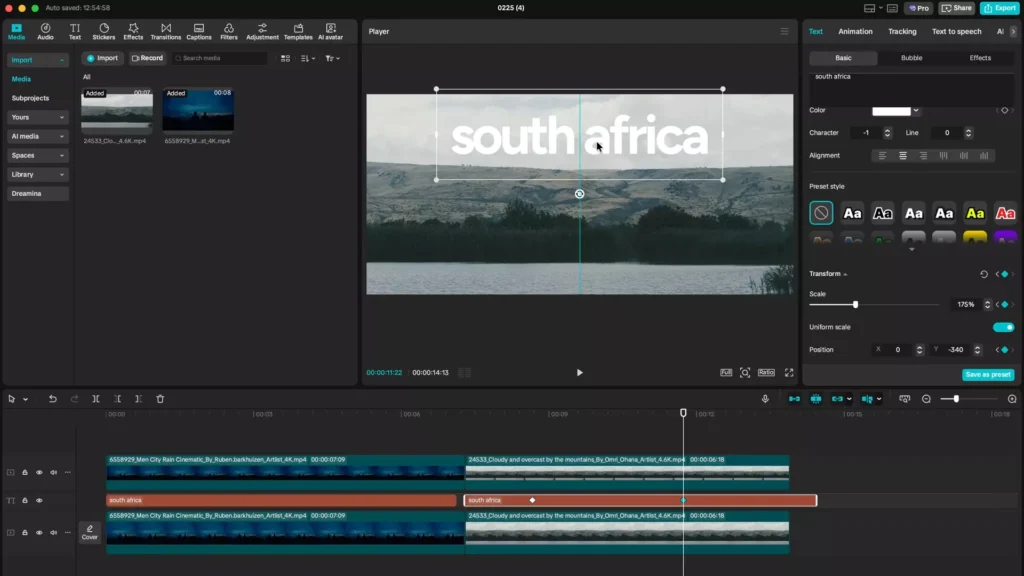
1. 3D Perspective Text for Dynamic Captions
This effect adds depth so text feels like it belongs inside the scene rather than floating on top of it.
It’s perfect for B-roll, cinematic shots, or landscape footage.
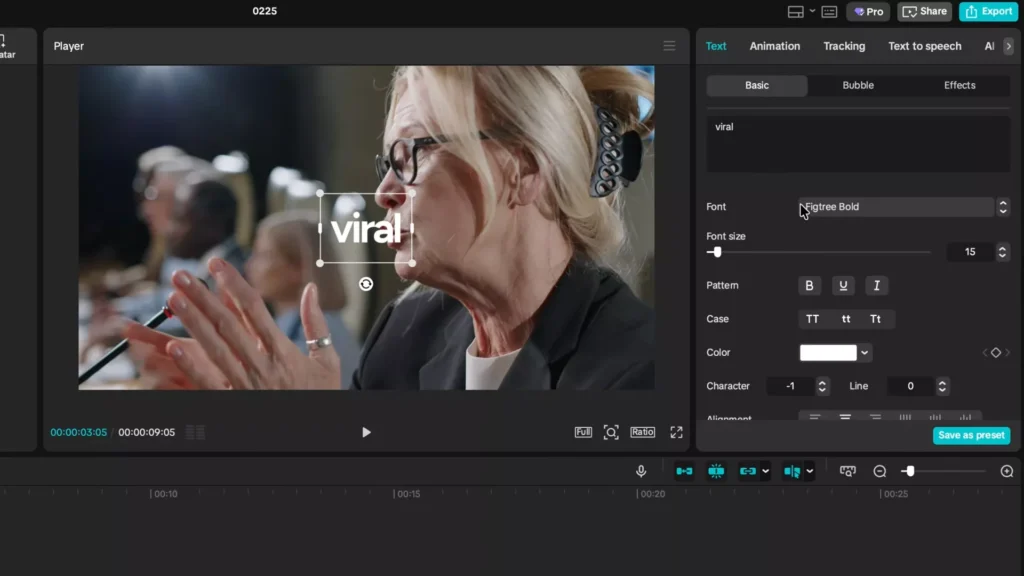
Create the Base Clip
- Add your footage to the timeline.
- Insert default text and type your first word (for example: “Viral”).
- Choose a bold font like Fig Tree Bold.
- Set character spacing to -1 for tighter typography.
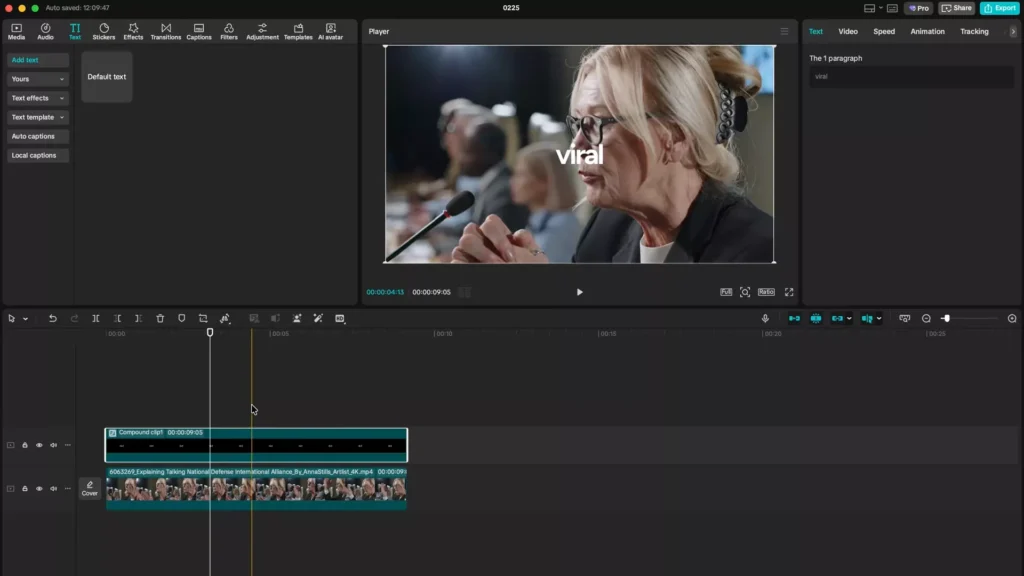
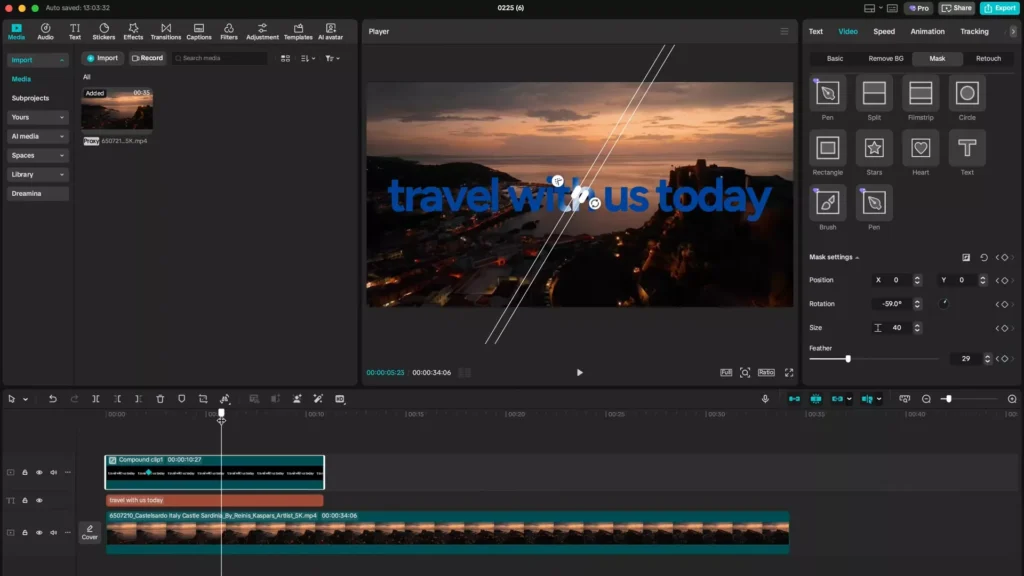
Right-click the text layer and Create Compound Clip.
This locks the base text layer so you can animate it safely.
Apply the 3D Flip Animation
- Open the Animation → Combo panel.
- Search for Flip Six.
- Apply the animation.

If the text appears smaller after applying the animation, open the compound clip and increase the font size — it won’t reduce quality.
The Flip Six animation creates a convincing 3D perspective flip that makes text feel integrated with camera motion.
Create a Staggered Word Reveal
Duplicate the compound clip several times and change each word:
- Viral
- 3D
- Perspective
- Text
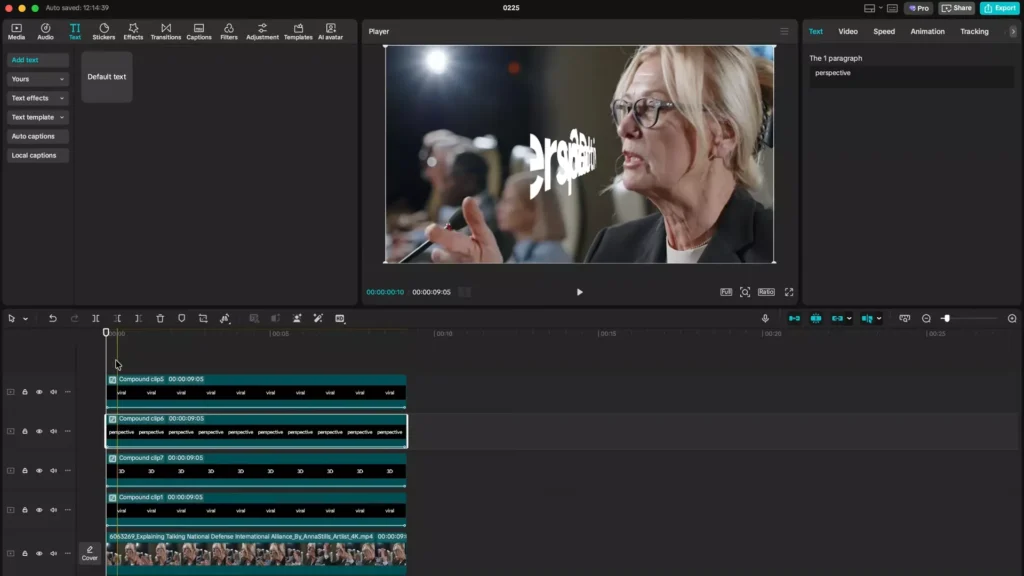
Freeze the frames at the ideal rotation angle for each word.
Then stagger the clips along the timeline to create a dynamic reveal sequence.
When aligned with the scene’s angles, the text appears to follow the landscape or camera tilt, creating a premium visual effect.
Read Also: 10 Powerful Motion Typography Techniques in CapCut
2. Smooth Animated Captions with the Player Three Effect
If you want captions that feel polished and fluid, this effect is one of the best options.
It’s widely used in TikTok voiceovers and reels because the motion is subtle and natural.
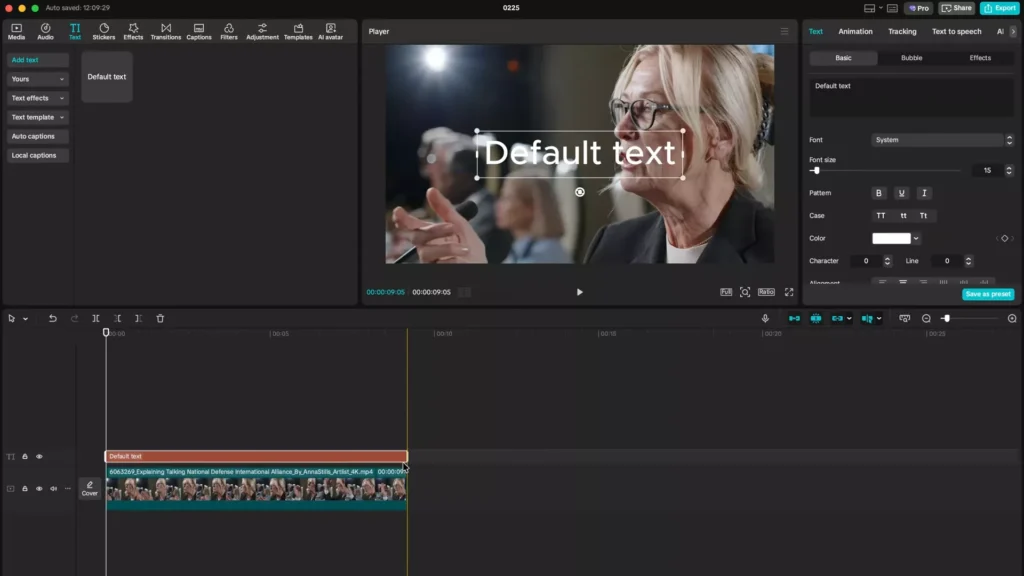
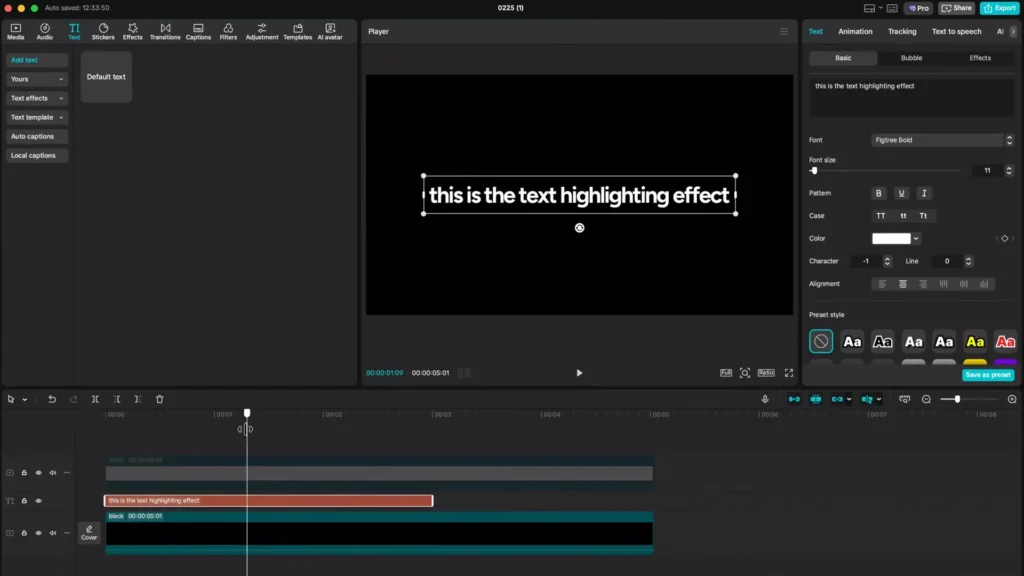
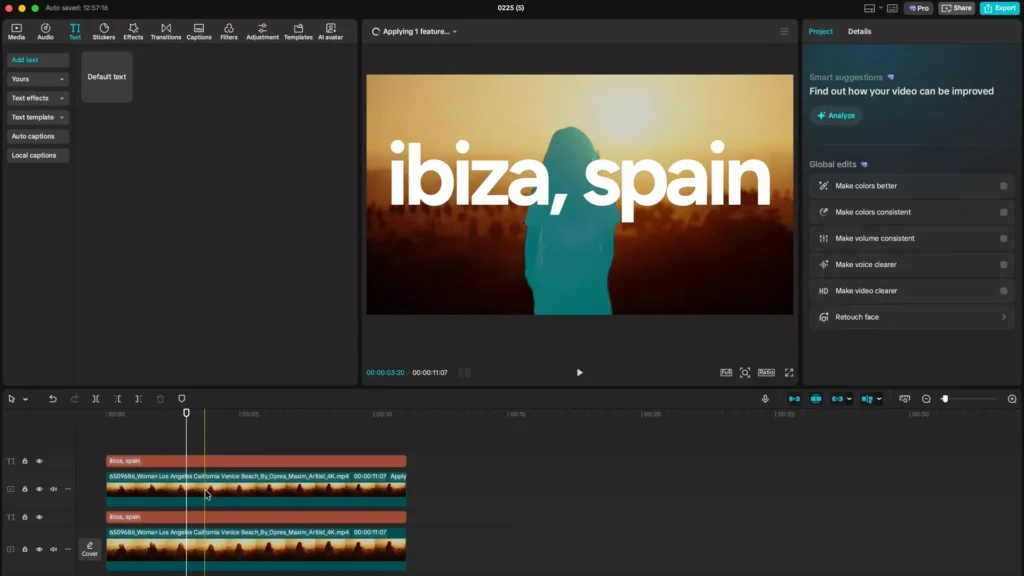
Generate Auto Captions
- Import your audio or voiceover.
- Go to Text → Auto Captions.
- Let CapCut generate subtitles.
Edit the captions into short line groups such as:
- First line: 3 words
- Second line: 2 words
- Third line: 2 words
This structure improves readability.
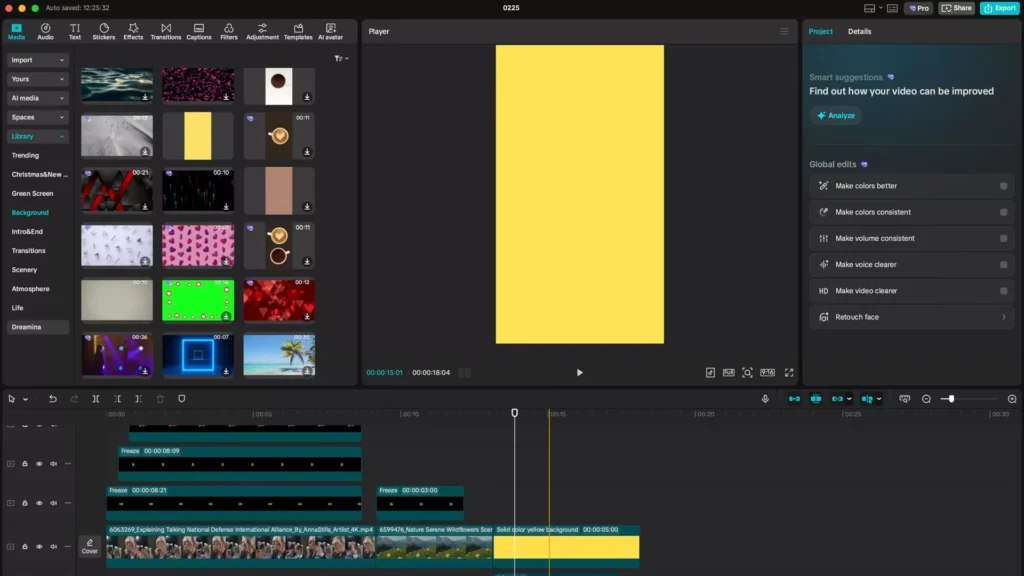
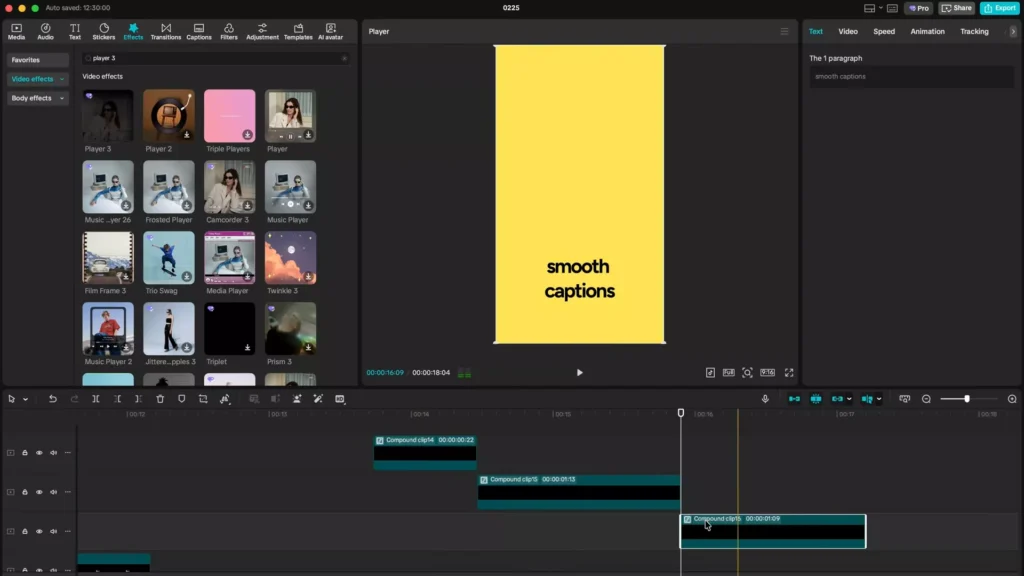
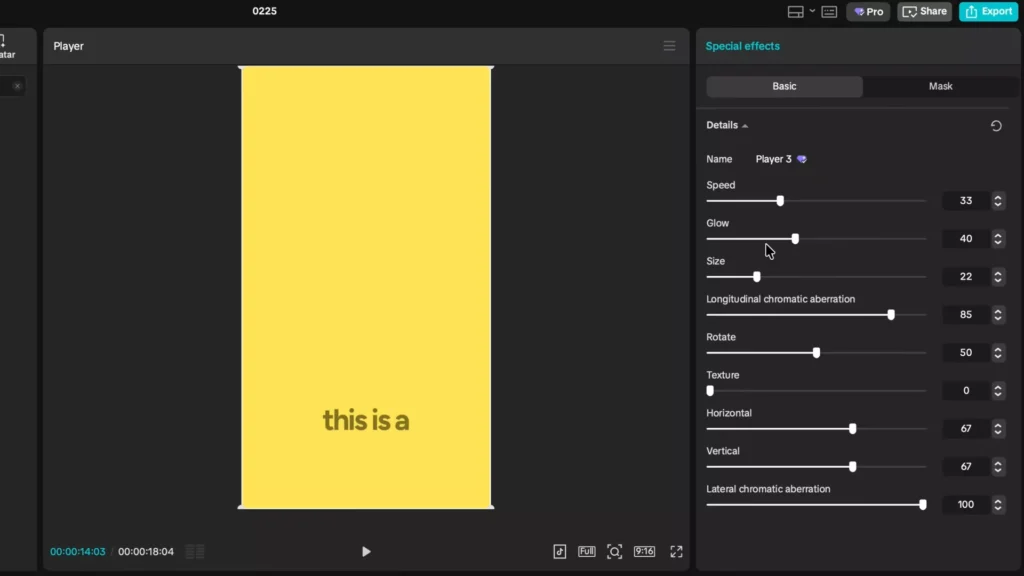
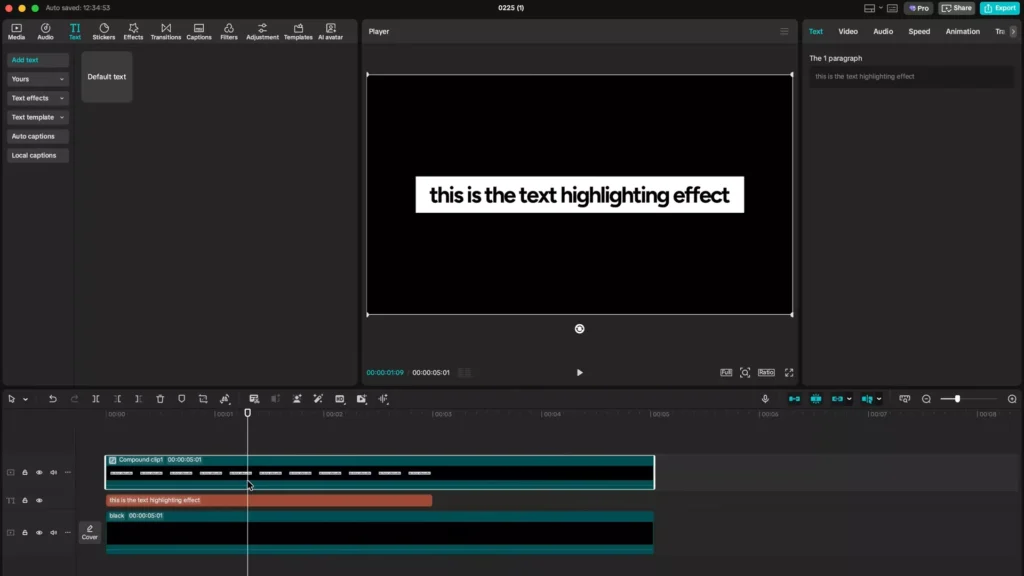
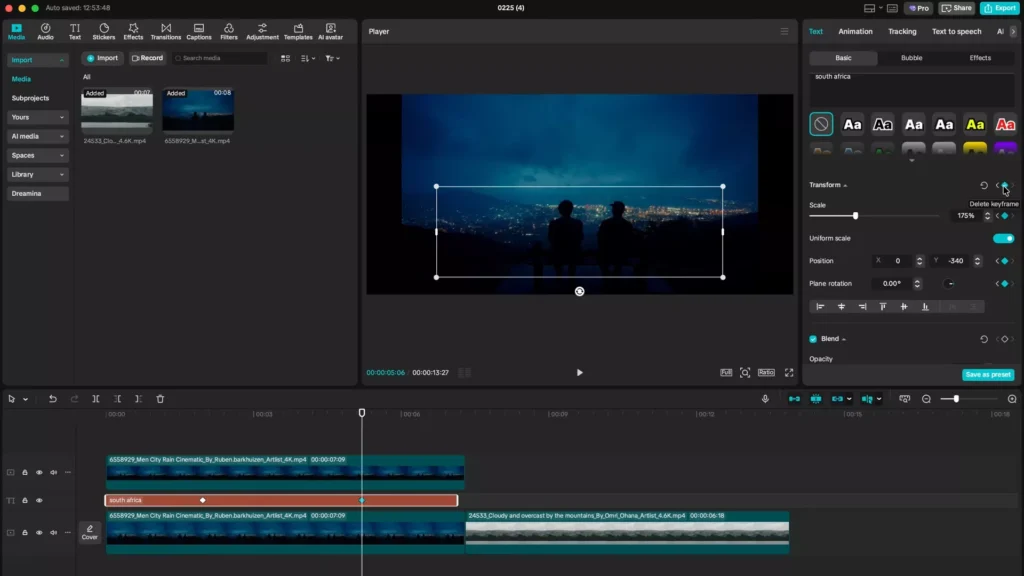
Apply the Player Three Effect
- Select a caption group.
- Create a Compound Clip.
- Go to Effects → Search “Player 3.”
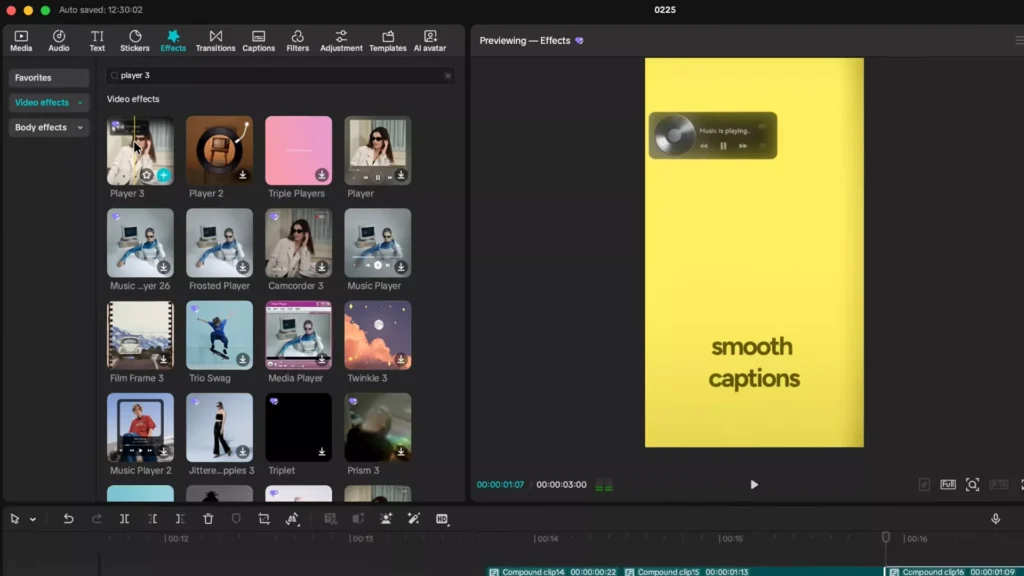
Apply the effect and reduce Texture to 0.
The result is a smooth flowing caption animation that feels far more professional than standard subtitles.
Copy the Animation to All Captions
- Copy the animated caption clip.
- Select the remaining caption clips.
- Right-click → Paste Attributes.
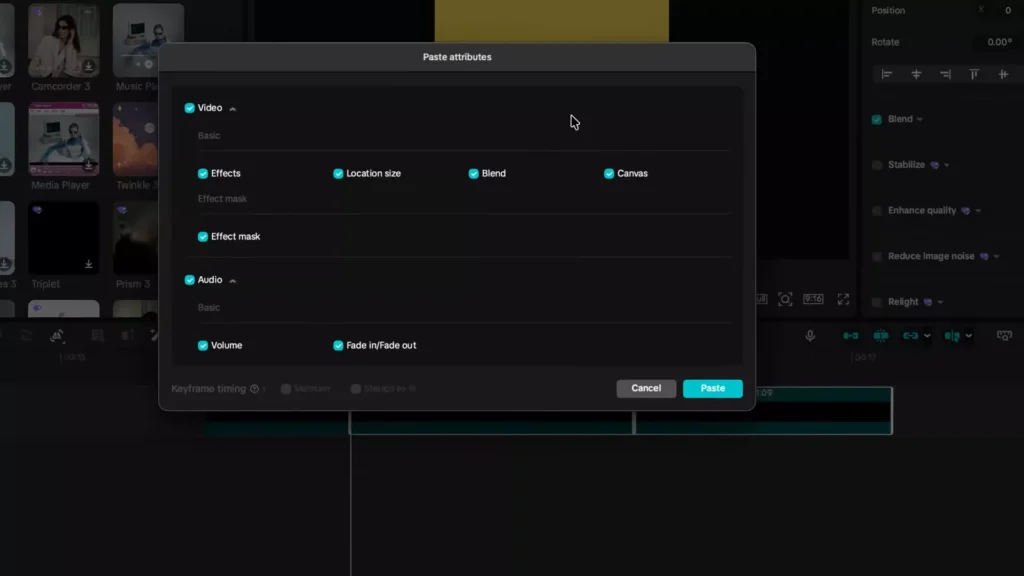
Now all captions animate identically — saving tons of time while keeping the style consistent.
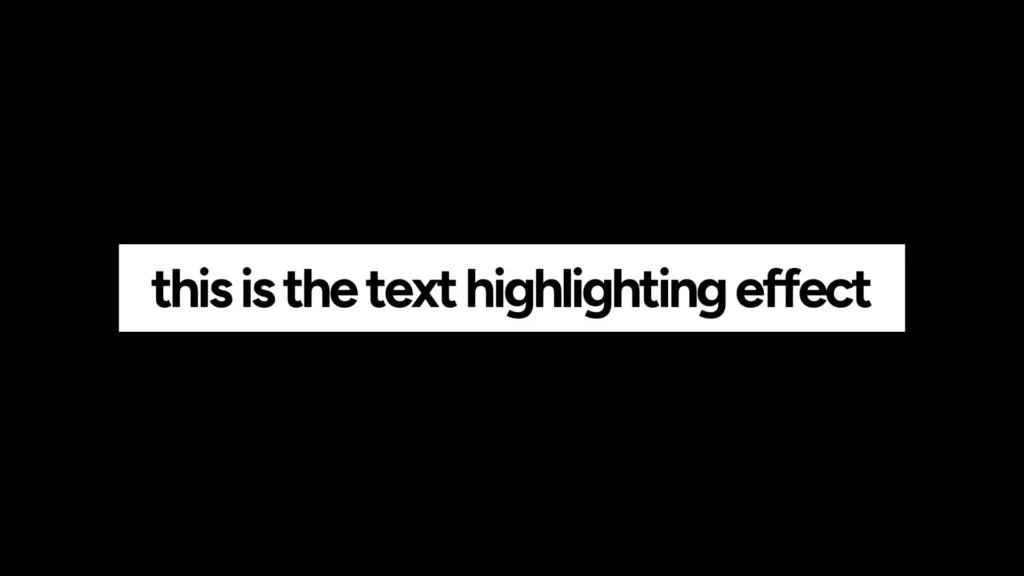
3. The Professional Highlight Color Change Effect
You’ve probably seen this effect in documentary or educational videos from creators like Ali Abdaal or Johnny Harris.
A highlight bar sweeps across text while the word changes color.
Setup the Layers
Create three layers:
- Black background
- White background (temporarily hidden)
- Text layer in between
Duplicate the text and place the second version above the white layer.
Set the top text to black.
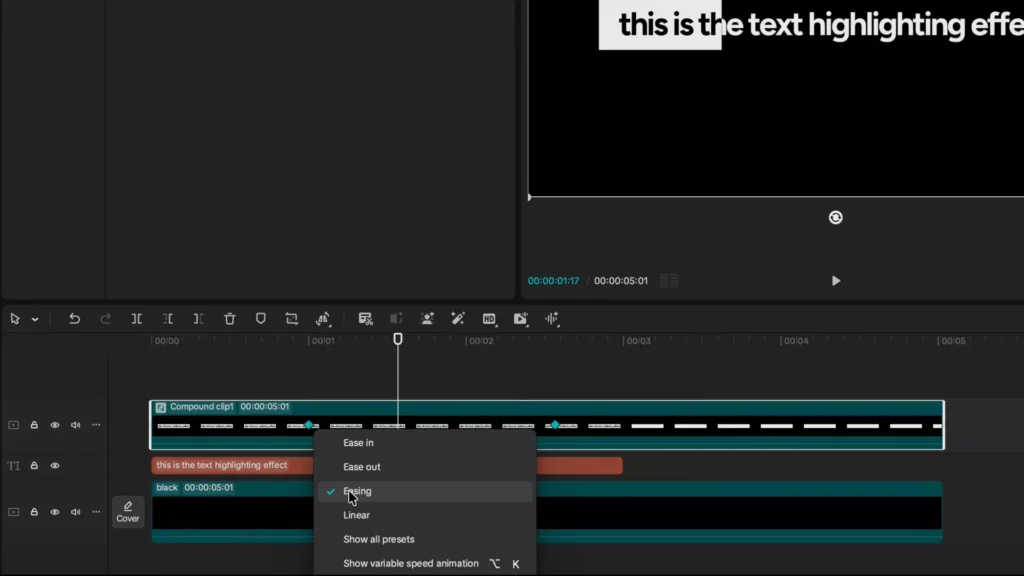
Create the Highlight Sweep
- Enable the white background layer.
- Select the white layer and top text.
- Create a Compound Clip.
Add a Split Mask and rotate it 90 degrees.
Keyframe the mask so it moves across the screen over one second.
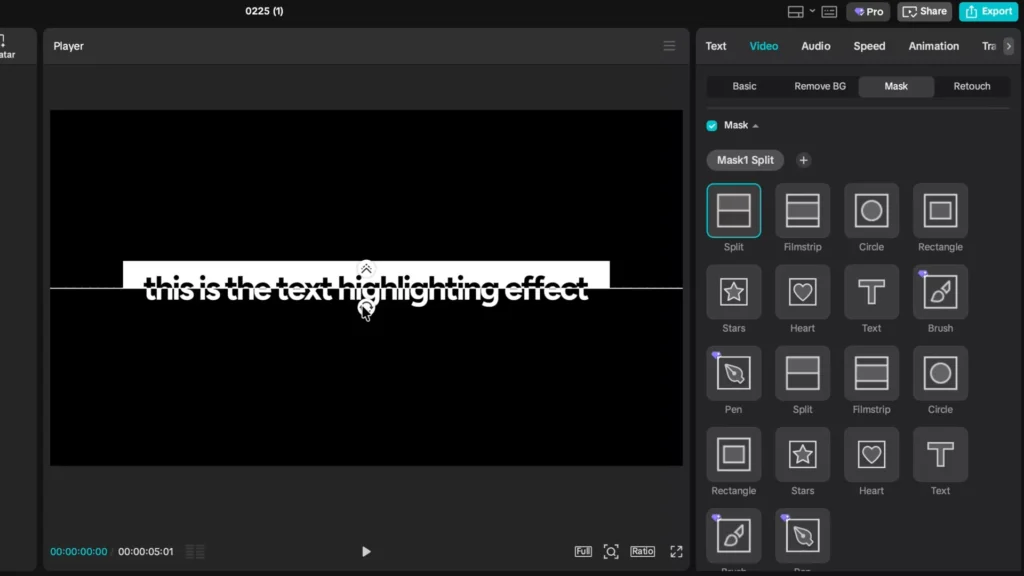
As the mask moves, the top black text disappears and the white text underneath appears.
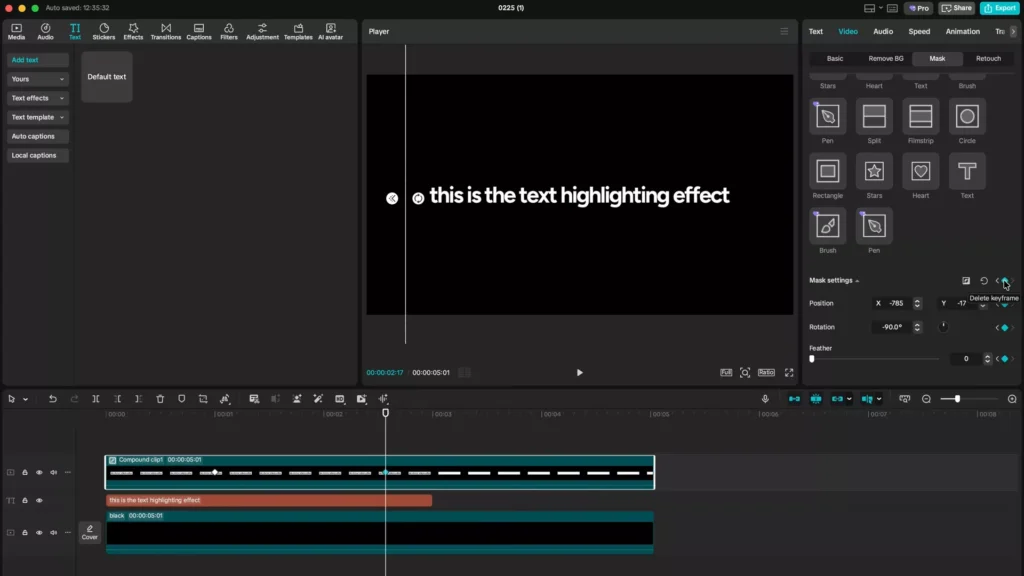
The result looks like a highlight sweeping across the words while changing their color.
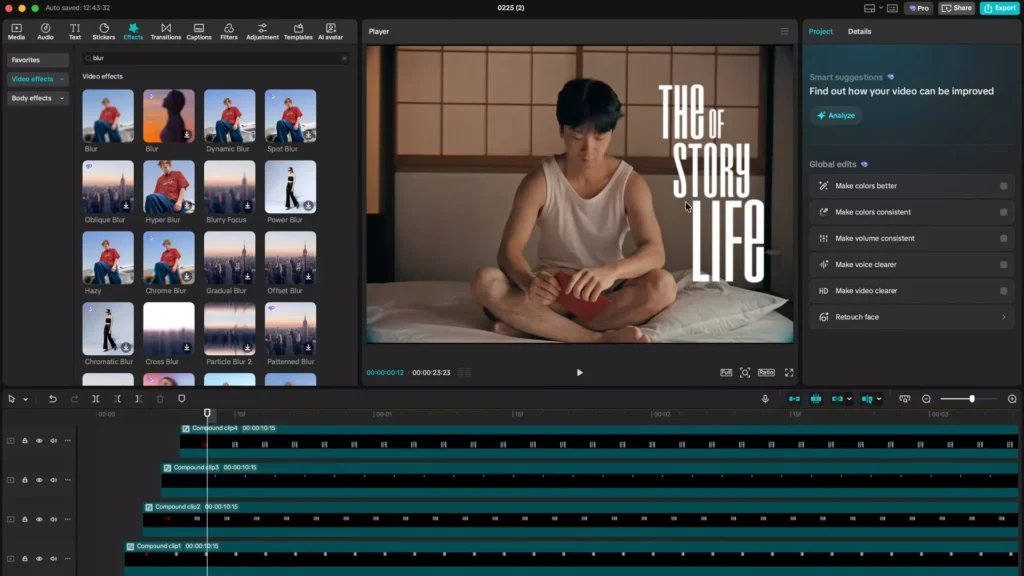
4. Staggered Text Reveals with Scene Blur
This style is common in modern storytelling videos.
Words appear one at a time while subtle blur blends them into the environment.
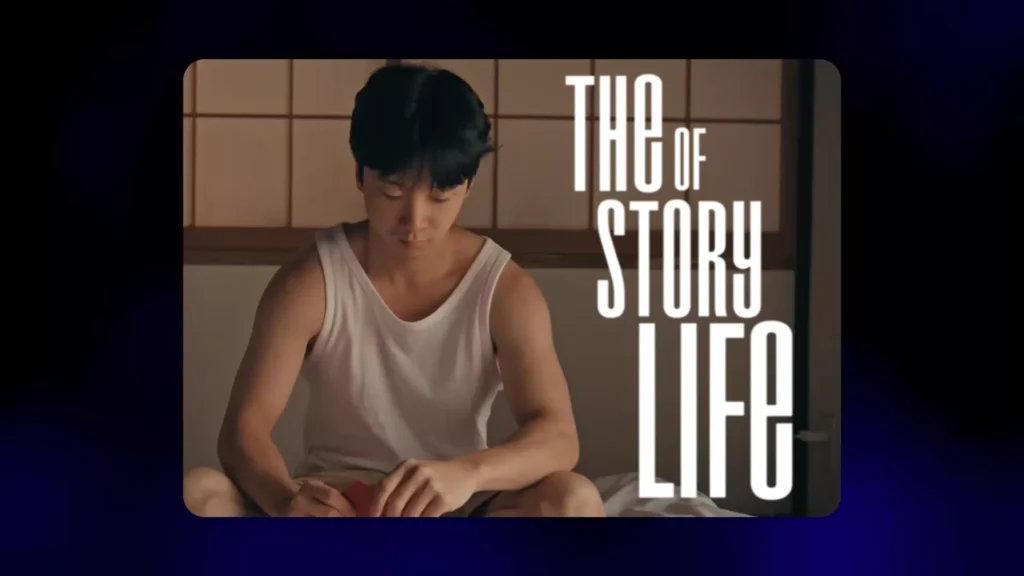
Create the Base Text
Add your text phrase and duplicate it into individual words:
- The
- Story
- Of
- Life
Shift each word slightly to the right.
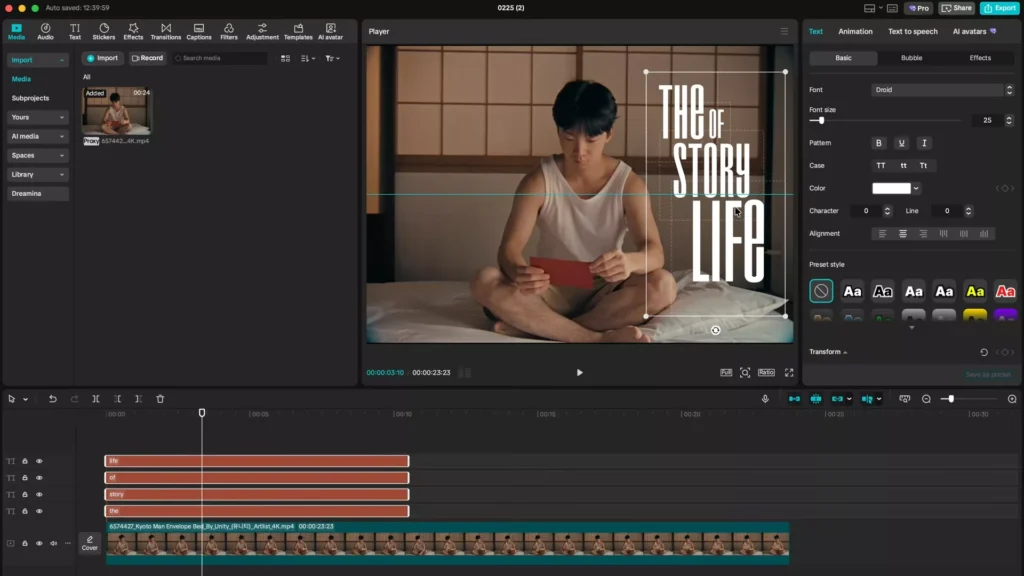
Cut each clip a few frames apart so the words appear sequentially.
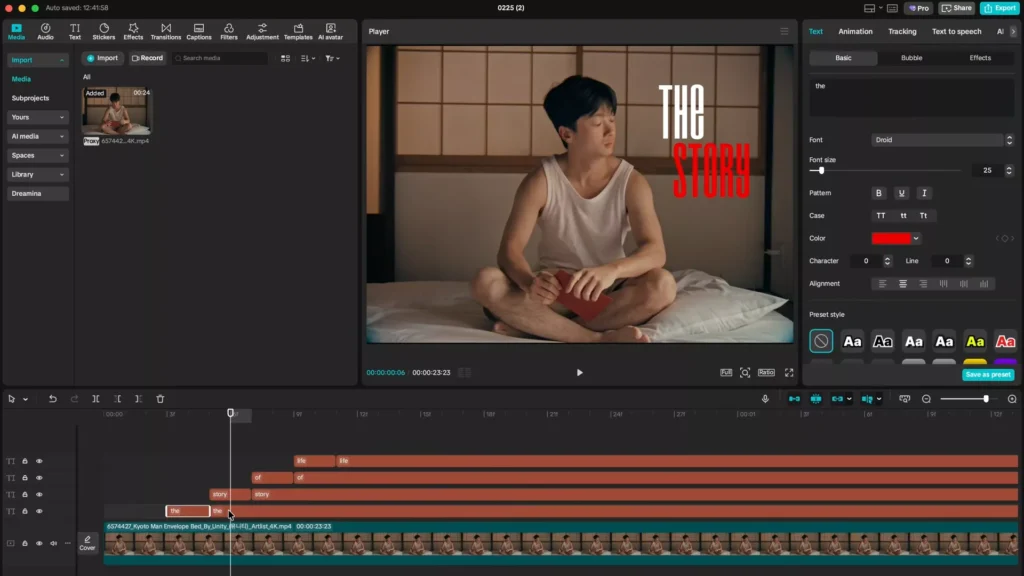
Add Blur Integration
Apply a Blur effect to each text compound.
Adjust blur intensity differently for each layer to create a soft entrance effect.
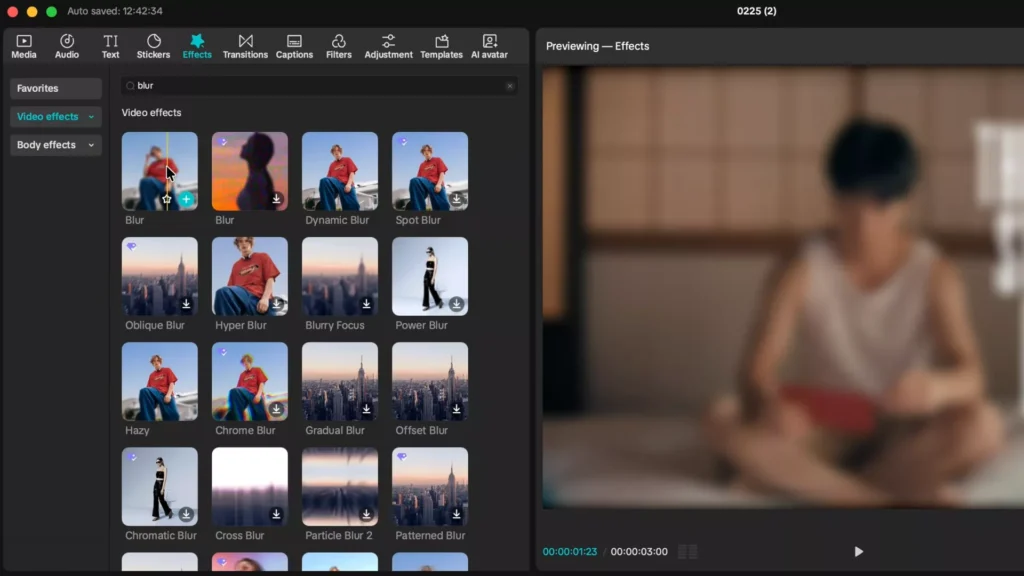
This makes the text feel like it’s emerging from the scene rather than simply appearing.
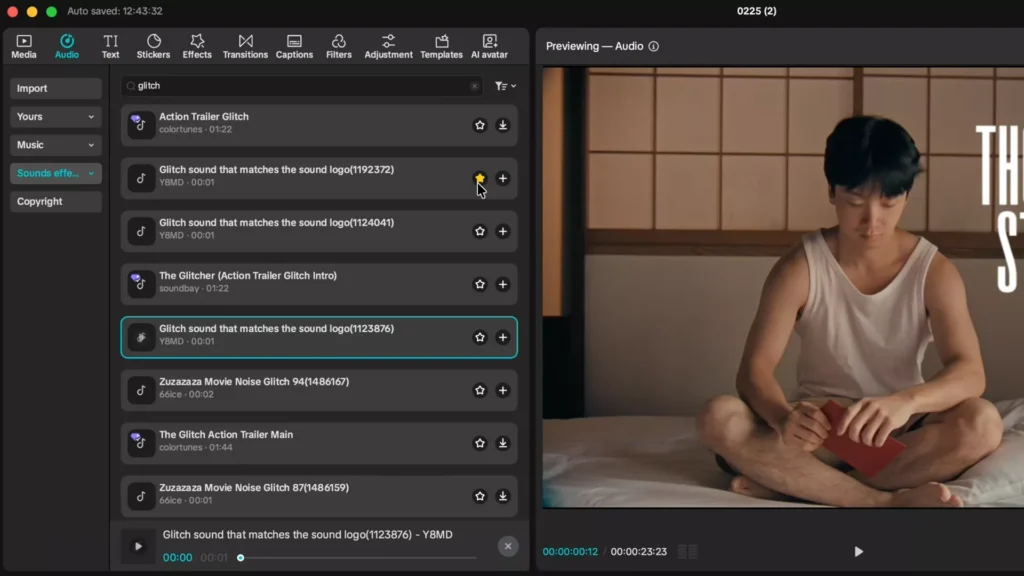
Add Sound Design
Search for a glitch or click sound effect and place it at the reveal moment.
Even subtle sound design dramatically increases perceived production quality.
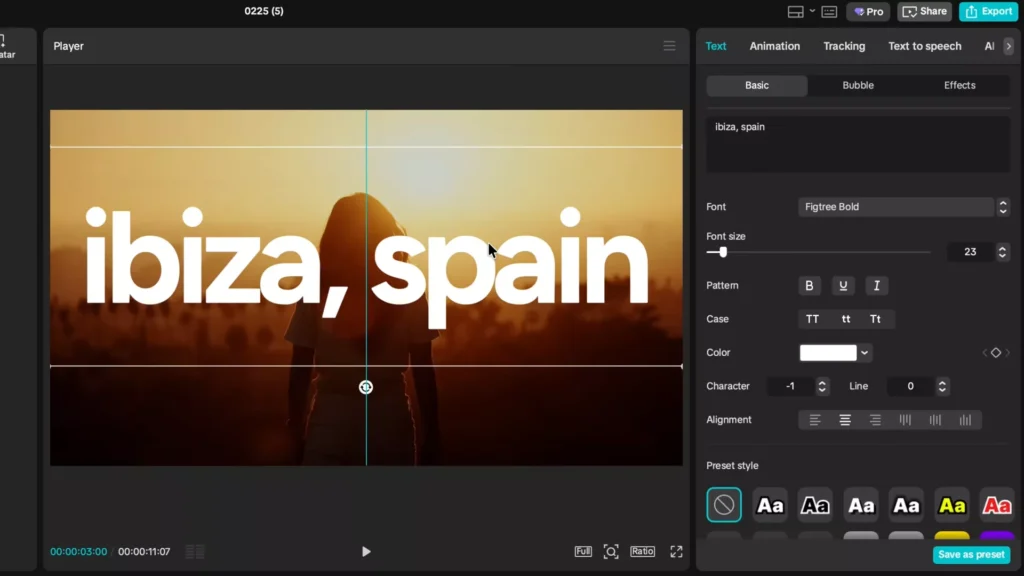
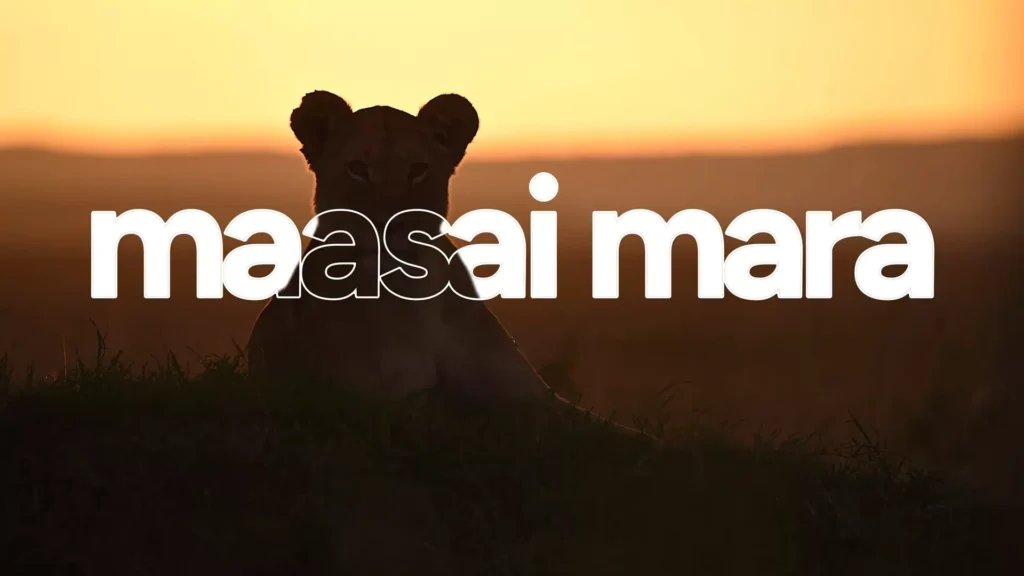
5. Minimalist Gradient Text for Clean Titles
Sometimes the best design is simple.
A subtle gradient can add depth without distracting from the message.
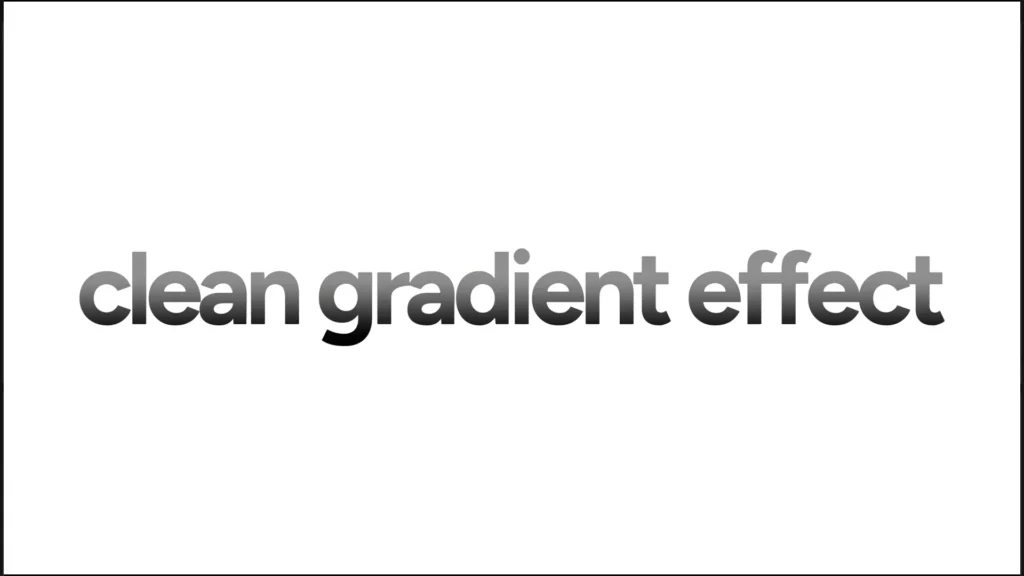
Build the Gradient Text
- Create a white background.
- Add black text in a clean font.
- Duplicate the text and change the duplicate to a light gray.
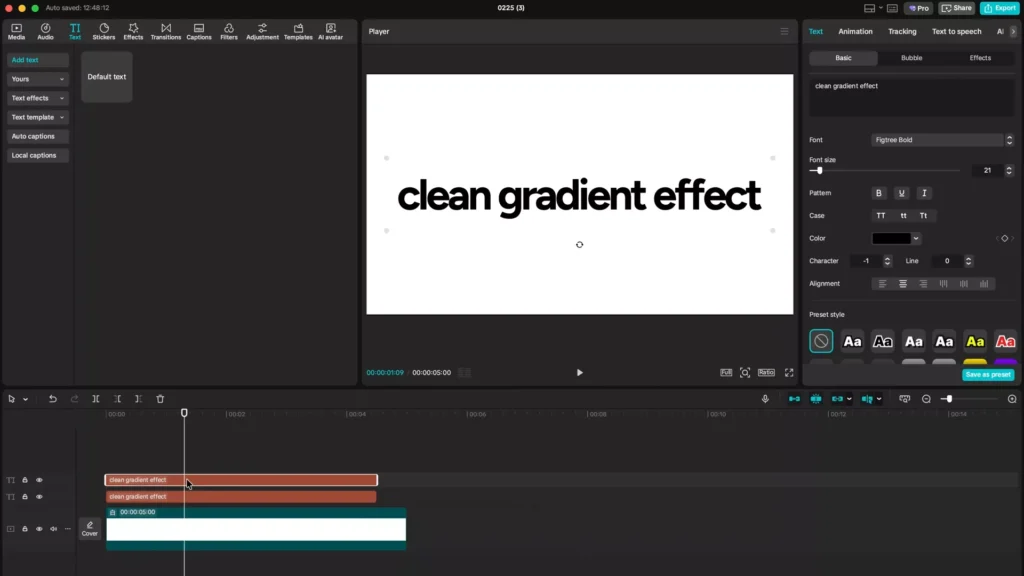
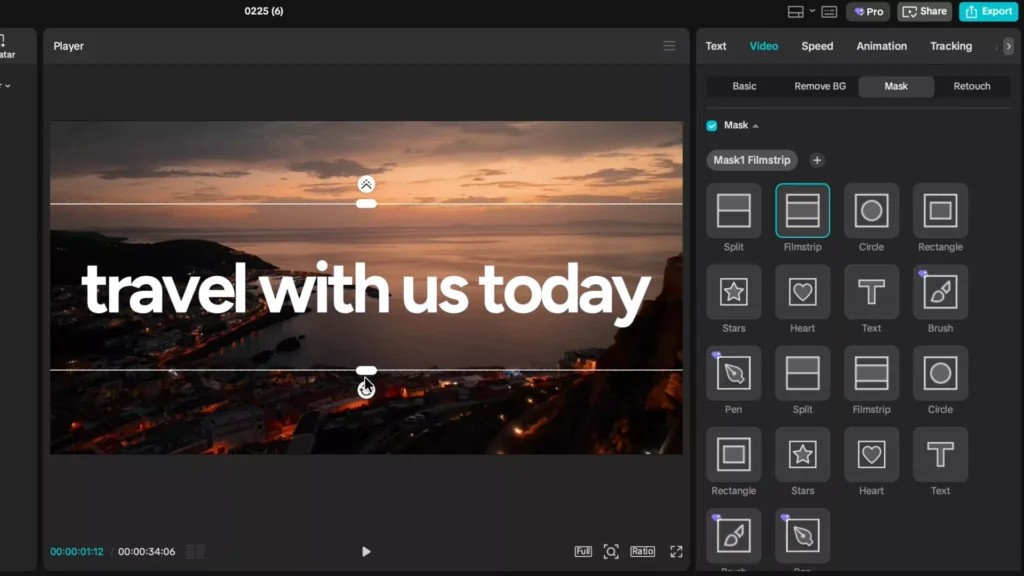
Add the Mask
Compound the top text layer and apply a Split Mask.
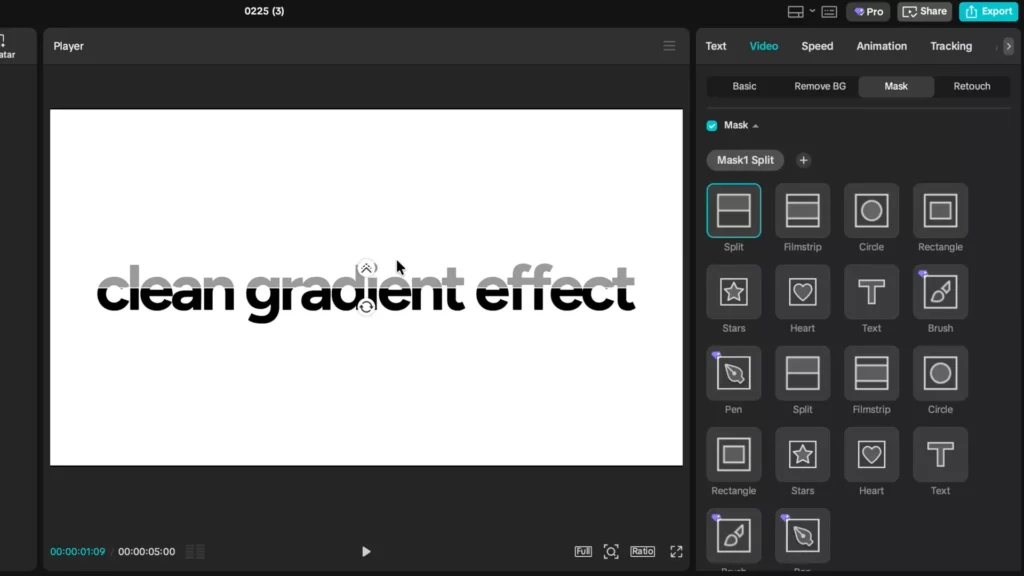
Increase feather to about 35.
Position the mask near the bottom of the text to simulate a soft shadow or gradient shine.
The result is a clean, elegant title style commonly used in reels and brand videos.
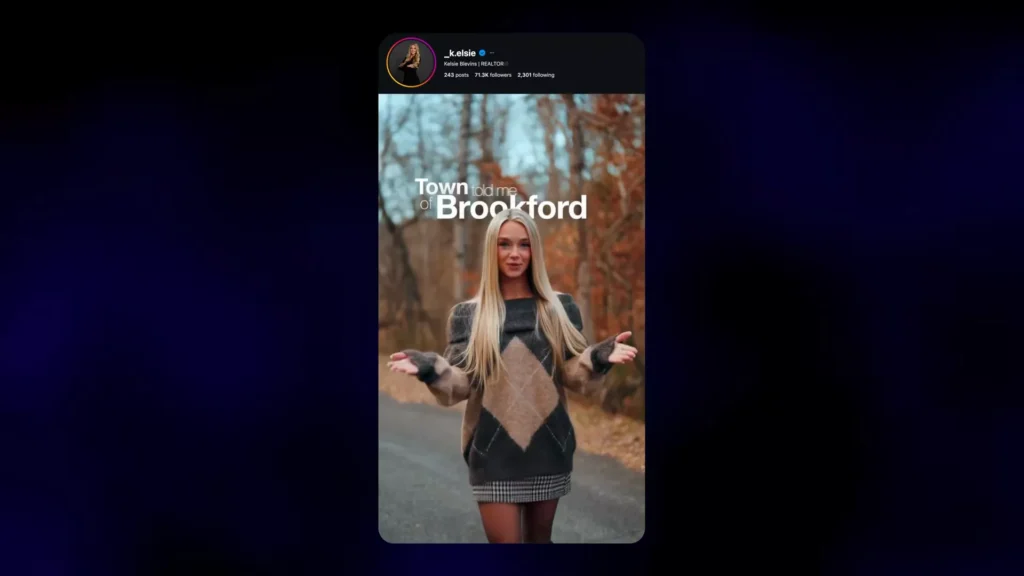
6. Text Behind Subjects (Handlifting Effect)
This effect places text behind people or objects in your footage.
It instantly creates cinematic depth.
Create the Foreground Mask
Duplicate your video layer and place the copy above the text.
Use the Mask Brush to paint over foreground elements such as:
- People
- Mountains
- Trees
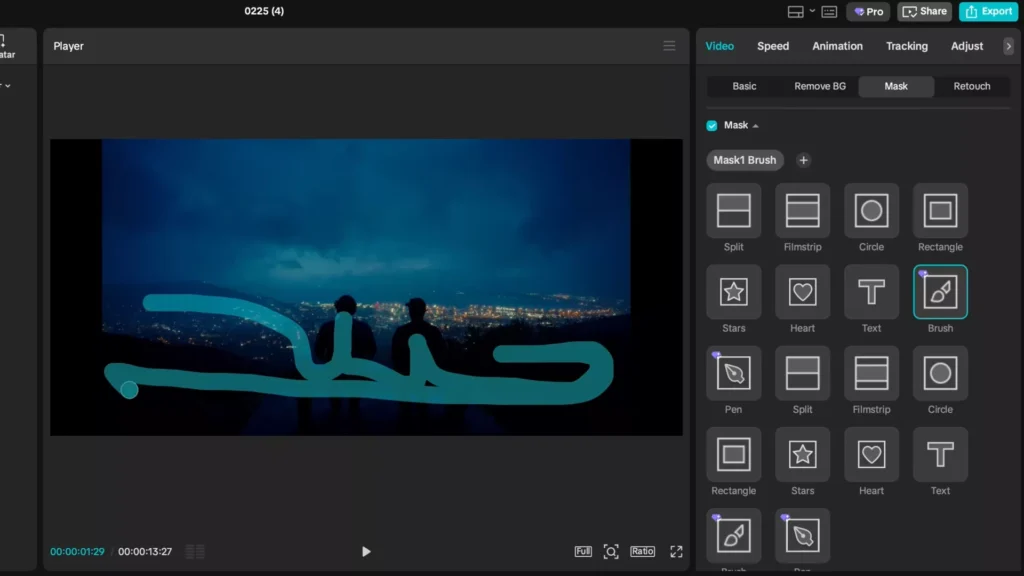
Animate the Text
Add keyframes to move the text upward.
As the text moves, the masked subject appears in front of it — making the text look like it’s lifting from behind the scene.
This technique works beautifully in travel and nature footage.
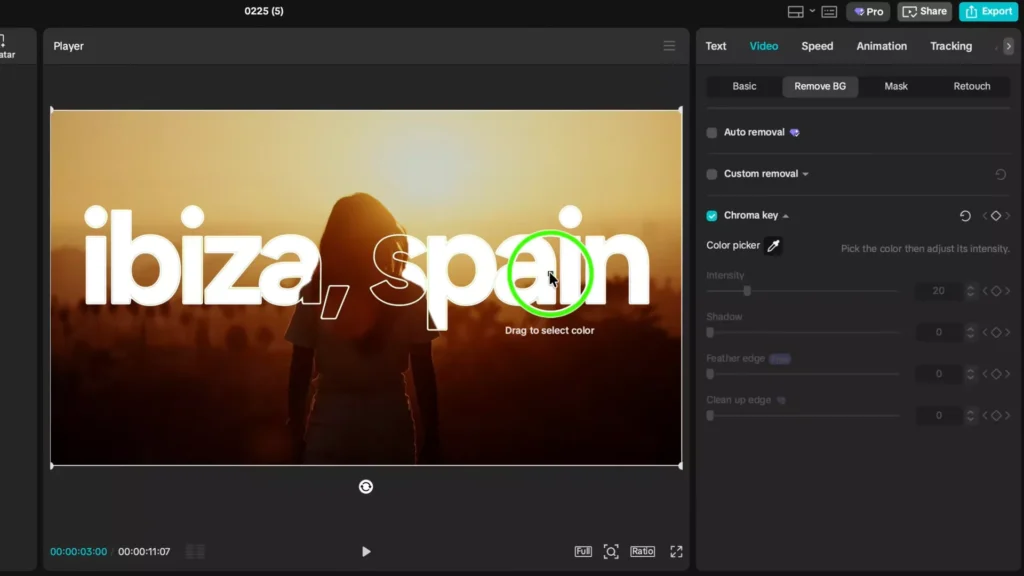
7. Outline Text Around a Subject
Another advanced technique is creating an outline that frames your subject.
Create the Outline
- Duplicate the subject clip.
- Mask the person using the brush tool.
Create a duplicate text layer:
- Enable Stroke
- Set thickness around 5
- Use green as the fill color

Remove the Green Background
Compound the text layer and apply Chroma Key to remove the green fill.
This leaves only the outline stroke, which appears to frame the subject beautifully.
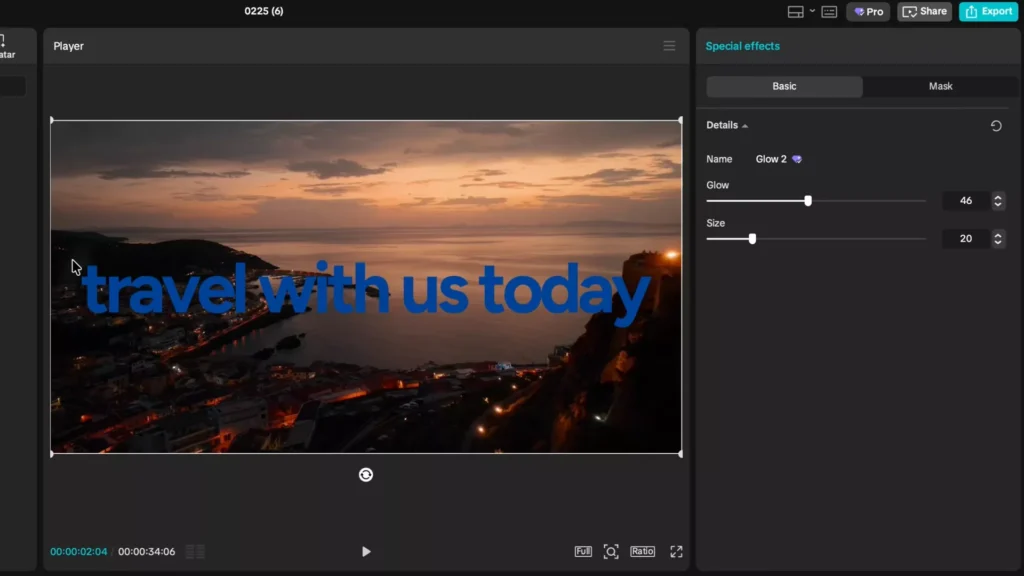
8. Cinematic Glow Text Reveal
This effect looks like something straight out of a TV commercial.
A glowing shine sweeps across the text and reveals it.
Setup the Text Layers
- Add dark-colored text over a dark video.
- Duplicate the text and make the top layer white.
Create the Shine Animation
Compound the white text layer and add a Film Strip Mask.
Rotate the mask slightly and animate it moving across the text.
Then apply a Glow effect with moderate intensity.
As the mask passes over the text, the glow creates a bright cinematic shine.
Quick Overview: All 8 CapCut Text Effects at a Glance
If you’re skimming for ideas, here’s a quick breakdown of all the effects covered in this guide and where they work best.
| Text Effect | Best For | Difficulty | Time to Create |
|---|---|---|---|
| 3D Perspective Text | Cinematic edits, travel footage | Medium | 2–3 minutes |
| Player Three Captions | TikTok, reels, voiceover content | Easy | 1 minute |
| Highlight Color Sweep | Documentary style videos | Medium | 3 minutes |
| Staggered Text Reveal | Storytelling edits | Easy | 2 minutes |
| Gradient Title Text | Clean titles and intros | Easy | 1 minute |
| Text Behind Subjects | Cinematic depth effects | Hard | 5 minutes |
| Subject Outline Text | Creative framing | Medium | 3–4 minutes |
| Cinematic Glow Reveal | Ads and promotional videos | Medium | 3 minutes |
If you’re just starting out, begin with Player Three captions or gradient text, then work up to masking effects like text behind subjects.
Who These CapCut Text Effects Are Perfect For
These techniques aren’t just for professional editors. They’re incredibly useful for anyone creating social content.
Content Creators
If you’re making short-form content like:
- TikTok videos
- Instagram Reels
- YouTube Shorts
then animated captions and staggered reveals can dramatically increase viewer retention.
YouTube Creators
Long-form creators can use these effects to enhance:
- Documentary-style storytelling
- Educational videos
- Talking-head content
- Explainer videos
Effects like highlight sweeps and cinematic glow reveals are especially effective for emphasizing key ideas.
Read Also: CapCut Video Size & Aspect Ratio Calculator (All Platforms)
Freelance Video Editors
If you edit for clients, these effects instantly make your work look more premium. They’re perfect for:
- Social media ads
- Brand marketing videos
- Promotional reels
- Corporate content
Small typography upgrades often create the biggest perceived quality improvements.
Best Fonts for Professional CapCut Text Effects
Even the best animations won’t look good with poor typography. Choosing the right font can dramatically improve the final result.
Here are some fonts that work especially well with the effects in this guide.
Bold Documentary Style
These fonts are ideal for cinematic captions and storytelling edits.
- Fig Tree
- Bebas Neue
- Anton
They create strong visual presence and work well for 3D perspective text and highlight effects.
Clean Minimal Style
Perfect for modern social media content.
- Inter
- Poppins
- Montserrat
These fonts look great with Player Three captions and gradient titles.
Cinematic Title Fonts
For more dramatic video intros or travel edits.
- Droid Serif
- Playfair Display
- Cinzel
They work especially well with glow reveals and cinematic animations.
Pro Tip:
Try setting character spacing to -1 or -2. Slight negative spacing makes captions look tighter and more professional.
10 CapCut Text Animation Ideas Trending on TikTok
Short-form creators constantly experiment with new typography styles. If you want your edits to feel modern and engaging, these are some of the most popular text trends currently dominating TikTok and Reels.
1. Kinetic Typography
Words move dynamically across the screen to match speech or music beats. This style works especially well in motivational or storytelling videos.
2. Documentary Captions
Large, bold captions placed strategically within the frame — similar to documentary videos — help emphasize key points in educational content.
3. Word-by-Word Captions
Instead of displaying entire sentences, each word appears individually as the speaker says it. This keeps viewers focused and improves retention.
4. Highlight Sweep Text
A color highlight moves across important words, helping viewers quickly identify key ideas.
5. Perspective Text
Text is rotated and positioned to match camera angles or landscape slopes, making it feel integrated with the environment.
6. Glitch Text Reveals
A quick glitch animation introduces text with a digital distortion effect. These are popular in tech or gaming content.
7. Staggered Sentence Reveals
Words appear one at a time in sequence, creating suspense and rhythm within the edit.
8. Glow Titles
Soft glowing text is often used in travel edits and cinematic montages.
9. Blur-to-Sharp Text
Text starts blurred and gradually becomes clear as it appears on screen.
10. Masked Scene Text
Text moves behind objects or subjects in the scene, creating depth and a cinematic feel.
Many viral creators combine two or three of these styles within a single video to keep visuals engaging.
Best CapCut Settings for Sharp, Professional Text
Even great effects can look blurry if the export settings are wrong. Use these settings to ensure your text stays crisp after uploading to social platforms.
Export Resolution
Always export at 1080p or higher.
Recommended settings:
- Resolution: 1920 × 1080
- Frame rate: 30fps or 60fps
- Bitrate: 10–20 Mbps
Higher resolution prevents compression from ruining your typography.
Avoid Over-Scaling Text
If text is resized dramatically inside compound clips, it may lose clarity.
Instead, adjust the original font size first, then animate the text.
Use Bold or Semi-Bold Fonts
Thin fonts can become blurry after compression, especially on TikTok.
Bold fonts remain readable even on small mobile screens.
Maintain High Contrast
White text on dark footage — or dark text on bright backgrounds — always performs best.
Strong contrast ensures your captions remain readable even on smaller devices.
How Better Captions Can Increase Watch Time
Text isn’t just decoration — it directly affects how long viewers stay on your video.
Captions guide the viewer’s attention and reinforce your message.
Captions Help Silent Viewers
Many people scroll social media with the sound off. Captions ensure your message still reaches them.
Text Creates Visual Rhythm
Animated captions introduce movement throughout the video. This prevents the edit from feeling static.
Key Words Keep Attention
Highlighting important words or phrases helps viewers quickly understand your message.
Short Text Improves Readability
Instead of displaying long sentences, break captions into short phrases.
For example:
Instead of writing:
This editing trick will instantly improve your CapCut videos.
Break it into smaller sections:
- This editing trick
- Will instantly improve
- Your CapCut videos
This structure keeps viewers engaged and makes the text easier to process.
Text Emphasizes Important Moments
When text appears exactly when something important is said, it reinforces the message visually.
That combination of audio + visual emphasis significantly increases viewer retention.
Bonus: Simple Rule Professional Editors Follow
If you want your text to look premium, remember this rule:
Animation should support the story, not distract from it.
Great editors keep their typography:
- clean
- readable
- consistent
- purposeful
When text animations enhance the story instead of overwhelming it, the entire video feels more professional.
Common Mistakes When Using Text Effects
Even great effects can look amateur if used incorrectly. Avoid these common mistakes when editing.
Using Too Many Effects
Stacking multiple text animations in a single clip can make the edit feel chaotic.
Instead, choose one primary text style for the entire video and stay consistent.
Oversized Text
Huge captions might grab attention, but they often block the subject or ruin composition.
A good rule: text should support the visuals — not dominate them.
Poor Timing
Text animations should match either:
- scene movement
- music beats
- dialogue emphasis
Random animation timing makes edits feel unpolished.
Low Contrast
If viewers struggle to read your text, the effect loses its impact.
Always ensure strong contrast between the text and the background.
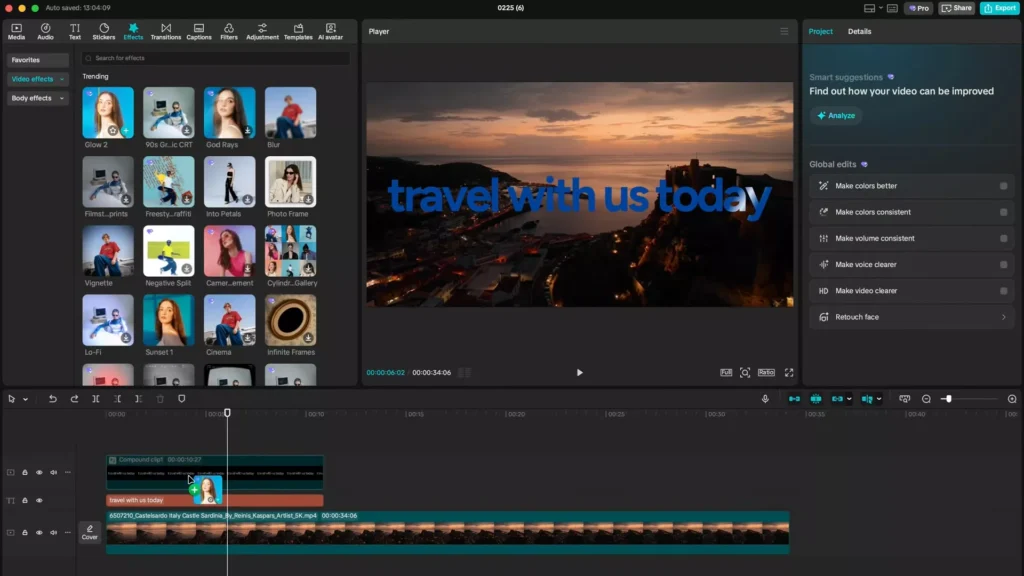
Pro Editing Tips to Make These Effects Look Even Better
The effects themselves are powerful, but small refinements can make them feel much more professional.
Add Subtle Motion Blur
Motion blur makes text animations feel smoother and more realistic. Even a small amount can dramatically improve visual quality.
Match Scene Perspective
When using perspective text or cinematic titles, rotate or reposition the text slightly to match the camera angle.
This helps the text feel like it’s part of the environment rather than floating above it.
Keep Animations Short
Most professional text animations last between 0.5 and 1.2 seconds.
Long animations slow down pacing and reduce viewer engagement.
Use Sound Design
Tiny sound effects — like clicks, whooshes, or glitches — can make text reveals feel far more dynamic.
Even subtle audio cues improve perceived production value.
Useful CapCut Shortcuts for Faster Editing
Keyboard shortcuts can speed up your editing workflow dramatically.
Here are a few helpful ones to remember.
| Action | Shortcut |
|---|---|
| Split clip | Ctrl + B |
| Copy clip | Ctrl + C |
| Paste clip | Ctrl + V |
| Undo | Ctrl + Z |
| Redo | Ctrl + Shift + Z |
Learning just a few shortcuts can easily cut your editing time in half.
When to Use Each Text Effect
Different editing styles work better in different types of videos.
Here’s a quick guide to help you decide.
Use 3D Perspective Text
For travel footage, cinematic B-roll, or landscape scenes.
Use Player Three Captions
For TikTok videos, reels, and voiceover content.
Use Highlight Color Sweep
For educational videos and storytelling.
Use Staggered Text Reveals
For narrative sequences or dramatic moments.
Use Gradient Titles
For clean intros, minimalist edits, and brand content.
Use Glow Reveals
For ads, trailers, or promotional videos.
Choosing the right style helps maintain a consistent visual identity throughout your video.
Frequently Asked Questions
Is CapCut good enough for professional editing?
Yes. While CapCut is beginner-friendly, its masking tools, keyframes, and effects allow creators to produce professional-level social media edits.
Many viral creators and editors rely on CapCut for short-form content.
Do these effects work on the mobile version of CapCut?
Most of these techniques work on both mobile and desktop versions. However, masking and detailed keyframe animations are often easier to control on the desktop version.
Which text effect is easiest for beginners?
The Player Three caption animation and gradient text effect are the easiest to create and require very little setup.
Which effect looks the most cinematic?
Text-behind-subject masking and glow reveal effects tend to look the most cinematic because they integrate with the scene rather than sitting on top of it.
Before You Go: One Simple Upgrade That Changes Everything
Most beginner edits fail because they rely on static text overlays.
Professional editors treat text as part of the visual storytelling — adding motion, depth, and emphasis where it matters.
The good news is you don’t need expensive software to achieve that.
Start by trying just one effect from this guide in your next edit.
Once you begin integrating animated typography into your workflow, your videos will instantly feel more cinematic, engaging, and professional.
Final Thoughts: Stop Using Basic Text
Basic text overlays instantly make videos feel amateur.
These effects can dramatically upgrade your editing style:
- 3D perspective captions
- Smooth animated subtitles
- Documentary highlight effects
- Staggered word reveals
- Clean gradient titles
- Text behind subjects
- Subject outlines
- Cinematic glow reveals
Try adding just one of these effects to your next edit.
You’ll be surprised how quickly your videos start to feel premium and professional.