If you create content for social media, you have probably noticed how much of a difference captions make. Whether viewers are watching on mute or just need extra clarity, captions help improve engagement and make your message clearer. In this guide, we will walk you through how to add animated captions using CapCut — completely free!
Here’s what you’ll learn:
- How to auto-generate captions in CapCut
- How to customize font, color, and animation styles
- How to apply the same style to all your captions with just a few taps
- How to add and style manual captions when auto-captions miss something
Whether you’re new to CapCut or just want to take your videos to the next level, this guide will have you captioning like a pro in minutes!
Tools Used: CapCut (Mobile)
How To Add Animated Captions In CapCut
Step-by-Step Guide
Step 1: Create or Import Your Video
Start by importing your clip and making basic edits (like trimming or cutting). Once your video is ready, you’re set to start captioning.
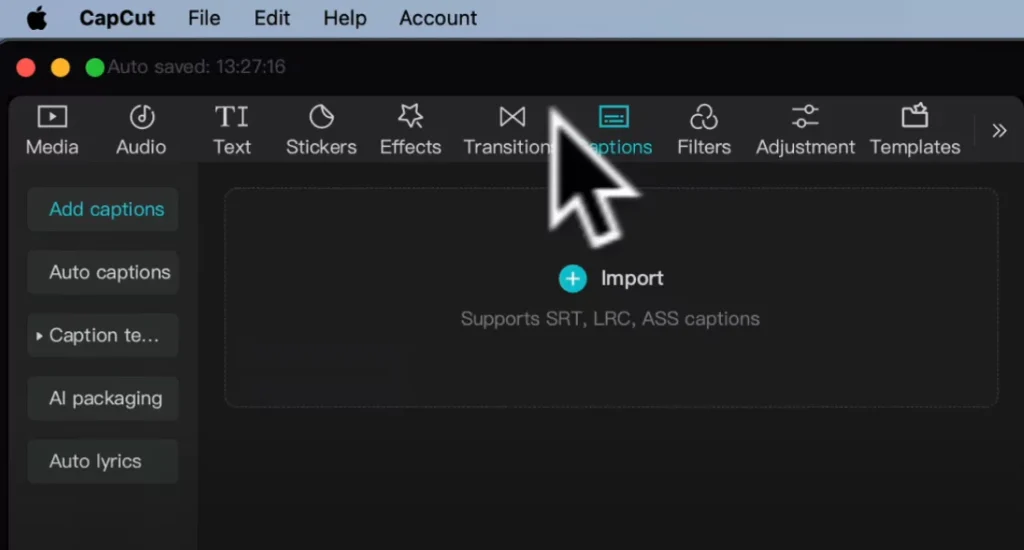
Step 2: Use Auto Captions
CapCut’s Auto Captions feature saves time by automatically generating subtitles based on your speech.
- Go to the Captions tab.
- Click Auto Captions.
- Hit Generate and CapCut will transcribe your audio.
You’ll see a new caption track appear above your timeline.
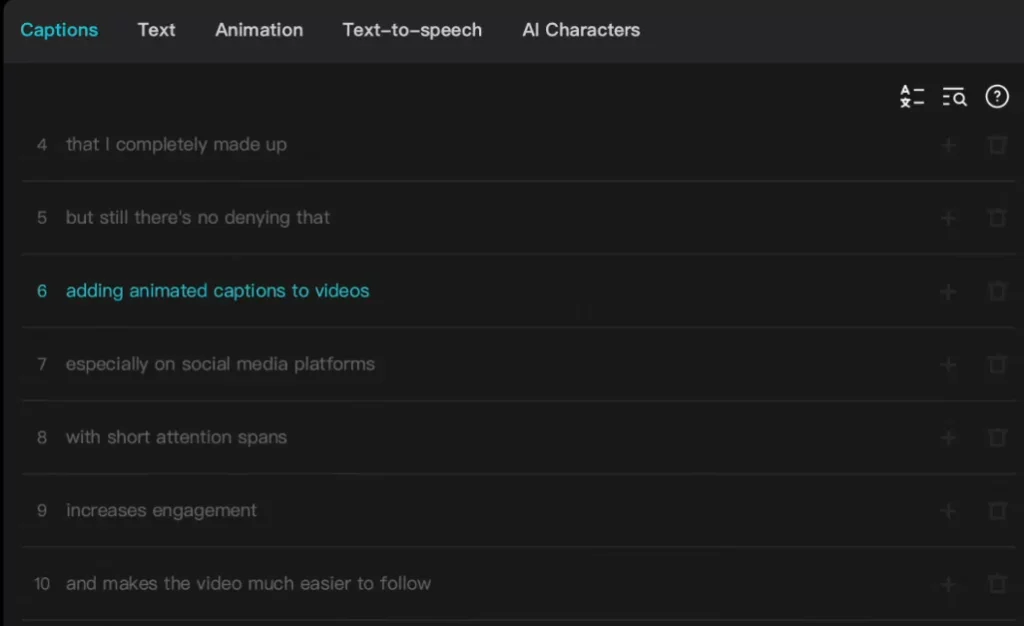
Fixing Errors
CapCut usually does a good job, but mistakes can happen.
- Click any caption block to edit it.
- Use the text box on the right to correct any word.
- You can also view your full script, delete unnecessary lines, or add new ones.
Step 3: Sync the Timing
Sometimes captions don’t align perfectly with your audio.
- Look at the waveform to see where speech begins.
- Drag the edges of each caption block to match the audio for a clean sync.
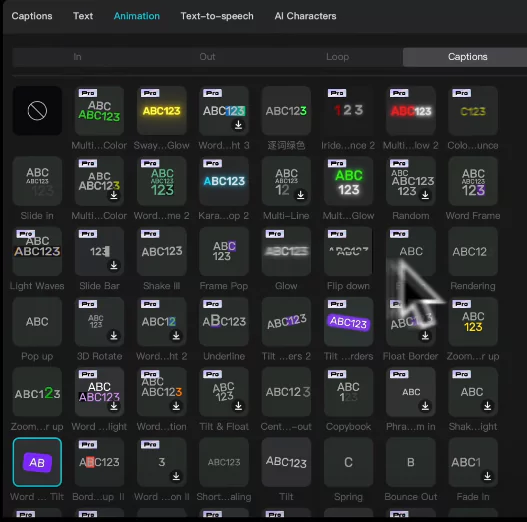
Step 4: Style Your Captions
Now for the fun part — adding animation!
- Select the entire caption track.
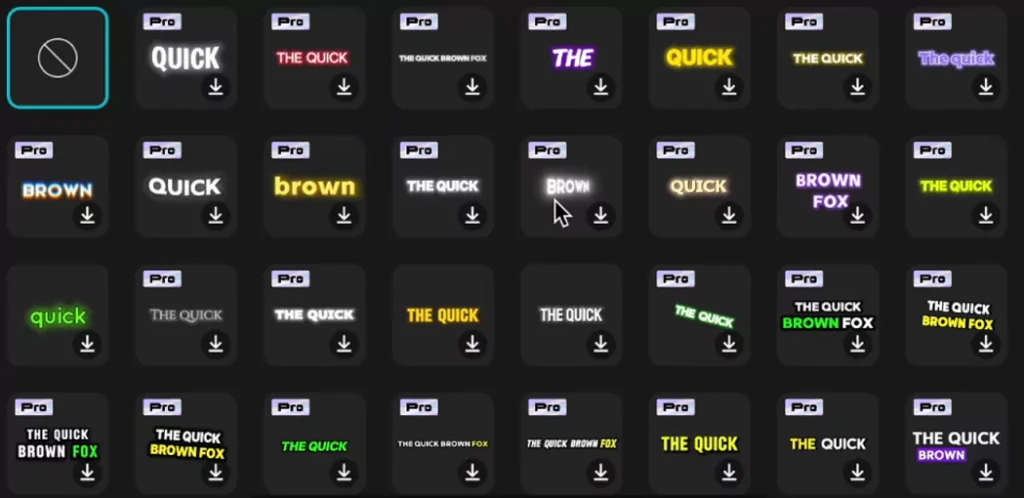
- Go to Text > Templates.
- Browse through CapCut’s built-in animated caption styles (both free and Pro).
- Select your favorite — it will apply to the whole caption track.
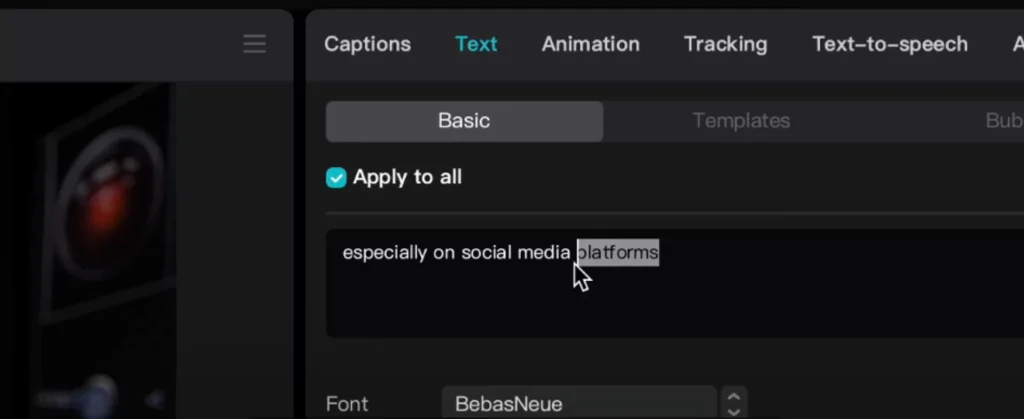
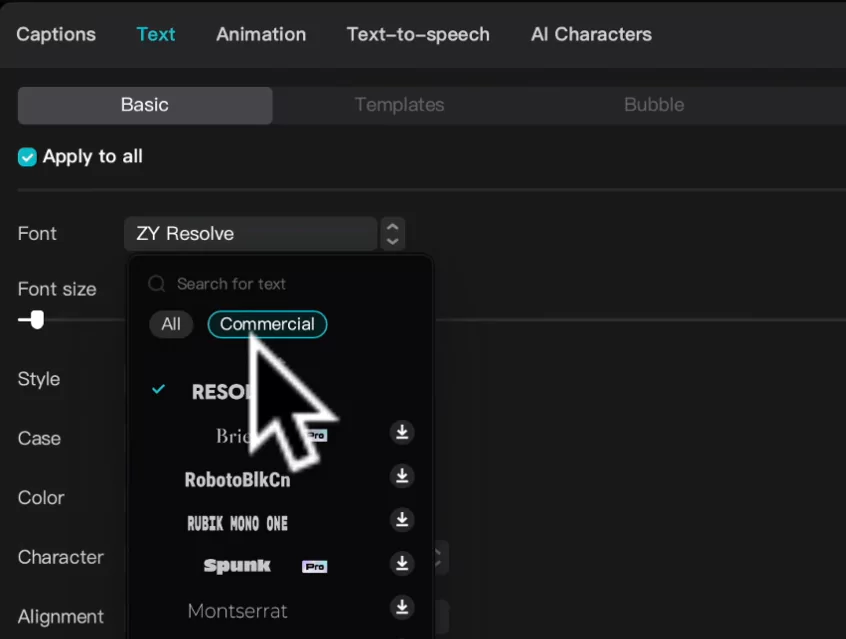
You can also adjust:
- Font type
- Font size and color
- Position on screen (by dragging in the preview window)
Make sure to toggle “Apply to All” when you want these settings applied across every caption.
Step 5: Emphasize Important Words
Want a specific word (like a number or phrase) to pop?
- Split the caption into two parts.
- Duplicate the caption.
- Edit each one to isolate the key word.
- Resize or restyle it individually.
This adds visual variety and draws attention to critical information.
Step 6: Add Caption Animations
For motion effects:
- Go to the Animation tab.
- Explore different in/out/loop animations for captions.
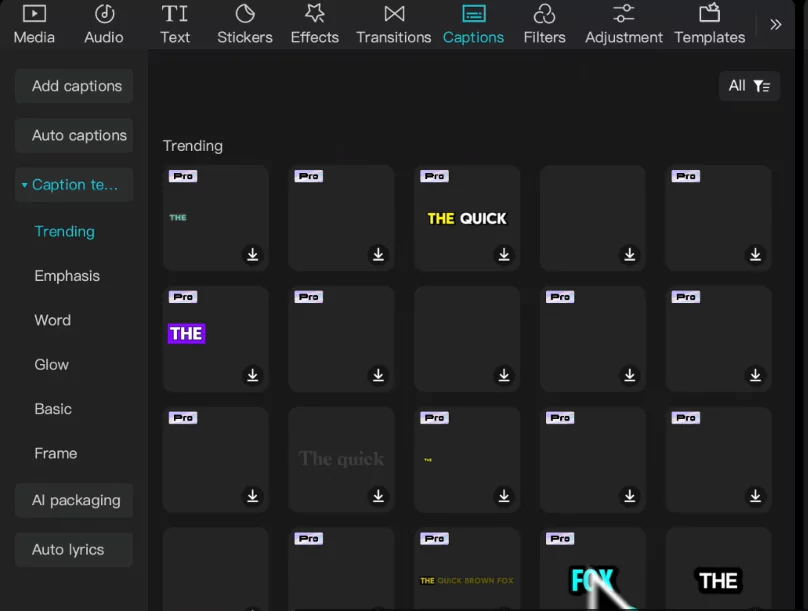
Want to add captions without speech? Use Caption Templates:
- Navigate to Captions > Caption Templates.
- Choose a style and hit the blue plus to insert it.
- Sync it manually to the beat or moment in your video.
Additional Tips
- Manual Captions: If auto-captions miss certain words or phrases, you can manually add captions by:
- Tapping on “Text” > “Add Text”.
- Typing your desired caption.
- Applying the same style and animation as above.
- Consistency: Ensure all captions have a uniform style for a professional look.
- Duplicate, Don’t Stretch
- Instead of dragging one caption across the entire video:
- Hold Option (or Alt) on your keyboard.
- Click and drag the caption to duplicate.
- Change the text and place it at the right time.
- This keeps your editing organized and flexible.
Benefits of Adding Animated Captions
Captions are more than just subtitles — they’re a tool to grab attention. Especially on platforms like TikTok, Instagram Reels, or YouTube Shorts, animated captions can increase watch time and make your videos stand out. Bonus? They’re perfect for audiences who scroll with their sound off.
Adding animated captions to your videos has tons of benefits, especially if you’re posting on platforms like TikTok, YouTube Shorts, or Instagram Reels. Here’s a breakdown of why they’re so powerful:
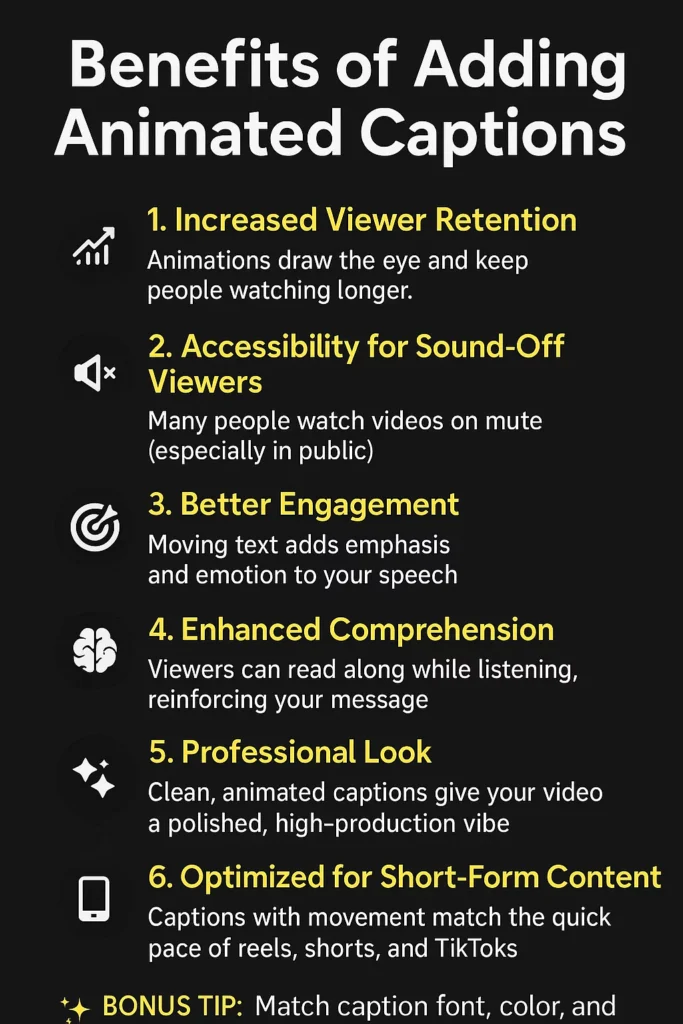
1. Increased Viewer Retention
- Animations draw the eye and keep people watching longer.
- Dynamic captions make your content feel more alive and engaging.
2. Accessibility for Sound-Off Viewers
- Many people watch videos on mute (especially in public).
- Captions ensure your message gets across even without audio.
3. Better Engagement
- Moving text adds emphasis and emotion to your speech.
- Helps highlight important points, jokes, or dramatic pauses.
4. Enhanced Comprehension
- Viewers can read along while listening, reinforcing your message.
- Great for educational or explainer-style content.
5. Professional Look
- Clean, animated captions give your video a polished, high-production vibe—even if it’s shot on a phone.
6. Optimized for Short-Form Content
- Captions with movement match the quick pace of reels, shorts, and TikToks.
- They help your video stand out in a feed full of static text or no captions at all.
If you’re branding your content, you can match your captions’ font, color, and motion style to your visual identity!
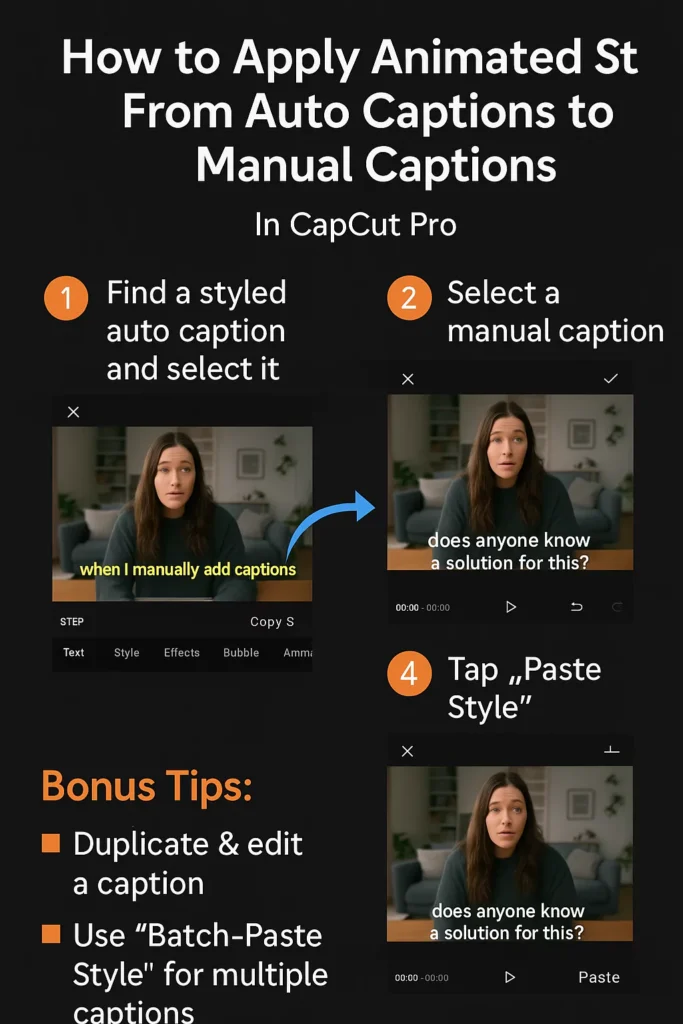
Step-by-Step: Match Manual Captions with Auto-Caption Style
Here is a simple step-by-step guide (with a visual-style reference in mind) to help apply the animated caption style from auto-captions to your manual ones in CapCut.
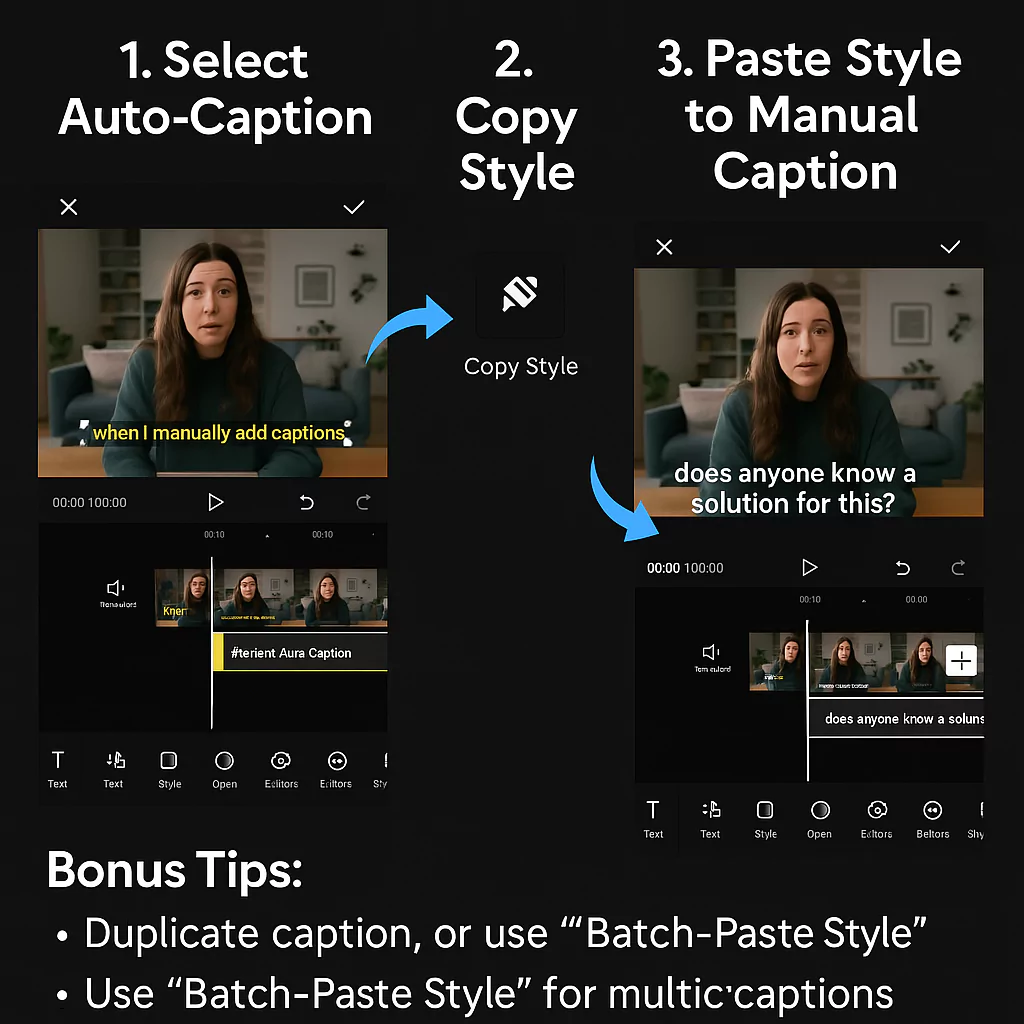
Step 1: Identify the Styled Auto Caption
- Go to the auto-generated caption that already has the animation and style you like.
- Tap to select it.
Step 2: Copy the Style
- In the bottom toolbar, find and tap “Copy Style” (look for a paintbrush or roller icon).
- CapCut will confirm that the style has been copied.
Step 3: Apply Style to Manual Captions
- Tap the manual caption (the one you added yourself).
- Then tap “Paste Style” from the toolbar.
Your manual caption should now have the same animation, font, color, and size as the auto one.
Bonus Tips for Faster Workflows:
Option 1: Duplicate & Edit
- Duplicate a styled auto-caption.
- Move it to the right spot in your timeline.
- Double-tap the text to change it manually.
This way, you keep all the styling without reapplying anything.
Option 2: Use “Batch Paste Style”
If you’re on mobile and editing multiple captions:
- After copying the style, you can tap and hold on one caption, then multi-select others.
- Then tap “Paste Style” to apply it to all selected captions at once.
CapCut Styling Cheat Sheet
Here’s a custom cheat sheet you can refer to while editing in CapCut:
1. Copying the Style:
- Select the auto-generated caption with the desired style/animation.
- Tap the “Copy Style” button (usually represented by a paintbrush or roller icon).
2. Applying the Style to Manual Captions:
- Tap the manual caption you want to style.
- Tap “Paste Style” to apply the copied style.
- Confirm that the animation, font, color, and size now match the auto-caption.
3. Alternative Workflow: Duplicate & Edit
- Duplicate a styled auto-caption from your timeline.
- Move the duplicate to the correct timing.
- Edit the text to match your manual caption.
4. Batch Editing:
- After copying the style, select multiple manual captions (tap and hold to multi-select if supported).
- Tap “Paste Style” to apply the style to all selected captions in one go.
Keep this cheat sheet handy for quick reference during your editing process. Enjoy your streamlined editing!
CapCut’s animated captions are a powerful and free way to enhance your videos. Whether you are captioning a vlog, reel, or skit, adding motion to your text can make your content more watchable, accessible, and visually appealing.
Here is a video guide on How To Add Animated Captions In CapCut: