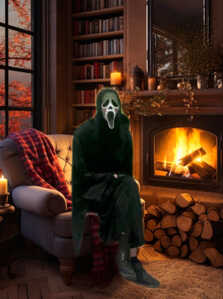
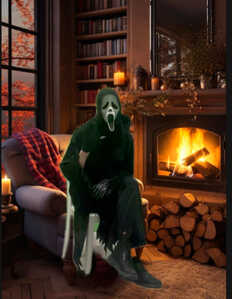
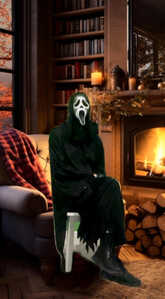
Hello, I use Capcut mobile for my video editing. I'm running into an issue with one of my videos where after using auto removal I can't completely remove the chair object. I want to remove the entire chair because one of my backgrounds I'm adding is a chair by a fireplace. I tried using the custom removal, but that is too much manual work doing frame by frame. Looking for suggestions to address the issue quickly. My video is too big to upload so I'll show some screenshots.
Hi,
CapCut's Auto Background Remover is having trouble cleanly removing the chair because the subject (Ghostface character) is sitting in it, and the chair blends with the clothing and background. This is a common limitation of AI removers when foreground and background elements are tightly connected.
Quick solutions to fix or mask the chair:
Here are some fast and relatively easy options to solve or hide the leftover chair without doing frame-by-frame edits:
1. Use a foreground mask (overlay trick)
Create a version of your background (chair by fireplace) without the Ghostface character and place it as an overlay in front of the video to cover the chair bits that weren’t removed.
Steps in CapCut mobile:
-
In your project, tap Overlay > Add Overlay, choose your clean fireplace image.
-
Resize and position it so it sits directly over the leftover chair area.
-
Use the Mask tool (under Overlay tools) → choose Split or Linear and feather it to blend with the background.
-
If needed, duplicate and adjust across your timeline.
This masks the chair parts without full frame-by-frame editing.
2. Use CapCut's “Retouch” tool
On some devices, CapCut offers a Retouch > Remove Object or Face/Body Beautify tool — not perfect, but can sometimes help blur or soften edges from leftover items like chairs.
However, be aware that this feature may only be on CapCut Pro or certain phone models.
3. Export a clean frame & use it as overlay
If the subject doesn’t move much:
-
Export one frame with the Ghostface subject (and most of the chair removed).
-
Use a photo editing app (like Remove.bg or Pixlr) to erase remaining chair parts manually.
-
Reimport the cleaned-up frame as an image overlay and stretch it across that part of the timeline.
This reduces the need to clean every frame — just do it once.
Alternative advanced option:
Use CapCut Desktop (PC) or an external app like Runway ML or Unscreen Pro which offer more powerful object removal with better edge detection. You can process the clip once and then bring it back into CapCut.
If CapCut's built-in tools aren't cutting it for this specific video, and you're willing to explore other options, some online tools specialize in object removal. These will require uploading your video, which you mentioned is large, but they often leverage more advanced AI. Examples (you would need to research current pricing and features):
- RunwayML: Known for its powerful AI magic tools, including inpainting (object removal). It's more of a professional tool, but can be very effective.
- AniEraser: An online object remover that allows you to lasso the area with the unwanted object.
- Unscreen: Primarily for background removal, but some tools within these platforms might offer more refined object removal.
Optimize your footage for auto removal (if possible for future shoots):
- Lighting: Ensure the chair and your subject are well-lit and evenly lit. Shadows can interfere with CapCut's ability to distinguish objects.
- Contrast: Film the video with a background that has high contrast against the chair. If the chair is dark, a light background would be better. If the chair is a common color, a more unique background color might help.
- Minimal Movement: If the chair or camera is moving excessively, it can make it harder for the auto-removal to work cleanly.
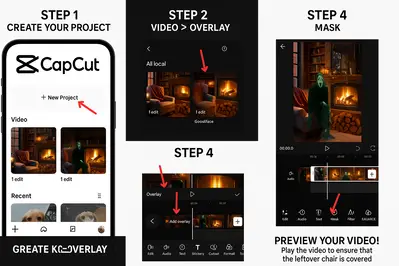
Here is a guide on hiding leftover chair using an overlay mask in CapCut Mobile
What you need:
-
Your background image (chair by fireplace — without Ghostface).
-
Your edited clip (Ghostface with chair mostly removed).
-
CapCut Mobile (latest version).
Step 1: Create your project
-
Open CapCut and tap New Project.
-
Add your background image (fireplace without Ghostface).
-
Then tap Overlay → Add Overlay → Select your edited Ghostface clip.
Step 2: Resize and Position the Ghostface Clip
-
Resize and move the overlay (Ghostface clip) so it aligns naturally in front of the fireplace.
-
Trim the overlay to match the length of your background.
Step 3: Add the Fireplace Image Again as an Overlay
This is the clever part where we use the background to cover the leftover chair.
-
Tap Overlay again → Add Overlay → choose the same fireplace image.
-
Position it exactly over the chair bits sticking out.
-
Tap the overlay → scroll → choose Mask.
Step 4: Apply Mask to Cover the Chair
-
In the Mask menu, choose:
-
Split (for vertical/horizontal masking) OR
-
Linear (for diagonal masking)
-
-
Adjust the position and feather to blend it naturally.
-
If needed, duplicate the overlay and adjust masks for better coverage.
Step 5: Preview and Adjust
-
Play your video to ensure the chair is fully hidden.
-
If Ghostface moves, adjust the overlay keyframes to follow.
If the above solutions are not helping then you can try the below methods:
- Duplicate and mask: This is often the best approach for stubborn objects.
- Duplicate your video clip: Place your original video on the main track. Then, copy and paste it as an overlay on the track above.
- Apply Auto Removal to the top clip: On the top (overlay) clip, apply the "Auto Removal" feature as you normally would. This will remove most of the background, likely leaving some remnants of the chair.
- Mask the Chair on the bottom clip: Select the bottom (original) clip on the main track. Go to the "Mask" option. Choose a mask shape (rectangle, circle, or even a custom shape if available) that roughly covers the chair.
- Invert the Mask (if needed): If the mask hides the chair, you'll want to invert it so that only the chair is visible within that masked area.
- Adjust and Refine: Carefully adjust the size, position, and feathering of the mask on the bottom clip to isolate only the chair remnants that the auto-removal missed.
- "Erase" the Chair: Now, by adjusting the mask on the bottom layer, you are essentially "erasing" the chair from view, as the auto-removed top layer will show through where the chair was. This avoids frame-by-frame custom removal.
- Chroma Key (If you can add a temporary green/solid color background): If you're able to re-record the problematic part with a solid, contrasting background (like a green screen or even a plain colored sheet behind the chair), you could use the Chroma Key feature.
- Place the footage with the solid background on an overlay track.
- Go to "Cutout" and select "Chroma Key."
- Use the color picker to select the solid background color.
- Adjust "Strength" and "Shadow" to get a clean removal of the background, leaving only the chair.
- You can then place this extracted chair over your desired background or manipulate it as needed. This is more of a re-recording solution than a quick fix for existing footage.
- Consider "Smart Brush" in custom removal (if you have CapCut Pro or for very short segments): While you mentioned custom removal is too much manual work, if it's just a small, persistent area of the chair that auto-removal misses, the "Smart Brush" in custom removal might be quicker than trying to mask it perfectly. It's still manual, but often more intelligent than a regular brush.
Important note on Auto Removal: Sometimes, CapCut's auto-cutout might not show the complete removal in the preview but will render correctly upon export. If you're confident it should work, try exporting a short segment to see the final result.
Given your concern about manual frame-by-frame work, the duplicate and mask method within CapCut is likely your best bet for the existing video. It allows you to leverage auto-removal for the majority and then precisely "patch" the problematic area with a mask, without needing to manually draw on every single frame.
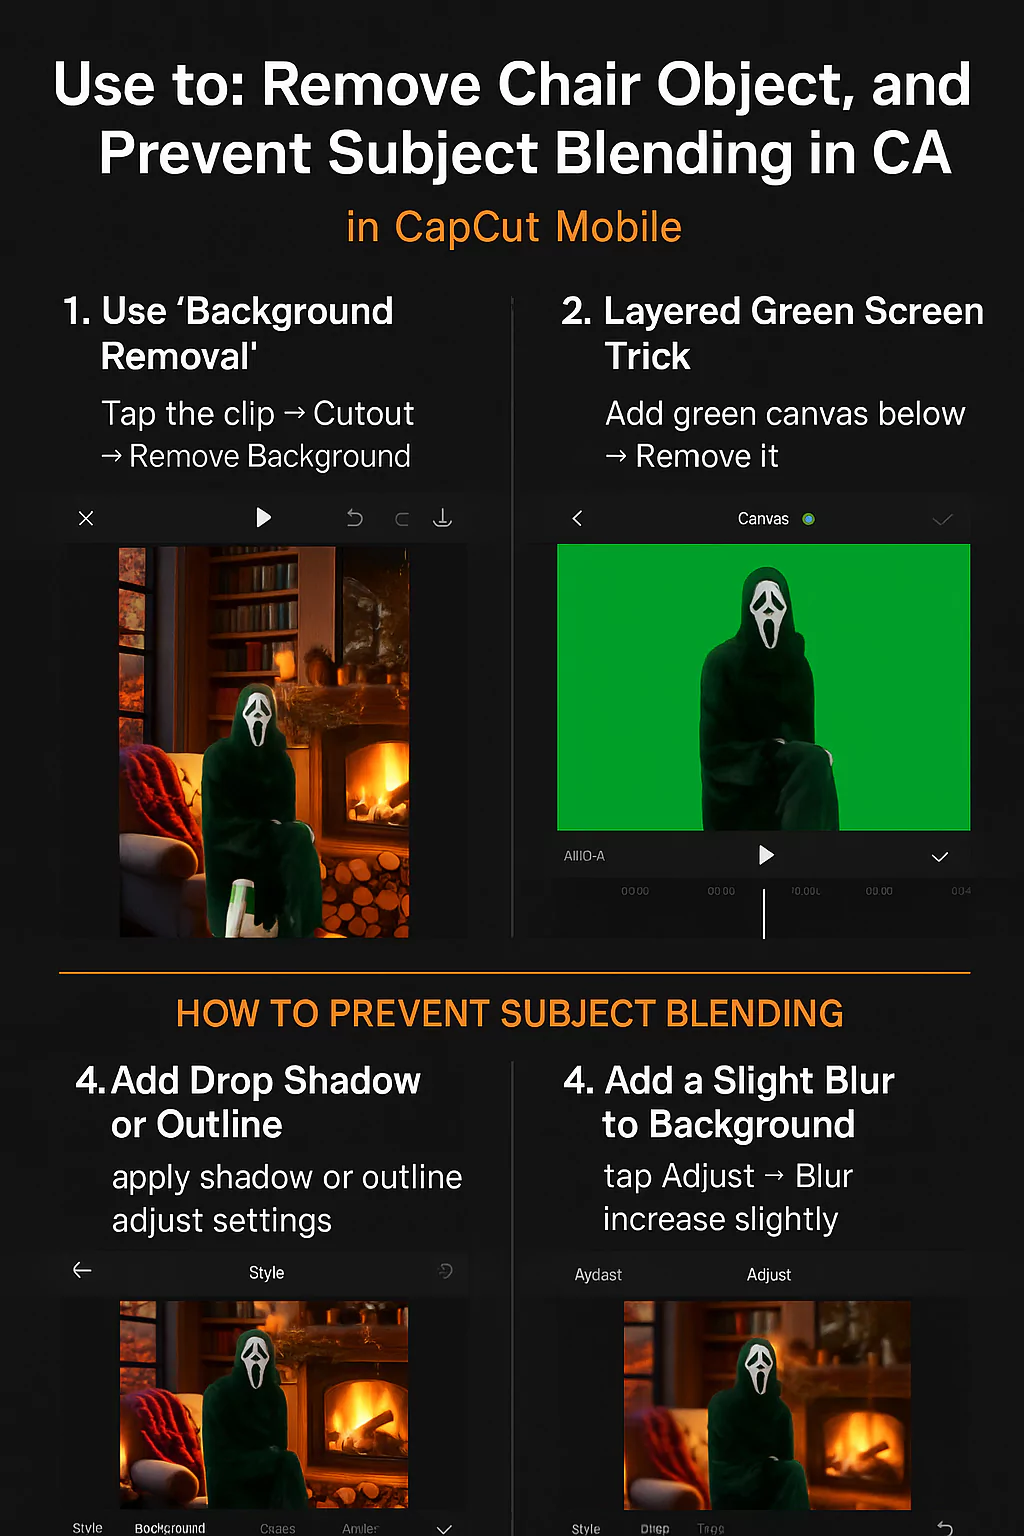
Thanks for the updated screenshot and video. Since you are facing:
-
Partial chair removal
-
Frequent subject movement
-
Blending of the subject into the background
Here is a better workflow tailored for CapCut Mobile to clean up the object and enhance separation between the subject and the new background:
1. Use “Background Removal” Instead of Object Removal
-
Go to your clip in the timeline.
-
Click on the clip > Cutout > Remove Background.
-
CapCut will attempt to isolate the person and remove the background — including the chair.
-
You may get better results than with “Auto Remove Object.”
If that doesn’t fully work:
2. Layered Green Screen Trick (Simple and Works Well with Movement)
- Export the current clip with the chair still partially visible.
- Import that exported clip into a new project.
- Add a solid green background below it.
-
Click on “Canvas” > “Background” > Pick bright green (or blue — whichever doesn’t appear on your subject).
Use “Remove Background” or “Chroma Key” on the green part to clean it up better.
-
This acts like a faux green screen and lets CapCut isolate better due to higher contrast.
How to prevent subject from blending into the fireplace scene
Use drop shadow or outline effect:
-
Select the subject clip.
-
Click on Style or Effects.
-
Apply Drop Shadow or Outline (white or red).
-
Adjust opacity and blur to make the subject “pop” from the background.
Add a Slight Blur to the Background:
-
Click on the background clip.
-
Add the “Blur” filter or use Adjust > Blur.
-
This creates depth and visually separates your subject.
Use Motion Tracking
In CapCut Mobile, the tracking feature is limited — but if your subject moves too much and removal breaks:
-
Consider using CapCut PC or another app like Runway ML or Adobe Premiere with masking for more accurate tracking.

