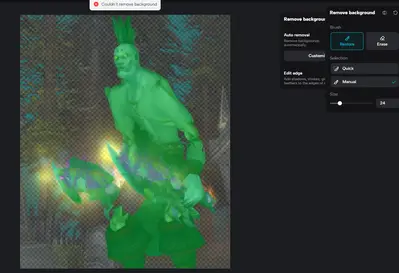
After clicking on "Auto background removal," I was not satisfied with the results, so I tried to manually restore some of the removed content, everytime I try to click save, it says "Couldn't remove background" same for erase.
I have tried multiple pictures, and the result is the same.
I am a pro user and using the CapCut PC app.
Hi,
This is a known CapCut PC bug where the manual Restore or Erase tools in background removal fail to save, even for Pro users, and give the "Couldn't remove background" error.
Here are the main causes and fixes you can try:
Why this happens?
-
Temporary server-side glitch – Even though manual restore/erase is local, CapCut still sends background removal data to its servers for processing. If the connection fails, it can’t save.
-
Cache corruption – Old background removal data in CapCut’s local cache can break the save process.
-
App bug in recent updates – This has started after recent updates in the PC version.
-
Image size/format issue – Very large PNGs or certain transparency settings sometimes trigger errors.
How to fix this error:
Clear CapCut’s cache
-
Go to Settings → Storage → Clear Cache in the CapCut PC app.
-
Close and reopen the app.
-
Try the same image again.
Save edits in smaller steps
-
Instead of restoring a lot in one go, restore in small sections, then save after each.
-
This sometimes bypasses the server timeout.
Convert your image before importing
-
Open the image in Paint or Photoshop and re-save it as JPG or a flattened PNG (no transparency).
-
Then try background removal again.
Use “Custom” background removal
-
Skip the auto-remove first.
-
Directly use Brush → Restore to paint the subject.
-
This avoids the first auto step that sometimes breaks saving.
Try the web version of CapCut
-
Go to capcut.com/editor and log in.
-
Upload your image and do the same steps — web version often works even when PC app is bugged.
Roll back or update CapCut
-
If this started after an update, try reinstalling and installing an older version of CapCut.
-
Or check for the latest update — CapCut patches these bugs quickly.
Below is an offline workaround you can use right now to do the same restore/erase background editing without hitting CapCut’s save bug.
This method will keep all the fine edges, and when you re-import the image into CapCut, it will behave exactly like the original.
Offline Background Removal + Restore Workaround
We willl use Photopea (free, browser-based Photoshop alternative) or GIMP (free desktop app).
Both work offline after the first load.
Option 1 – Photopea (Fastest & No Install)
-
Open Photopea
-
Once loaded, you can turn off Wi-Fi if you want offline use.
-
Open your image
-
Drag & drop the PNG/JPG from your PC.
-
-
Remove the background
-
Menu: Select → Magic Cut (similar to CapCut Auto Remove).
-
Adjust the Green (keep) and Red (remove) brush like you would in CapCut’s Restore/Erase.
-
-
Fine-tune edges
-
You can zoom in and use the brush tools to precisely paint back or erase parts.
-
-
Export with transparency
-
File → Export As → PNG (keeps transparent background).
-
-
Import into CapCut
-
Now your image is already perfectly cut — no need to use CapCut’s bugged Restore/Erase at all.
-
Option 2 – GIMP (Offline Desktop App)
-
Download GIMP
-
Install and open.
-
Open your image
-
File → Open → Select your image.
-
-
Remove background
-
Use Select by Color Tool or Fuzzy Select Tool to remove big areas.
-
Use Eraser Tool for manual cleanup.
-
-
Restore parts if needed
-
Keep a duplicate of the original layer under the cutout layer.
-
Use the Layer Mask to paint back areas instead of erasing permanently.
-
-
Export as PNG
-
Keeps transparency for CapCut.
-
Why this works better:
-
No server errors (everything is done locally).
-
You can zoom in for pixel-perfect edges.
-
Full control over brush size & hardness.
bump

