Not sure which aspect ratio or resolution to use in CapCut?
We have developed a free calculator utility that gives you the exact video size settings for TikTok, Instagram Reels, YouTube Shorts, and more — so your videos upload sharp, properly cropped, and platform-ready.
Select your platform below and get the correct CapCut export settings instantly.
No guessing. No blurry exports.
Why Video Size Matters in CapCut
Using the wrong video size in CapCut can cause:
- Blurry or pixelated exports
- Black bars or awkward cropping
- Videos getting compressed by Instagram or TikTok
- Content being rejected from Shorts or Reels feeds
Each platform has a preferred aspect ratio and resolution, and matching it correctly in CapCut helps preserve quality and reach.
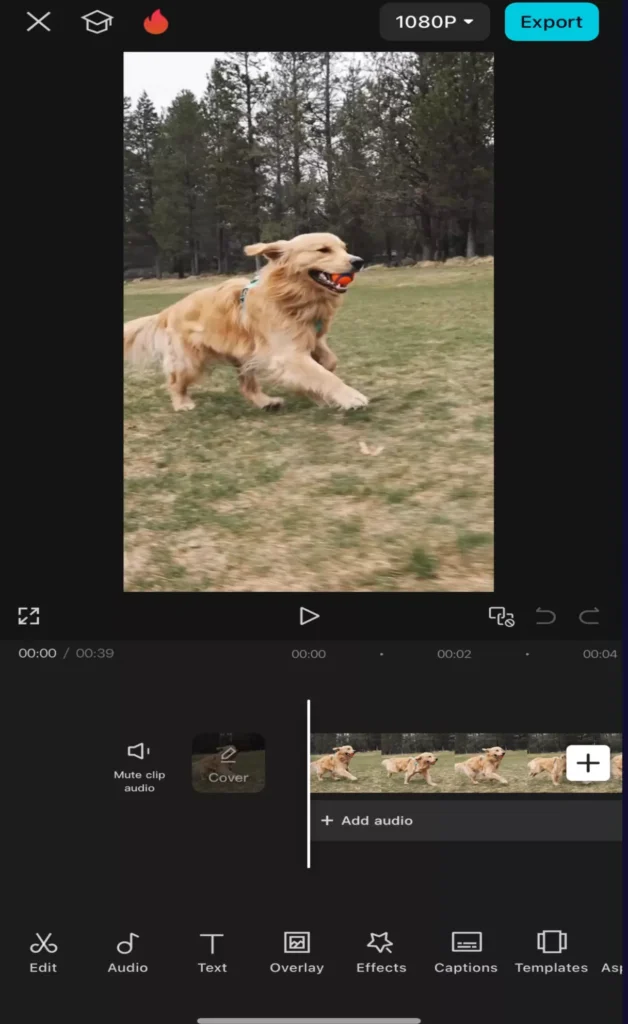
CapCut Video Sizes by Platform
Below are the most commonly used CapCut aspect ratios and resolutions for social media in 2026.
CapCut Settings for TikTok
- Aspect Ratio: 9:16
- Resolution: 1080 × 1920
TikTok videos perform best when edited vertically at full HD. Always set your CapCut canvas to 9:16 before importing clips.
CapCut Settings for Instagram Reels
- Aspect Ratio: 9:16
- Resolution: 1080 × 1920
Instagram Reels compress heavily if the resolution is mismatched. Avoid scaling up smaller clips inside CapCut.
CapCut Settings for YouTube Shorts
- Aspect Ratio: 9:16
- Resolution: 1080 × 1920
YouTube Shorts require vertical video under 60 seconds. Exporting at the correct size helps avoid upload errors.
CapCut Settings for YouTube Videos
- Aspect Ratio: 16:9
- Resolution: 1920 × 1080
For standard YouTube videos, always match the timeline resolution to your export resolution in CapCut.
Use the CapCut Aspect Ratio & Resolution Calculator
Aspect Ratio:
Resolution:
Choose your platform from the above and instantly see:
- The correct aspect ratio
- The recommended resolution
- A quick CapCut tip to avoid quality loss
This calculator is updated to reflect current platform requirements, so you don’t have to search through outdated tutorials. You can quickly bookmark this page and come back whenever you need help choosing your aspect ratios for every platform needs.
Best Export Settings in CapCut
Even with the correct resolution, exports can look bad if other settings are wrong.
For best results in CapCut:
- Match timeline resolution to export resolution
- Avoid scaling clips above 100%
- Use 30fps for most content, 60fps for fast motion
- Increase bitrate if your video looks compressed
These small changes can dramatically improve final quality.
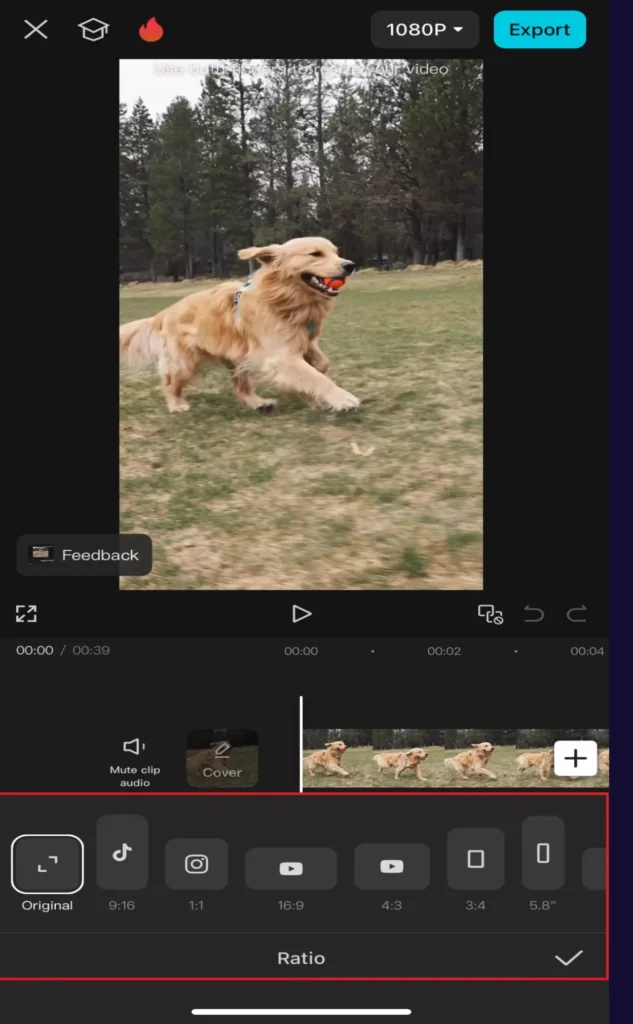
CapCut Aspect Ratios Explained
An aspect ratio describes the shape of your video, not the quality.
For example:
- 9:16 → Vertical (phone-first platforms)
- 16:9 → Horizontal (YouTube, desktop)
- 1:1 → Square (feeds and carousels)
In CapCut, choosing the wrong aspect ratio often leads to:
- Cropped faces
- Important elements cut off
- Black bars on upload
Always set the aspect ratio first, then edit — not the other way around.
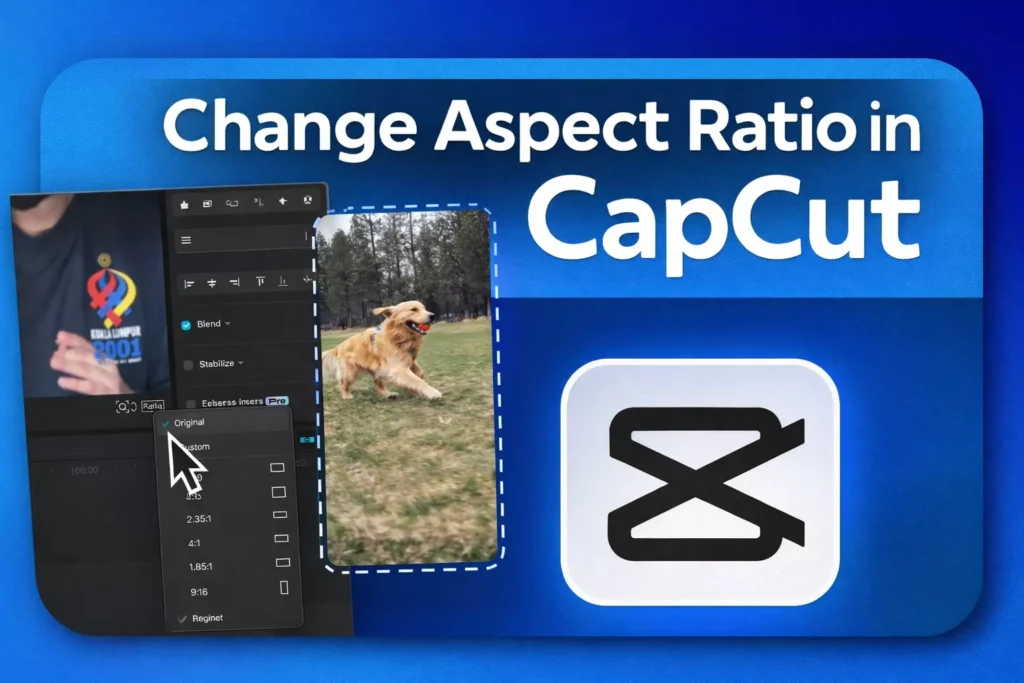
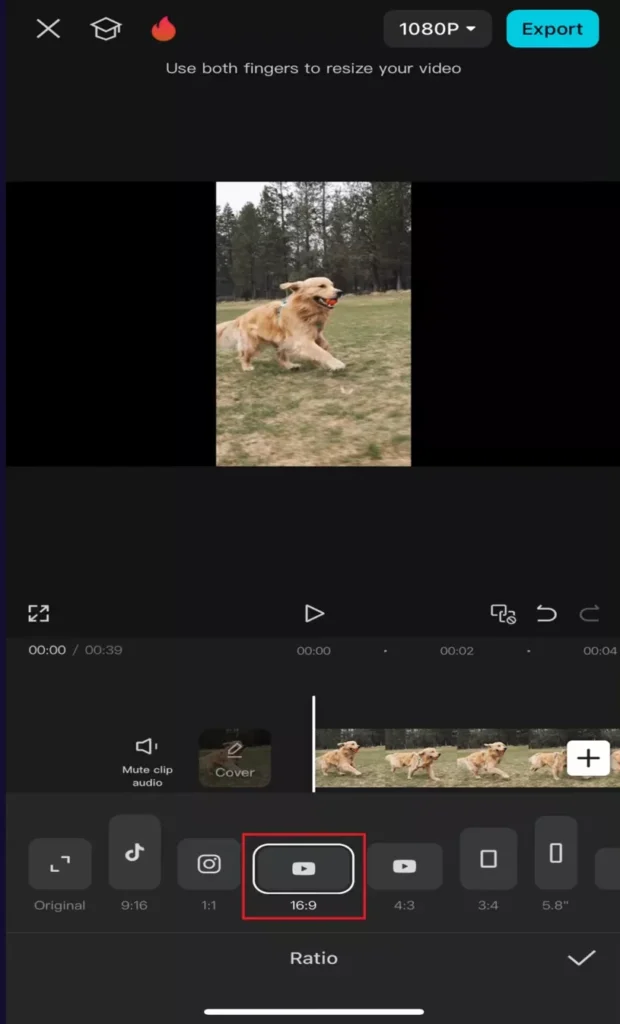
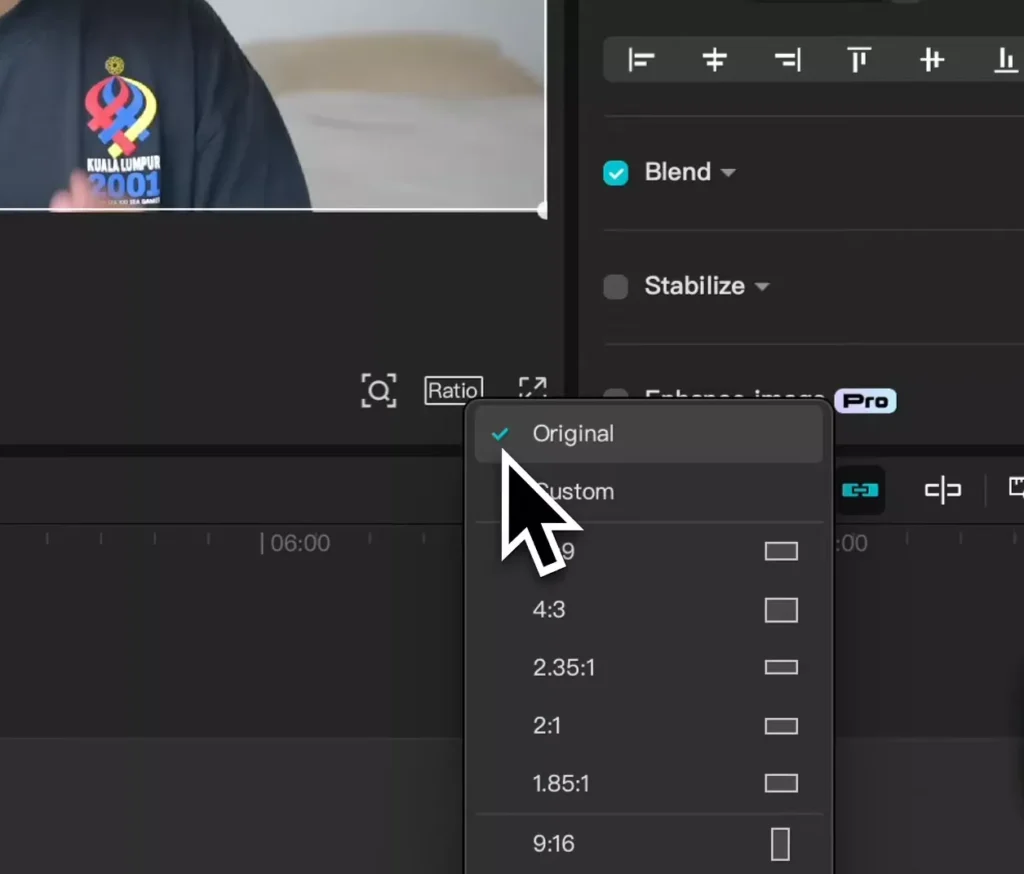
How to Change Video Aspect Ratio in CapCut
If your video looks cropped, zoomed in, or has black bars, you usually just need to change the aspect ratio correctly inside CapCut.
CapCut makes this easy with its built-in Format / Canvas tools.
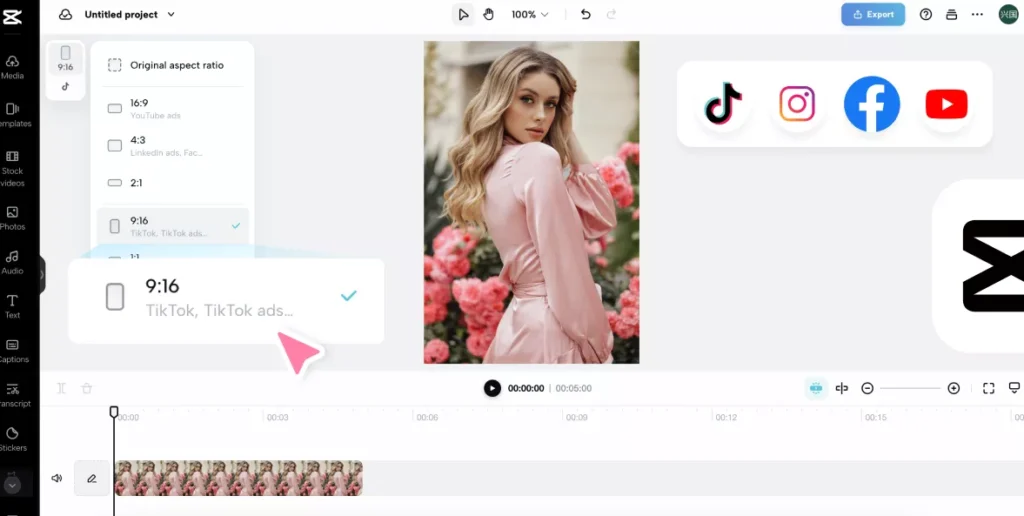
Change Aspect Ratio in CapCut (Mobile: iPhone & Android)
- Open your project in CapCut
- Tap the Format or Canvas or Aspect ratio option
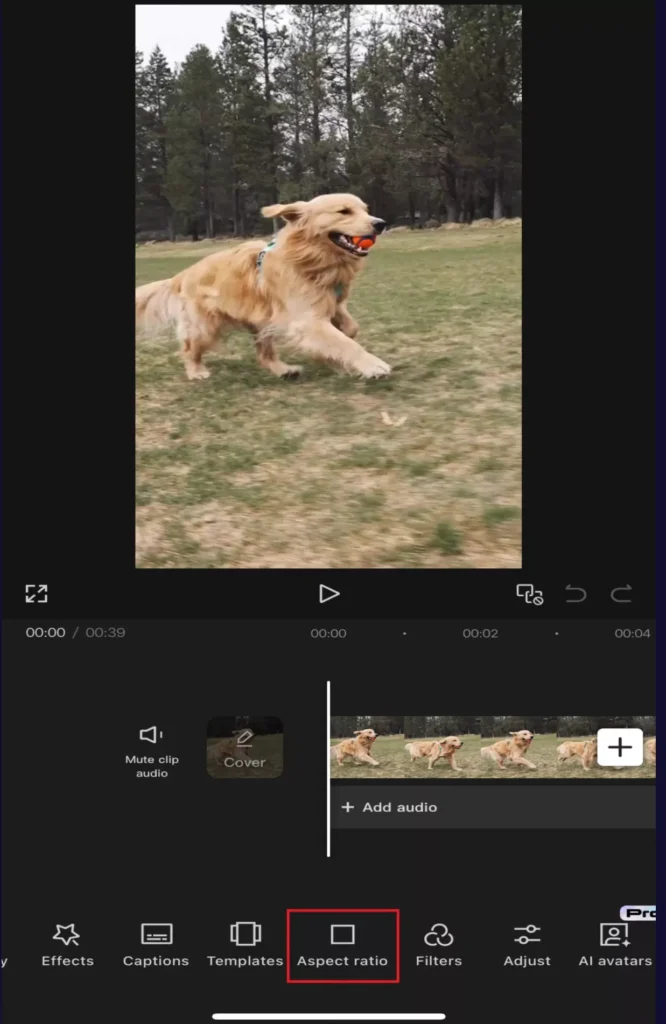
- Choose your target ratio (9:16, 16:9, 1:1, etc.)
- Reposition or resize clips to keep the subject centered
- Confirm and continue editing
Tip: Always choose the aspect ratio before adding text and overlays. This prevents misalignment later.
You can see these steps from the YouTube video below:
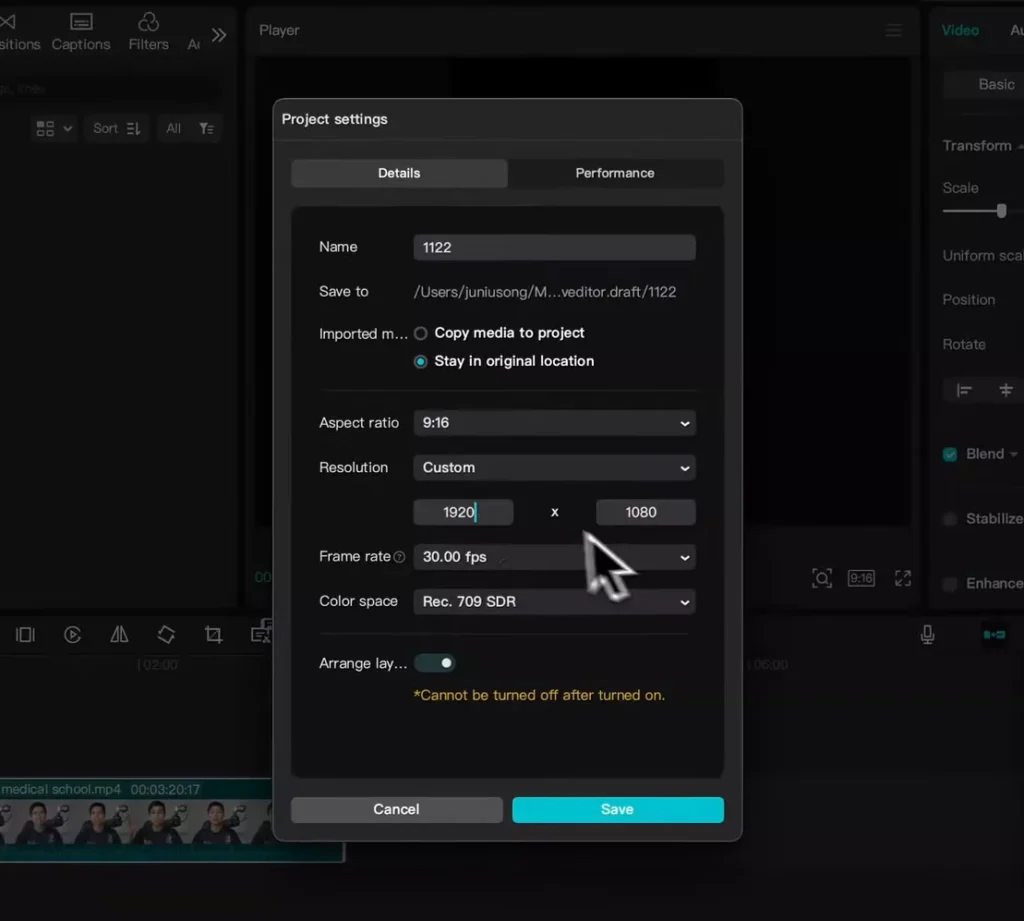
Change Aspect Ratio in CapCut (Desktop & Web)
- Import your video into CapCut Desktop or Web
- Look for Aspect Ratio or Canvas Size in the toolbar
- Select the correct format for your platform
- Adjust framing if needed
- Export using the same resolution as your canvas
Tip: Your timeline resolution and export resolution should always match to avoid blur.
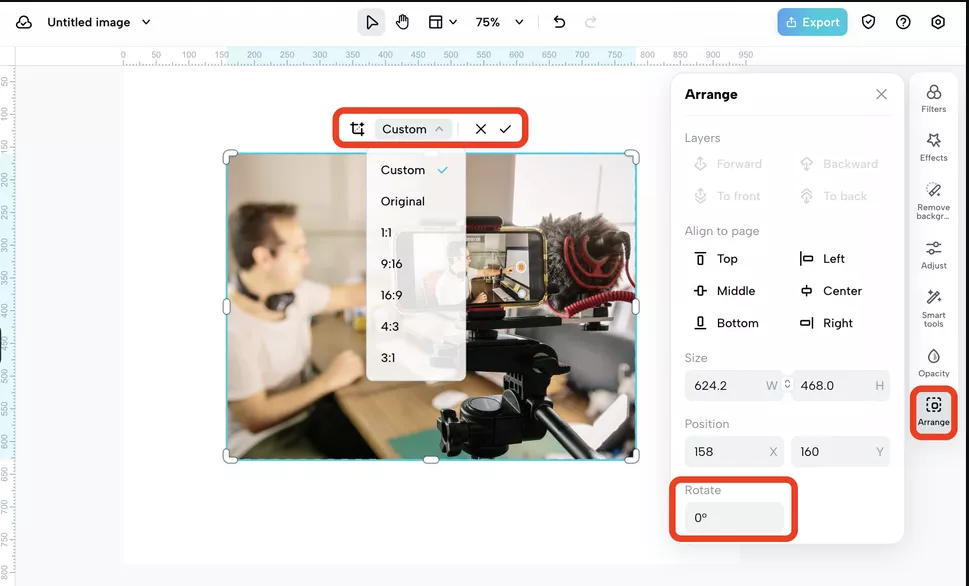
What to Do If Your Video Doesn’t Fit the New Ratio
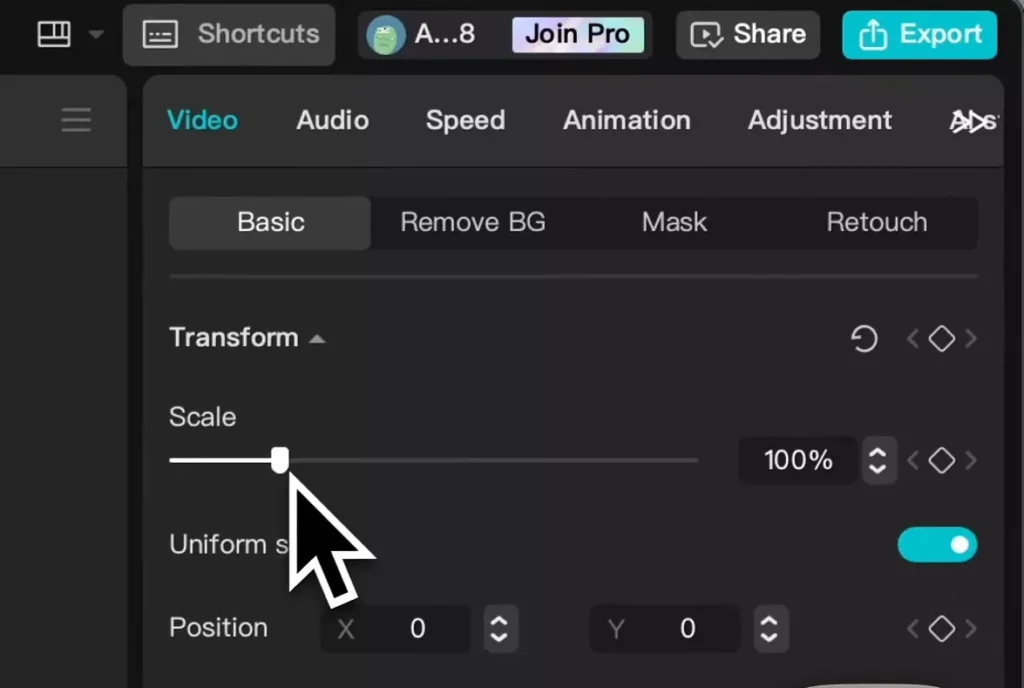
When switching aspect ratios, your original footage may not fill the screen perfectly. CapCut gives you a few safe options:
- Resize and reposition the clip manually
- Add a blurred background instead of zooming in
- Avoid scaling above 100% whenever possible
These methods help preserve quality while keeping everything in frame.
Best Practice: Aspect Ratio First, Editing Second
One of the most common mistakes in CapCut is changing the aspect ratio after finishing the edit.
For best results:
- Set the aspect ratio
- Confirm the resolution
- Then start editing
This ensures your video stays sharp across TikTok, Instagram Reels, and YouTube.
Use the Calculator to Choose the Right Ratio
Instead of guessing which format to use, scroll back up and use the CapCut Aspect Ratio & Resolution Calculator.
It tells you:
- Which ratio to use
- The exact resolution
- Platform-specific tips to avoid quality loss
Bookmark this page and check it before every export.
Frequently Asked Questions
What is the best resolution for CapCut?
The best resolution depends on the platform. For vertical videos, 1080 × 1920 (9:16) is the standard. For horizontal videos, 1920 × 1080 (16:9) works best.
Why does my CapCut video look blurry after exporting?
Blurry exports usually happen due to resolution mismatches, low bitrate, or scaling footage beyond its original size.
Is 720p okay for CapCut?
720p works, but 1080p is strongly recommended to avoid platform compression and quality loss.
Can I use the same CapCut video size for all platforms?
Vertical platforms (TikTok, Reels, Shorts) share the same 9:16 format, but horizontal platforms like YouTube require different settings.
Common CapCut Video Size Mistakes to Avoid
Even experienced creators make these mistakes:
1. Editing at 9:16 but exporting at 16:9
This causes blur and unwanted padding.
2. Scaling clips above 100%
Upscaling reduces sharpness fast.
3. Mixing resolutions in one timeline
Lower-resolution clips can drag down the entire export.
4. Using low bitrate exports
Especially noticeable on Instagram and TikTok.
Fixing these alone solves most quality complaints.
CapCut Video Size vs Platform Compression
Social platforms compress videos differently:
- TikTok: Aggressive compression on low bitrate files
- Instagram Reels: Heavy recompression if aspect ratio is wrong
- YouTube Shorts: Less compression, but strict format rules
Uploading at the correct resolution and ratio gives platforms less reason to compress your video further.
That’s why matching CapCut settings matters.
Vertical vs Horizontal Videos in CapCut
Choosing between vertical and horizontal should be intentional.
Use vertical (9:16) for:
- TikTok
- Instagram Reels
- YouTube Shorts
- Snapchat
Use horizontal (16:9) for:
- YouTube videos
- Tutorials
- Long-form content
- Desktop-first audiences
CapCut handles both well — the key is starting with the correct canvas size.
Should You Use 4K in CapCut?
4K sounds better — but it’s not always necessary.
Use 4K only if:
- Your source footage is already 4K
- You plan to crop heavily
- You’re exporting for YouTube (not Shorts)
For TikTok, Reels, and Shorts, 1080 × 1920 is ideal.
4K increases export time and file size with minimal real-world benefit.
CapCut Export Checklist (Before You Hit Export)
Before exporting any video, quickly check:
- Correct aspect ratio
- Timeline resolution matches export resolution
- No clips scaled above 100%
- Frame rate is consistent
- Bitrate isn’t set too low
Running through this checklist prevents 90% of quality issues.
Who this tool is for?
This CapCut calculator is helpful if you:
- Are new to video editing
- Post on multiple platforms
- Want consistent quality across uploads
- Are tired of blurry exports
- Edit on mobile or desktop
If you export often, bookmarking this page saves time and mistakes.
Future Enhancements
We are actively improving this tool. Planned additions include:
- Frame rate recommendations
- Bitrate suggestions
- File size estimates
- Platform-specific presets
Check back as the tool evolves. You can comment on this post about what tool you want to see for CapCut PRO.
Final Tip
If your video looks sharp inside CapCut, it should look sharp after upload — as long as the aspect ratio and resolution are correct.
Bookmark this page and use the calculator before exporting any video.