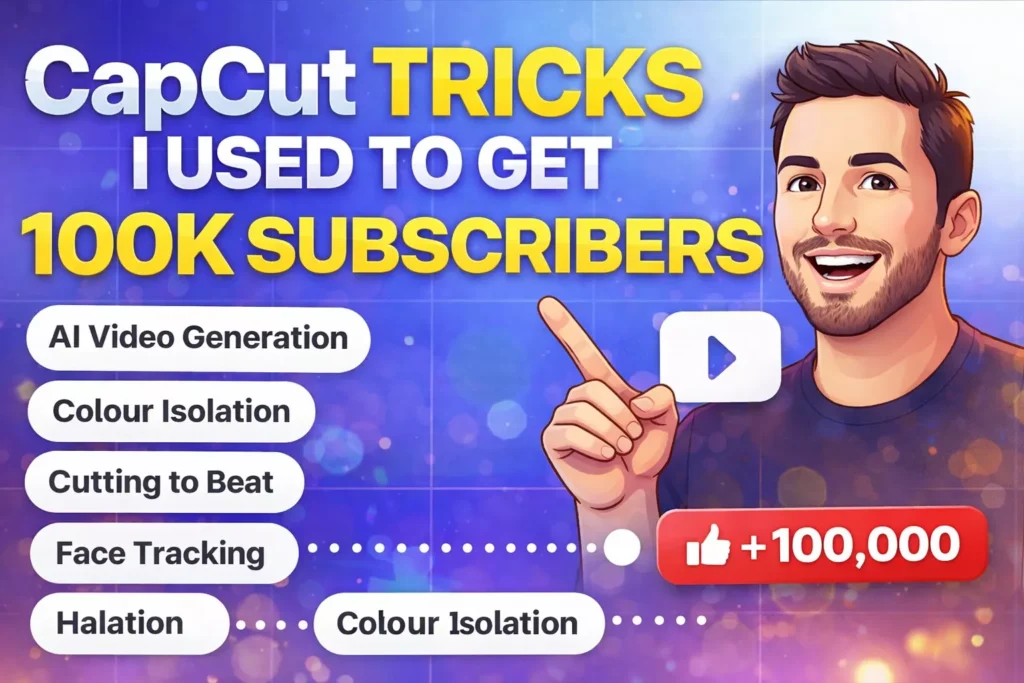
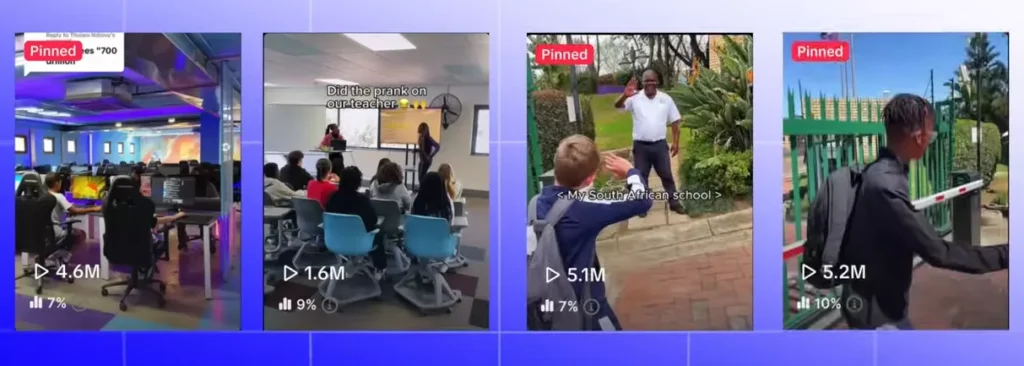
Want proof that simple, smart edits can grow a channel? Using the CapCut tricks below, I grew to nearly 100,000 subscribers in just 80 videos. These aren’t just for YouTube. You’ll see them across cinema, TV ads, music videos, short form, and brand content. If you’re chasing your first 10,000 subscribers, your next million, or sharpening skills as a professional editor, these techniques work.
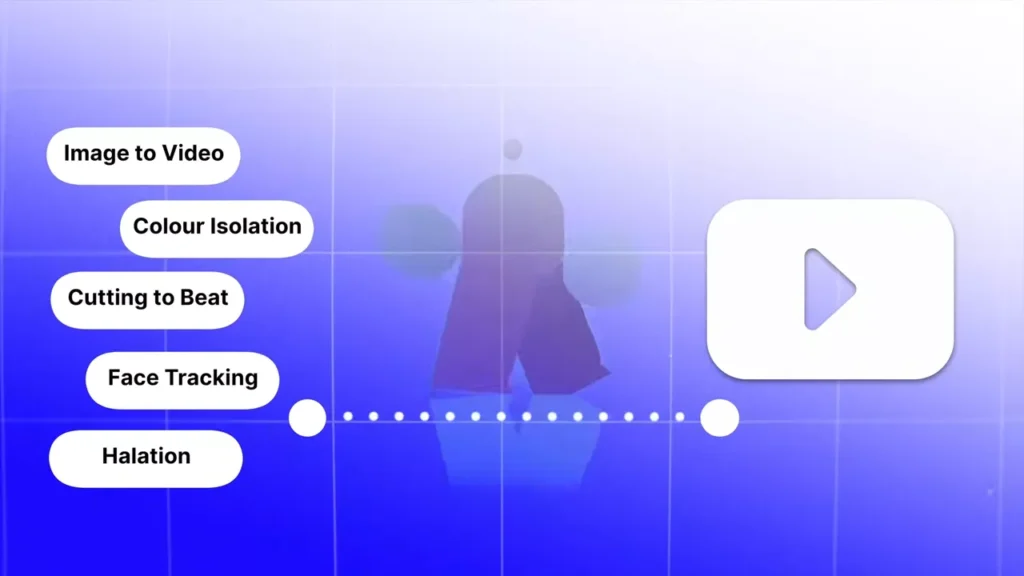
Here’s what you’ll learn in this post today, and how to use each trick to grow and make money from your content:
- AI video generation for intros
- Color isolation for emotional impact
- Cutting edits to the beat for rhythm and flow
- Face tracking for dynamic shots
- Halation for a cinematic glow
These techniques took years to learn, but you can master them fast with focused practice. Let’s get into the steps and examples you can use today.
Trick 1: Create Captivating Intros with AI Video Generation
Great intros hook viewers and keep them watching. CapCut’s latest AI video tool makes it easy to build animated intros from static images, with motion graphics and sound baked in.

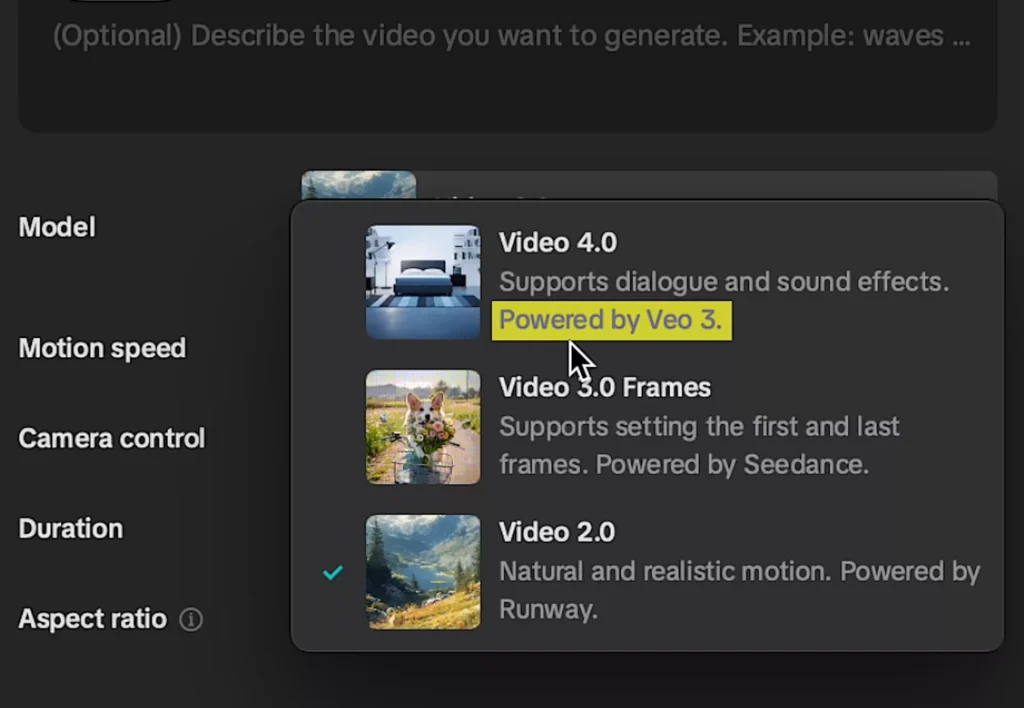
What Makes the Veo 3 Model Special
CapCut now supports Veo 3 for AI video generation, and the results are impressive. Set the video model to 4.0 (powered by Veo 3), feed it a strong prompt, and let the tool create an intro that feels polished and on-brand.
It is not just for channel intros. You can animate product shots, logos, thumbnails, and more to create insanely high-quality visuals with minimal effort.
This works well for:
- YouTube intros and transitions
- Product teases in reviews
- Animated sequences in explainers
- Branded bumpers for series or playlists
If you’re new to the app, you can pair this with the official CapCut tutorial for beginners to set up your workspace and timeline cleanly before you generate.
Step-by-Step Guide to Generating an Intro
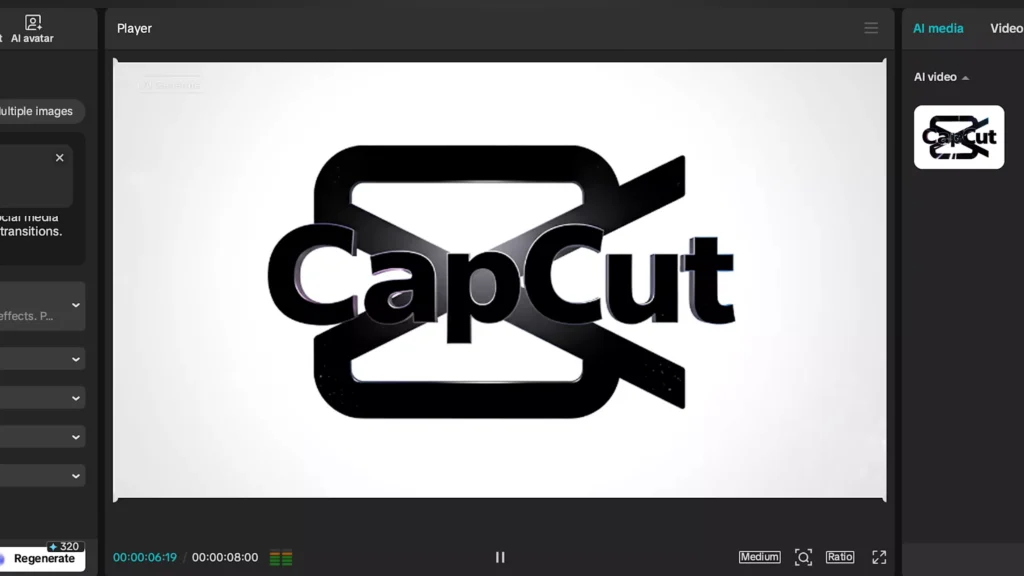
- Open a blank project, then go to AI media, and select AI video.
- Import an image, like your logo or a product shot.
- Set the video model to 4.0, which is powered by V3.
- Use ChatGPT to write a short prompt for an intriguing intro using your image. Paste it into the prompt field.
- Set the aspect ratio to 16:9, then click Generate.
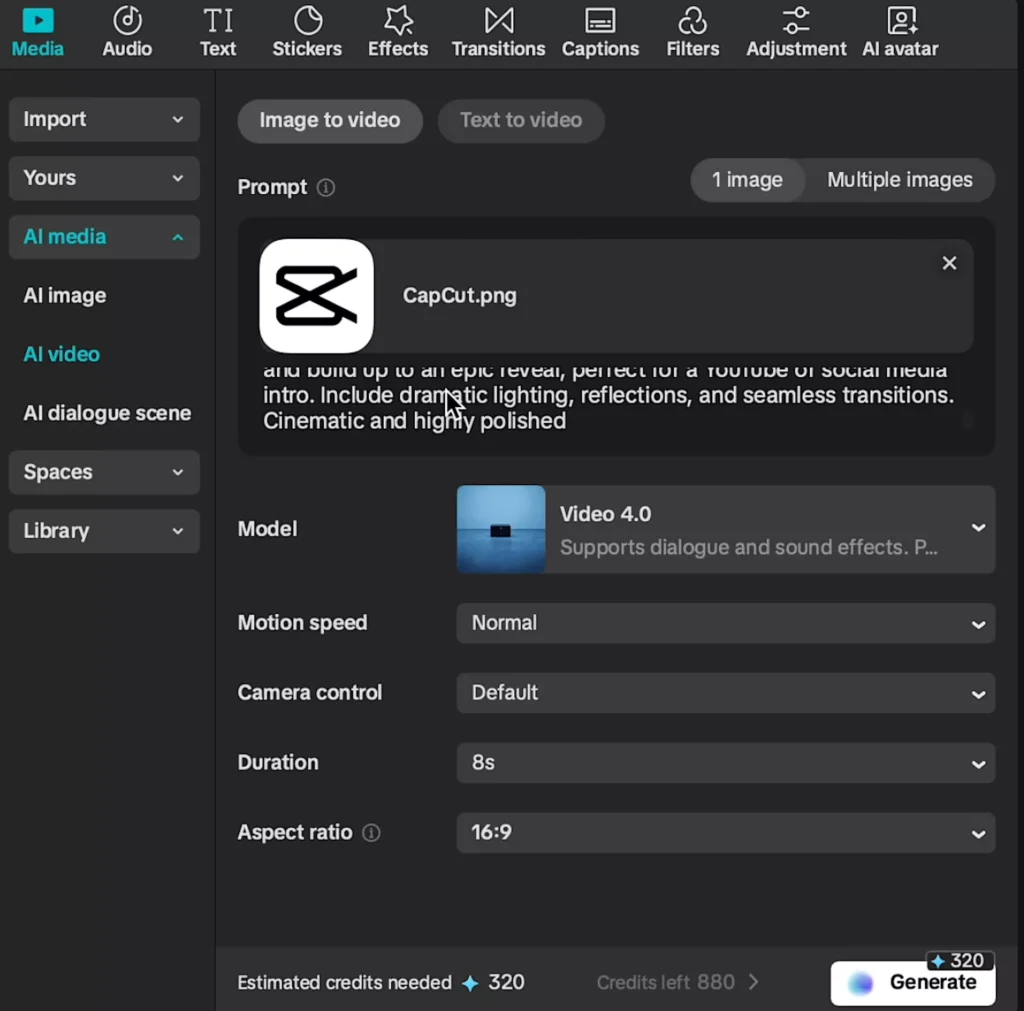
That’s it. In a few clicks, CapCut builds an animated sequence with motion, composition, and sound effects. Review, trim any extra beats at the start or end, and add it to your template for future videos.
Extending It to Product Animations
You can take any still photo and turn it into an animated visual:
- Snap a clean product photo.
- Use ChatGPT to draft a background or scene concept.
- Download the background image, import both into CapCut, and run the same AI video workflow.
- Choose the take that fits your brand style.
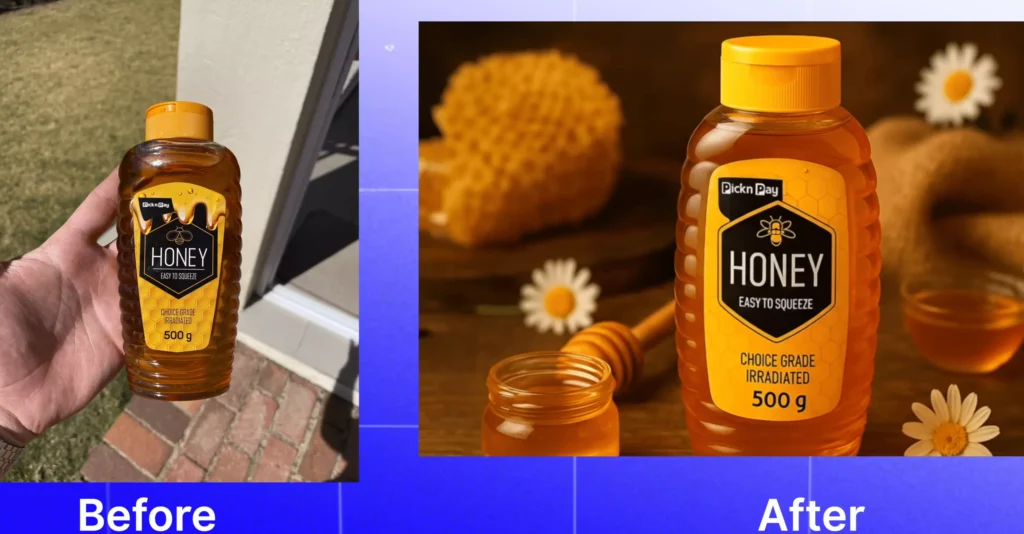
Tip: Use this to make static images dynamic in vlogs, unboxings, or ads. It saves time and gives your videos a consistent, pro look.
If you want extra inspiration, browse a curated playlist like CapCut Editing Tips and Tricks to see how others structure intros and transitions.
Trick 2: Use Color Isolation to Make Subjects Pop
Color affects mood. It is a classic post-production technique to direct attention, guide emotion, and shape story. One simple way to do this is color isolation, which keeps one color vibrant and desaturates the rest. Done right, the subject pops and the viewer stays locked in.
Why Colors Matter in Editing
Warm tones can feel inviting. Cool tones can feel calm or tense. By isolating colors, you shift what the viewer notices first. For example, isolating yellow on a jacket while dropping surrounding greens and blues can make a subject stand out from a busy background.
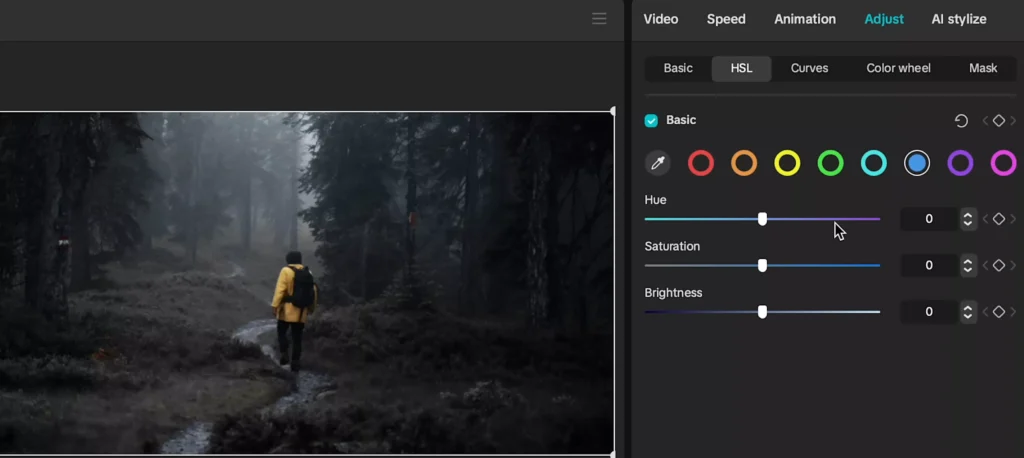
Basic Workflow in CapCut
- Drag your video to the timeline. Click the Adjust tab, then open HSL.
- HSL stands for hue, saturation, and brightness. These control how each color looks.
- Choose the color you want to emphasize, like yellow, and leave its saturation as is or raise it slightly.
- Go through the other color tabs and drop their saturation.
The result is clean and eye-catching. Your subject will pop without complex masking.
Advanced Tweaks for Specific Clips
- Use the color drop icon to sample a specific tone in your scene. Then desaturate it or its neighbors.
- For foliage, reduce saturation in the green and yellow tabs to keep leaves neutral.
- Want red fruit to look rich? Raise red saturation and shift orange hue slightly toward red.
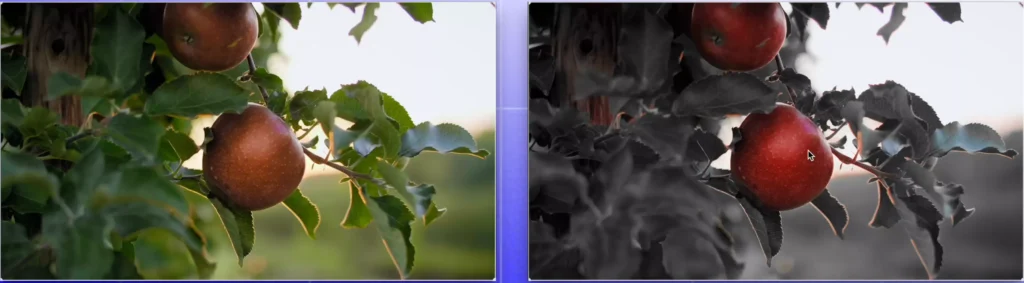
These quick tweaks can make a standard shot feel crafted and intentional. In a couple clicks, you’ll shape the mood and direct the eye where it counts.
Trick 3: Time Your Edits to the Beat for Immersive Flow
When your cuts match the rhythm, the viewer feels it. Music videos use this all the time. Kendrick Lamar’s “HUMBLE.” and Billie Eilish’s “bad guy” both align cuts to the beat to create a tight, satisfying pace. Do it right, and your edits feel clean and immersive. Do it wrong, and the flow falls apart.
This simple technique has helped videos reach millions of viewers because it creates momentum that holds attention.
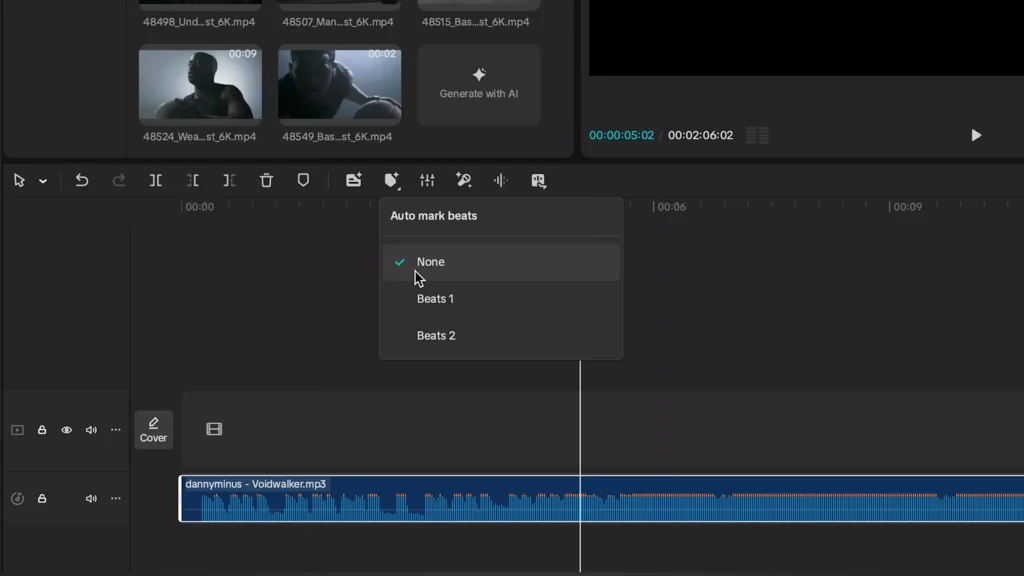
Easy Setup in CapCut
- Add your music track to the timeline.
- Select the audio clip, then open the automark beats tab.
- Choose beats 1 for fewer, broader markers, or pick beats 2 for more precise timing points.
You’ll see markers appear on the waveform where the beats hit. Now you can cut confidently without guessing.
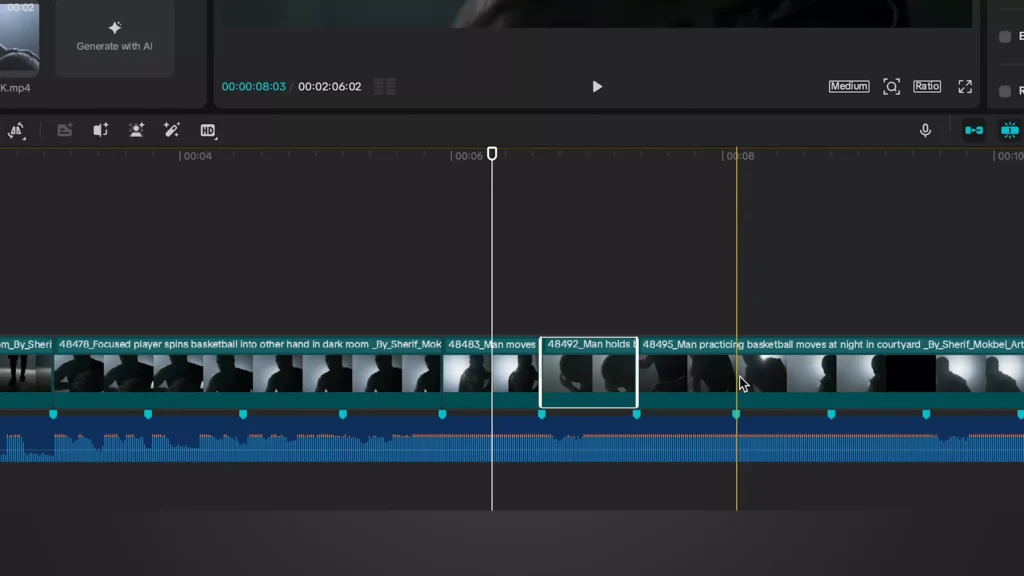
Applying Cuts in Practice
- Use the W key to make your first cut right on a marker.
- As the beat drops, stack quick cuts on consecutive markers to create energy.
- Build a fast sequence for 10 to 20 seconds to pull viewers through the intro and into your main content.
In a short time, you can cut a whole sequence directly on the beat. The result is smooth pacing and a rhythm that feels natural, not forced.
If you want more ideas for musical timing and effect stacks, the breakdown in 13 More Useful Video Editing Tricks You Can Do In CapCut can spark new setups to try.
Trick 4: Add Dynamism with Face Tracking
Face tracking is a quick way to add movement to static shots. It works for POV clips, run-and-gun B-roll, and talking head videos where you want the frame to “follow” the subject. You’ll see tracking used in high-energy music videos too, like The Weeknd’s “Blinding Lights.”
Simple Steps in CapCut
- Add your clip to the timeline and select it.
- Open the video tab and choose camera tracking.
- If CapCut detects a face, you’ll see a bounding box. Click Start.
- Set Fit to canvas, then dial Shake down to zero for clean movement.
- If the subject is too dark to auto-detect, switch to Custom, position the box over the face, then Start again.
Now the camera will stay locked to the face as your subject moves. This keeps attention on the person speaking or performing, and it makes simple angles feel more alive.
For extra practice resources and new effect ideas, check out the roundup video 15 BEST CapCut Tricks to Take you from a Noob to PRO!. It pairs well with the techniques here.
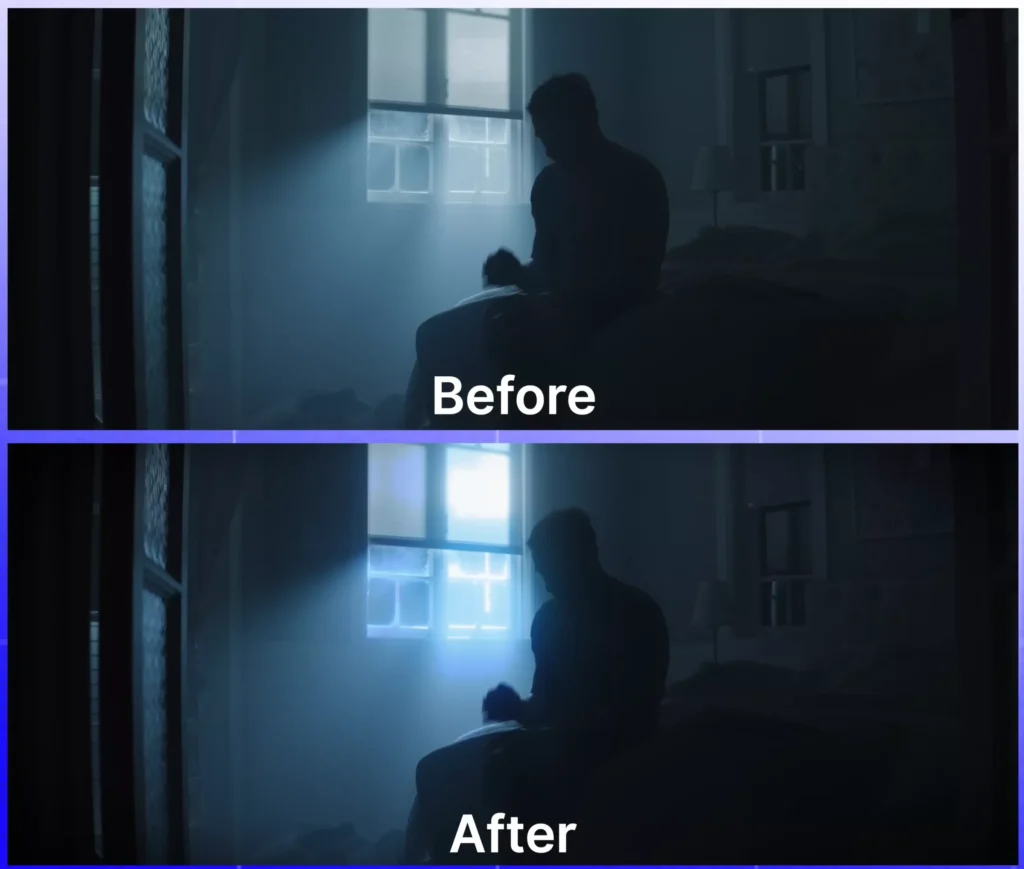
Trick 5: Hack Colors for Cinematic Halation
Halation is a glow effect around bright highlights. It is popular in film looks and color grading, especially on high-contrast shots where light hits hard against dark areas. You’ll spot it in “Blinding Lights,” where the glow gives the frame a gritty, cinematic vibe.
Use this on night scenes, neon signs, practical lights, and backlit portraits. It gives your footage a tasteful lift without feeling overprocessed.
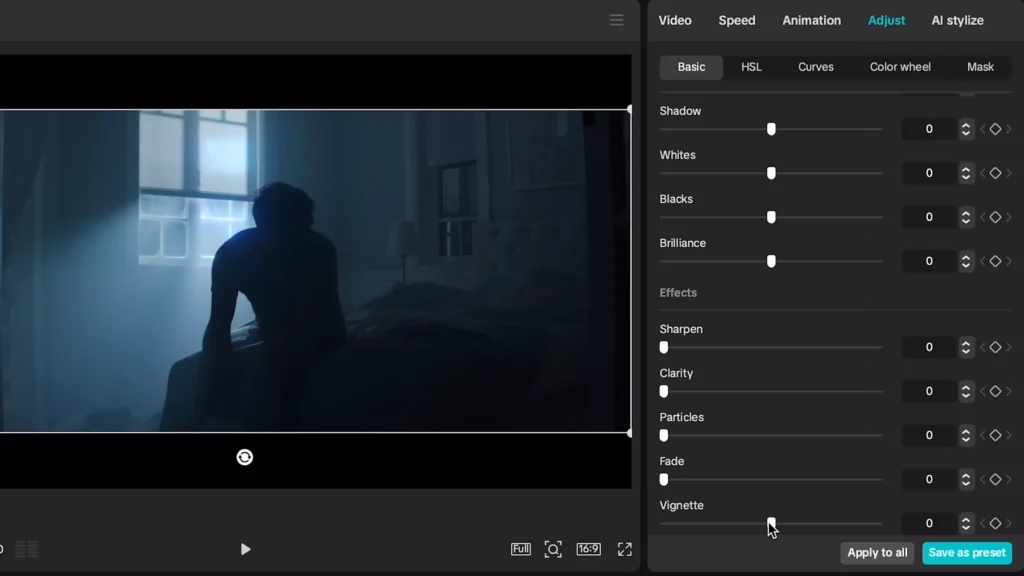
Applying the Effect Step-by-Step
- Open the effects panel and search for halo.
- Apply the Dreamy halo effect directly to your clip.
- In the effect settings, set Blur to 0 and Sharpen to 0 for a more subtle, controlled look.
- Select your video clip and open the Adjust tab.
- Add a vignette, around 8 points, to draw attention to the subject.
- Add about 5 points of contrast to make highlights punch.
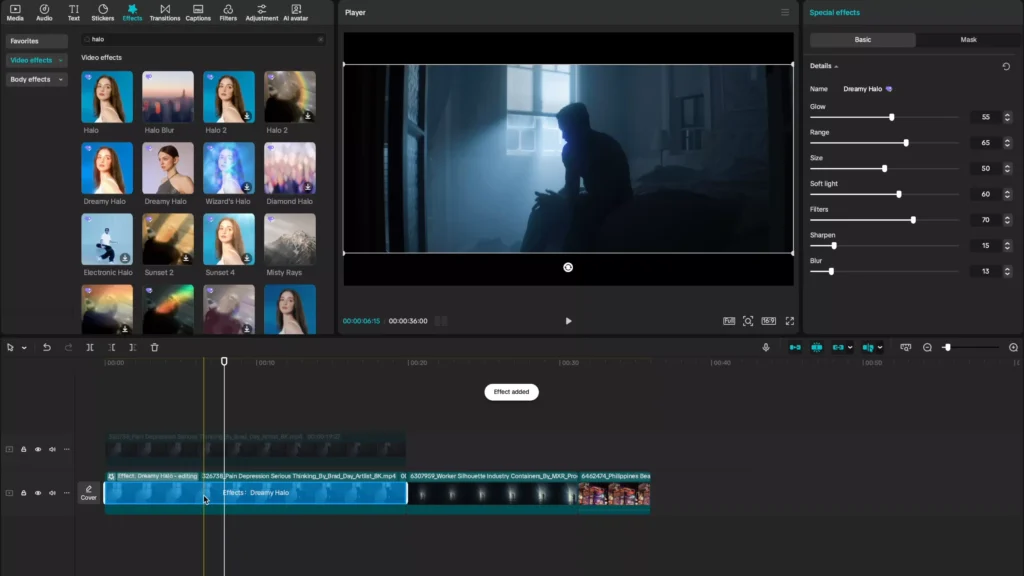
Compare the before and after. You’ll see a soft, cinematic glow around light sources and a stronger sense of depth. Try this on a few different clips. Backlit shots show the effect best, especially if your subject stands between the camera and a bright source.
If you want to keep building your toolkit, community threads like Mastering CapCut: Essential Tips & Tricks surface clever workflows and shortcuts that pair well with halation and tracking.
What’s Next: More Advanced CapCut Tricks
There is always another level. Next up, explore After Effects-level tricks you can recreate inside CapCut. Think advanced transitions, stylized motion, and layered effects that still export clean and fast.
In the meantime, keep sharpening with these resources:
- Make your CapCut PRO edits look like After Effects
- How to Make Viral Captions in CapCut: Step-by-Step Guide
- CapCut Templates Unlocked: Create Viral Videos in Minutes
- Best AI Video Generators + CapCut Workflow Guide
Conclusion
Simple techniques, used with intent, can transform your videos. AI intros hook viewers fast. Color isolation guides the eye. Beat-synced cuts add rhythm. Face tracking brings motion to static shots. Halation adds mood and polish. Start with one trick, apply it in your next project, and keep going. When you are ready to push further, take advantage of the CapCut PRO free trial and stack your skills. What will you create this week?
#capcut #VideoEditing #EditingHacks #CapCutTutorial #capcuteffects #capcutedit