Creating professional-looking video transitions and thumbnails used to take me hours—sometimes days. Now, with the help of AI and a clean editing workflow, I can pull off cinematic match cuts, smooth B-roll transitions, and high-click-through thumbnails in minutes.
In this post, I’ll walk you through exactly how I use AI in my real editing workflow—step by step. This isn’t theory or hype. It’s the same process I use for my own content to boost retention, click-through rate, and overall production quality.
Whether you are a YouTuber, short-form creator, or editor, this guide will show you how to blend AI with traditional editing tools like CapCut to get results that actually perform.
What You will Learn in This Guide
By the end of this post, you’ll know how to:
- Create cinematic match-cut transitions using AI-generated motion
- Make unrelated clips feel like one continuous camera move
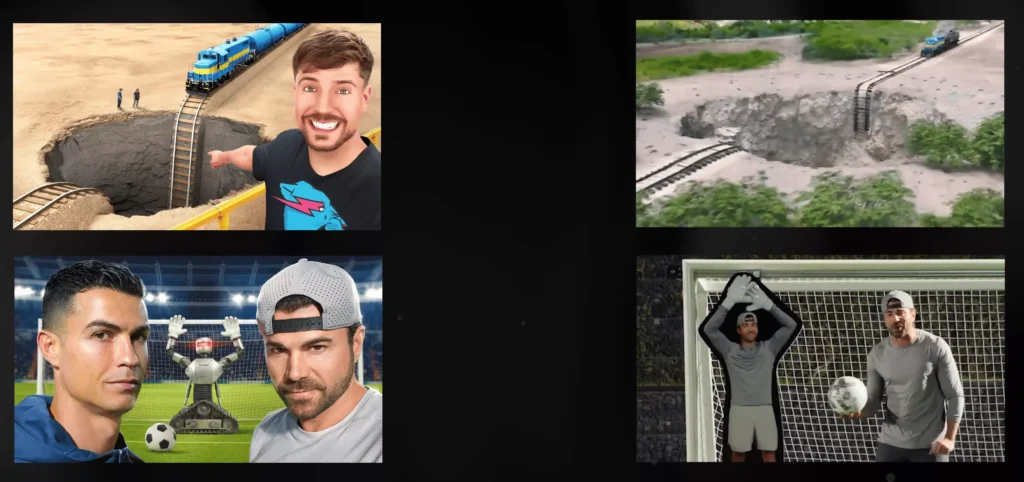
- Design high-CTR thumbnails with AI (and sync them with your video hook)
- Use simple CapCut techniques that make everything feel intentional and polished
- Avoid common AI editing mistakes that break immersion
You can get a free version of CapCut PRO here before you get started.
Why I Started Using AI for Video Editing
Traditional transitions require motion graphics, keyframing, masking, or expensive plugins. AI completely changes that.
Instead of manually animating camera movement, I now:
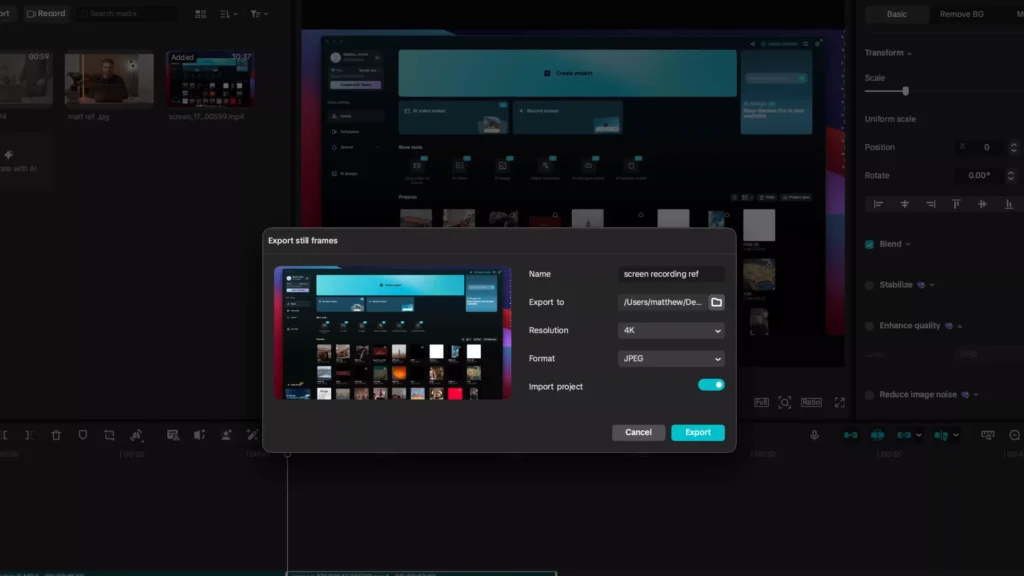
- Export the last frame of one clip
- Export the first frame of the next clip
- Let AI generate the motion between those two frames
The result feels like a real camera move—without the manual labor.
AI doesn’t replace editing skill, but it compresses time. What used to take hours now takes minutes.
Read Also: YouTube Storytelling with CapCut: Cinematic Editing Tips for Creators
My Exact AI Video Editing Workflow (Step-by-Step)
1. Creating a Match-Cut Transition (Talking Head → Screen)
This is one of my most-used effects.
The process:
- Trim and color-grade my talking-head clip
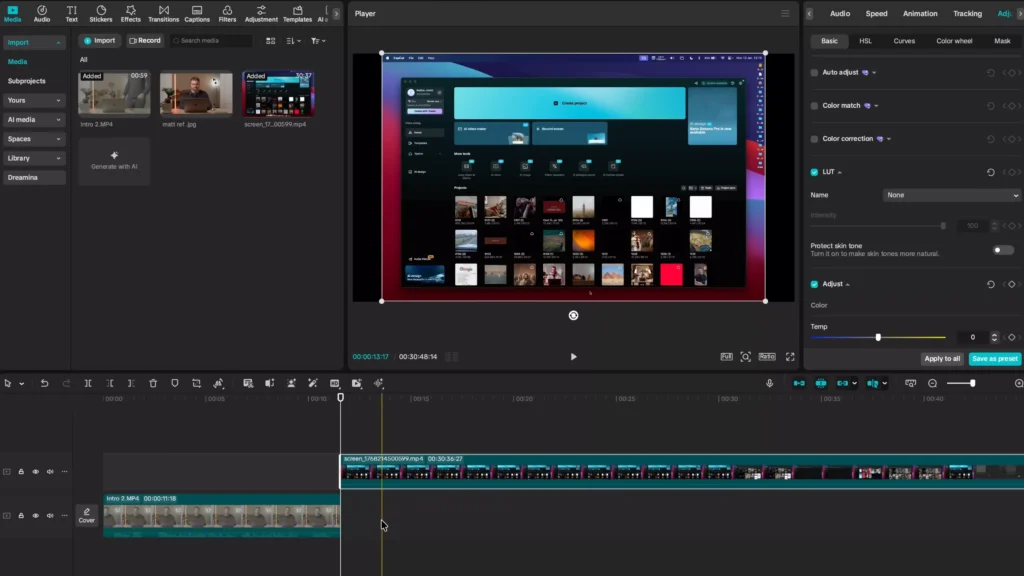
- Export the last frame of that clip as an image
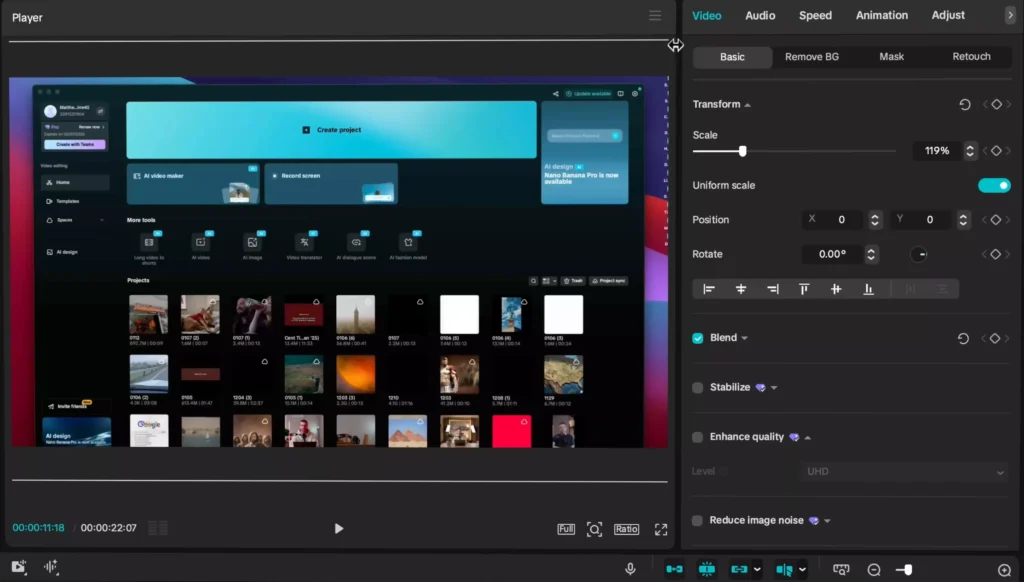
- Import the next clip (for example, a screen recording)
- Export the first frame of that second clip
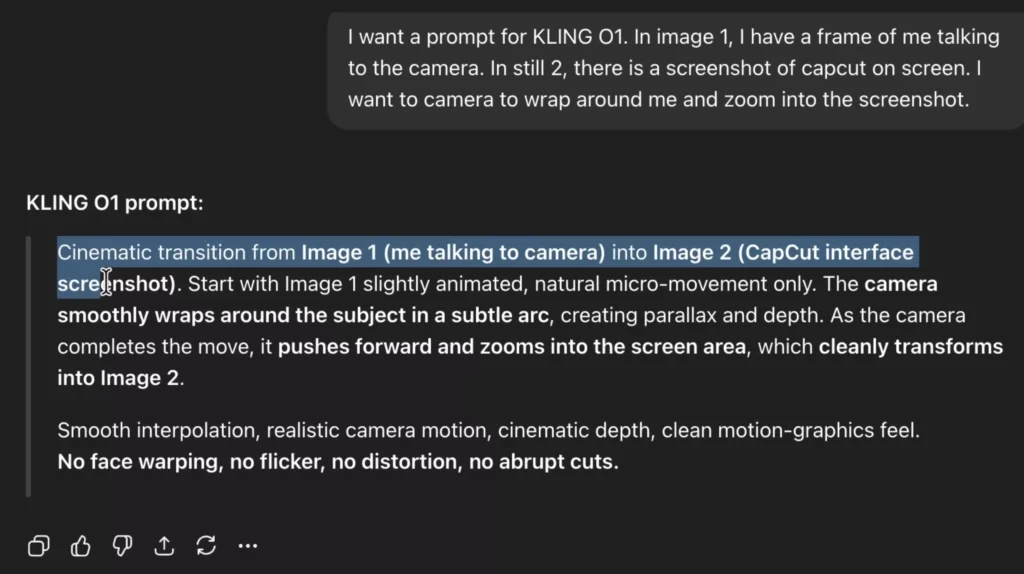
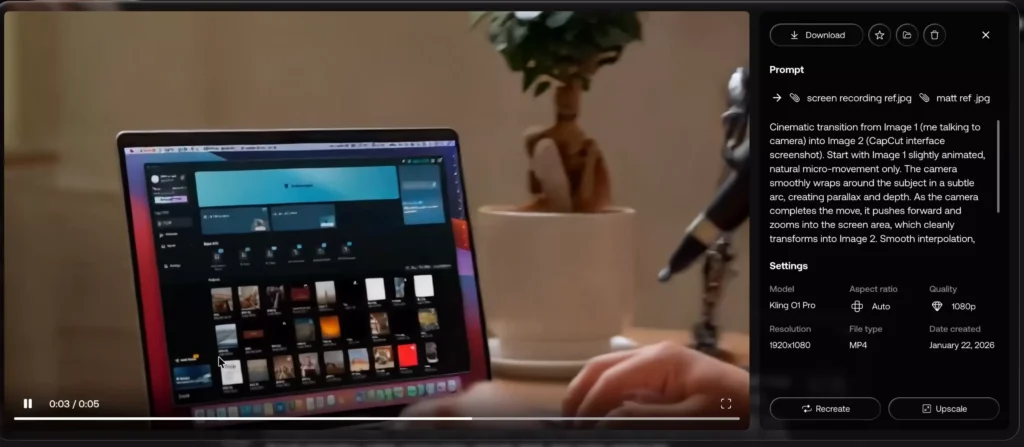
- Upload both images into an AI video generator that supports start + end frames
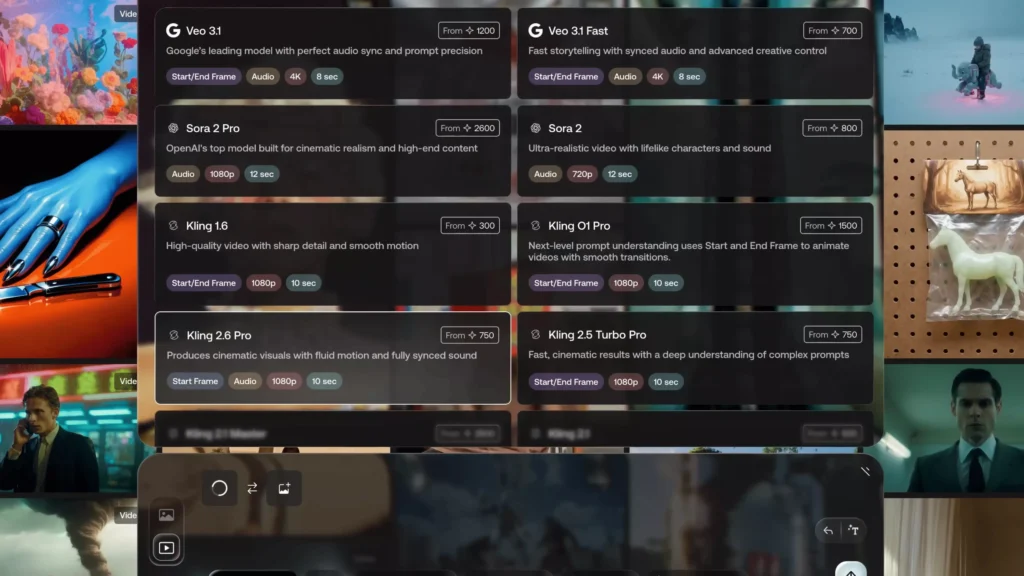
- Generate a short transition clip

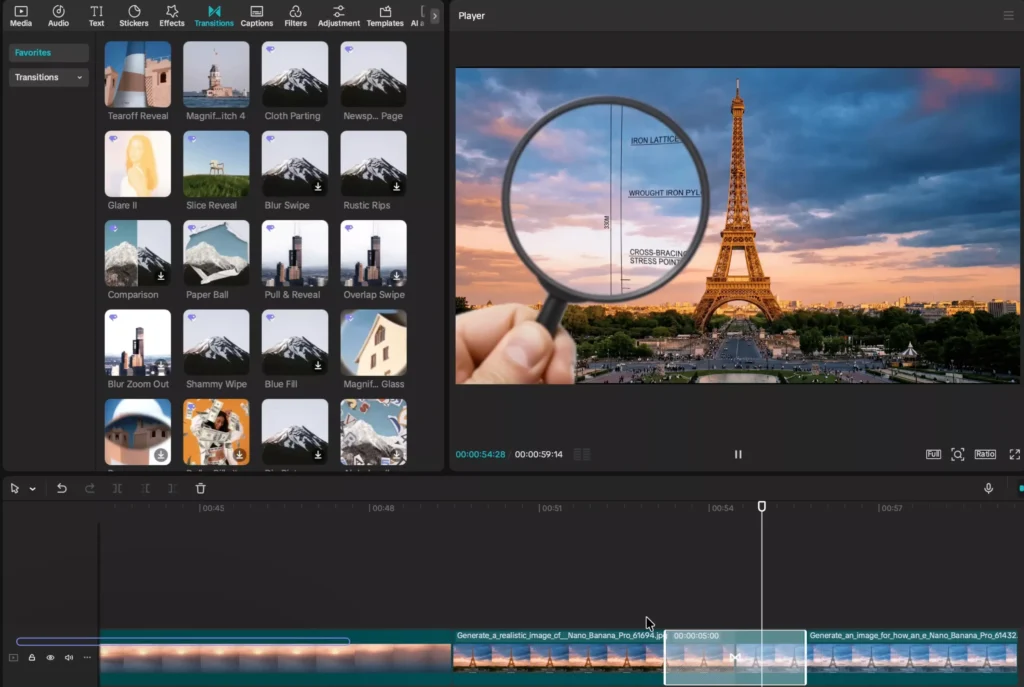
- Place the AI clip between both original clips in CapCut
To smooth everything out:
- I add a light “Mix” transition
- Combine all clips into a compound clip
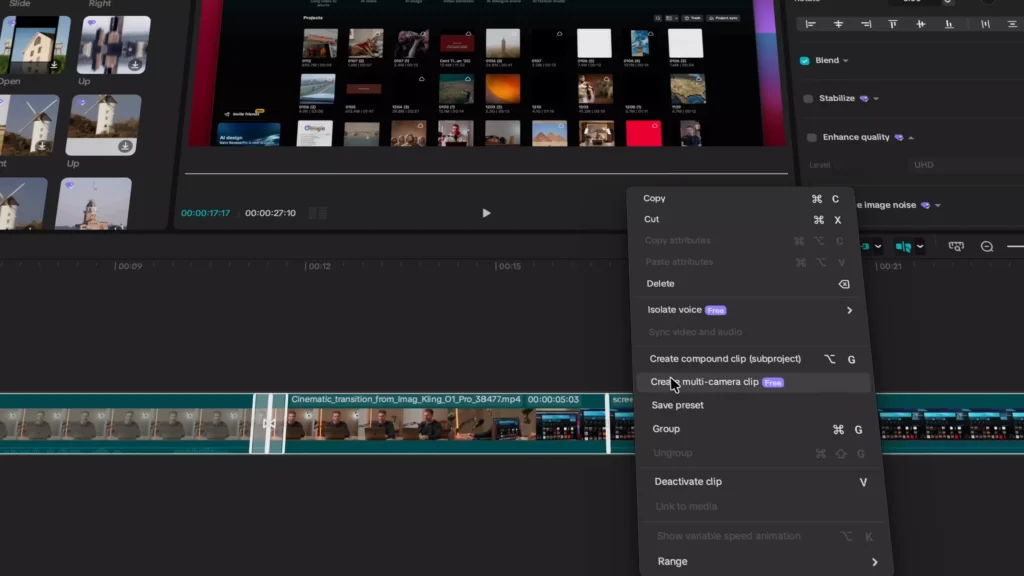
- Apply a custom speed curve, accelerating the middle of the transition
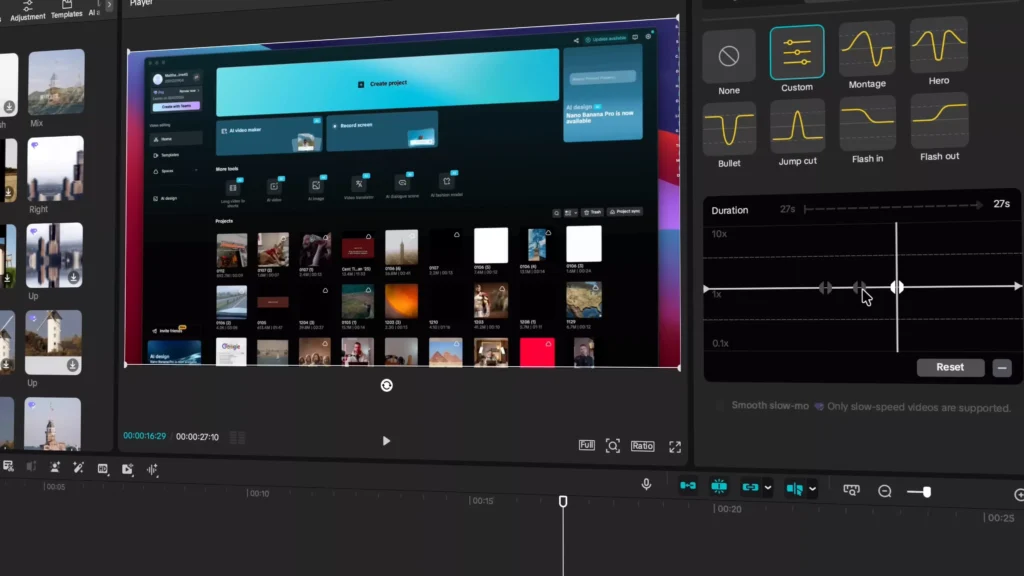
This hides imperfections and adds momentum.
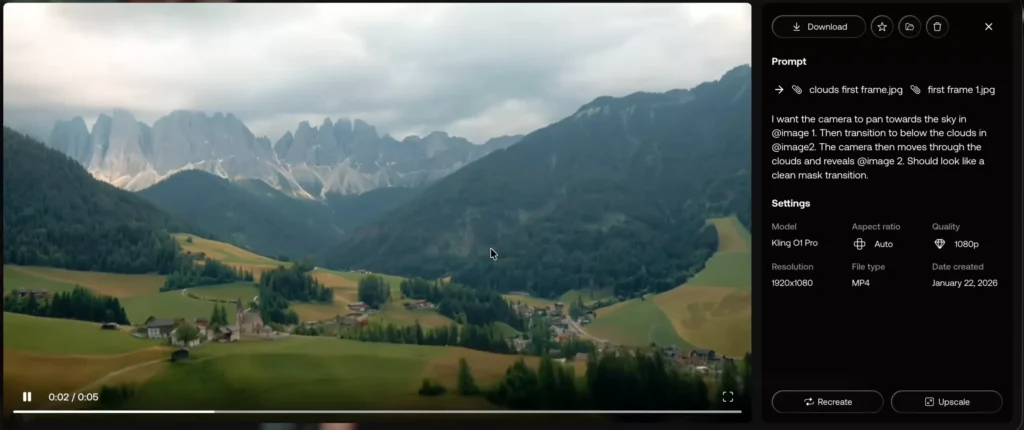
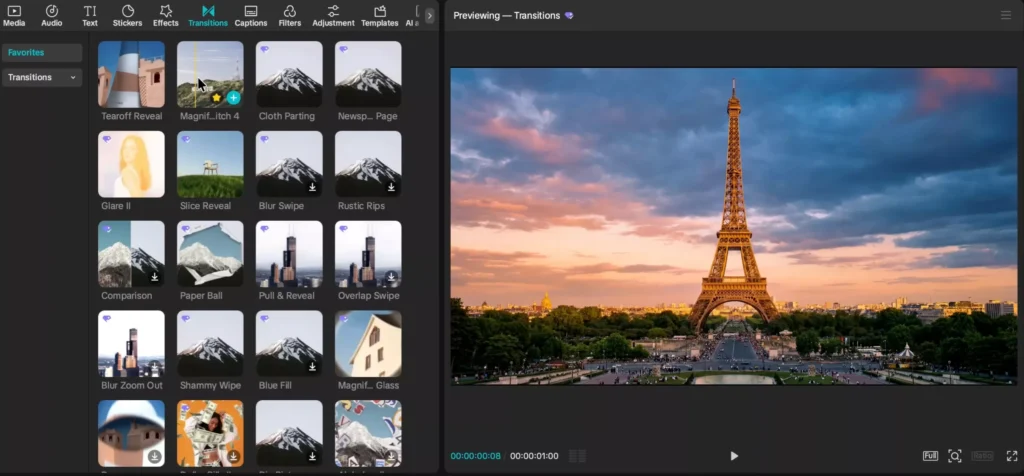
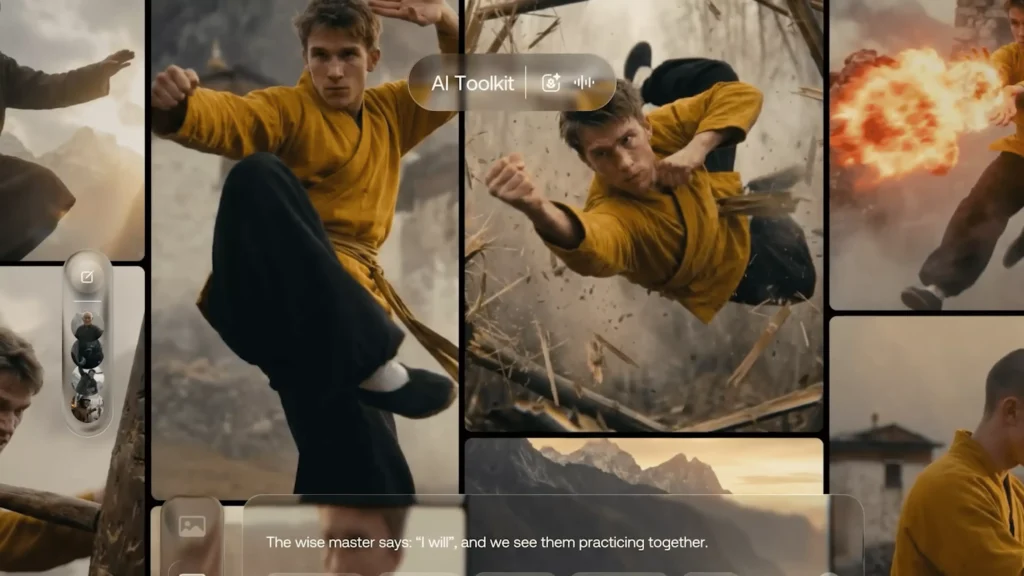
2. Creating Cinematic B-Roll Transitions (Unrelated Clips)
You can use the exact same method to connect two totally different scenes.
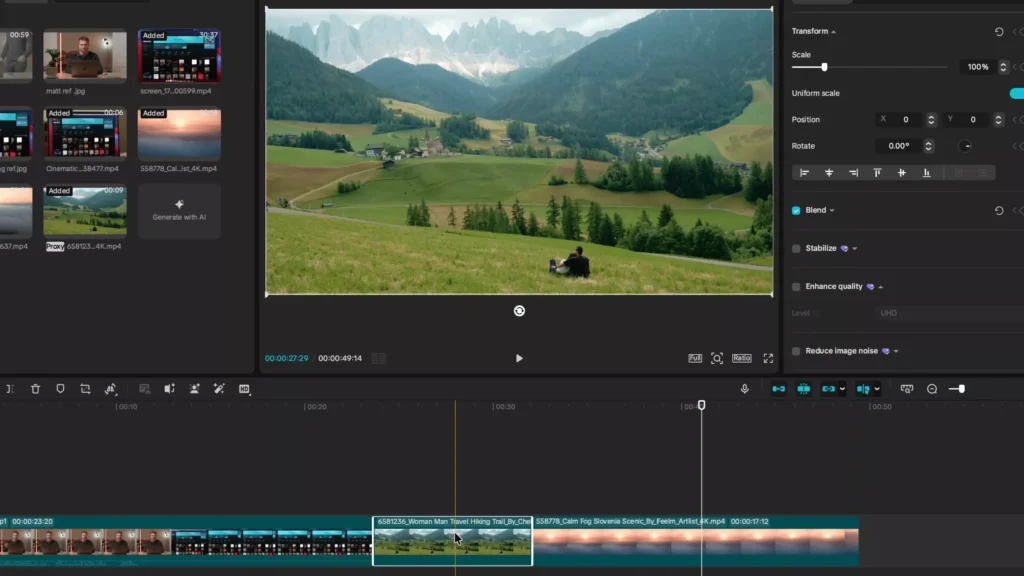
For example:
- Shot A: people sitting in a field
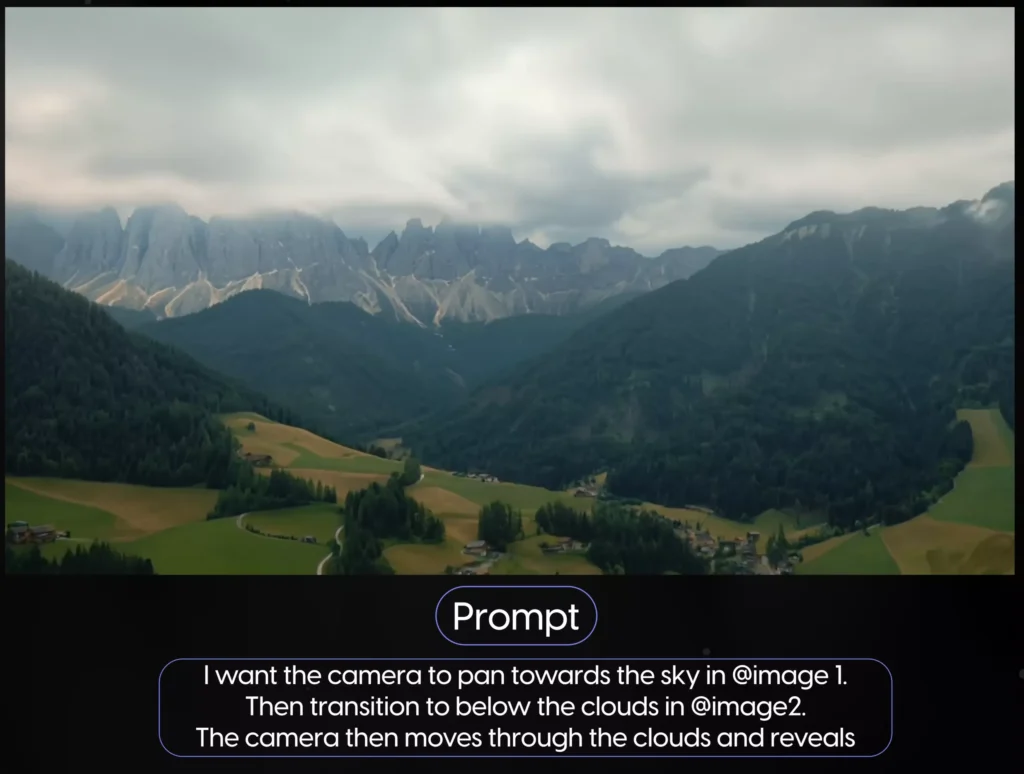
- Shot B: clouds above the sky
By exporting the last frame of A and first frame of B, AI can generate a believable camera lift or drone-style move that visually connects them. (see the images below)
This works incredibly well for:
- Travel videos
- Montages
- YouTube intros
3. When I Don’t Use AI Transitions
Not everything needs AI.
For image-to-image transitions, I often:
- Use CapCut’s native transitions
- Add subtle motion effects (slow zooms, pendulum motion)
- Keep movement minimal so it feels intentional
AI is powerful—but restraint is what makes it look professional.
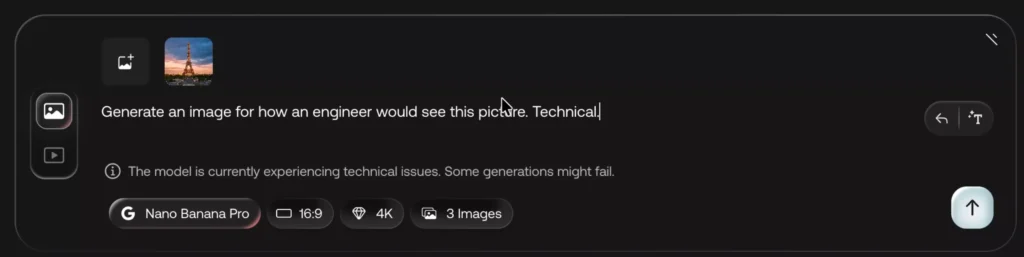
How I Create AI Thumbnails That Actually Get Clicks
Thumbnails matter more than ever.
My current approach:
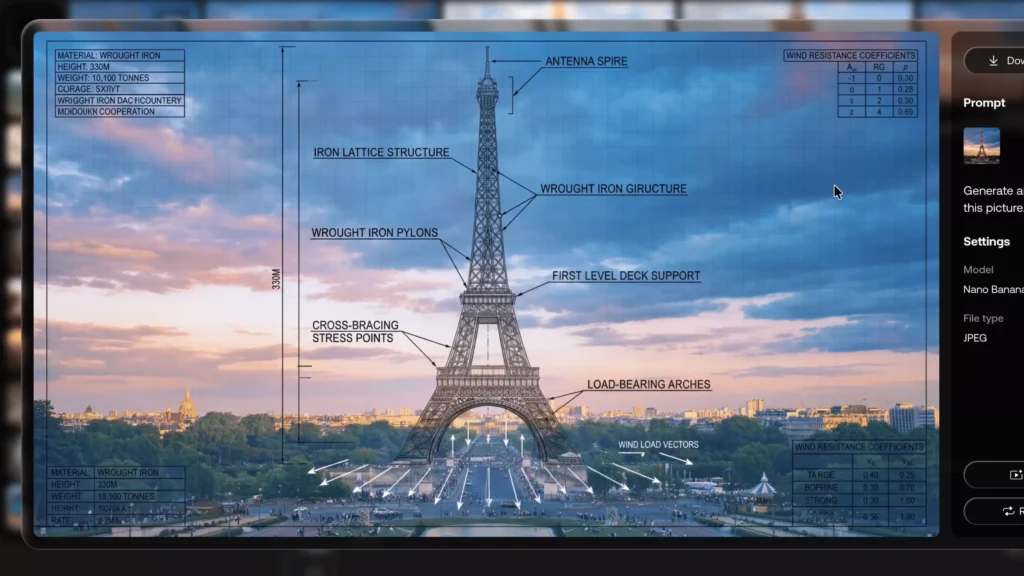
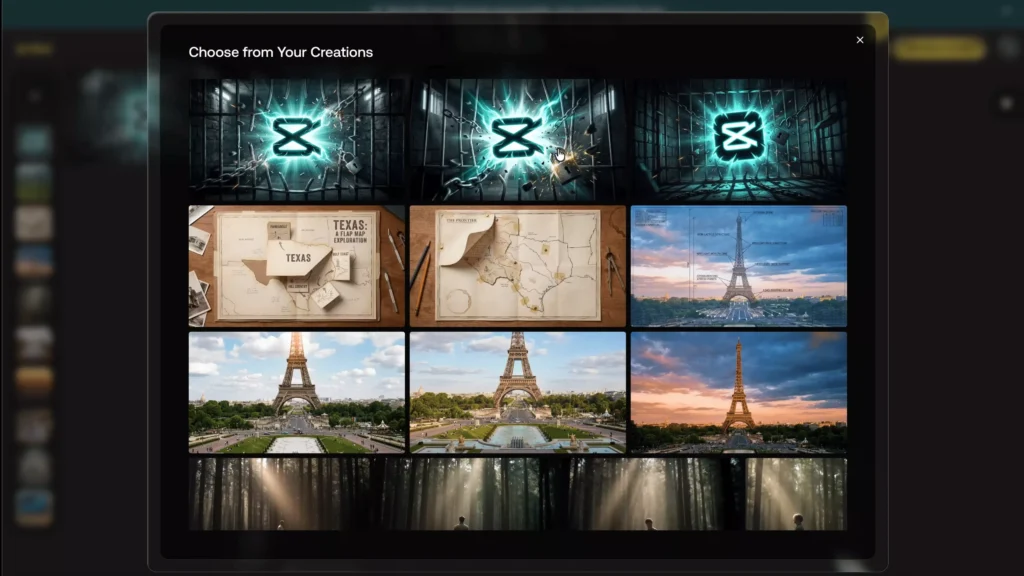
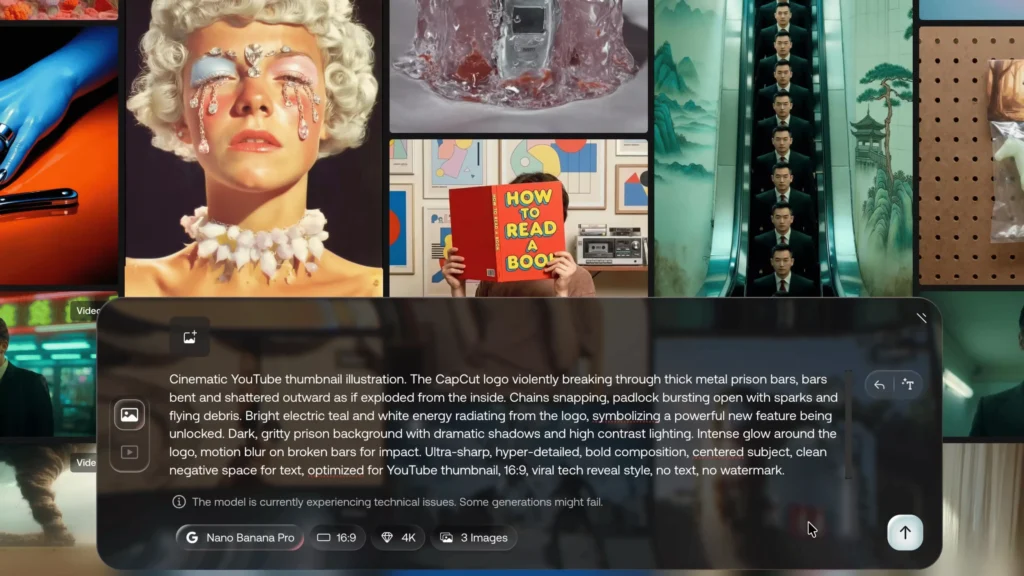
- I design thumbnails using AI image generation
- I test 2–3 variations
- I animate the winning thumbnail and use it in the first seconds of the video
That visual consistency between thumbnail and opening hook massively improves retention.
Why it works:
- Viewers immediately recognize what they clicked on
- There’s no disconnect between promise and payoff
- It builds trust and keeps people watching
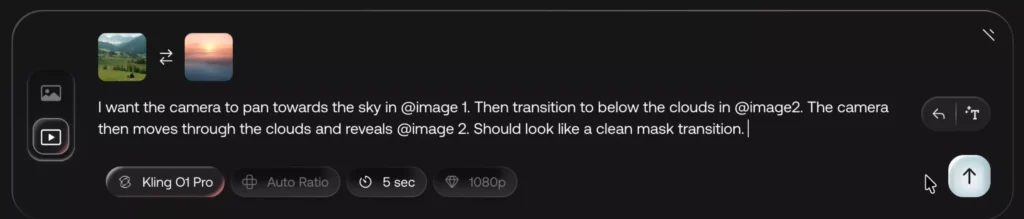
Prompting Tips That Get Better AI Results
Here’s what’s worked best for me:
- Be specific about camera movement (orbit, zoom, wrap, lift)
- Mention lighting and realism
- Keep prompts clear, not poetic
- Generate multiple versions and pick the cleanest one
Bad prompts = chaotic motion
Clear prompts = cinematic flow
Final Polishing Checklist Before Export
Before I export any video, I double-check:
- Lighting consistency between clips
- Audio levels (AI clips often get muted)
- Speed ramps don’t affect voice pitch
- Transitions feel motivated—not random
- Thumbnails visually match the opening scene
These small checks make a massive difference.
Results I’ve Seen Using This Workflow
After switching to this AI-assisted workflow:
- My videos feel more cinematic
- My intros hook viewers faster
- Thumbnails perform better in tests
- Editing time dropped dramatically
I’ve even had videos cross major view milestones where thumbnail + hook alignment played a huge role.
Frequently Asked Questions (FAQ)
Is AI video editing beginner-friendly?
Yes. If you can export a frame and drag clips into an editor, you can do this. AI handles the hardest part—the motion.
Do I need expensive software?
No. Most of this can be done with affordable AI tools and CapCut which you can get for free from capeditcut.com.
Will AI transitions hurt video quality?
Not if used sparingly. The key is blending AI clips with traditional editing techniques.
Can this work for short-form content?
Absolutely. In fact, AI transitions often perform even better in shorts where motion matters more.
Is this replacing real editing skills?
No. AI enhances good editing—it doesn’t replace taste, pacing, or storytelling.
Key Takeaways
- AI is best used between clips, not everywhere
- Match cuts feel cinematic because they preserve motion
- Thumbnail and intro alignment boosts CTR and retention
- Subtle speed curves hide imperfections
- Editing judgment still matters more than tools
Final Thoughts
AI isn’t a shortcut—it’s a multiplier.
When you combine AI-generated motion with solid editing fundamentals, you unlock a level of polish that used to require entire teams. If you’re creating content regularly, this workflow isn’t just faster—it’s a competitive advantage.
If you would like to try Artlist, click here.