What makes Vox videos so watchable? They use specific editing choices to guide your eyes, set the pace, and keep you curious. These are not flashy effects.
They are small, smart tweaks that shape how a story feels. Use them right, and you can make solo edits look like they came from a full production team.
Here is a clear, practical breakdown of the most effective Vox-style techniques, all inside CapCut. They also translate well to other editors. Apply them, and you can expect a jump in how long people watch and how often they share.
I have applied these in my own videos, and the results speak for themselves with my video views increase by 500%.
Why Vox Videos Hook Viewers So Well
Vox videos feel like guided discovery. You are not just watching, you are part of the story. That comes from a stack of deliberate choices that steer attention and create rhythm.
- Text that blends with the scene so it feels hand-drawn, not pasted on.
- Screen recordings that feel tactile and alive, not flat or dry.
- Music that supports the voice, never fights it.
- Sound cues that match real-life actions, like clicks and pen strokes.
- Smooth motion flow with easing, match cuts, and cuts on action.
- Reduced frame rate during graphics, which signals editorial intent.
These techniques are simple to apply once you know where to look in CapCut. They work on solo projects, and they scale to bigger edits. The goal is to trick the viewer to keep watching by making the story easier to follow and more pleasing to the eye.
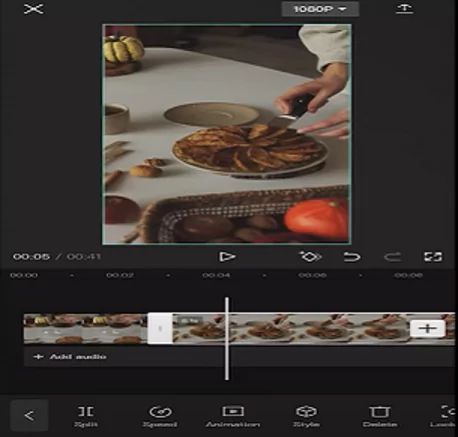
Making Screen Recordings Feel Alive: Vox’s Layered Texture Hack
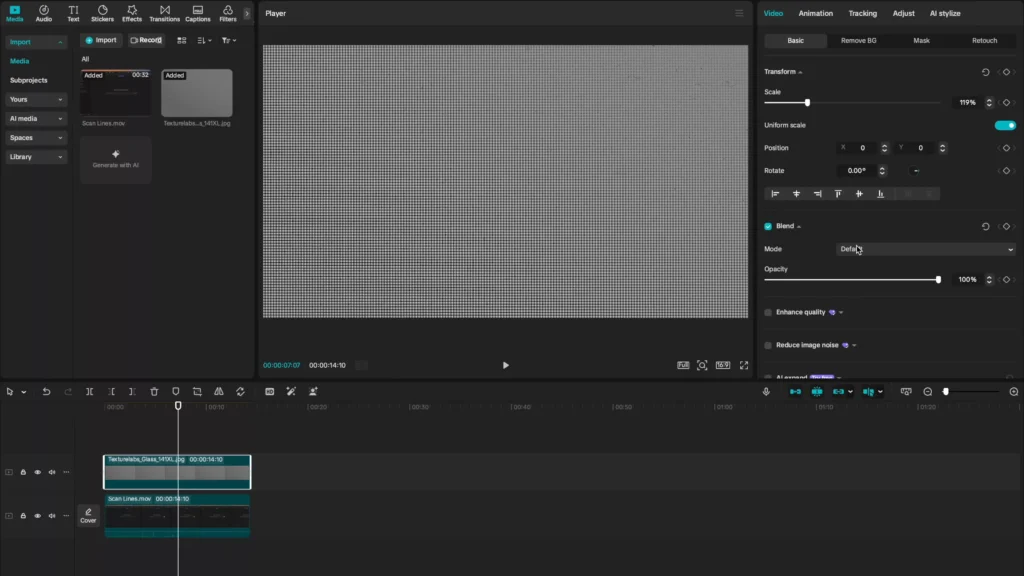
Screen recordings are often stiff. Vox turns them into moments of discovery. The trick is layered textures that add depth and focus without distraction. Use three layers on top of your screen recording for a subtle but powerful lift.
Layer 1: Adding Scan Lines for a Retro Monitor Feel
Scan lines give screens a slight texture that feels familiar and lived in.
Steps:
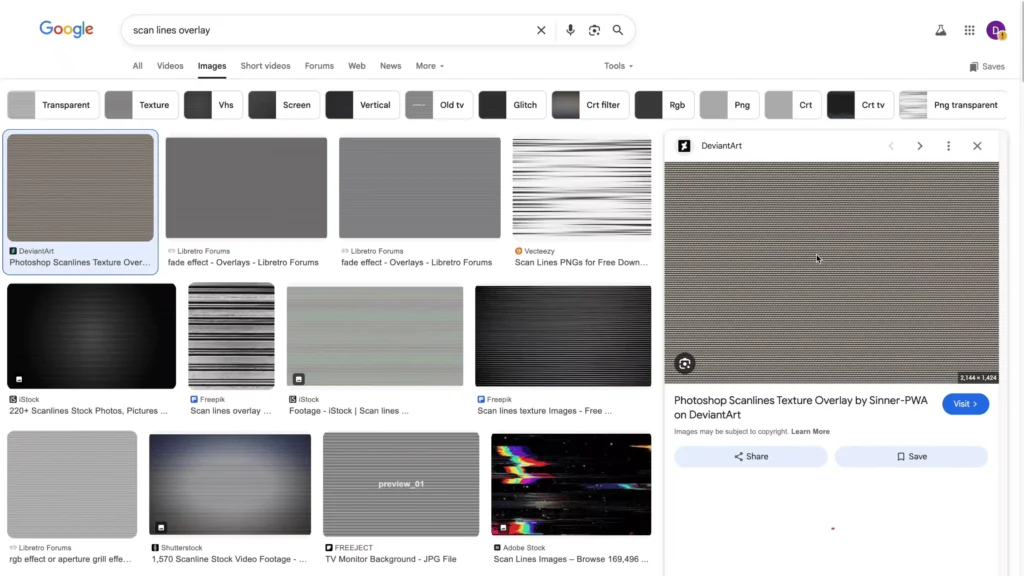
- Find a high-resolution scan line texture or a monitor overlay, for example by searching Google or using a texture site.
- Drag the texture above your screen recording in the timeline.
- Set the blend mode to Overlay.
- Adjust opacity until it looks natural.
Tips:
- Lower opacity often works better.
- Make sure the texture covers the full frame.
- Avoid over-contrast lines. You want finesse, not stripes.
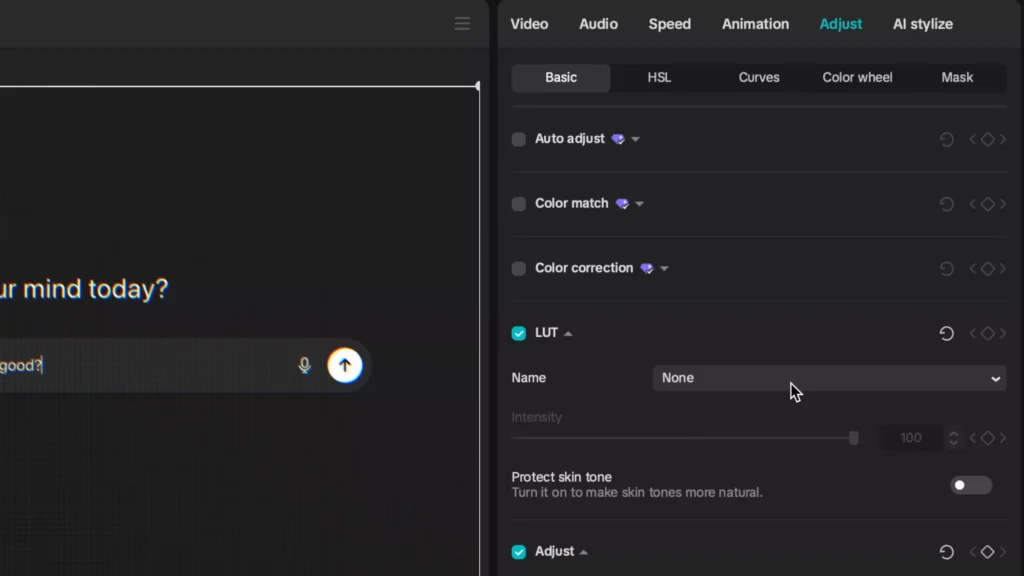
Layer 2: Applying Chromatic Aberration for Subtle Shifts
A tiny color shift sells the idea of a real monitor.

- In the Effects panel, search “chromatic,” then apply “chromatic quirk.”
- With both sliders at 50, the effect is off. Nudge the values to add a slight split.
- Less is more. A small change goes a long way.
Pro tip: Start low and preview often.

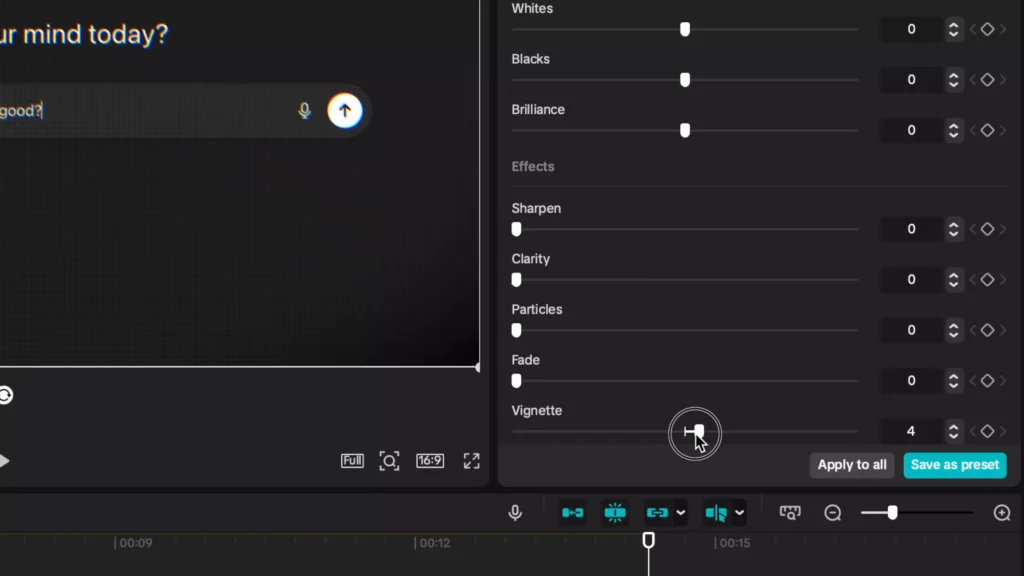
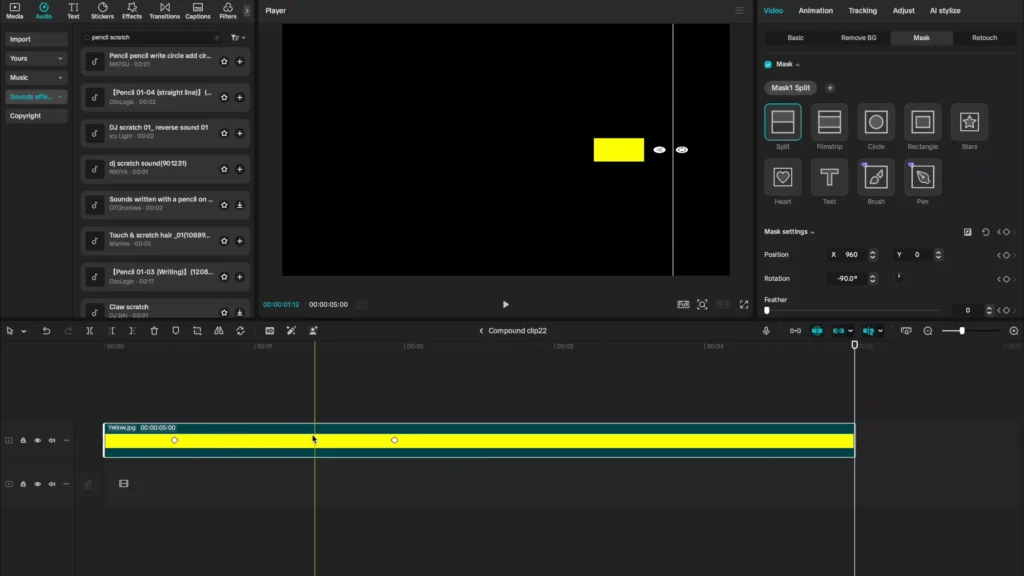
Layer 3: Using Vignette to Guide Eyes
A gentle vignette keeps focus where the action is.
- Select both layers and make a compound clip.
- Open Adjust, then add a few points of vignetting.

Benefits:
- Darkens distractions at the edges.
- Adds a subtle editorial feel.
- Guides attention to the center of the screen.
Used together, these layers turn a dry capture into something textured, focused, and story-friendly.
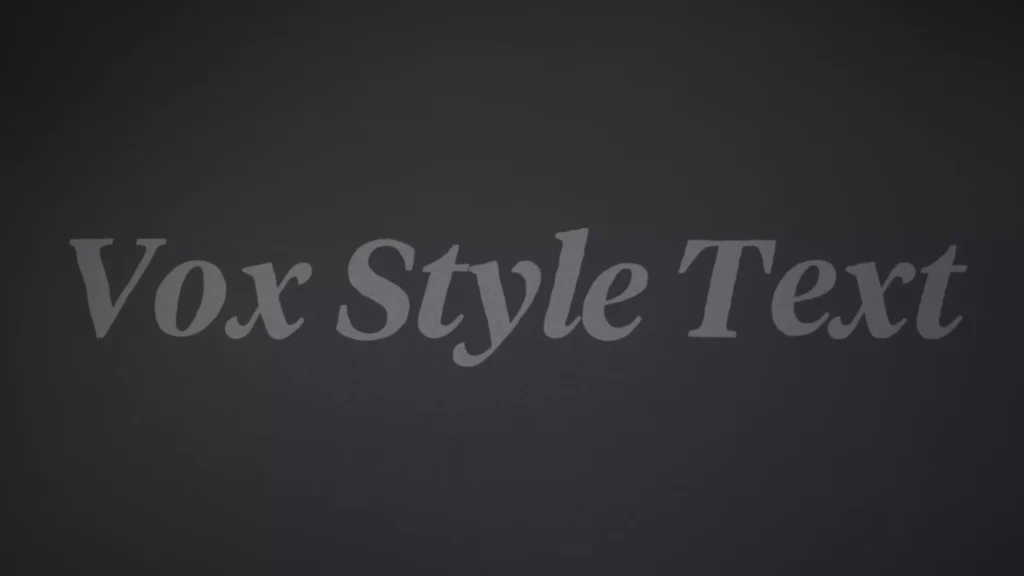
Crafting Vox-Style Text: Blending and Hand-Drawn Vibes
Vox text feels integrated with the scene. It is curvy, textured, and a bit imperfect, like notes in a notebook. This style humanizes explainer content and keeps visuals from feeling sterile.
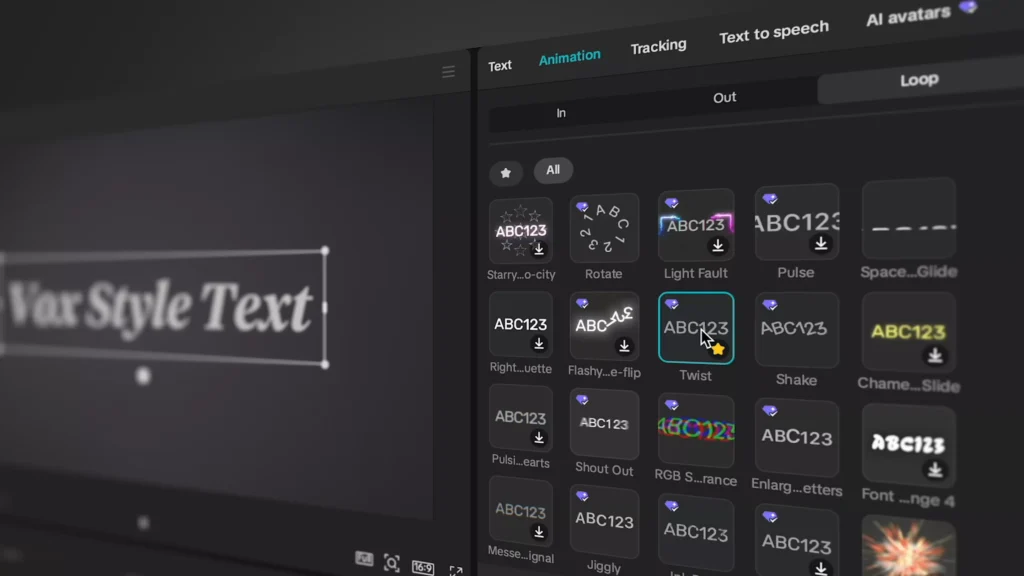
The Twist Animation for Curvy, Handwritten Text
The core move is a looping animation that rounds off edges and adds character.
Steps:
- Add your text, then select the text layer.
- Go to Animation, then Loop, then choose Twist.
- Use the arrow keys to scrub to a frame where the text shape looks great.
- Compound the clip and create a freeze frame on that exact moment.
- Remove the extra compound pieces before and after the freeze.
- Change the blend mode on the freeze frame to add texture to the text.

This locks the good shape in place and avoids the constant wobble that can distract.
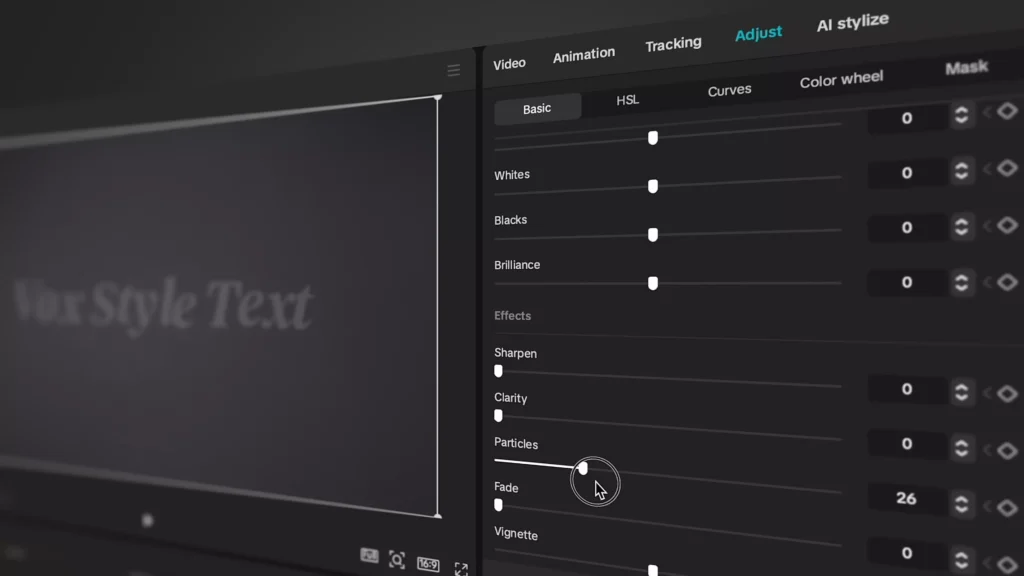
Adding Noise and Textures for Background Integration
Once the text sits still, blend it into the scene.
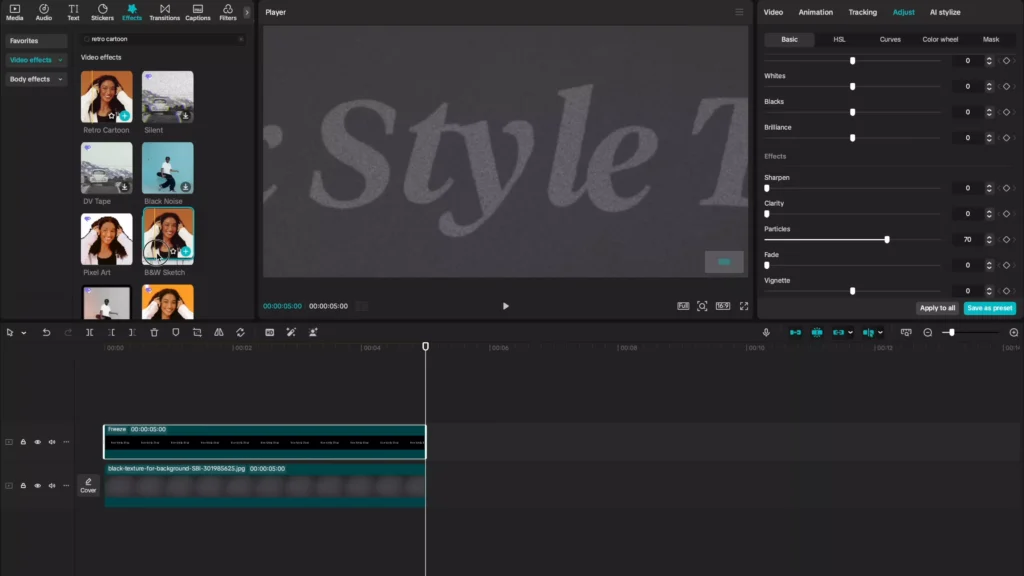
- In Adjust, find Particles, then set it around 70 percent. This adds a light noise layer that helps the text sit in the shot.
- Apply the “retro cartoon” effect to introduce a paper-like texture. Then tune the slider so it is visible but not loud.
Effects to consider:
- Particles: Adds grit and breaks up solid fills.
- Retro Cartoon: Softens lines and gives a light vintage feel.
Essential Text Animations and Timing Tips
Reveal animations should feel smooth and friendly, not rushed. Vox-inspired options to try:
- Wiping in
- Typewriter
- Retrotyper
- Slide right showing right
- Slide down
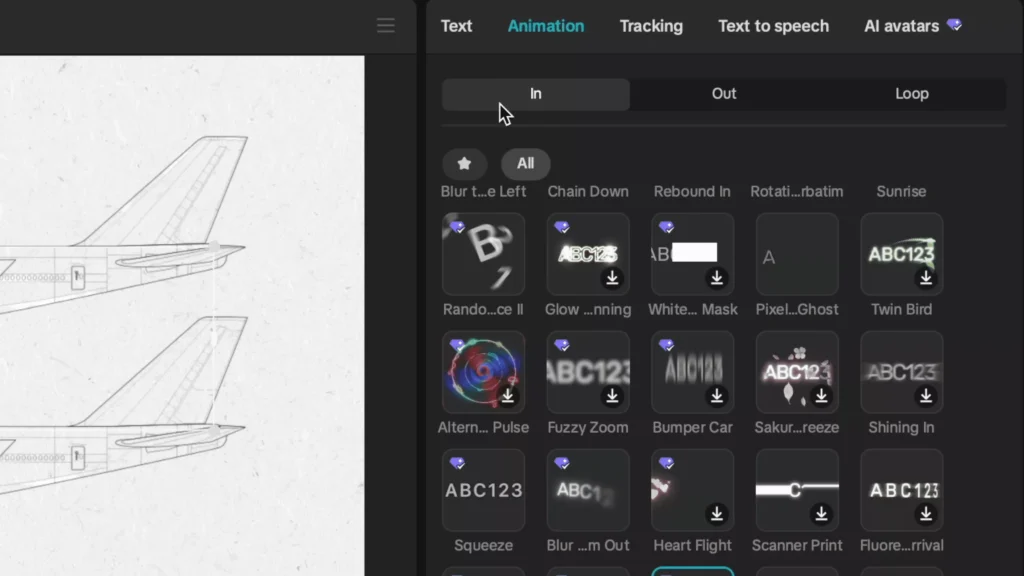
Use shorter movements and set the default animation duration to about 2 seconds for a polished reveal. The 2-second rule makes text feel intentional.
Premium Assets to Elevate Your Vox Edits: Spotlight on Storyblocks
If you want your edits to look like a full team worked on them, high quality assets help a lot. This includes footage, music, images, overlays, and sound effects you can plug right into your timeline.
Storyblocks fits this use well with unlimited downloads on fixed monthly or annual plans, so you are not paying per file.
You can even build full segments with nothing but stock and graphics. For this style, try the creator’s curated set of Vox-friendly assets in the Storyblocks library. Browse the playlist in the Vox-style assets collection on Storyblocks.
Slowing It Down: Vox’s FPS Lag for Stylish Animations
Vox often lowers frame rates for certain motion graphics. Dropping to around 12 frames per second gives a handmade, editorial feel, like classic infographic animation.
In CapCut:
- Search for “FPS lag” in Effects.
- Apply it to your timeline.
- At zero, nothing changes. As you raise it, you introduce that shutter-lag feeling.
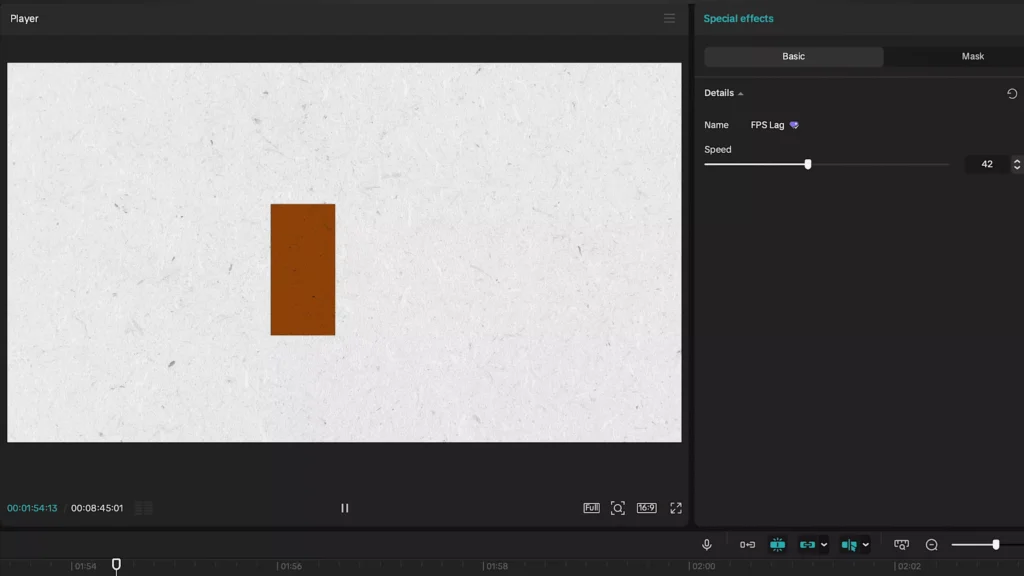
From silky to stylistic in one slider.
Use this on infographics, title cards, or icon moves. It pairs well with smooth motion curves since you control both the cadence and the style.
Sound Secrets: Music and Foley for Immersive Vox Videos
Audio does as much as visuals in Vox edits. It sets the tone, keeps pace with motion, and adds sensory detail that glues shots together.
Choosing the Right Music, The Mima Sound
Vox often uses tracks with a light, pulsing groove that supports the voiceover. This mima sound leaves space for narration and avoids heavy bass or complex melodies. Over time, viewers link this sound with learning and clarity, so it primes them to receive information.
Pick music that:
- Leaves room for the voice.
- Has a steady structure.
- Feels curious and calm, not epic or intense.
Adding Tactile Foley Sounds
Foley brings motion to life. Think about the physical actions on screen and layer in sounds that match.
Examples to use:
- Keyboard typing
- Mouse clicks and UI taps
- Camera shutter
- Highlighter or pen strokes
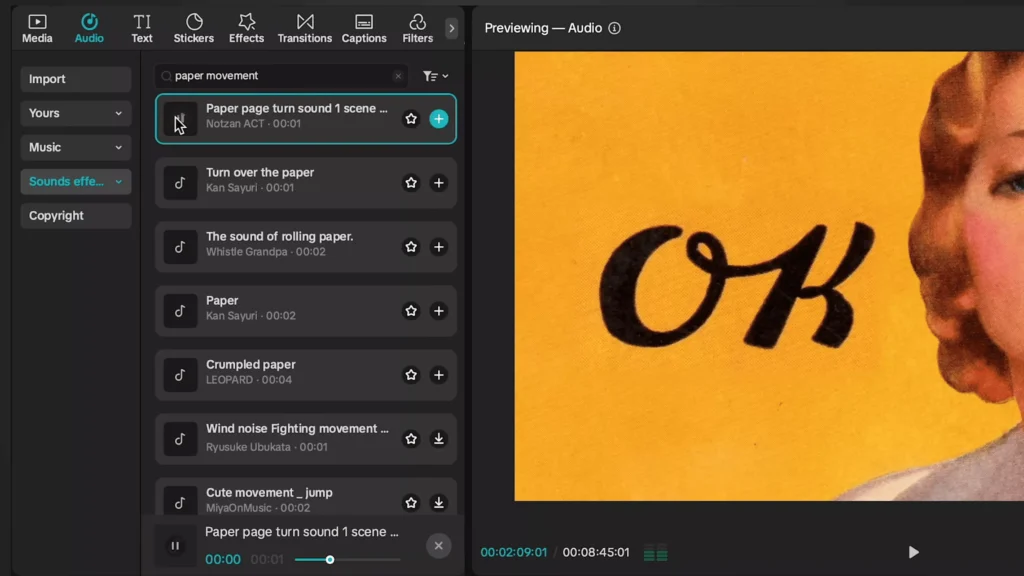
- Paper movement
- Chalk drag
- Typewriter taps
- Pencil scratch
Two quick habits:
- Think real life first, then find or make the sound that fits.
- Layer sounds where there is motion, like text wipes, graph reveals, and icon bounces.
CapCut’s built-in library has plenty of usable effects, including chalk drag, paper movement, film camera shutter, typewriter, and pencil scratch. Start light, then stack as needed.
Mastering Smooth Animations: Key Vox Motion Techniques
Vox motion has a consistent feel: long, slow, and smooth. That applies to highlight passes, picture zooms, text slides, and graphic moves. The core is good easing, matched transitions, and cuts on action.
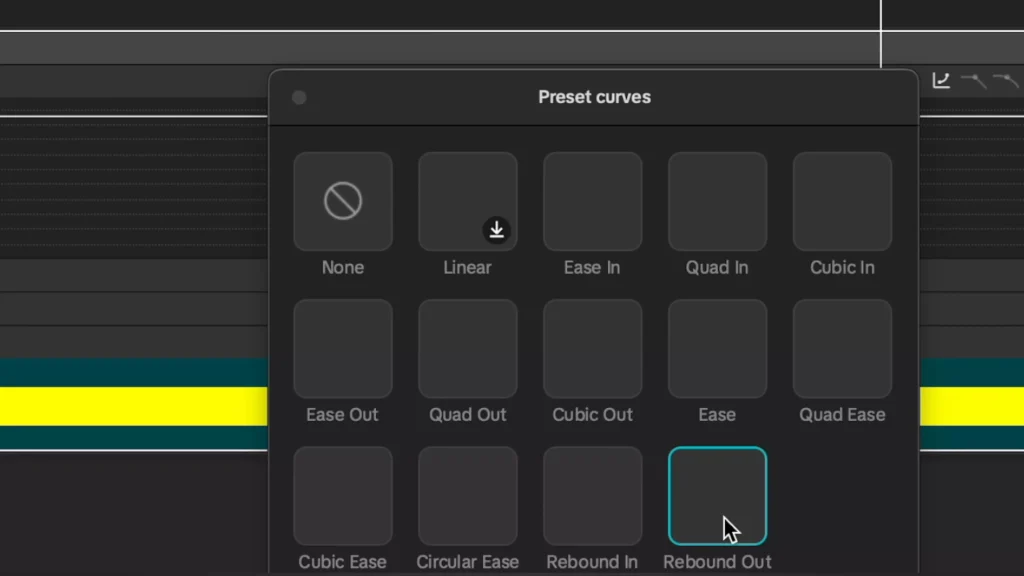
Using Rebound Out Curves for Easing
Easing makes motion feel human. The rebound out curve starts fast, then slows as it lands, which looks natural on almost any element.
Steps in CapCut:
- Animate your property, for example, a highlight wipe or a text slide.
- Open the keyframe editor (Option K).
- Select the position X curve for horizontal moves, or the property you are animating.
- Pick the rebound out preset.
- Adjust the first keyframe slightly downward to add acceleration.
- Pull the second keyframe’s handle closer to the first to control the glide.
This creates a quick start with a clean, slow finish. Use it for most UI moves, lower thirds, and info graphics.
Match Cutting for Seamless Transitions
Match cuts help you glide from one object to the next without a jolt.
Workflow:
- Between two clips or objects, make a compound clip.
- Find the exact place where the change happens, then press M to set a marker.
- Add transform keyframes one second before and one second after the marker.
- On the second keyframe, adjust scale for a gentle zoom.
- Open the keyframe editor, select the scale curve, then choose circular ease.
- Align the curve so the peak lands on the marker.
If the timing is off, drag the keyframe or its handles so the curve hits right on the marker. When you play it back, you get a smooth zoom that lands on the cut point.
Tips:
- Keep the zoom subtle to avoid a jarring pop.
- Add a touch of blur during motion if needed to soften edges.
Cutting on Motion for Invisible Edits
A sharp cut at the end of a move feels harsh. Cut while an element is moving, and the eye accepts the change. This turns a hard jump into a smooth pass. It works on graph changes, slide transitions, even B-roll swaps. Invisible cuts equal pro level.
Putting It All Together
Here is a quick way to apply these ideas on your next project:
- Start with your screen recording and apply the three texture layers: scan lines, chromatic split, vignette.
- Build your text with Twist, freeze a clean frame, then add particles and retro cartoon for texture.
- Choose music in the mima style, keep levels under the voice.
- Add tactile sounds that match clicks, draws, and reveals.
- Shape motion with rebound out curves, add match cuts for object swaps, and cut on action.
- Try an FPS lag effect on select graphics for that editorial touch.
Small moves compound into a strong style. Keep it subtle, stay consistent, and let the story lead.
In the meantime, keep sharpening with these resources:
- Make your CapCut PRO edits look like After Effects
- CapCut Editing Tricks: Step-by-Step to grow your YouTube channel
- CapCut Templates Unlocked: Create Viral Videos in Minutes
- CapCut vs Premiere Pro: Which Video Editor is better?
Conclusion
Vox-style edits work because they respect the viewer’s attention. Texture on screens, blended text, focused audio, and smooth motion all serve one goal, clearer stories that people watch longer. Start with one section of your workflow, then layer in more as you go.