CapCut is a favorite video editing tool for many users because it offers powerful features and an easy interface. Some want to keep access to pro features that were free in earlier versions. Previously, downgrading to older versions, like 1.4 or 1.5, let users unlock features for free.
Users have observed that CapCut developers are making free features as PRO features one by one in newest updates. Therefore, if your app updates automatically then you will lose a free feature if that becomes PRO.
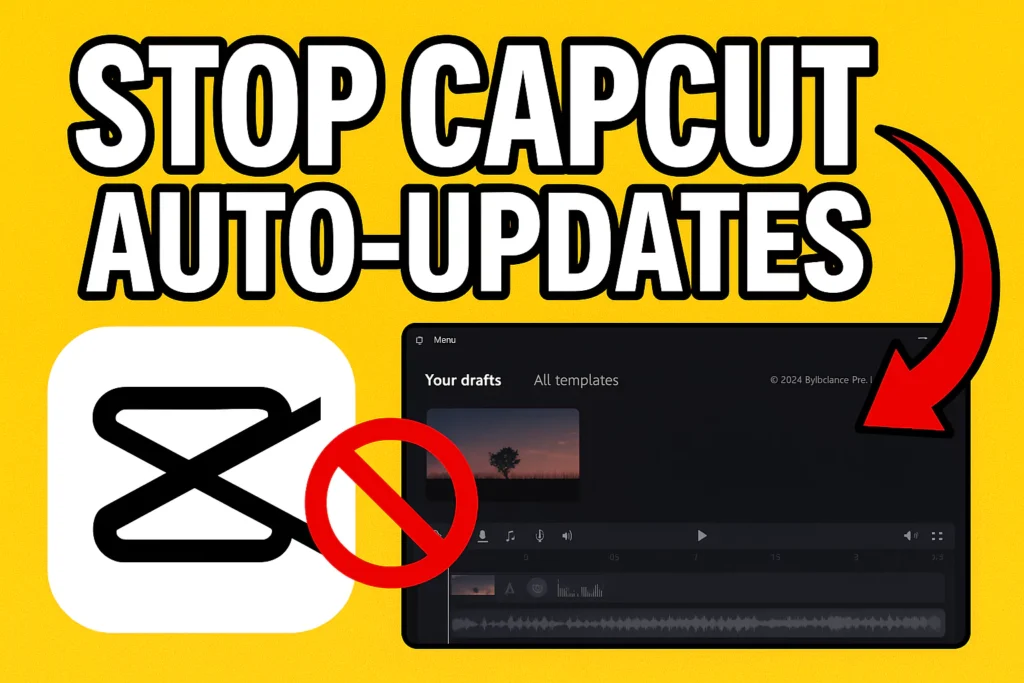
That worked well until the developers made updates that blocked this trick. Now, CapCut automatically updating itself, removing the ability to stay on older versions. Learning how to stop these auto-updates has become essential for those who want control over their app version.
Why CapCut updates automatically and how it affects users?
CapCut’s update system is built to keep the app current and secure. When the app detects a new version, it rolls out an update.
While that benefits most users, it creates problems for others. People using older versions to access free paid features get locked out when the app updates.
Plus, updates can cause bugs or wipe out custom tweaks. Managing these updates is key if you’re trying to stick with an older version or customized setup.
Preparing your system for the update block process
Delete existing CapCut version
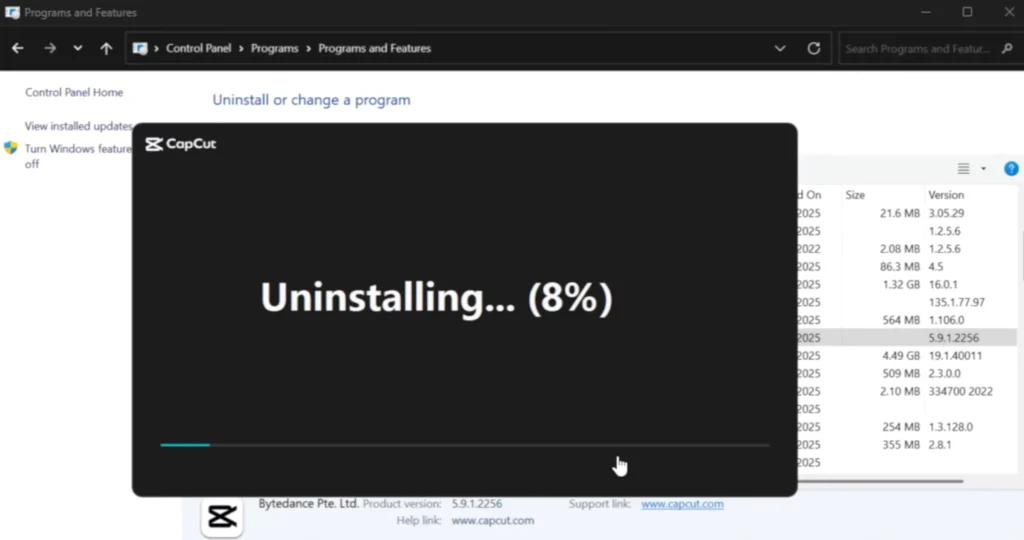
Before blocking updates, remove the current version on your PC. If the app auto-updated, it must be deleted to start fresh.
Uninstall CapCut through your control panel or settings. This clears the way for the version you want to reinstall. Remember, this step is critical—if you don’t delete the latest version, the update trick might not work.
Downloading an older version of CapCut
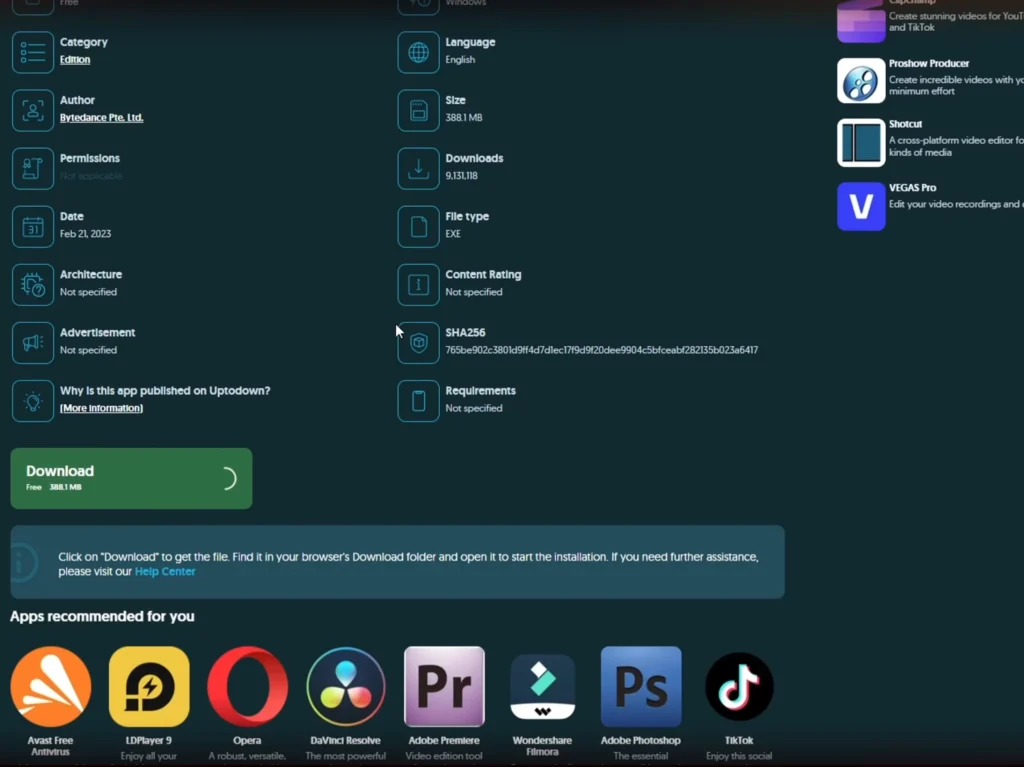
Next, get an older version like 1.5 from a safe source, such as Upto-down. Choosing official or trusted websites reduces the risk of malware.
These versions are usually available in archived files or setup packages. If you’re unsure how to do this, check out tutorials linked in the description. This ensures you’re starting with a genuine, virus-free version.
How to block CapCut from automatically updating
Accessing hidden system files
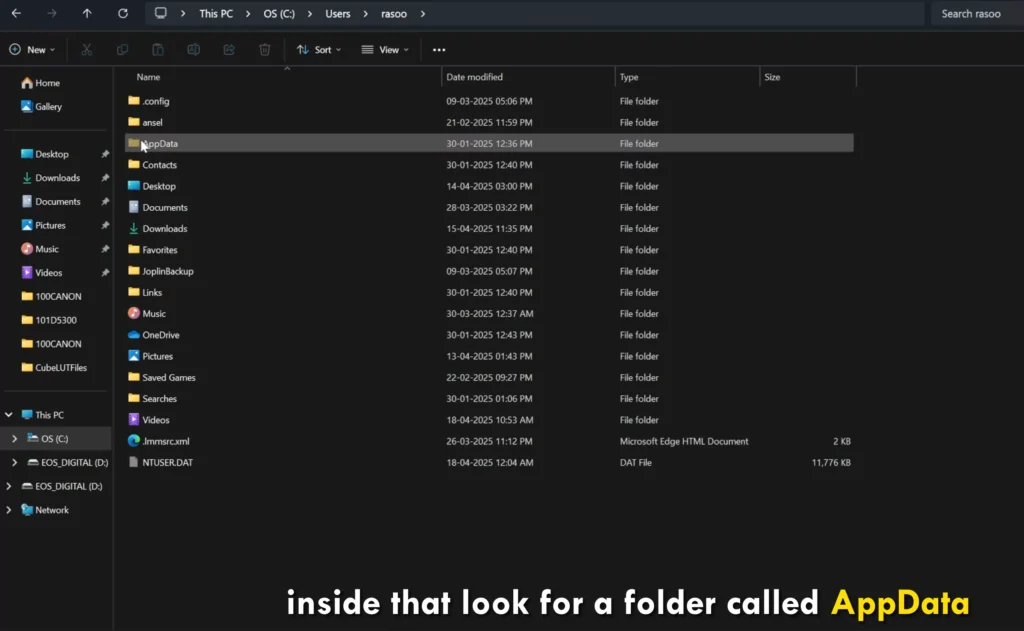
CapCut stores its data deep inside your system folders. These are often hidden, so you need to reveal them. Open your C drive, then go to the Users folder. Find your username folder, then locate ‘App Data’. If you don’t see it, go to the top menu, click on ‘View’ and check ‘Hidden Items’. Now you can access all system folders.

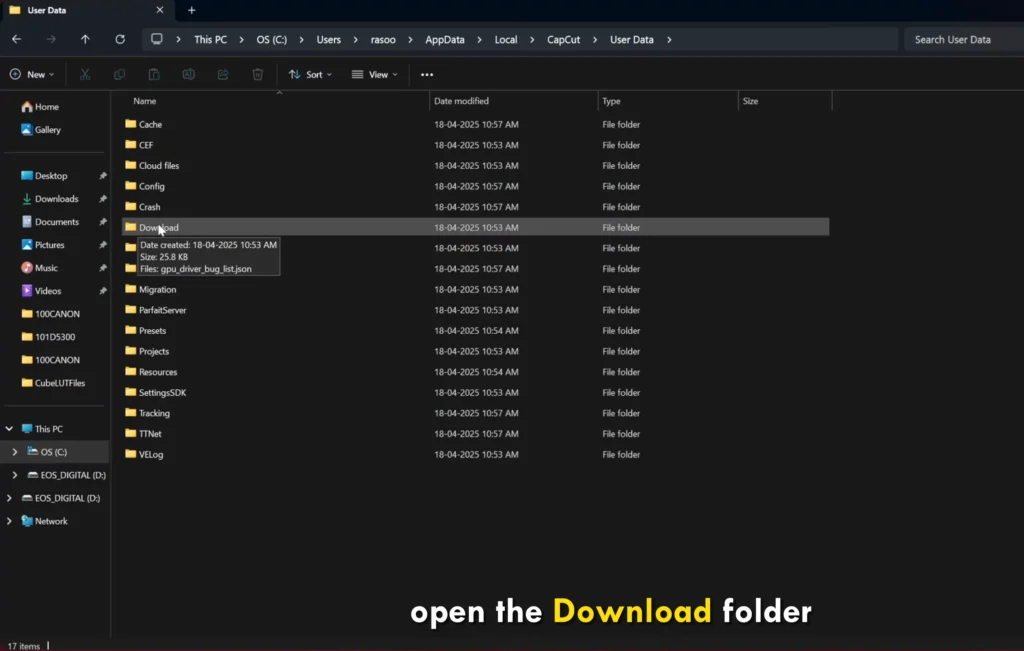
Navigating to the Correct Folder
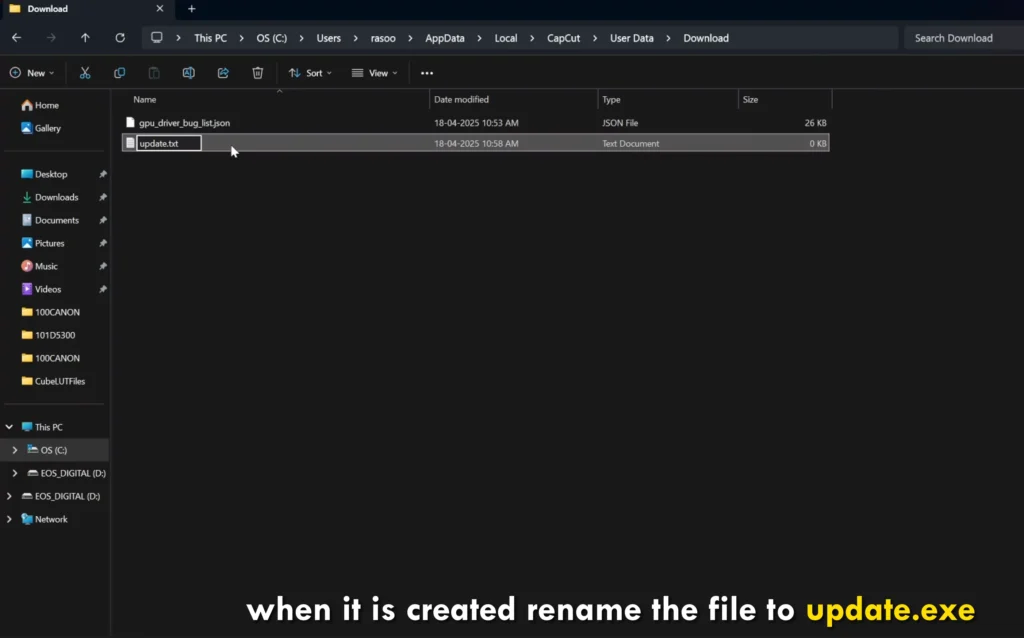
Once you make hidden folders visible, go to Local > CapCut > user data > download. Inside the ‘download’ folder, you’ll create a fake update file. This is where the app checks for updates automatically, so adding a fake file tricks it into thinking an update is already in progress.
Creating a fake update file
In that folder, right-click and choose New > Text Document. Name this file update.exe, all lowercase. If file extensions are hidden, you’ll need to enable them first in view settings. After renaming, right-click the file and go to Properties. Check ‘Read-only’, then click ‘Apply’ and ‘OK’. This fake file will prevent Cap Cut from fetching updates automatically.
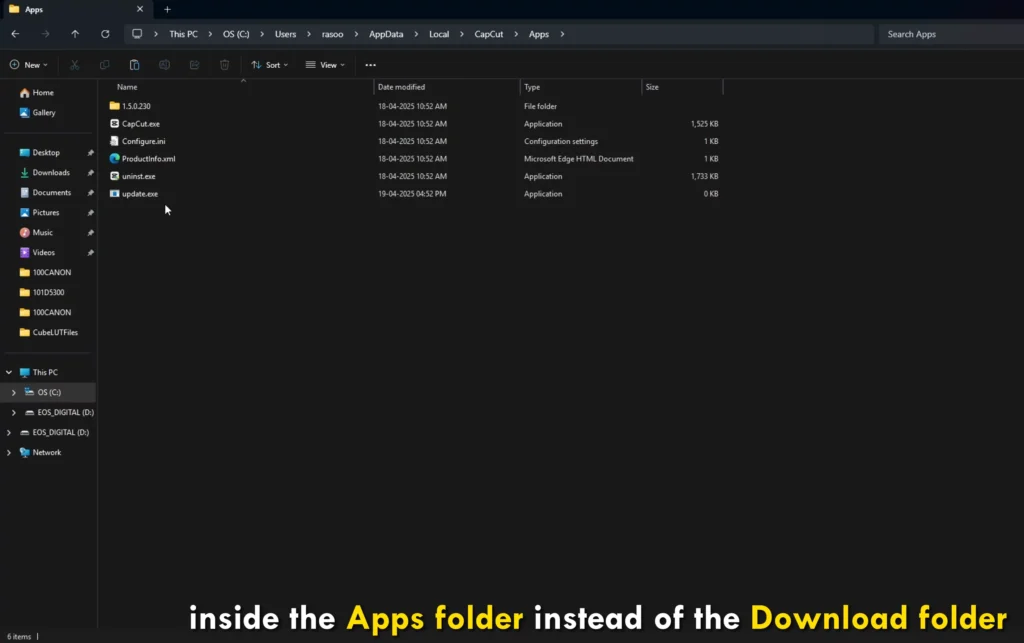
Applying the method to other folders
If the first method doesn’t stop updates, create the same update.exe inside the ‘apps’ folder in the same directory. Multiple fake update files in different locations increase your chances of blocking updates reliably.
Final checks and troubleshooting
Once done, open CapCut. If you see a pop-up prompting an update, just close it. The app should run normally on your desired older version.
If updates keep slipping through, double-check that ‘update.exe’ is still ‘read-only’ and located in the correct folder. Repeating the process in other directories can help prevent update triggers.
Alternative methods if the above fails..
Method 1: Using In-App Settings (The Easiest Route)
Fortunately, newer versions of CapCut PC include a built-in setting to manage update preferences. This is the simplest and safest way to prevent automatic updates.
- Open CapCut PC.
- Access Settings: Look for a settings icon (a gear or cogwheel) on the main interface. Click on it. You might then need to click on a “Settings” option within the menu that appears.
- Navigate to Update Options: Inside the settings menu, look for a section related to “Software Update,” “Version,” or “General.”
- Change Update Preference: You should find an option that says “Automatic update”. If it’s enabled, look for an alternative like “Get notified about updates,” “Notify me before downloading updates,” or a simple toggle to turn off automatic updates. Select this option.
- Save Changes: Make sure to click “Save” or “Apply” to confirm your new settings.
By choosing to be notified, CapCut will alert you when a new version is available, but it won’t download and install it without your explicit permission. You can then choose to update at your convenience or ignore the update if you prefer to stay on your current version.
For older versions (like CapCut 2.0), a similar option under “Settings” then “Version,” where you might need to uncheck an option like “Try better test version.”
Method 2: Advanced File Manipulation (For Tech-Savvy Users)
A more intricate version of the file manipulation method is given below. This involves editing configuration files in addition to creating dummy files.
Disclaimer: This is an advanced method. Incorrectly modifying configuration files can lead to application instability. Proceed with extreme caution and only if you are comfortable with these types of changes.
- Locate CapCut Folders: Navigate to
C:\Users\[Your Username]\AppData\Local\CapCut\Apps. Inside, you’ll find folders for different CapCut versions. You’ll also look for theUser Data\Downloadfolder. - Edit
Configure.ini:- At the root of the
Appsfolder, findConfigure.ini. - Open it with Notepad.
- Modify the line to read:
last_version=1.0.0.0(or a very old version number). - Save the file.
- At the root of the
- Create and Replace Files:
- Create two empty text files. Name them
Update.EXEandProductInfo.xml. - Make both these files “Read-only”.
- Copy these two read-only files and paste them into your desired CapCut version folder (e.g., the folder for version 1.5 if you want to stick with that). Replace any existing files if prompted.
- Paste these same two read-only files into the
C:\Users\[YourUser]\AppData\Local\CapCut\User Data\Downloadfolder, again replacing if necessary. - It’s recommended to close CapCut and delete other version folders if you are trying to lock to a specific older version.
- Create two empty text files. Name them
This comprehensive approach aims to control the version information CapCut reads and block the update executables.
Method 3: Using a Firewall to Block Internet Access
Another strategy is to prevent CapCut from communicating with its update servers by blocking its internet access through your firewall.
- Open your Firewall Settings:
- Windows: Search for “Windows Defender Firewall” or your third-party firewall application.
- macOS: Go to “System Settings” > “Network” > “Firewall.”
- Create an Outbound Rule:
- In Windows Defender Firewall, you’d typically go to “Advanced settings,” then “Outbound Rules,” and create a “New Rule.”
- Select “Program” and browse to the
CapCut.exeexecutable file in its installation directory. - Choose to “Block the connection.”
- Apply the rule to all network types (Domain, Private, Public).
- Give the rule a name (e.g., “Block CapCut Updates”).
- Considerations: Blocking CapCut’s internet access entirely might prevent some online features from working, such as downloading new effects, templates, or accessing cloud-based services if CapCut utilizes them. This method is more of a blunt instrument.
Important Considerations:
- Why Stick to an Older Version? Users might prefer an older version due to a familiar interface, specific features that were changed or removed, get access to features that were not PRO in earlier versions or to avoid new bugs introduced in recent updates.
- Security Risks: Older software versions might have unpatched security vulnerabilities. Be aware of this risk if you choose not to update for an extended period.
- Functionality: New features, effects, and compatibility improvements will be missed if you don’t update.
- Reverting Changes: If you use file manipulation methods and later decide you want to update, you’ll need to delete the dummy
update.exefiles or revert changes to configuration files and then manually check for updates within the app or reinstall CapCut.
By using one of these methods, you should be able to gain more control over how and when your CapCut PC application updates, allowing you to maintain a setup that best suits your workflow.
Best practices for maintaining a modified CapCut version
- Keep backups of your preferred version in case you need to reinstall.
- Regularly verify that the fake update files are intact.
- Stay alert for features or updates from the official Cap Cut team.
- Remember, using older versions might expose you to security risks—stick to sources you trust.
- Respect software rules—this method is for personal use and understanding how systems work, not for bypassing license agreements.
Expert tips and recommendations
Tech experts suggest that managing app updates carefully involves more than just blocking files. Use trusted sources to download older versions and scan files with antivirus tools.
Also, consider alternative apps with no update restrictions if you find this process too complicated or risky. Always stay informed about any new app patches or official updates that could change how this method works.
Conclusion
Stopping CapCut from updating automatically keeps your preferred version intact, especially if you’ve customized it for free access to premium features. The process is straightforward: uninstall the current version, download your favorite older version, then create a fake update.exe file in the required folders. Always double-check that the fake file stays ‘read-only’ and is in the right place.
Maintaining control over app updates can be a game-changer—just remember to keep backups and stay safe online. With these steps, you can enjoy your favorite Cap Cut version without interruption, all while respecting the process’s simplicity and your needs.